


Play The Best Golf Of Your Life in 6 weeks | 6 of 6
Sorry, you need to be a member to access to this video.
Become a member here!

Video 6 in our 6 part series, "Play the Best Golf Of Your Life In 6 Weeks" - this golf lesson and drill will show you how to create increased distance and swing speed with proper release and golf swing extension.
In the final video of our 6 part golf lesson series, we are going to give you golf drills and golf instruction that will address proper golf club release and swing extension in your golf swing.
With all the basic elements of the golf swing covered in videos 1 -5, we are ready to talk about how to create extension in your golf swing that will result in increased swing speed and more distance.
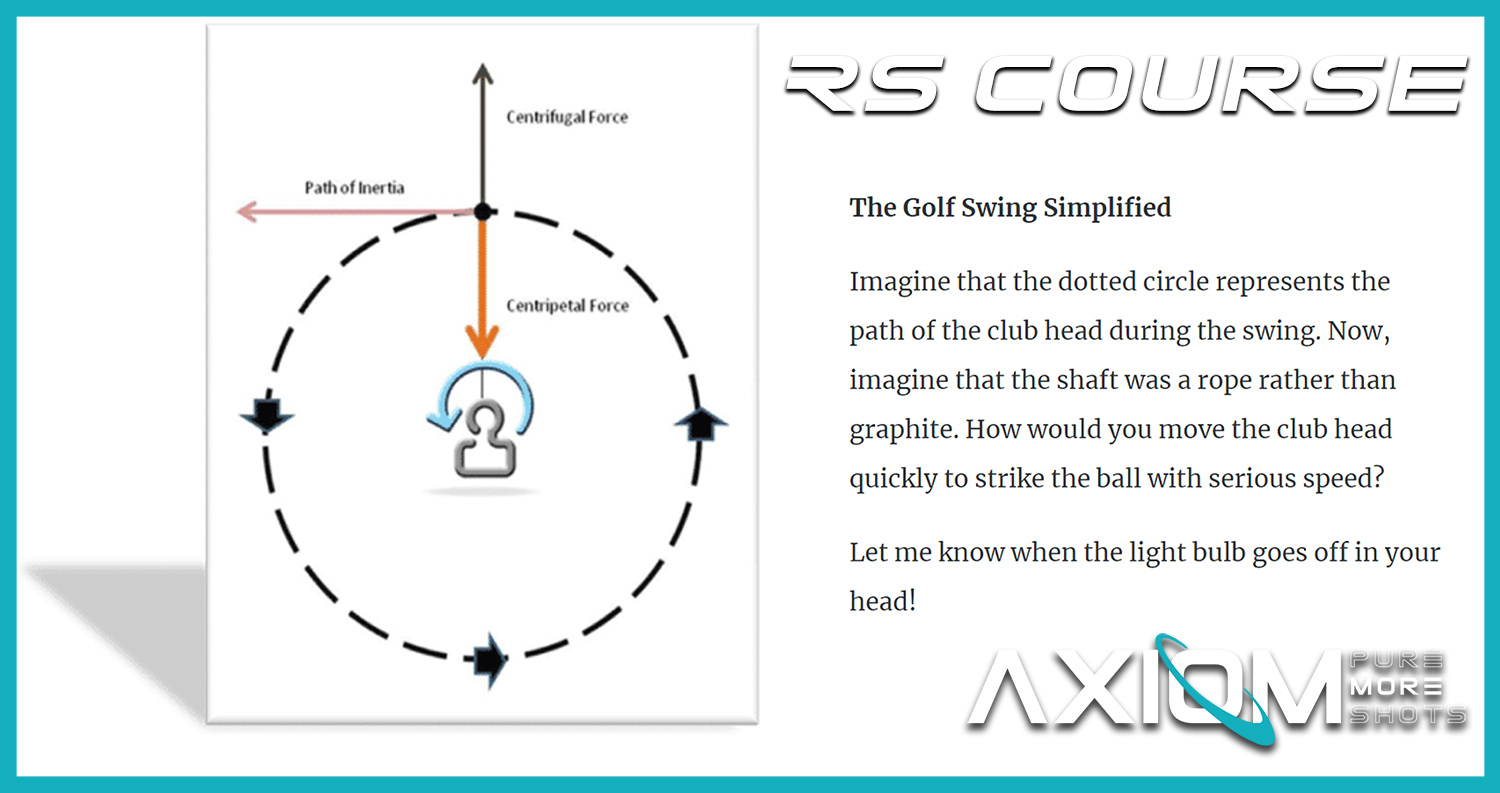
The key to properly releaseing the golf club and getting extension in your golf swing is to allow the golf club to extend and pull your hands and arms through the impact zone. This carry over swing momentum, when properly executed using the RotarySwing golf system, will create the extension that tour players achieve in their golf swing.
A simple golf drill that you can use to perfect your swing extension is to:
1. Keep the buttons on your shirt BEHIND the belt buckle when you impact the golf ball. If your buttons pass your buckle during the golf swing, it means that you are opening too soon and losing power and extension.
2. Keeping the golf club on a good path by using the "buttons" drill, will keep even weight transfer and prevent poor weight shift. The two factors play a big part in whether or not you can acheive maximum golf swing extension.
In today's video, we're going to be talking about how to get some good extension into your finish position. I know a lot of amateur golfers tend to struggle with getting that dreaded chicken wing look and they tend to have a lot of extra body rotation down in the hitting area which in turn can start to cause erratic ball striking. It can make you release a little bit late.
So I want to spend a few minutes just kind of recapping some of the stuff that we've already covered over the first five weeks. Video number one we were talking about minimizing that head movement. Trying to get a little bit more centered in your golf swing. That way you start to eliminate a lot of moving parts that are going to affect bad ball striking. Also we've discussed early extension of the spine. We've discussed how to shake out tension with your hands and your arms. So the way this video series is designed is that if you ever start to develop some of these faults in your golf swing, you can always circle back to any of these videos at any particular time, revisit the drills, spend a lot of time going through those repetitions over that next week or so and then you'll start to shake out some of that bad stuff and start playing some of your good golf again.
So the drill this week to help kind of tie it all together is how we're going to create proper extension. I know in some of the previous weeks we talked about how to control the bottom of the swing arc and getting the club to bottom out in the same spot every single time. Now what we're going to be talking about is what we're going to do after impact here. And a lot of people are like, "Well Chris, why does that even matter? The golf ball's already gone."
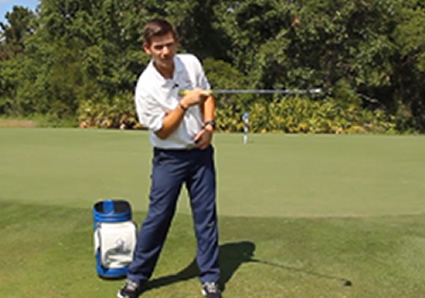
Well things that happen post-impact are ways for us to reverse diagnose things that are going on in the golf swing so if you do see yourself getting that dreaded chicken wing look, why is this happening? Well let's talk about that for a second here. So if you were to have both hands directly out in front of you and you were to push your lead arm across your center, keep pushing, pushing, pushing, what's your trail arm going to eventually do here? Okay, it's going to break. I'm sorry, this would be my actual, my lead arm on my left side pushing my trail arm across my center. You can see that my arm starts to break.
So we can understand that if you're battling with too much of that right-side dominance down there, we can figure out ways to give you drills so that post-impact you don't have that particular chicken wing look. So what we're going to be doing, we're going to be looking for ... When you shift your weight over to your left side and you get things nice and stacked up ... We've talked about the left shoulder, left hip socket, left knee and left ankle being right stacked on top of each other. Now what I want you to do, when you're releasing the club and your wrists and forearms are extending out in front of you, is ... I want you to keep the buttons on your shirt behind your belt buckle. If you notice that your buttons are getting on top of your belt buckle or in front of your belt buckle, that's when you're going to start to use too much of the trail side of your body.
So let's show you what looks like here. When I start to push really hard, you can see now my buttons are really stacked up on top of my belt buckle here. So my goal now is what I'm going to do here is after I get my left side stacked up, I'm going to keep my buttons back, keep my head back and I'm going to allow the club to pull me up into a finish. But I want to keep my buttons back as long as humanly possible.
Let's show you again here in slow motion. So shift left, left side of the body stacked up, keep my buttons back. You're going to notice that my shoulder plane is going to start to steepen quite a bit. That's going to help hold the hands and arms out in front of the body.
So let me show you from this angle here. Shift left. So I keep my buttons back. You can notice that my shoulder plane starts to steepen a little bit. This is a great way to start to develop some good, good extension in your golf swing. It also helps the club stay on a good path that's going to help you start keeping the ball more on target, more often.
Okay, guys? So that's video number six. I wish you guys all much success with this over the next week or so. Get your thousand reps in of this and you'll start to hit the ball more consistently, more solidly every single ...

Kevin
Craig (Certified RST Instructor)
stephen
Craig (Certified RST Instructor)
stephen
Glen
Craig (Certified RST Instructor)
David
Craig (Certified RST Instructor)
Glen
Craig (Certified RST Instructor)
keith
Chris (Certified RST Instructor)
RODERICK
Chris (Certified RST Instructor)