Introduction to Perfect Impact
Welcome to the first part of our four-week series focused on achieving a tour-quality impact position in golf. If you've been struggling with mishits—whether it's hitting off the heel or toe, or dealing with fat or thin shots—this series is designed for you. By the end, you’ll not only become a better ball striker, but you'll also understand the fundamental issues that may have been affecting your swing.
Understanding the Importance of Impact Position
When observing elite golfers, two common factors stand out: the position of the lead wrist at impact and the maintenance of the spine angle through the hitting area. These elements are crucial for achieving solid contact and maximizing your swing's potential.
This Week's Focus: The Lead Wrist
In this first week, we will concentrate specifically on the position of your lead wrist at impact. It’s critical to have a flat or slightly bowed lead wrist, a position often seen in tour-level patterns. Many amateur golfers, on the other hand, tend to let their wrists scoop, which adds loft to the club and makes it difficult to compress the ball properly.
Your Weekly Drill: 1000 Repetitions
To effectively train this position, your goal for the week is to complete a total of 1000 repetitions. While this may sound daunting, it can be broken down into manageable segments. You don’t need to be on the course or at the driving range; you can practice right in your home or garage.
Isolating the Lead Wrist
Start by getting into your normal setup. Shift your weight to your lead side by rolling to the inside of your right foot, ensuring most of your weight is over your lead side. It's important to keep your head still; this promotes secondary axis tilt, which helps in shallowing the swing. When gripping the club, focus on the back three fingers of your left hand, maintaining a relaxed grip with no tension in your thumb or pointer finger.
Drill Execution
With your right hand relaxed and positioned as if it's a backseat passenger, swing your arms to a 9:00 position. Your left wrist should point out in front of you, and your right hand should remain light on the club. As you practice this, your glove logo should face behind you at the top of your swing. Maintain light grip pressure in the back three fingers of your left hand.
Focus on the Release
If you find that your clubhead appears flippy at impact, consider removing your right hand from the equation entirely for some repetitions. This will help you focus solely on your left arm and wrist, enhancing your understanding of the release and impact position.
Building Towards Speed and Compression
As you progress through this week’s drills, remember that starting small is essential. As we advance through the coming weeks, we'll integrate additional components that will ultimately lead to increased speed and compression in your shots.
Conclusion and Next Steps
Be sure to complete your drills and focus on your lead wrist position. Keep practicing, and don't hesitate to reach out if you have questions or need assistance. In our next video, we will build on this foundation and introduce new techniques to further refine your impact position.
Key Takeaways
- Focus on achieving a flat or slightly bowed lead wrist at impact.
- Complete 1000 repetitions of the prescribed drills to solidify your muscle memory.
- Isolate your left hand to enhance your understanding of the release during your swing.
- Maintain a relaxed grip pressure to promote a natural swing.
- Stay tuned for upcoming videos that will integrate additional skills for improved ball striking.
See What GOATY Finds in Your Swing
Upload a swing video and get your GOATScore, root cause diagnosis, and personalized drill prescription in 60 seconds.
Analyze My Swing Freeor
Try a Free Live LessonRelated Articles
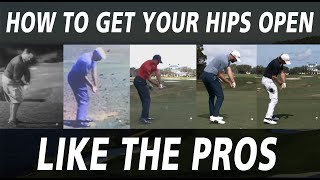
Unlocking Hip Movement for Impact Like the Pros
Learn how to open your hips at impact, a key difference between amateurs and elite golfers. Discover the secrets of the

Understanding Why Golf Is So Hard and How to Improve
Discover the key reasons golf is challenging and learn effective drills to enhance your swing and ball-striking abilitie

Master the GOAT Delivery Position for Better Ball Striking
Unlock the secrets of great ball strikers by mastering the GOAT delivery position with supination techniques for improve