Understanding Wrist Mechanics in Golf
Welcome to a comprehensive guide on using your wrists effectively in your golf swing. In this article, we will break down the anatomical functions of the wrists and how they contribute to a powerful and efficient swing. Understanding these mechanics is crucial for any golfer looking to elevate their game.
Anatomical Terminology of the Wrists
To begin, let’s clarify some key terms regarding wrist movements. First, we have radial deviation, which is the action of cocking your wrist. Imagine holding up your thumb like a hitchhiker; pulling it back towards your forearm is radial deviation.
The opposite of this movement is ulnar deviation, or the uncocking of the wrists. In golf terms, this is crucial for understanding how to release the club at impact.
Flexion and Palm Reflection
The next set of functions includes flexion and palm reflection. Flexion, specifically dorsiflexion, involves pulling the knuckles back towards the forearm, which is referred to as cupping or hinging of the wrists in golf. Conversely, palm reflection is the act of hinging the wrist inward, which is known as the bowing of the wrists.
Rotational Movements
Next, we have rotation, which involves the radial and ulnar joints. Supination refers to rotating your palm upward—think of holding a cup of soup—while pronation is turning your palm downward.
Wrist Set
Another important concept is wrist set, which is a middle point between dorsiflexion and radial deviation. Picture trying to hammer a nail; your wrist naturally sets back into this position. Wrist set is vital during the takeaway and at the top of your swing.
Using Wrists Effectively in the Golf Swing
Now that we have established the terminology, let’s explore how these wrist movements function during the golf swing. An essential point to remember is that your wrists should be used in a passive manner early on in the swing and then activated at the moment of impact.
During the takeaway, focus on rotating your wrists rather than pushing the clubhead. You should aim for a relaxed grip pressure—around a four or five on a scale of ten—to allow for natural wrist movement. A common mistake is to try and move the clubhead too quickly without proper body rotation, which can lead to loss of control and power.
Checkpoints for the Takeaway
As you begin your swing, ensure that your lead wrist is controlling the movement. Your glove logo should face down the target line, and as you rotate your wrists, they will naturally set back to support the club—aiming for the shaft to be parallel to the ground.
Top of the Swing
At the top of your swing, your left wrist should maintain a slight rotation while the right wrist responds by adding a bit more set. This balance provides the necessary support for the club without cranking up tension. Remember, a rigid wrist is counterproductive; keep it relaxed to maintain movement fluidity.
The Downswing
As you transition into the downswing, it’s critical to allow your body rotation to lead the movement. Both wrists should continue their respective actions—your left wrist will be supinating while the right wrist reacts by maintaining the set. This rotational movement combined with the right timing can help you preserve lag, which is key for generating speed at impact.
Key Takeaways
- Understand the anatomical terms related to wrist movements: radial/ulnar deviation, flexion/palm reflection, and rotation.
- Use your wrists in a passive sense during the initial parts of the swing to avoid tension.
- Maintain a relaxed grip to allow for natural wrist movement, facilitating better control and power.
- Focus on body rotation rather than simply pushing with the hands to generate clubhead speed.
- Utilize wrist set to support the club throughout the swing while keeping the wrists fluid and responsive.
See What GOATY Finds in Your Swing
Upload a swing video and get your GOATScore, root cause diagnosis, and personalized drill prescription in 60 seconds.
Analyze My Swing Freeor
Try a Free Live LessonRelated Articles
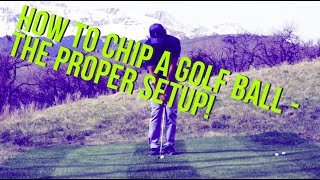
Mastering the Chip Shot: Proper Setup Techniques
Learn the essential setup for chipping golf shots to ensure consistent and clean contact. Improve your game with these e

Master Your Golf Swing: Key Hand Movements for Success
Discover the two essential hand movements for a great golf swing and learn how to play like the elite.

Understanding Speed vs. Power in the Golf Swing
Learn why speed is more crucial than power in your golf swing to hit the ball further. Discover effective techniques to