
Understanding the Importance of the Backswing
The golf backswing is a crucial component of your overall swing. It sets the stage for the downswing and ultimately impacts how you hit the ball. Before diving into the intricacies of the backswing, it’s essential to have mastered the setup and takeaway. If you're not confident in those areas, focus on them first, as they lay the foundation for a successful backswing.
Progression and Isolation Techniques
When teaching the backswing, I employ two primary techniques: progression and isolationism. Progression involves simplifying the movements at first and then gradually stacking additional elements as you master each step. Isolationism, on the other hand, means removing distractions such as the golf club and ball to focus solely on the movement itself.
Conceptual Framework
Before you begin, it's critical to grasp the concept of movement in the golf swing. There are two main dimensions to consider: vertical movement and rotational movement. When looking at your swing from down the line, you should visualize a shaft placed down the center of your body. Anything behind this shaft is in the depth dimension, while anything that moves straight up and down is in the vertical dimension.
Many golfers mistakenly try to move their arms into the depth dimension, leading to a flat and ineffective swing. Instead, your arms should feel as if they move only in the vertical dimension. The rotational movement of your body will naturally guide your arms into the correct depth position.
Drills for a Proper Backswing
Now, let’s get into some practical drills to help you develop a proper backswing. Follow along with me to ensure you’re executing the movements correctly.
Isolating Shoulder Elevation
Start without a golf club. Stand straight up and let your arms hang at your sides. Elevate your arms from belt height to the base of your chest. This movement should be minimal, focusing primarily on vertical movement. Your hands should remain in front of your sternum throughout this exercise.
Incorporating Arm Flexion
Once you’re comfortable with shoulder elevation, the next step is to flex your right arm while maintaining proper alignment of your elbow and shoulder. Your left arm should also be positioned correctly to ensure that the wrist remains flat and perpendicular to the ground.
As you fold your right arm, allow your left arm to rotate slightly. This rotation is crucial for maintaining the proper plane of the club. Remember, your right elbow should be in front of your shoulder, and you want to keep your elbow pits facing outward.
Combining Elevation, Flexion, and Rotation
After mastering the elevation and flexion, it’s time to add rotation. Stand up straight and execute the elevation and flexion movements while incorporating a gentle rotation of your body. This combination will help you build a more dynamic and effective backswing.
As you rotate, ensure your posture remains intact. Your arms should maintain a certain width, and you should not pull your hands back toward your shoulder. Instead, keep them slightly extended as you transition into the backswing.
Checking Your Backswing Position
To check your backswing, remember the sequence: stand up straight, perform shoulder elevation, flex your arms, and then engage your rotation. This sequence will help you consistently achieve the correct position at the top of your backswing.
Key Takeaways
- Master the setup and takeaway before focusing on the backswing.
- Use progression and isolation techniques to simplify the learning process.
- Understand the importance of vertical movement and rotation in your swing.
- Practice drills focusing on shoulder elevation and arm flexion.
- Combine elevation, flexion, and rotation to achieve a proper backswing position.
See What GOATY Finds in Your Swing
Upload a swing video and get your GOATScore, root cause diagnosis, and personalized drill prescription in 60 seconds.
Analyze My Swing FreeFree, no credit card
Get Your Free Swing AnalysisRelated Articles

Mastering Your Backswing: Fix Right Arm Bending Issues
Learn how to stop your right arm from bending too soon in the backswing for better impact positions and power in your go

Mastering the Proper Golf Backswing: Key Techniques
Learn the essential techniques for a proper golf backswing with insights from Chuck Quinton, focusing on body movement,
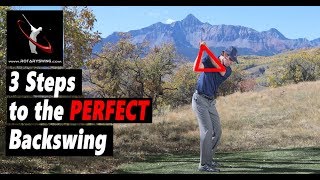
Master Your Golf Backswing in 3 Simple Steps
Learn the three key components to a perfect golf backswing: rotation, elevation, and flexion. Transform your swing today