Master the Golf Transition
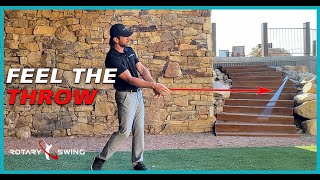
Show of hands, how many of you struggle with the transition? Well, no more after working through this sequence of movements. Do this program for 30 days and your transition will be as good as any golfer in the world. The trick is the sequence in which you practice the movements and where your focus lies. This program is about making you focus on the movements that really matter like weight shift and core rotation, so you stop worrying about that darn club and little white devil!
If your transition is off, it doesn't matter how pretty of a backswing you made, nothing is going to work in sequence in your swing.
And that's why the RST five-step stuff starts with weight shift and core rotation.
That's what we're going to talk about today, but we're going to do it specific to the transition.
We're going to start out without a club, and then we're going to start working our bodies into getting the club back in there.
And once the body movements are correct, these are drills that you can do anytime, anywhere.
So if you really struggle with your transition, I want you to work this drill all the time so that you can make this transition move just second nature for you, because it's really not that difficult.
It's difficult as you start stacking more pieces on, but the pieces we're going to start with today, it's going to feel really simple.
And then we're going to start adding pieces to it as this video goes on.
And make it more challenging, and make it more in the context of how you make a normal golf swing.
So at first, absolutely no golf club.
We don't need it.
We want our arms across our chest.
We're going to focus just on doing the transition.
And I'm going to show you and walk you through the key things that I'm feeling and thinking about as I'm making these moves.
So right now, we're going to not worry about the backswing.
I'm going to assume you have this stuff pretty well dialed in at this point.
And we're just making that initial shift.
As I'm doing this from down the line, I want you to watch a couple things.
Notice my left knee flex.
It doesn't straighten up right away.
I'm actually increasing my knee flex.
I'm actually sitting down into my left side.
And from down the line, I'm exaggerating this slightly, but it's a little bit of increase of knee flex.
This helps load that leg.
So what I want you to feel first is kind of sitting into that left leg during the transition.
So this first move back and just kind of sitting into it, I'm just moving this hip over and letting weight start to transfer.
And by letting this knee bend, it helps me shift more weight and take weight off the right side.
So this is the little baby squat move.
And as I get a little more comfortable with just increasing the knee flex in the left side, I'm starting to feel my left glute, quad, hamstring, everything here is starting to work.
So this is the first little key, just getting the feeling of shifting over.
And as I do that, now I'm going to combine it with a little bit of rotation.
So now both knees are squatting slightly.
At first, I just want you to feel the left side, feel these muscles activate.
And then once you get comfortable with that, as I'm doing that, this is technically a closed hip slide, right?
My hips aren't rotating at all right now.
I'm just feeling weight transfer.
And then I'm going to let my hips turn.
And as I do that, you'll notice both knees flex slightly.
This is just pushing force leverage into the ground that I'm using from both legs now and helping shift my weight and rotate my hips back.
This is the whole first key to that weight, the transition, getting to the left side and beginning the hip, the rotation.
Technically, these are happening simultaneously.
So as you're increasing the knee flex and sitting into this left side, the goal is to get to the point where you're doing that while turning your hips back to square.
That's our first step.
Left knee, right knee, hips are pretty close to square.
From there, all I need to do is post up.
Now that's more in the impact stuff.
So we're not going to focus on that too much.
We're just trying to dial in just the transition.
So we're trying to get left knee, right knee, post up.
From face on, as I come through, this left hip should be over the left ankle.
When you're looking in the mirror, that's what I want you to be paying attention to.
This pants seam going right through the center of my hip, knee and ankle and the right foot staying down.
As I'm posting up, that's what gets that knee flex out of there and pushes your hip back out of the way so that you're now posted up to be able to release the club.
From the transition stuff, this is all the lower body needs to do.
So then how do we get the club?
What does it need to do during that time?
Well, as I go back, I'm doing just the left knee first, right?
So I'm just doing this little baby step.
Look what's happening to my hands.
Technically, yes, I'm still doing a closed hip slide.
We don't want to do a closed hip slide in the real swing, but you're just focusing on feeling weight transfer and movement from your lower body, not from anything up here.
Not moving my arms or hands at all, but they're being moved by that little left knee move, left hip move.
And then as I add the right leg into it, put both in there, look how far my hands are down.
From here, all I got to do is post up and release, but that's in another video.
So for here, just that transition move, this is getting the club to drop down in the slot, shallow out and get in position.
But again, the only thing you're focusing on is trunk movement.
You get lost with this or the club starts coming over the top or anything.
When you're doing these drills, take the club out, go back to left knee.
As I'm doing this, I'm really trying to keep my shoulders pointing back at the mirror behind me because I don't want to start opening up my shoulders.
That leads to all the problems that most amateur golfers have.
So I'm trying to really keep my shoulders shut.
The only thing that's turning them is my hip rotation.
So now if I get that feeling back in there, I can go back to the club again, not doing anything with the golf club.
I'm just shifting and getting my weight posted up a little squat move.
And then that's, what's going to bring me down into impact.
That's the whole key to the transition.
If you can do nothing with your upper body, feel this little weight shift, a little bit of rotation.
Your transition is going to bring the club down on plane.
It's going to shallow it out for you and get you into a great impact position.
Si votre transition est décalée, peu importe la beauté de votre backswing, rien ne fonctionnera en séquence dans votre swing.
Et c'est pourquoi le programme RST en cinq étapes commence par un transfert de poids et une rotation du tronc.
C'est de cela dont nous allons parler aujourd'hui, mais nous allons le faire spécifiquement pour la transition.
Nous allons commencer sans club, puis nous allons commencer à travailler notre corps pour remettre le club en place.
Et une fois que les mouvements du corps sont corrects, ce sont des exercices que vous pouvez faire à tout moment, n'importe où.
Donc, si vous avez vraiment du mal avec votre transition, je veux que vous travailliez cet exercice tout le temps afin que vous puissiez faire de cette transition une seconde nature pour vous, car ce n'est vraiment pas si difficile.
C'est difficile à mesure que vous commencez à empiler plus de pièces, mais les pièces avec lesquelles nous allons commencer aujourd'hui vont sembler vraiment simples.
Et puis nous allons commencer à y ajouter des pièces au fur et à mesure que cette vidéo avance.
Et rendez-le plus difficile, et placez-le davantage dans le contexte de la façon dont vous effectuez un swing de golf normal.
Donc au début, absolument pas de club de golf.
Nous n'en avons pas besoin.
Nous voulons que nos bras soient croisés sur notre poitrine.
Nous allons nous concentrer uniquement sur la transition.
Et je vais vous montrer et vous guider à travers les éléments clés que je ressens et auxquels je pense lorsque je fais ces mouvements.
Donc pour l'instant, nous n'allons pas nous soucier du backswing.
Je vais supposer que vous maîtrisez bien ces choses à ce stade.
Et nous sommes juste en train de faire ce changement initial.
Pendant que je fais cela depuis le bas de la ligne, je veux que vous regardiez quelques choses.
Remarquez la flexion de mon genou gauche.
Ça ne se redresse pas tout de suite.
En fait, j'augmente la flexion de mon genou.
En fait, je suis assis sur mon côté gauche.
Et en regardant en bas, j'exagère légèrement, mais c'est une petite augmentation de la flexion du genou.
Cela aide à charger cette jambe.
Donc, ce que je veux que vous ressentiez en premier, c'est en quelque sorte vous asseoir sur cette jambe gauche pendant la transition.
Donc ce premier mouvement vers l'arrière et je m'y assieds simplement, je déplace simplement cette hanche et je laisse le poids commencer à se transférer.
Et en laissant ce genou se plier, cela m'aide à déplacer plus de poids et à soulager le côté droit.
Voilà donc le petit mouvement de squat du bébé.
Et à mesure que je me sens un peu plus à l'aise en augmentant simplement la flexion du genou du côté gauche, je commence à sentir mon fessier gauche, mon quadriceps, mes ischio-jambiers, tout ici commence à fonctionner.
C'est donc la première petite touche, juste pour avoir la sensation de passer à autre chose.
Et pendant que je fais cela, je vais maintenant le combiner avec un peu de rotation.
Alors maintenant, les deux genoux sont légèrement accroupis.
Au début, je veux juste que vous sentiez le côté gauche, que vous sentiez ces muscles s'activer.
Et puis, une fois que vous êtes à l'aise avec cela, pendant que je fais cela, c'est techniquement une glissade de hanche fermée, n'est-ce pas ?
Mes hanches ne tournent pas du tout en ce moment.
Je ressens juste un transfert de poids.
Et puis je vais laisser mes hanches tourner.
Et pendant que je fais cela, vous remarquerez que les deux genoux fléchissent légèrement.
Il s'agit simplement d'appliquer un effet de levier sur le sol que j'utilise maintenant avec mes deux jambes et qui m'aide à déplacer mon poids et à faire pivoter mes hanches vers l'arrière.
C'est toute la première clé de ce poids, la transition, arriver sur le côté gauche et commencer la hanche, la rotation.
Techniquement, ces événements se produisent simultanément.
Ainsi, lorsque vous augmentez la flexion du genou et que vous vous asseyez sur ce côté gauche, l'objectif est d'arriver au point où vous faites cela tout en ramenant vos hanches à l'état carré.
C'est notre première étape.
Genou gauche, genou droit, les hanches sont assez proches du carré.
À partir de là, tout ce que j’ai à faire est de publier.
Maintenant, c'est plus dans le domaine de l'impact.
Nous n’allons donc pas trop nous concentrer sur cela.
Nous essayons simplement de gérer la transition.
Nous essayons donc de lever le genou gauche, le genou droit et de nous positionner.
De face, lorsque je passe, cette hanche gauche devrait être au-dessus de la cheville gauche.
Lorsque vous vous regardez dans le miroir, c'est à cela que je veux que vous prêtiez attention.
La couture de ce pantalon traverse le centre de ma hanche, de mon genou et de ma cheville et le pied droit reste en bas.
Au moment où je poste, c'est ce qui fait que le genou se plie et pousse votre hanche vers l'arrière pour que vous soyez maintenant prêt à relâcher le club.
En ce qui concerne la transition, c'est tout ce que le bas du corps doit faire.
Alors comment obtenir le club ?
Que doit-il faire pendant ce temps-là ?
Eh bien, en revenant en arrière, je fais d'abord juste le genou gauche, n'est-ce pas ?
Alors je fais juste ce petit pas de bébé.
Regardez ce qui arrive à mes mains.
Techniquement, oui, je fais toujours un slide de hanche fermé.
Nous ne voulons pas faire un glissement de hanche fermé dans le swing réel, mais vous vous concentrez simplement sur la sensation de transfert de poids et de mouvement de votre bas du corps, pas de quoi que ce soit ici.
Je ne bouge pas du tout mes bras ni mes mains, mais ils sont déplacés par ce petit mouvement du genou gauche, ce mouvement de la hanche gauche.
Et puis, lorsque j'ajoute la jambe droite, je mets les deux là-dedans, regarde jusqu'où mes mains sont descendues.
À partir de là, tout ce que j'ai à faire est de publier et de publier, mais c'est dans une autre vidéo.
Donc, pour le moment, juste ce mouvement de transition, il s'agit de faire descendre le club dans la fente, de le faire sortir peu profondément et de le mettre en position.
Mais encore une fois, la seule chose sur laquelle vous vous concentrez est le mouvement du tronc.
Vous vous perdez avec ça ou le club commence à prendre le dessus ou quoi que ce soit.
Lorsque vous faites ces exercices, sortez le club et revenez au genou gauche.
Pendant que je fais cela, j'essaie vraiment de garder mes épaules pointées vers le miroir derrière moi parce que je ne veux pas commencer à ouvrir mes épaules.
Cela conduit à tous les problèmes que rencontrent la plupart des golfeurs amateurs.
Alors j'essaie vraiment de garder mes épaules fermées.
La seule chose qui les fait tourner, c'est la rotation de ma hanche.
Donc maintenant, si je retrouve cette sensation, je peux retourner au club, sans rien faire avec le club de golf.
Je me déplace simplement et je place mon poids en faisant un petit mouvement de squat.
Et puis c'est ce qui va me faire tomber dans l'impact.
C’est toute la clé de la transition.
Si vous ne pouvez rien faire avec le haut de votre corps, sentez ce petit déplacement de poids, un peu de rotation.
Votre transition va faire descendre le club sur un plan.
Cela va vous faciliter la tâche et vous mettre dans une excellente position d'impact.
Si tu transición no es correcta, no importa qué tan lindo sea el backswing que hayas realizado, nada va a funcionar en secuencia en tu swing.
Y es por eso que el método RST de cinco pasos comienza con el cambio de peso y la rotación del núcleo.
De eso es de lo que vamos a hablar hoy, pero lo haremos específicamente para la transición.
Comenzaremos sin un palo y luego comenzaremos a trabajar nuestros cuerpos para volver a colocar el palo allí.
Y una vez que los movimientos del cuerpo sean correctos, estos son ejercicios que puedes hacer en cualquier momento y en cualquier lugar.
Entonces, si realmente tienes dificultades con tu transición, quiero que practiques este ejercicio todo el tiempo para que puedas hacer que este movimiento de transición sea algo natural para ti, porque realmente no es tan difícil.
Es difícil a medida que comienzas a apilar más piezas, pero con las piezas con las que comenzaremos hoy, parecerán realmente simples.
Y luego comenzaremos a agregarle piezas a medida que avanza el video.
Y hazlo más desafiante y hazlo más en el contexto de cómo haces un swing de golf normal.
Así que, al principio, absolutamente nada de palos de golf.
No lo necesitamos
Queremos nuestros brazos cruzados sobre nuestro pecho.
Nos centraremos únicamente en hacer la transición.
Y voy a mostrarles y guiarlos a través de las cosas clave que estoy sintiendo y pensando mientras hago estos movimientos.
Así que ahora no nos vamos a preocupar por el backswing.
Supongo que a estas alturas ya tienes todo esto bastante bien controlado.
Y apenas estamos haciendo ese cambio inicial.
Mientras hago esto desde abajo, quiero que presten atención a un par de cosas.
Observa cómo se flexiona mi rodilla izquierda.
No se endereza de inmediato.
De hecho, estoy aumentando la flexión de mi rodilla.
En realidad estoy sentado sobre mi lado izquierdo.
Y desde abajo, estoy exagerando esto un poco, pero es un pequeño aumento en la flexión de la rodilla.
Esto ayuda a cargar esa pierna.
Entonces lo primero que quiero que sientas es sentarte sobre esa pierna izquierda durante la transición.
Entonces, este primer movimiento hacia atrás y simplemente sentarme en él, simplemente estoy moviendo esta cadera hacia adelante y dejando que el peso comience a transferirse.
Y al dejar que esta rodilla se doble, me ayuda a trasladar más peso y quitarlo del lado derecho.
Así que este es el pequeño movimiento de sentadilla para bebé.
Y a medida que me siento un poco más cómodo con solo aumentar la flexión de la rodilla en el lado izquierdo, comienzo a sentir que mi glúteo izquierdo, cuádriceps, isquiotibiales, todo aquí está comenzando a funcionar.
Así que esta es la primera pequeña clave, simplemente para tener la sensación de estar cambiando de marcha.
Y mientras hago eso, ahora voy a combinarlo con un poco de rotación.
Ahora ambas rodillas están ligeramente en cuclillas.
Al principio, sólo quiero que sientas el lado izquierdo, que sientas cómo se activan estos músculos.
Y luego, una vez que te sientas cómodo con eso, mientras lo hago, técnicamente esto es un deslizamiento de cadera cerrado, ¿verdad?
Mis caderas no están girando en absoluto en este momento.
Sólo estoy sintiendo una transferencia de peso.
Y luego voy a dejar que mis caderas giren.
Y mientras hago eso, notarás que ambas rodillas se flexionan ligeramente.
Esto es simplemente empujar la fuerza de apalancamiento en el suelo que estoy usando ahora con ambas piernas y que ayuda a cambiar mi peso y rotar mis caderas hacia atrás.
Esta es la primera clave de ese peso, la transición, llegar al lado izquierdo y comenzar la cadera, la rotación.
Técnicamente, estos eventos están sucediendo simultáneamente.
Entonces, a medida que aumentas la flexión de la rodilla y te sientas en este lado izquierdo, el objetivo es llegar al punto en el que estés haciendo eso mientras giras las caderas hacia atrás para ponerlas en posición cuadrada.
Éste es nuestro primer paso.
Rodilla izquierda, rodilla derecha y caderas casi cuadradas.
Desde allí, todo lo que tengo que hacer es publicar.
Ahora, eso tiene más que ver con el impacto.
Así que no nos vamos a centrar demasiado en eso.
Simplemente estamos intentando marcar la transición.
Entonces estamos tratando de conseguir la rodilla izquierda, la rodilla derecha y el poste.
De frente, al pasar, esta cadera izquierda debería estar sobre el tobillo izquierdo.
Cuando te mires al espejo, eso es a lo que quiero que prestes atención.
Esta costura del pantalón pasa justo por el centro de mi cadera, rodilla y tobillo, quedando el pie derecho abajo.
Mientras estoy publicando, eso es lo que saca la flexión de la rodilla y empuja tu cadera hacia atrás para que ahora estés posicionado para poder soltar el palo.
De la parte de transición, esto es todo lo que la parte inferior del cuerpo necesita hacer.
Entonces ¿cómo conseguimos el club?
¿Qué necesita hacer durante ese tiempo?
Bueno, a medida que vuelvo, estoy haciendo solo la rodilla izquierda primero, ¿verdad?
Así que sólo estoy haciendo este pequeño paso.
Mira lo que le pasa a mis manos.
Técnicamente, sí, todavía estoy haciendo un deslizamiento de cadera cerrado.
No queremos hacer un deslizamiento de cadera cerrado en el swing real, pero simplemente te estás concentrando en sentir la transferencia de peso y el movimiento desde la parte inferior del cuerpo, no desde nada aquí arriba.
No muevo mis brazos ni mis manos en absoluto, pero se mueven con ese pequeño movimiento de mi rodilla izquierda y de mi cadera izquierda.
Y luego, cuando agrego la pierna derecha, pongo ambas allí y mira qué tan abajo están mis manos.
Desde aquí, todo lo que tengo que hacer es publicar y lanzar, pero eso estará en otro video.
Entonces, por aquí, solo ese movimiento de transición, es hacer que el palo baje hasta la ranura, se aleje poco a poco y se coloque en posición.
Pero una vez más, lo único en lo que te debes concentrar es en el movimiento del tronco.
Te pierdes con esto o el club comienza a caerse o algo así.
Cuando estés haciendo estos ejercicios, saca el palo y vuelve a la rodilla izquierda.
Mientras hago esto, trato de mantener mis hombros apuntando hacia el espejo detrás de mí porque no quiero comenzar a abrir mis hombros.
Esto conduce a todos los problemas que tienen la mayoría de los golfistas aficionados.
Así que estoy intentando mantener mis hombros cerrados.
Lo único que los hace girar es la rotación de mi cadera.
Así que ahora, si vuelvo a tener esa sensación, puedo volver al palo de golf sin hacer nada.
Simplemente estoy cambiando de posición y colocando mi peso en un pequeño movimiento de sentadilla.
Y luego eso es lo que me va a hacer caer al impacto.
Ésta es la clave de la transición.
Si no puedes hacer nada con la parte superior del cuerpo, siente este pequeño cambio de peso, un poco de rotación.
Tu transición hará que el club baje de nivel.
Esto lo hará más superficial y te colocará en una excelente posición de impacto.
Wenn Ihr Übergang nicht gelingt, spielt es keine Rolle, wie schön Ihr Rückschwung war, denn bei Ihrem Schwung wird nichts in der richtigen Reihenfolge funktionieren.
Und deshalb beginnt das RST-Fünf-Schritte-Training mit Gewichtsverlagerung und Rumpfrotation.
Darüber werden wir heute sprechen, allerdings speziell im Hinblick auf den Übergang.
Wir beginnen ohne Schläger und trainieren dann unseren Körper, um den Schläger wieder hineinzubekommen.
Und wenn die Körperbewegungen erst einmal stimmen, können Sie diese Übungen jederzeit und überall durchführen.
Wenn Sie also wirklich mit Ihrem Übergang zu kämpfen haben, möchte ich, dass Sie diese Übung ständig durchführen, damit Ihnen dieser Übergang ganz natürlich gelingt, denn er ist wirklich nicht so schwierig.
Es wird schwieriger, wenn Sie anfangen, mehr Teile aufzustapeln, aber mit den Teilen, mit denen wir heute beginnen, wird es sich ganz einfach anfühlen.
Und dann werden wir im Verlauf des Videos damit beginnen, Teile hinzuzufügen.
Und machen Sie es anspruchsvoller und orientieren Sie sich mehr an einem normalen Golfschwung.
Also erstmal absolut kein Golfschläger.
Wir brauchen es nicht.
Wir wollen unsere Arme vor der Brust verschränkt haben.
Wir werden uns nur auf den Übergang konzentrieren.
Und ich werde Ihnen die wichtigsten Dinge zeigen und erläutern, die ich fühle und über die ich nachdenke, während ich diese Schritte mache.
Daher machen wir uns im Moment keine Gedanken über den Rückschwung.
Ich gehe davon aus, dass Sie diese Dinge mittlerweile ziemlich gut im Griff haben.
Und wir nehmen gerade diese erste Änderung vor.
Während ich dies von unten mache, möchte ich, dass Sie auf ein paar Dinge achten.
Beachten Sie die Beugung meines linken Knies.
Es richtet sich nicht sofort auf.
Ich steigere tatsächlich meine Kniebeugung.
Ich sitze tatsächlich auf meiner linken Seite.
Und von unten betrachtet, ich übertreibe ein wenig, ist es eine leichte Zunahme der Kniebeugung.
Dies hilft, das Bein zu belasten.
Ich möchte, dass Sie als Erstes spüren, wie Sie während des Übergangs auf dem linken Bein sitzen.
Bei dieser ersten Bewegung nach hinten und wenn ich mich einfach hineinsetze, bewege ich einfach die Hüfte rüber und lasse die Gewichtsverlagerung beginnen.
Und indem ich das Knie beuge, kann ich mehr Gewicht verlagern und die rechte Seite entlasten.
Das ist also die kleine Baby-Kniebeuge-Übung.
Und während ich mich ein wenig wohler fühle, indem ich die Kniebeugung auf der linken Seite erhöhe, beginne ich zu spüren, wie mein linker Gesäßmuskel, mein Quadrizeps, meine Oberschenkelmuskulatur, alles hier beginnt zu arbeiten.
Dies ist also der erste kleine Schlüssel, um einfach ein Gefühl für das Umschalten zu bekommen.
Und während ich das mache, kombiniere ich es jetzt mit einer kleinen Rotation.
Jetzt sind beide Knie leicht in der Hocke.
Zuerst möchte ich, dass Sie nur die linke Seite spüren und spüren, wie diese Muskeln aktiviert werden.
Und wenn Sie sich dann damit wohlfühlen, so wie ich es mache, ist das technisch gesehen ein geschlossener Hüftrutscher, richtig?
Meine Hüften drehen sich im Moment überhaupt nicht.
Ich spüre nur eine Gewichtsverlagerung.
Und dann lasse ich meine Hüften drehen.
Und während ich das tue, werden Sie bemerken, dass beide Knie leicht gebeugt werden.
Dadurch übe ich einfach eine Hebelwirkung auf den Boden aus, die ich jetzt von beiden Beinen aus nutze und die mir hilft, mein Gewicht zu verlagern und meine Hüften nach hinten zu drehen.
Dies ist der erste Schlüssel zu diesem Gewicht, der Übergang, das Erreichen der linken Seite und der Beginn der Hüftrotation.
Technisch gesehen geschehen diese Vorgänge gleichzeitig.
Während Sie also die Kniebeugung verstärken und auf die linke Seite sitzen, besteht das Ziel darin, an den Punkt zu gelangen, an dem Sie dies tun, während Sie Ihre Hüften wieder in die gerade Position drehen.
Das ist unser erster Schritt.
Linkes Knie, rechtes Knie, Hüfte sind ziemlich genau im rechten Winkel.
Von dort aus muss ich nur noch posten.
Das gehört jetzt eher zum Thema Auswirkungen.
Deshalb werden wir uns nicht zu sehr darauf konzentrieren.
Wir versuchen lediglich, den Übergang zu optimieren.
Wir versuchen also, das linke Knie und das rechte Knie hochzubekommen.
Wenn ich von vorne durchkomme, sollte die linke Hüfte über dem linken Knöchel sein.
Wenn Sie in den Spiegel schauen, ist es das, worauf Sie achten sollten.
Die Naht dieser Hose verläuft genau durch die Mitte meiner Hüfte, meines Knies und meines Knöchels, wobei der rechte Fuß unten bleibt.
Wenn ich mich aufrichte, wird dadurch die Kniebeugung gelöst und die Hüfte nach hinten aus dem Weg gedrückt, sodass Sie nun aufgerichtet sind und den Schläger loslassen können.
Das ist alles, was der Unterkörper von den Übergangsübungen tun muss.
Wie bekommen wir dann den Club?
Was muss es während dieser Zeit tun?
Wenn ich zurückgehe, trainiere ich zuerst nur das linke Knie, richtig?
Ich mache also nur diesen kleinen Babyschritt.
Schauen Sie, was mit meinen Händen passiert.
Technisch gesehen mache ich immer noch einen geschlossenen Hüftslide.
Wir möchten beim echten Schwung keinen geschlossenen Hüftrutsch machen, sondern Sie konzentrieren sich nur darauf, die Gewichtsverlagerung und Bewegung von Ihrem Unterkörper aus zu spüren, nicht von irgendetwas hier oben.
Ich bewege meine Arme oder Hände überhaupt nicht, aber sie werden durch diese kleine Bewegung des linken Knies und der linken Hüfte bewegt.
Und wenn ich dann das rechte Bein hineinlege, beide hineinstecke, schau, wie weit meine Hände unten sind.
Von hier aus muss ich nur noch posten und veröffentlichen, aber das ist in einem anderen Video.
Hier geht es also nur um diese Übergangsbewegung, bei der der Schläger in den Schlitz fällt, flacher wird und in Position gebracht wird.
Aber auch hier gilt: Sie konzentrieren sich ausschließlich auf die Rumpfbewegung.
Man verliert sich darin, oder der Schläger fängt an, überzutreiben, oder so etwas.
Wenn Sie diese Übungen machen, nehmen Sie den Schläger heraus und gehen Sie zurück zum linken Knie.
Während ich das mache, versuche ich wirklich, meine Schultern nach hinten zum Spiegel hinter mir gerichtet zu halten, weil ich nicht anfangen möchte, meine Schultern zu öffnen.
Das führt zu allen Problemen, die die meisten Amateurgolfer haben.
Ich versuche also, die Schultern wirklich geschlossen zu halten.
Das Einzige, was sie dreht, ist meine Hüftrotation.
Wenn ich dieses Gefühl jetzt wieder habe, kann ich wieder zum Club zurückkehren, ohne etwas mit dem Golfschläger zu machen.
Ich verlagere mein Gewicht einfach und mache eine kleine Kniebeugebewegung.
Und das ist es, was mich zum Nachdenken bringt.
Das ist der Schlüssel zum Übergang.
Wenn Sie mit Ihrem Oberkörper nichts tun können, spüren Sie diese kleine Gewichtsverlagerung, eine kleine Rotation.
Ihr Wechsel wird den Club völlig zum Absturz bringen.
Dadurch wird es für Sie abgeflacht und Sie gelangen in eine Position mit großer Wirkung.






Tyler
Craig (Certified RST Instructor)
Andrew
Craig (Certified RST Instructor)
Subin
Chuck
Jens
Craig (Certified RST Instructor)
Jens
Craig (Certified RST Instructor)
Jens
Greg
Craig (Certified RST Instructor)
Bernard
Craig (Certified RST Instructor)
Shane
Craig (Certified RST Instructor)
Ted
Craig (Certified RST Instructor)
Ted
graham
Craig (Certified RST Instructor)