For many people, hitting a draw represents both the ultimate achievement in controlling your ball flight and a daunting task.
However, once you've mastered the RST swing method, you realize that, due to the simplicity of the swing, controlling and manipulating ball flight is very simple.

In the video, you'll find out why this great backswing position is NOT ideal for a draw.
Because the RST method is engineered around the simplest possible movements of the human body, the club is taking a very simple path away from and back to the ball.
This allows you to make very small and easy adjustments to hit the ball high, low, left or right.
In this video, the focus is on the simple adjustments that can be made to hit two different types of draws:
- The basic push draw, where the path is modified so the ball starts right and then curves left, and
- A straight draw, where the ball starts a little left of your target line and then turns left from there.
Each of these shots serves a different purpose and can be used to get extra distance or to get at an otherwise inaccessible pin placement.
If you understand the "new" ball flight laws, you'll quickly conclude that these are the changes needed to hit these two types of draws:
- Push draw: relatively closed club face at impact, club path going "in to out."
- Straight draw: relatively closed club face at impact.
In case you are unfamiliar with the new ball flight laws, they can roughly be summed up by the following:
About 85% of the initial direction of your shot is determined by the club face angle, and about 15% is determined by the club path.
The constant for both types of draw shots is the relatively closed club face. The picture below demonstrates approximately what you should be looking for in terms of getting your club face closed in the downswing.

The image on the left shows about how much your club face should be closed at this point in the swing to hit a draw, as compared to a straight shot on the right.
Now, let's look into the details of learning how to hit the draw. To do this, we'll do a side-by-side comparison of Rory Mcilroy and RotarySwing founder Chuck Quinton.
In the following sequence Mcilroy is hitting a draw and Quinton is hitting a straight shot.

Frame 1: Rory is coming under the plane, Chuck is on top of the plane. Click image to enlarge it.
Frame 1: The Swing Plane and Path
It is very easy to see a radically different approach and plane into the golf ball here. The fact that an iron and a wood are being hit here makes only minute differences as the attack angles would only vary by less than 4 degrees.
What is readily visible is how much "under the plane" Mcilroy is. The yellow line drawn on both golfers represents the plane of the club shaft at impact. While Quinton is perfectly on top of the plane, Rory is well under it and this will lead to his swing path being well from the inside.
Having an "in to out" path like this will allow you to hit a "push draw" if that is the shot you are looking for, but if the angle of the clubface isn't exact at impact you can block the ball way to the right or hit a quick snap hook.

Frame 2: Rory's horizontal swing plane is shifted to the right. Click image to enlarge it.
Frame 2: Horizontal Swing Plane
The horizontal swing plane in Rory's swing is shifted to the right, whereas Quinton's is more down the target line. The horizontal swing plane is measured as the overall plane the club travels on during the downswing, regardless of the path the club head was traveling at impact.
This late in the downswing it is quite easy to visualize that Mcilroy's 3 wood is traveling on a path that is pointing well right of his target where Quinton's 7 iron is "on plane" at this point.
Let's look more closely to see what happens to Rory's path as it nears impact.

Frame 3: Rory is still approaching the golf ball well from the inside. Click image to enlarge it.
Frame 3: The Clubhead Toe Line
Here I've drawn a line on outside edge of the golf ball when the both club heads are about the same distance from the ball. Of course, it is impossible to get them exact without 3D analysis, but given the significant differences in the approach plane, the illustration is valid.
Because Rory is under the plane and coming well from the inside, his club head is further to the inside of the target line than Quinton's is. There is no correcting the path into the ball at this point, so Rory is committed to hitting a pretty big draw from this point, which he does extremely well.

Frame 4: Rory has his plane lines crossed up very late in the downswing. Click image to enlarge it.
Frame 4: Crossed Plane Lines
Note the blue line representing the current plane of Rory's shaft and how it intersects with the plane his shaft is on at impact. At this very late point in the golf downswing, you're path is going to be fairly in to out at impact.
Again, if you are seeking a push draw which is definitely the longest way to maximize overall distance with your longer clubs, this is not a bad thing. Just realize that if you see this in your golf swing and you are working on hitting the ball straight, you will have a nearly impossible time doing so. You can hit a straight shot - a straight push - but not one that will start on your target line and stay there.

Impact! Click image to enlarge it.
Frame 5: Impact
You probably were wondering how Mcilroy was ever going to end up on that yellow plane line after looking at all the previous positions! Impact, however, doesn't tell us much about the path and plane that the club is traveling on, it simply tells us where it was at impact. This really isn't of much use when it comes to talking about learning how to draw the golf ball. But, the next frame does.

This i.mage tells the story of Mcilroy's swing plane and path Click image to enlarge it.
Frame 6: Visualizing the Golf Swing Plane
The red circles on both golfers represent the sweet spot of each club at this point in the golf swing. The blue line represents the line that the ball is traveling on from where it was at setup to the first few feet of flight.
It is very clear to see that Rory's clubhead has continued traveling straight down the line, which at this point in the golf swing, typically indicates a swing path that was in to out.
You can also see that Mcilroy's club shaft is above the plane at this point, an indicator of a horizontal swing path that is shifted to the right. Compare that to Quinton whose club is on the same plane it has been on throughout the entire golf swing.
Conclusion
The so called "push draw" in golf requires a swing path that is in to out as demonstrated by Rory above and a clubface that is shut in relation to his path. If you want the big high swooping draw, you must alter your path and horizontal swing plane.
By contrast, if Quinton were to hit a draw with his swing plane and path, the ball would start left of his target line and continue further left. Hitting a draw with a swing that is "on plane" will tend to hit the ball lower as the angle of attack is typically steeper when compared to how Rory is approaching the ball when using the same golf club.
Now that you know "what" you need to accomplish in your swing to start hitting draws, it's time to watch the video to find out "how" to do it:
- Find out which hand is primarily responsible and how to use it properly,
- Learn how to alter your setup for the push draw, and
- Discover how to perform the two crucial elements that will help you get your club face closed the correct amount at impact.
Video Transcription: How to Draw the Golf Ball
As you've learned in our "Knuckles Down, Logo Down" video, really what we're trying to do to control the club face is all done with that pulling motion of the left hand.
It's very important for that to be trained to keep the club face moving in the correct direction, to keep the club face stable, because that's the dominant hand in controlling the club face, in terms of being able to control it very easily.

Pulling with the left hand controls the club face
A simple way to think about this is if you're pulling a pull cart down the fairway - you know the pull carts that you pull behind you or push in front of you, depending on how you use it, that carries your clubs for you so you can walk and not have to carry your clubs on your shoulder - if you pull that down the fairway, it will track directly behind you and basically move in almost a perfectly straight line because it's always moving towards the force of movement.
Now, when you push something, you get behind it, which is a more dominant motion. If you're not pushing directly behind the center of gravity, it's always going to turn and it's going to be moving down the fairway like this, so if you watch somebody pushing one, it'll kind of have a zig-zag pattern to it, relatively, compared to someone who's just pulling it - it'll follow directly, in a straight line.
That's why we learn to use the left hand. The same thing is true in golf. If I start pushing at it, while it's a more dominant motion, if everything's not dialed in there perfectly it's going to be very hard for me to control the club, and it tends to break the left wrist down and make it impossible to control the loft on the club face, so you can't control your trajectory.

Pulling allows control - pushing requires adjustment
Everything we're doing is predominantly left hand, when it comes to club face control. As we look at drawing the ball, we need to start understanding exactly how that works, and look at making a couple of little adjustments to draw the ball, because it's very, very simple to hit a draw. There are a couple of things that we're going to adjust.
At impact, I know that my club face needs to be relatively shut, in relation to where I'm wanting to hit the ball, so there's a couple of things to think about here. First of all, understand that the vast majority - the most influencing factor of the initial ball flight direction - is the club face angle.
The path has about 20 percent, the club face is about 80 percent, roughly. It's a little bit different in there because the ball compresses on the face and so on, but if you just think that the majority of the starting direction of your ball is going to be club face angle, you can manipulate the path a little bit in order to get the ball to start a little bit to the right and draw back.
It just depends on the type of draw that you want to hit. If you want to hit basically a straight draw, where your path isn't going to change - you're not going to try and swing more in-to-out to get it to start to the right - then there's very little adjustment your swing needs to make, other than the club face angle and the release.
You can set up dead square, just like you always do. Make your normal swing path, that's square. Just understand that the ball is going to start a little bit left of your target line and draw farther left. If you want to manipulate it and get the ball to start slightly to the right of your target line and draw back, you have to make an adjustment in the setup.

Left wrist flat (above) and bowed (below)
All that means is moving the ball back slightly in your stance. That will get you to the point where you're coming slightly from the inside, and then all we need to do is worry about club face angle.
It's a very, very small adjustment. Even just moving the ball back an inch in your stance, maybe two, will get you to the point where you're coming quite a bit more from the inside than you normally would be, and be able to hit a draw that starts to the right and comes back.
From there, it's all just worrying about the club face angle, and that's simple. The RST swing pattern is such a simple swing that you're really doing so little manipulation that you have the freedom to start adjusting what you do with the club face angle.
Long story short, the only two things that I'm going to do different in my swing, other than the setup position, is A, at the top I'm going to let my left wrist bow just a little bit more, so right now this would be the top of my swing normally - my wrist is really flat - I would let my wrist bow slightly. That goes back into that "Knuckles Down, Logo Down" video.
As I go to the top, this is going to give me a little bit of a head start on getting that club face to be a little bit shut, in relationship to my target line, than where it would be normally.

Club face is slightly more shut than normal
Go to the top and let my left wrist feel it's just slightly bowed. You can see it's a tiny little change. We're only talking a few degrees here. As I start coming down, notice the club face is a little bit more shut than where it would normally be. It would normally be about here.
Now it's a little bit more shut, my wrist is a little bit more bowed. The only thing I'm going to do from here is just let the club release a little bit more. I'm coming from the inside a little bit, the ball would be back in my stance, and I'm going to release it depending on how much I want it to draw.
If I want to hook it really hard, I'm going to bow it more and release it more. If I don't want to draw it so much, it's going to be a little bit more gradual. Very, very simple changes; once you've put all the other pieces together in your swing, to draw the ball.
Work on just getting to the top, adjusting your wrist just slightly - let it arch a little bit more, so you're going to roll those knuckles in a little bit early - and then start to release the club a little bit more as you come through, and you'll be able to draw the ball with no problems.
Watch part 2 now to see how you're moving your body in the opposite direction of the pros!


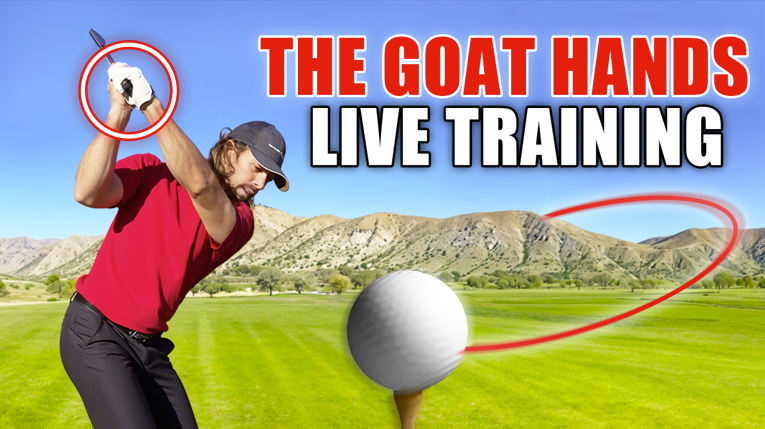






 In the video, you'll find out why this great backswing position is NOT ideal for a draw.
 The image on the left shows about how much your club face should be closed at this point in the swing to hit a draw, as compared to a straight shot on the right.


 Pulling with the left hand controls the club face
 Pulling allows control - pushing requires adjustment
 Left wrist flat (above) and bowed (below)
 Club face is slightly more shut than normal
