Watch part 2 now to see how you're moving your body in the opposite direction of the pros!
Many of you are probably Ben Hogan fans; a lot of us at RotarySwing.com are too. He was one of the greatest ball strikers ever to play the game, and did a lot of things that were revolutionary and many years ahead of his time.

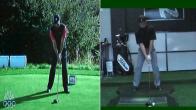
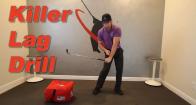
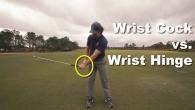
Cupping the left wrist opens the club face
You've probably heard of Hogan's swing "secrets" - tips that some say you can apply to your game and fix your game forever.
For instance, one of Hogan's famous moves was to cup his left wrist at the top of the swing, and this was a technique that helped him become a much better golfer than everyone else.
However, the fact that it worked for Hogan doesn't mean you should automatically do it. Cupping your left wrist opens the club face, so if you're already hitting slices and you cup your left wrist it's only going to make matters worse. Your slice will get even bigger.
Hogan tended to hook the ball a little too much, early in his career. Cupping the left wrist allowed him to compensate for his hook and helped straighten out his ball flight, so it was definitely a good idea for him. That doesn't make it a cure-all.

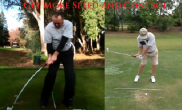
Kicking the right knee in can make you lean back
Another of Hogan's secrets that you may have heard about is kicking the right knee in as you start your downswing. It's true, Hogan got a lot of lateral shift in the downswing with that move. However, that move can put a lot of wear and tear on your left hip.
The left hip comes under a lot of strain if it slides too far forward, past neutral joint alignment. It can get very sore and suffer damage over time.
Sliding the hip forward can also cause you to lean your upper body back and get too much axis tilt away from the ball, which can lead to lower back pain.
If you have pain in your left hip or lower back in your golf swing, or after playing a round of golf, it may well be that you're shifting too far forward with your lower body.
No Magic Bullet, But...
We all know there's no secret move you can apply to your game to magically fix everything that's wrong with your swing and turn you into a fantastic golfer.
Nobody with a 20 handicap ever discovered that one little secret move that catapulted them onto the PGA Tour. That's just not how it works. The "secret" is to build an entire swing that's fundamentally solid and allows you to play well day in and day out.
That said, Hogan did have some secrets that allowed him to become a much better golfer than most of his counterparts, and there is one that you can definitely apply to your own game.
One of Hogan's secrets was to eliminate one side of the golf course. He practiced doing this on a daily basis, and it's certainly one of the things that helped him become such a great golfer.
We're going to show you how to do that yourself at the end of today's lesson. When you can go out on a course and find trouble on one side or the other, you can just eliminate that side of the golf course. It will be much easier to make pars and a lot of birdies.
Tone it Down
The main topic for today is how to tone down the shot shaping techniques you learned on Days 1-5.
You've learned how to hit big hooks and slices. You know how to manipulate your hands and body to get the ball moving in different ways. Now we're going to show you how to tone that down so you can use those same techniques to hit a fairly straight shot that just falls a little to the left or right.
Your game will be much more consistent and much more effective because you'll be able to control your shots and compensate for errors when you're playing a round of golf.
Get That Hook Under Control
We'll start with how to tone down the hook.
In the earlier lessons, you learned that swinging the club out to the right would get the ball to start to the right, and that closing the club face by rolling it to the left would put some right-to-left spin on the ball and get it to hook back to the left.
We had you do big, exaggerated versions of these movements to hit a 20 or 30 yard hook. That's the right way to learn these motions; you start big, then tone it down. Today you're ready to tone it down.
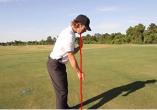
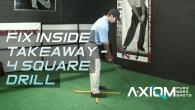
The drill set up in the photo below will help you practice smaller, more controlled hooks. You'll need two alignment rods and two foam swimming pool "noodles." The noodles are very inexpensive, usually just a couple of dollars wherever beach or pool items are sold.

Placing pool noodles on the alignment rods makes them easier to see
Slide the noodles over the alignment rods. If you can't get foam noodles you can still do the drill; they just make the lines easier to see. If you drill with just the rods it's possible to miss (hit outside the rods) without realizing it.
Set up the rods so that if you were to hit a perfect swing, dead-straight toward the target in the distance, the ball would just barely miss the left foam noodle.
You can also lay a rod or club on the ground, parallel to the target line. This is your reference line for aligning feet, hips, and shoulders. Set everything up so that if you were to line up completely square to the line and hit a perfectly straight shot, you would barely miss the left noodle.
Adjust Your Stance
When you were learning to hit a hook we had you keep your stance square and manipulate the shot with just your hands, arms, and club to swing out to the right. That helped you exaggerate and learn the moves, but it's going to change now that you're ready to hit a controlled hook.
The reason is that if you set up square and use your arms and body to hit all your hooks, the club face will tend to work too far behind your body. If you need to swing 20 yards out to the right you can end up with the club coming way from inside, forcing you to flip your hands at the bottom, and you can't do that consistently over time.

Feet are lined up 10 yards to the right
Instead, we're going to adjust your stance. We'll start with a 10-yard draw, so you need to line your feet up about 10 yards to the right of the target.
When your feet, hips, and shoulders are all square to your adjusted target line, you can swing just slightly to the right, instead of exaggerating it like before.
The reason we do this is that the direction your ball starts out is controlled about 85% by the direction the club face is pointing.
If you want to play a 5 yard draw, your club head needs to be moving about 10-12 yards to the right of the target.
You don't want to have to swing 10-12 yards to the right in relation to your body's alignment. Instead, you'll line up your feet about 10 yards to the right and then barely swing inside-out - just a little to the right - with the plane of the club coming through impact. Then you'll just close the face a little bit.
Start the drill about four or five feet behind the foam noodles and hit five shots. Try to start them all out 10 yards to the right and then draw them back so they end up about 5 yards to the right of the pin.
Keep practicing until you can hit five shots that start to the right of the noodle and then draw back.
Move Back For a Bigger Challenge
Once you've got the hang of it from 4-5 feet away, you're going to move farther and farther back from the foam noodles. This makes your margin for error much smaller.
The farther back you go, the less room you have to start to the right of the eventual target while still keeping the ball between the alignment rods.

Hitting a draw
If you're up pretty close to the alignment rods and your shot goes just barely inside the right noodle, that may be 20-30 yards to the right of your target.
If you move back a little, now when you barely miss the right noodle you may be sending the ball just 10 yards right of the target. A little farther back and the right noodle is only 5 yards right.
The farther back you go, the more difficult the drill.
Once you're doing pretty well at 4-5 feet away, move to a spot 10-12 feet back and hit the shot again. Practice from here until you can hit five good shots that start to the right of your target (but between the alignment rods) and then draw back to the left.
Once you're doing that fairly well, bring it back to about 15 feet from the noodles and do another five.
Keep practicing until you can do 15 good shots in total - five each from 5, 10, and 15 feet. That's it for the Day 6 drills.
Hogan's Secret
We talked at the beginning about Hogan's trick of eliminating one side of the course.

Imagine a wall
This is very important - it's actually one of the most important fundamentals that you can have in your golf course strategy.
To start using this trick yourself, you need to imagine a giant wall starting at the left foam noodle and stretching all the way to the target in the distance.
When you're hitting right, you're going to consider anything that touches that wall - anything to the left of a perfectly straight shot - to be a terrible shot.
Start out your shots, play them to the right and let them fade back. You can miss 20 yards to the right, no problem. A big miss to the right is better than any shot that crosses the target line and misses to the left, even by just a yard.
When you're hitting a fade, obviously your imaginary wall is on the right.
- When you play a right-to-left shot, never cross the target line to the left.
- When you play a left-to-right shot, never cross the target line to the right.
If you do, it's a bad shot. Definitely count it as a miss.
Practice getting your hook under control and make sure that you never cross the target line. Whenever you hit a right-to-left shot, be sure you never ever miss to the left of the target.
As you learn to do this you'll be amazed at how much easier it becomes to miss only on one side or the other.


















































































































































 Cupping the left wrist opens the club face
 Kicking the right knee in can make you lean back
 Placing pool noodles on the alignment rods makes them easier to see
 Feet are lined up 10 yards to the right
 Hitting a draw
 Imagine a wall