Video Menu
My Favorite Videos
My Favorite Videos
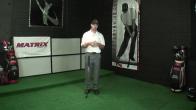
9 to 3 Drill Program for RSA
Sorry, you need to be a RotarySwing Academy member to access this video.

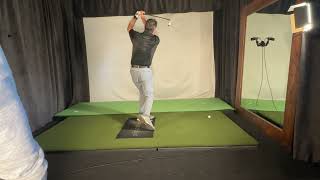
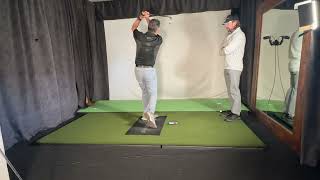
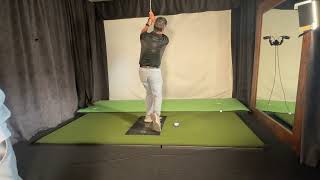
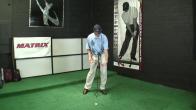
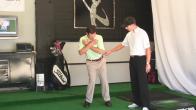
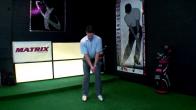
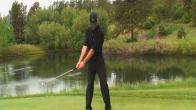
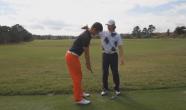
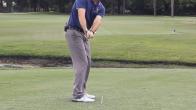
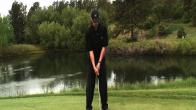
NOTHING is more important to mastering the golf swing than perfecting the movements that you do through the hitting area. This is exactly what this program teaches you. Every single position, feeling and movement into impact and the release. If you had to do just one drill for the rest of your life, this is it. You will learn how to post up like a pro and you'll be shocked how well you start compressing the ball with such a compact swing, and you'll be pleased to find the full swing is little more than adding a little more turn to this drill.
When learning any move in the golf swing, the best place to start is obviously without a golf club.
You know by now it's all about learning how to move your body, how to engage your body, stretch muscles, lengthen muscles, relax muscles, engage muscles.
That's what the golf swing simply is.
It's no more complicated than that.
It's learning how to move your body.
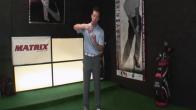
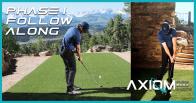
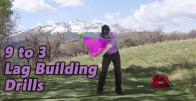
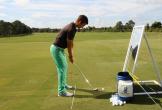
Now with today's program, what we're going to do is focus on the nine to three move.
And you hear me talk about that a lot.
It's a critical way to learn the swing.
It's a critical pathway, because really, what you're learning is from.
When the club's parallel to the ground to parallel to the ground on the other side is everything that really matters in the swing.
If you get that stuff right, the rest of it is truly just little details of setting that stuff up, making it more easy to repeat those moves.
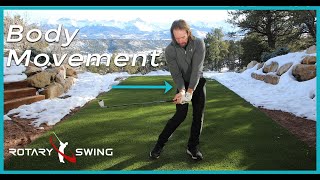
So we're going to start out first with just our body movements.
And a nine to three move is a really small move.
And at first we just say you're taking a seven iron, shouldn't really go more than 50 yards at first.
And you start getting more comfortable.
You can hit it up to maybe a hundred, 130 yards or so.
But because we're making a small swing, we don't want to try and hit it that far.
We're just trying to perfect the moves.
So the first thing we're going to work on with this nine to three move is just this initial shift and turn.
And you're only going to turn about halfway back when I have the club, that'll make more sense.
We're going to go parallel to the ground.
So what you're going to really focus on is turning about 45 degrees.
What I'm really trying to get you to focus on right now is shifting to the right and pulling that right shoulder back.
Without a club, this move should be really simple.
And so at first you may be thinking, ah, this is dumb.
Why am I doing this drill?
And just follow along with me.
Right heel into the ground, right ankle into the ground, right shoulder back.
Keep doing this move because I want you to start feeling the muscles that are activating right now.
Now you should, even right now, already I feel my right glute starting to wake up because I'm kind of sitting into it.
It's starting to say, Hey, I'm doing some work over here.
And I'm also starting to feel my obliques because that's what's twisting my rib cage.
That's what I'm trying to get you to feel while doing this drill.
Now let's put it together with the other side.
So I've got right ankle, right shoulder.
Now I'm going to shift from the left side.
You're going to notice as I do this, my head is going to look like it pitches back a little bit.
So I'm going to have more secondary axis tilt as I shift to the left and pivot my hips just about 30 degrees open.
Right shoulder back, weight to the right, left ankle, left hip.
Right shoulder, right ankle, left ankle, left hip.
Notice I didn't say anything about my shoulders on the way down.
Right shoulder, right ankle, left ankle, left hip.
Now this would technically put me into an impact position.
So how would I add the three o'clock position to this?
You won't without a golf club because that would require you to do something with your hands.
And at this point we shouldn't be doing anything with our hands.
So when you're doing this drill without a golf club, right shoulder, right ankle, left ankle, left hip.
You stop at impact because the only reason you would ever keep going past here is momentum, which is created by the golf club.
Golf club's moving fast.
It's going to pull your body into this follow through position.
You never try and train yourself to get there.
Right ankle, right shoulder, left ankle, left hip.
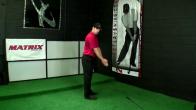
Now I'm going to try it with my arms out.
Right ankle, right shoulder.
Hands go to three o'clock or excuse me, nine o'clock.
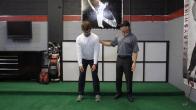
I want you to imagine with your hands that you could shake my hand if I was standing on the other side of you.
And now from here, left ankle, left hip, perfect impact position.
Piece of cake, right shoulder, right ankle, left ankle, left hip, perfect impact position.
You're going to look just like a tour pro.
Keep doing it.
Right shoulder, right ankle, left ankle, left hip, perfect impact position.
You're doing great.
This is how you're going to start learning these critical moves in the swing.
At the end of the day, what matters more than impact?
Nothing.
So if we can get this sequence down from moving halfway back into impact, as we add a golf club to this, which we're going to do in just a second, keep doing the reps.
We're in a perfect impact position.
We're going to learn how to get into a perfect release, right shoulder, right ankle, left ankle, left hip, we do it from down the line.
First I'll do it without my arms out there, right shoulder, right ankle, got a little flex in my knees.
Still kind of sitting slightly into the right side.
Now I'm going to go shift my weight back to my left ankle.
Move my left hip out of the way.
Shoulders are square.
Hips are slightly open.
Right shoulder, right ankle, right hip, left shoulder, excuse me, left ankle, left hip.
Arms out.
Right shoulder, right ankle.
You and I could shake hands right here.
Left ankle, left hip.
Perfect impact position.
Shoulders are square, maybe even slightly closed at this point.
Hips are open.
Left ankle, left hip.
Now, let's grab a golf club.
Do the exact same moves.
we're going to go back.
We're going to feel the exact same thing.
This is critical.
We're flailing the thing around with your hands.
Right shoulder, right ankle is what you're thinking to yourself.
The fact that you're holding a golf club doesn't matter.
Hold it upside down.
It'll get rid of some of the momentum.
Make it a little easier for your wrist to stay more relaxed.
Left ankle, left hip.
Perfect impact position.
Golf is going to be a piece of cake if you can get this drill down.
Right shoulder, right ankle.
Left ankle, left hip.
Good.
Same move.
There.
As you start getting more comfortable and you're making sure you're watching yourself in the mirror, you're doing it correctly, then I want you to start to speed it up a little bit.
You can start making the pause at the top a little more dynamic.
So, now you'll notice as the club's still going back.
I'm going to do it slowly.
The club's still going back, but I'm starting to shift back to the left and turn my hips before I finish my backswing.
As I watch myself in the mirror, I can see my hips are moving while my hands are still actually kind of floating up.
That's how we get this dynamic stretch.
Take the club right side up.
Still got to keep my hands nice and relaxed.
Same thing, but now I've got a little momentum, you'll see.
So, now that the club's got a little mass on the end of it, I just want to let it start going where it's telling me it wants to go.
I'm not trying to control it at all.
I'm just trying to get into that same impact position we've been working on.
Right shoulder, right ankle, left ankle, left hip.
But the club is kind of heavy.
It wants to keep going.
So, I just let it by letting my forearms turn over.
I'm barely holding onto it with my right hand.
This is a nine to three drill.
Notice that my right shoulder is staying back.
My chest is still facing the mirror while the club moves another four feet.
I'm shifting, posting up, releasing.
It's all just forearm rotation at this point.
Letting my hands release.
You should be able to feel the natural momentum now because we did all these drills where we stopped at impact.
There's no momentum.
You felt like, oh, yeah, I can stop here.
No problem.
But as soon as you pick the club up right side the club didn't want to stop at impact anymore.
Nor do we want it to.
We want it to keep going.
We just have to let it.
And that's why we let our arms rotate over.
It doesn't get any more efficient than this.
You're not trying to flip it over.
That's impossible to time.
You're feeling the momentum and mass of the club rotate over for you.
It releases automatically.
You just got to keep your hands soft.
Keep moving your body exactly the way that we started.
Right shoulder.
Right ankle.
Club's nice toed up here.
Left ankle.
Left hip.
Just let it release.
I can start putting some of my other drills that I have on the site here.
VJ release drill.
Letting my hands stay nice and relaxed.
Letting the club speed up independent of I can start working on the five minutes, the perfect release drill.
Bringing my right shoulder on there underneath.
The big thing is starting to get these reps in.
Right ankle.
Right shoulder.
Left ankle.
Left hip.
Right ankle.
Right shoulder.
Left ankle.
Left hip.
Keep doing this.
Do this for at least 20 or 30 minutes a day.
Especially if you're brand new.
Just starting to get comfortable with RST and figuring what's going on.
Nine to three is a great drill to build everything on upon the rest of your golf swing.
You can hit balls doing this drill.







































































Mando
Craig (Certified RST Instructor)
Jeremiah
Craig (Certified RST Instructor)
John
Craig (Certified RST Instructor)
John
Craig (Certified RST Instructor)
John
Craig (Certified RST Instructor)
graham
Craig (Certified RST Instructor)
Christopher
Craig (Certified RST Instructor)
Christopher
Craig (Certified RST Instructor)
Dan
Craig (Certified RST Instructor)
Timothy
Craig (Certified RST Instructor)
Christopher
Craig (Certified RST Instructor)
Ted
Craig (Certified RST Instructor)
John
Craig (Certified RST Instructor)
John
Craig (Certified RST Instructor)
John
Craig (Certified RST Instructor)
John
Chuck
Craig (Certified RST Instructor)
John
Michael
Craig (Certified RST Instructor)
Michael
Craig (Certified RST Instructor)
John
Craig (Certified RST Instructor)
John
Craig (Certified RST Instructor)
John
Ted
Craig (Certified RST Instructor)
Ted