Video Menu
My Favorite Videos
My Favorite Videos
Fundamentals of Compression
Sorry, you need to be a member to access this video.
You Are Just Seconds Away - Become a member here!
Already a member? Log in now

Learning how to properly compress the ball is the first key to becoming a great ballstriker in golf and this video is the cornerstone piece in being able to learn just how to do that.
Compressing the ball properly starts right here.
Learning how to have proper shaft lean, how to use your wrists and your body together, And the angles that you need to create to properly compress and launch the ball for a penetrating, piercing ball flight starts right here.
And you're going to need to master this skill in order to be able to pass the skills assessment test that's coming up after this.
So as you're learning how to pitch properly, There's several things that we're going to want to learn how to do and double check as you're videoing your swing.
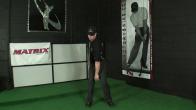
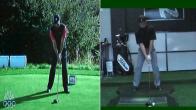
So we're going to start right from the beginning with setup, and I'm going to use this baseline of Tiger.
Now he's hitting a little bit more of a cut shot.
So you'll see the clubface a little bit more open, but other than that, the fundamentals are exactly the same, of course, as you've learned in the ripper shots, but you can hit a lot more spin, Put a lot more spin on the ball by just adjusting the clubface angle at setup and make the same stroke.
So I'm just doing a more of a square face shot.
So it's going to be a little bit lower, but you're going to see all of the fundamentals are the same.
And I want you to learn from this baseline because this is going to teach you how to properly launch and compress the ball.
So you hit those solid, pure shots that feel so good.
So at setup, here's what you're going to focus on first nose between your toes.
So when you're setting up, you want to feel, or you actually want to have it, your nose centered between your feet.
It can be a little bit more, right?
It can be a little bit more left, depending on the shot you're wanting to hit, but this will help you start to understand where your body weight should be.
You're going to be favoring the lead side, but you want your nose between your toes and your hands between your thighs.
So you can see that, uh, set up here that my hands are between my thighs.
And then as I get into the forward press, we're going to increase the shaft angle and decrease the amount of flexion in the wrist.
And so you can see the right wrist at setup is a little bit flexed.
So in other words, it's, it would be slightly bowed, but as you start the takeaway, you'll see that you start to get rid of some of that flexion and start to move into extension.
So you can see now my wrist is actually slightly arched back.
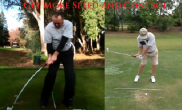
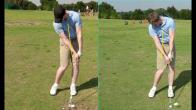
And the reason I'm doing this side by side with Tiger is because this is a, it's a great video, but it's, it's a little bit blurry.
So with mine, we've got a little bit better quality video.
So you'll be able to see what the hands are exactly doing.
So he's moving slightly into extension and starting to set that wrist.
Now, as you forward press, your whole body is involved in this, but it's very subtle, But you want to be freed up to move freely and be able to feel your body and your right hand working together.
So you'll note there's a bunch of little subtle things that are happening, But they should all be reacting to what you're trying to feel as you're starting to remove some of that.
Flexion in your right wrist to get the right wrist ready to hinge back.
So you'll see that my, my body weight's moving a little bit, my head's moving a little bit, everything's moving a little bit just to be a little bit more fluid and dynamic.
And as I forward press my hands, the back of my left hand is going to go from the inside of my thigh.
And the same thing as you see Tiger here on the right, and then it's going to move closer to the center of the thigh.
So basically your pant crease seam, that's about how much you're going to forward press.
And you're going to see why this is going to matter in a moment.
Because what we're going to do is we want to make sure we take off about five degrees of loft from where we are at set up to impact.
But we'll come back to that in just a moment.
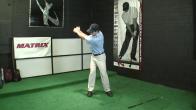
So now as the swing starts back, I am starting to extend or hinge my right wrist.
You can see there's a little bit of extension.
And the checkpoint here is right about when your lead arm, or excuse me, your trail arm is about a vertical.
So I'm going to draw a little line here, and then one, and just to kind of give me an idea.
And then we'll advance Tiger one more frame here.
So I've got Tiger's arm about vertical here, give or take a little bit.
And you're going to see about how much wrist hinge you should have at this point in the swing.
The reason this matters, don't worry about getting the exact numbers right.
What matters is if you, if your wrist angle looks like this, you haven't set your wrists enough.
And so, or if it's much more than this, then you've set your wrist way too much.
You want to find a nice balance.
You do want to start to set that wrist because you need to be able to get the club head to move behind the hands, which is happening as you're setting your wrist.
And that's, what's going to allow you to deal off the club more into impact.
So that'll give you a really simple checkpoint.
Again, it doesn't have to be exact numbers.
Again, it depends on the shot that you're wanting to hit as well, But you do need to make sure that you are setting the wrist off the ball with the right hand or trail hand.
Otherwise the club is not going to get up enough, and you're not going to be able to deal off the club properly.
So now, as we keep going back, The next thing I want to draw your attention to is we get to the top of our swing before we change directions.
Note how the logo is now of our shirt is under our chin, basically.
So if I just kind of drew a line there, you're going to see that that logo has moved.
The reason this matters is because you need to turn.
It's very easy, even on a pitch shot like this, to just kind of swing your arms across your body and not turn your body at all.
But remember, everything that you're doing right now is building up to a full swing.
And so obviously in a full swing, we don't just use our arms, our core is involved, our legs, our hips, our body, everything.
And so I want you to make sure that you are turning your body, using your core to turn your shoulders.
You can see just how much our shoulders are turned at this point to get that logo under your chin.
And these shots are going to carry about 10 to 15 yards.
That's all you're looking to do with this at this stage.
We don't want to carry it any further than that right now, because your skills assessment is going to be a 10 yard carry shot.
And this is going to make sure that you're building up the proper fundamentals to carry into wedge play, iron play, and then of course the driver.
So at this point, you're going to see that our left shoulder has gone down quite a bit in both cases.
And you can see a nice little gap between both of our arms.
This is just showing that you didn't push from the lead side, because otherwise that gap would disappear.
That means you're going to roll the face open, then you're going to have to try and time it coming down.
Uh, that's obviously going to make things way more difficult.
Uh, so now as we're coming down from here, It's so important that we start to get the feeling of that goat arm, of that elbow pit facing out away from us.
This is what's going to allow you to pass the skills assessment test, Because otherwise, you're going to start having the club face closed down on you.
And you're going to hit a lot of pools.
And you're not going to be able to control that club face.
So you'll see that that elbow pit is facing out away from us.
And as we get down right into the hitting area, We want to see a lot of angle between that right form or trail form and club shaft just before impact.
So this is very, very important.
Otherwise you're not going to be able to compress the ball properly with your irons.
So you'll see now in both cases, our hands are ahead of the ball, but we obviously haven't hit the ball yet.
This is going to assure that we get clean contact.
And this is so, so important for good iron play.
We've got to get our hands ahead of the ball at impact.
And that's why it's so important to have that takeaway checkpoint to make sure you're getting that right wrist or trail wrist to set the club early, much earlier than you would in a full swing because we're making a much shorter stroke, but we still have the same fundamentals coming into impact, which you'll see next, that we want to make sure that we have de -lofted that club significantly.
So now this is where you can start measuring if you have a reasonable swing software to get an idea of how much you are de -lofting.
That club face at impact.
So you want to be about four or five degrees more than you were at setup.
And I'll show you how to measure that here.
So, and both of us, Tiger and I are both roughly at 104 degrees of shaffling, with a 60 degree wedge, hitting about a 10 yard carry shot.
Now, if we go back to setup, you'll see that at setup, the angles are obviously a bit less, not as huge amount.
Again, we're only looking for about four or five degrees of de-lofting.
That'll be perfect when we get into iron play.
And, and again, if you have the exact frames at impact, it'll make a big difference.
So, but if you don't, the numbers will be a little bit off.
That's perfectly okay.
What you're trying to do is understand, making sure that your hands are well ahead of that ball at impact.
And a good checkpoint is that, you know, I'm a little bit past impact here, obviously the ball playing the ball off roughly off the right big toe, but obviously the club face is already at the center of my stancers.
So we don't have that exact frame, But basically, the back of your left hand is going to be just about even with your thigh at the moment of truth, right at impact.
And that's when you would have an accurate measurement of your shaft lean angle.
But if you're roughly in this range where I showed you about 104 degrees, give or take a little bit, again, it's not, you know, something about getting it absolutely perfect.
It's about getting it in this range, but you have to have angle in your right wrist.
You can see that my right wrist is still extended.
So arched back on itself slightly and tigers in the same case, again, it's blurry here.
That's why I'm using my swing next to it.
But you can see obviously that my hands are much further ahead of the ball at impact than they were at setup.
This right wrist is still arched back.
This is so important.
And by the time that your club shaft gets out, or your hands are outside of your thigh, and that club head starts to get past the outside of the lead foot, that's when it finally starts to get back to vertical.
So now you can see the club shaft has finally reached a neutral position.
Again, tiger shaft is very blurry, so it's hard to see, but I still have extension in this right wrist.
This is keeping the club face very quiet and de-lofted.
And I want to draw your attention to the club face through the hitting area, because this is important, vitally important, for being able to pass the skills assessment test, that that club face is very quiet right through here.
So you'll see the club face is square facing the target and still very, very square.
There's very little rotation.
And that's because I'm not pronating this trail arm, my right arm.
I'm trying to keep that elbow pit still facing out away from me.
You can see the same thing in tiger's case, left elbow pointing down the target line.
And that's going to allow you to control the starting line, which is everything.
If you can't control where that ball starting, you have no idea where it's going to end up.
But if you can control that starting line and get it to start on the same line every single time, which is the point of this drill with the proper trajectory, then you're going to start to be able to carry this over into your full swing.
You can still see that I have not pronated my right arm.
Both our right elbow pits are still facing out away from us.
We have not let that club face turn over.
This is how you learn to control that golf ball.
So now you can see that we're still holding that release of the club face off with our right hands.
And finally, our body's going to release a little bit to dissipate some of that energy that was in there.
But that is how you are able to control this golf ball.
This, the moment of truth is everything.
If we're not controlling that club face here, we've got no chance of controlling it at full speed with all of our other clubs in the back.
But the great thing about this sequence of movements is that it's the exact same thing you're going to do with your seven iron, your three iron, your three wood, your driver, everything is the same.
So remember, you're going to start to hinge the right wrist, your trail wrist right off the ball to get the club set, to get the club head, give yourself some angle so that you have something to hit with as you come down.
And then as you come down, you are going to release some of that right hand, but you're not going to release all of it.
You're going as your body pressure, as your pressure and weight shifting a little bit more forward, you're maintaining that angle to keep that loft off the face.
Now let's go outside and take a look at how to do this.
If you want to become a great ball striker, you've got to be a great chipper and pitcher of the ball, Because the same fundamentals that control and dictate what kind of ball striker you're going to be are learned right here.
It's so much easier to learn how to de-loft the club and use your hands properly to control that club face when the club is not going at a hundred miles an hour.
So as you just saw in the side-by-side with myself and Tiger, there's a few fundamentals that you've got to do right.
But the biggest thing that you're going to learn here is how to de-loft the club.
And that starts with your setup.
So you're going to start up with the ball off the big toe, your nose between your toes, your hands between your thighs, and that's going to give you a great baseline to set up from.
The big thing that you're going to do tend to do with this drill is push with this left hand.
And that's going to cause your shoulders to rotate really flat.
You need your shoulders to rock.
And you saw that there was a lot of movement of the logo to kind of get it behind, you know, in the center of the bot or the center of the head.
Because if you're not going to push your arms, which is going to get the club to go around, you've got to have something to get the club up.
Otherwise your arms are going to take over.
And so as you're using your core to help move your body and make room for your goat arm to come back through, you've got to get those shoulders to work with you.
And what's going to happen is once you feel that your shoulders and your core are working back like this, then all you have to really focus on is hinging your wrist, your arm, your arms in general, aren't really going to do a lot.
If you're a bad chipper of the ball, a bad pitcher of the ball, you're probably not a great ball striker with your irons either, because you're going to do the exact same thing.
You're going to tend to start the swing the same way.
And again, the biggest fault that we see all the time is this.
You can see my shoulders aren't really moving at all, but I've got the club basically all the way taken back to a full pitch shot here.
But I've rotated my arm, I've rotated the face open, and now I've just got to try and time a bunch of stuff coming down, which is never going to work out well.
So what you want is a very simple, basic stroke, and that's your core, moving your shoulders, my right hand starting to hinge back so that I've got that angle that I need to bring back down.
If you're back, if you take the club back like this, and you push with your lead arm, you're going to see there's not much angle in my right wrist at all.
And so as I come down, I'm going to scoop.
So you've got to get a feeling for this trail.
Hand to hinge, going back to get the club in order, hinged back or angled back so that I can de-loft coming down.
This is so important that you learn to get this feeling right of your trail, hand hinging back and your body helping move the club.
Once you have this kind of feeling, and I like to do go back and forth between doing both hands and then trail hand only.
And I start to get the feeling of my core moving my body back and hinging that wrist.
And now from here, it's really quite simple.
All I'm going to do is as I start to rock back forward, moving my pressure a little bit more to my lead side, I'm keeping that wrist angled back.
And then as I come down, I'm going to add a little bit of hit here, but I'm not going to hit so much that I'm losing all of that angle.
This is what you're going to need to video your swing and see what you're doing at impact.
You want to make sure that you've de-lofted four or five degrees more than where you were at setup.
And if you're set up with the fundamentals I just gave you and your hands are now, your back of your lead hand is toward the edge of your lead thigh at impact, that's all you've got to do.
That's going to take you from here to here.
And that's all we need to do to de -loft the club properly, to be able to launch the ball properly.
Because in your skills assessment test, what you're going to have to do is launch the ball with a very similar trajectory, launch angle and spin rate every single time in order to demonstrate that you have clubface control.
Clubface control isn't just directional control like you did in the straight line drill, you're going to need to master that as well.
But it's also de-lofting it, having proper wrist angles, Good biomechanics to have that leverage that you need on the shaft to be able to launch the ball low enough.
Because anybody can hit the ball high, that's not hard to do at all.
But learning to hit the ball hard and lower by having this trail wrist angled back, that's what you've got to learn in this motion.
So I'm going to show you a couple shots here and I'm going to make a couple mistakes to show you what you're going to tend to find as a mistake that you may find yourself doing.
So first I'm just going to make a normal little shot.
You'll see it's a nice clean contact, crisp strike, that's what you're looking for every single time.
As long as you're angled back, That club is going to still be working down as it actually hits the ball and it's not going to bottom out until way up here by your foot.
But you've got the ball back here, the bottom of your swing arc is going to be way up here.
So you're going to get nice, crisp, clean contact every time.
Now what's it going to look like if you don't?
So the first mistake is going to be that one.
There I've got all my weight on my back foot and I extended my right wrist too early or went into flexion.
This is flexion and extension.
As I do this, now I'm scooping.
Okay, so that's the opposite of hanging back and then trying to slap at it with my hand incorrectly.
What you want again is your pressure more forward, core taking the club back, right wrist hinging.
And then as I come down, I'm making sure that wrist is staying angled back.
So I've got a descending angle of attack.
That is going to completely change how you hit your irons, every club in your bag.
Obviously with the driver, we don't need a descending blow, but it's a great way to learn.
And you'll see, There's a drill that we're going to have to show you how to learn how to hit a penetrating driver shot.
Right here.
So if you play in windy conditions, it's going to be one of your best friends in the world to be able to hit that shot.
So now the other thing is if you're not getting the directional control that you have, that you want, and also not being able to control hitting this ball very low.
And I do want you to do this with your 60 degree.
And when carrying it 10 yards, this ball should go no more than two or three feet in the air.
If you're hitting it high, then again, you're probably hanging back off the back foot and releasing this too early, or you've got the ball too far forward.
Check your ball position.
We want to practice getting comfortable, being able to deal off the face while not losing directional control.
That's the other thing that you're going to tend to find is that when you start forward, pressing and getting your hands like this, if you don't have a proper grip, watch what's going to happen to that club face.
Well, now it's open.
So then as I come through and I start to try and de -loft it and keep this wrist angled back, club face is pointing 30 degrees, right?
You've got to have a proper grip.
The stronger right hand that works with this goat arm is what you're trying to feel.
So why?
The way I like to think about it is that I try to feel that my elbow pit is always facing out away from me, or 90 degrees away from my body.
And then as I come back through, I want to feel that I'm almost leading with this part of my hand.
Now, of course it's not, it's going to start to rotate at some point.
It doesn't have a choice, but if you're used to what most people do, pronating and internally rotating, you're going to hit every single one of these shots to the left.
And so getting used to this feeling of the elbow pit out and kind of leading with the back part of your palm until it starts to rotate.
This is what helps you maintain this angle.
As soon as you start to do this and your elbow starts to pronate, then you're going to start dumping that angle and you're going to hit it left.
And you're also going to tend to hit it high if you've got a weak grip.
So make sure that you've got a proper grip as you're doing this.
Use your core.
Again, your whole body's involved, even in the little forward press.
My wrist, as I move my wrist from flexion to extension just a little bit during that forward press, my shoulder's moving, my knees are moving, my hips are moving, my feet, my pressure, everything's moving just a little bit.
You don't want to be rigid and static and just try to be like, trying to just move your hands.
That won't work and it won't translate over to your full swing.
So a little bit of everything going back, hinge as you come through, maintain that and make sure you've got that descending strike.
And at first it's fine to practice holding the release off completely.
And what I mean by that is this.
So that was a big exaggeration.
You can see I'm really still holding that right wrist.
If you've been a bad flipper for many years, this and maintaining this goat arm, you'll be able to launch the ball very low, like you just saw there, but still be able to get the club face to be straight and square.
So it still launches on your line every single time.
This is what we're trying to master.
Making sure we can keep the loft off and keep the club face square through the strike.
Once you have this, Drill down where you can deal off the club and you're getting good directional control and being able to launch on the same trajectory, then you're ready for the skills assessment test, which is up next.
































































































































































































































Jack
Craig (Certified RST Instructor)
Clyde
Craig (Certified RST Instructor)
Stacy
Craig (Certified RST Instructor)
Stefano
Stefano
Craig (Certified RST Instructor)
Craig (Certified RST Instructor)
steven
Craig (Certified RST Instructor)
Matthew
Craig (Certified RST Instructor)
Matthew
Craig (Certified RST Instructor)
Matthew
Alex
Craig (Certified RST Instructor)
Alex
Craig (Certified RST Instructor)
Benjamin
Chuck
Benjamin
Benjamin
Chuck
philip
Chuck
philip
Robert
Chuck
Hugues
VINCENT
Chuck
Tom
Chuck
David
Chuck
Richard
Chuck
Matt
Chuck
Ted
Chuck
Ted
Mark
Mark
Chuck
Mark
Chuck
Scott
Chuck
Harold
Ben
Chuck