My Favorite Videos
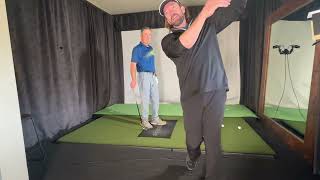
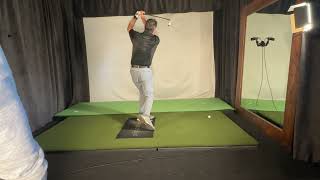
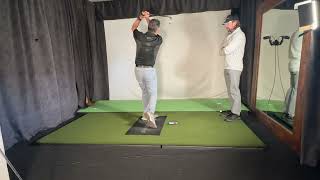
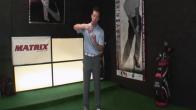
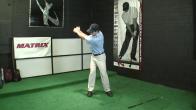
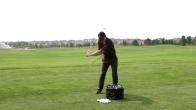
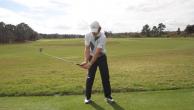
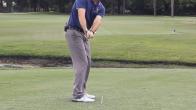
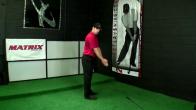
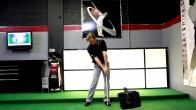
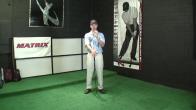
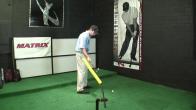
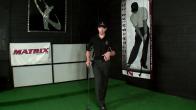
Golf Downswing, Rotary Golf Downswing Overview
Sorry, you need to be a member to access this video.
You Are Just Seconds Away - Become a member here!
Already a member? Log in now
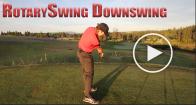
Mastering the setup, weight transfer and takeaway are critical to a great golf swing. But mastering the golf downswing is the most important and the most challenging of all. Because it happens so fast and requires so much precision, mastering the downswing will be the crux of learning to become a great ball striker. Be patient with it, the rewards are many and great! However, don't focus on the downswing until you can properly transfer your weight and perform a proper takeaway as these key pieces setup of the downswing.
Most golfers get very excited and want to focus just on the golf downswing because that's the only time you hit the ball. But the reality is, much of the downswing is a response to how you swung the club during the backswing. If your backswing was awful, you don't have much hope for a good downswing and impact position.
The good news is that we have a ton of golf instruction videos on the downswing that walk you through exactly how to get in to tour quality positions and do so with speed and effortless power.
- The downswing, is the crux of the golf swing
- The hips can't move as fast as the upper body
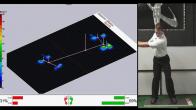
- The main focus of the golf downswing is shifting weight to the left heel
- The weight shift is NOT a push from the right
- Sit into the left glute, then pull with the left oblique
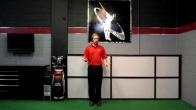
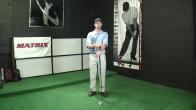
All right, So, quick overview of the downswing in RST and what it's really all about.
And what we're going to teach you how to do to hit the ball a long ways with this little effort as humanly possible.
In fact, that's the most common thing that I hear every day in lessons is, I don't feel like I did anything.
It doesn't feel like I'm working hard enough to hit the ball very far, And that's because we're extremely efficient in our movement with RST.
And we look at very heavily the physics involved in what's moving the club and what's creating leverage and speed and rotation and all these things.
In the swing, so that we can create a lot of speed with very little muscular effort.
The big key to that is the swing has to be big body movement, Big muscle, movement driven.
Rather than what most every single other golfer on the planet does, is they focus on moving the club with their arms and their hands and their shoulders.
When you swing from here up, your golf swing will be immediately capped.
You'll never be able to swing, which most people get stuck at, faster than about 92 miles an hour.
You simply don't have enough muscle mass to create enough horsepower to move the club more than about 92 miles an hour with the driver, and that's why most every amateur on the planet is stuck at that speed.
They never get past the triple digit number, But my students with the RST are going to be well over 110 miles an hour when they follow these movements.
The way that we prescribe them.
Because it's incredibly efficient to do so.
You'll be shocked how much speed you can pick up with how little effort you have to put into the swing.
And again, it all starts with the big muscle movements and then the downs, where we've obviously we've talked about the backswing and the takeaway movements.
It's all big body movement.
We're not really even worrying about what our arms or hands are doing.
They're being moved by the body.
The downswing is especially true of that.
What we're going to do in the downswing is we're going to really focus on big muscle movement because we're trying to recruit muscle fiber in a specific sequence.
You need muscle fibers to be loaded in order to move that club fast.
It's that simple.
It's all about it comes down to an economy of scale when it comes down to muscle movement.
Once you're firing with your arms and shoulders, you've only got so much muscle up here.
And even if you're a bodybuilder, you're not going to be able to recruit enough pounds of muscle to swing the club faster than about 90-92 miles an hour.
How much muscle mass does it take to swing over 100 miles an hour?
It's about 32 pounds of muscle.
I don't know about you, I don't have 32 pounds of muscle up here in my arms and shoulders.
I definitely don't have it in my forearm.
So pushing against the shaft and holding on to the club really tight it's the most inefficient way to swing the club.
But I do have 32 pounds of muscle when I use the muscles in my butt, my glutes, my quads, my hamstrings, and my back.
I've got lots of muscle relatively when I put all that together in the right sequence that it's very easy for me to swing over 100 miles an hour.
And you're going to be able to do it too as you start understanding all these movement patterns.
So the first thing from the top of the swing, actually I'm going to do it without my arms again because we don't need to worry about the club, right?
We're focused on big motor movements so we take our club and our arms out of it.
And the first thing I'm going to do here is what?
Shift my weight.
That helps change the direction the club is moving this way to start going the other way without me doing it with tightening up my arms and hands.
The club's got momentum.
It's being swung back here relatively quickly and now you're asking it to change directions and start going this way.
Well, I can take my grip and tighten up and start making the club go this way, but of course that's going to cause me to cast it.
So that's the last thing that I want to do.
So as I start down, what I'm trying to do is shift my weight, use this big muscle mass and that's what's moving the club and my hands and arms can stay relatively relaxed.
And as I do that, I've now created some momentum going this way and as I start to rotate my pelvis this way, again I'll take the club out, now all of a sudden the club has been moved about seven feet in the downswing without me doing anything with my arms or hands or shoulders.
So now as I start down and shift my weight, look where the club is.
I'm literally trying, like I said in the RST overview, to do nothing with my shoulders.
I'm not trying to turn them at all.
If anything, I'm trying to imagine that I'm doing the opposite.
I'm not trying to do really anything with them, But as I start down, I'm just letting them relax and you'll notice as I do this.
And I'm just focusing on the big muscle movements of my trunk and my core, the club is brought down all the way into the hitting area without me doing anything.
So now all I have to do is post up and that is what snaps the release of the club.
Not me doing anything with my arms or hands at all.
The big key focus that you're going to learn as you start going through all these videos is that you're going to focus on shifting your weight, rotating and posting up.
That's the whole movement.
Not trying to do something with your hands or try and drop the club down on plane or any of that stuff.
Watch what happens to the club if I just focus on what I told you.
I'm going to shift my weight, turn my hips and post up.
Watch what happens to the golf club.
I go to the top, arms are where I want them, I didn't have to do anything.
Shift my weight, rotate my hips, post up.
The club fell down on plane and as I post up it would get into a perfect impact position again without me doing anything with my arms or hands.
They're staying soft, they're staying in reserve so that they have speed to release.
When your arms and hands and muscles get really tight you can't move them very fast and tighten yourself up here and try to move as fast as you can.
You just simply can't.
From here up, you're going to feel very relaxed in the rotary swing, and you're not going to feel like you're putting any effort into the swing.
And that's going to be the hardest mental hurdle for you to overcome when you start building a tour caliber golf swing like the Rotary Swing Tour is.
In fact more tour pros use the RST fundamentals than any other swing method out there because these are based on fact, they're based on science.
Now they may use all kinds of different variables of RST and look a little bit different, but when it comes down to the fundamentals of how you move your body, the sequence that you do it, the impact positions that you achieve, how you use lag and leverage for speed, every single tour pro uses these fundamentals or they wouldn't be a tour pro.
So I get asked all the time, which tour pro uses RST?
Well they all do or they wouldn't be out there.
They have to have these basic scientific principles in their golf swing, or the ball is not going to go anywhere, and it's not going to go anywhere very consistently.
So as you start learning this stuff there's lots of different things.
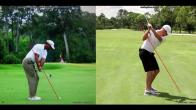
You'll see, we've done lots of Tour Pro reviews on the swing, where we point out what the RST fundamentals that they're using are.
So that you can start kind of picking these things out for yourself and learning, you know, through observation of other great players.
What you need to do in your swing.
And what you're going to find is that they all follow these fundamentals in the downswing.
They shift their weight, they rotate their pelvis, they keep their arms and hands relaxed, relatively relaxed, and they post up on this leg to release the leverage that they have in their swing.
You don't see any tour pros cast in the club, that's all this right side dominant movement that we talk about a lot on the website.
So So as you'll keep learning this stuff, you'll see that you're going to develop literally a tour caliber or better.
Because I mentioned in the overview, most of these guys get injured because they're ignoring some of the key fundamentals of RST.
You can play golf injury free, hit the ball further than you ever have, and be more consistent as you keep going through these videos and learning the RST fundamentals.









































































Rob
Craig (Certified RST Instructor)
Rob
Peter
Craig (Certified RST Instructor)
Peter
Craig (Certified RST Instructor)
Peter
Jim
Craig (Certified RST Instructor)
Jim
Craig (Certified RST Instructor)
Gavin
Craig (Certified RST Instructor)
Gavin
Gavin
Craig (Certified RST Instructor)
Gavin
Craig (Certified RST Instructor)
Gavin
Gavin
Craig (Certified RST Instructor)
Gavin
Craig (Certified RST Instructor)
Gavin
Gavin
Craig (Certified RST Instructor)
Gavin
Craig (Certified RST Instructor)
Duc
Craig (Certified RST Instructor)
Duc
Craig (Certified RST Instructor)
Jim
Craig (Certified RST Instructor)
Rayan
Craig (Certified RST Instructor)
Rayan
Craig (Certified RST Instructor)
Rayan
Craig (Certified RST Instructor)
Greg
Craig (Certified RST Instructor)
Robert
Craig (Certified RST Instructor)
Mark
Craig (Certified RST Instructor)
Nick
Craig (Certified RST Instructor)
Nick
Craig (Certified RST Instructor)
Mayur
Craig (Certified RST Instructor)
Mayur
Craig (Certified RST Instructor)
Mayur
Craig (Certified RST Instructor)
Mayur
Craig (Certified RST Instructor)
Mayur
Craig (Certified RST Instructor)
Mayur
Craig (Certified RST Instructor)
Mayur
Craig (Certified RST Instructor)
Mark
Craig (Certified RST Instructor)
Mary
Chris (Certified RST Instructor)
Steven
Craig (Certified RST Instructor)
Todd
Craig (Certified RST Instructor)
Ron
Craig (Certified RST Instructor)
Robert
Craig (Certified RST Instructor)
Richard
Craig (Certified RST Instructor)
Richard
Craig (Certified RST Instructor)
Bret
Craig (Certified RST Instructor)
william
Craig (Certified RST Instructor)
ryan
Craig (Certified RST Instructor)
ryan
Craig (Certified RST Instructor)
ryan
Raymond
Craig (Certified RST Instructor)
Marcel (Certified RST Instructor)
Craig (Certified RST Instructor)
Paul
Craig (Certified RST Instructor)
Paul
Aaron
Chris (Certified RST Instructor)
Christopher
Craig (Certified RST Instructor)
Christopher
Craig (Certified RST Instructor)
Ronan
Craig (Certified RST Instructor)
William (Certified RST Instructor)
Craig (Certified RST Instructor)
William (Certified RST Instructor)
Craig (Certified RST Instructor)
Julie
Craig (Certified RST Instructor)
Julie
Craig (Certified RST Instructor)
Julie
Chris
Craig (Certified RST Instructor)
John
Craig (Certified RST Instructor)
charles
Craig (Certified RST Instructor)
David
Craig (Certified RST Instructor)
Anthony
Craig (Certified RST Instructor)
Robert
Craig (Certified RST Instructor)
Eddie
Craig (Certified RST Instructor)
sambhu
Craig (Certified RST Instructor)
William
Craig (Certified RST Instructor)
Rich
Craig (Certified RST Instructor)
Rich
Craig (Certified RST Instructor)
Richard
Craig (Certified RST Instructor)
Victor
Craig (Certified RST Instructor)
Victor
Richard
Craig (Certified RST Instructor)
John
Craig (Certified RST Instructor)
Daniel
Craig (Certified RST Instructor)
Robert
Craig (Certified RST Instructor)
Gary
Craig (Certified RST Instructor)
jesse
Craig (Certified RST Instructor)
jesse
Chad
Craig (Certified RST Instructor)
Donald
Craig (Certified RST Instructor)
Ron
Ron
Craig (Certified RST Instructor)
Ron
Craig (Certified RST Instructor)
van
Craig (Certified RST Instructor)
David
Craig (Certified RST Instructor)
richard
Craig (Certified RST Instructor)
Giap
Andrew (Certified RST Instructor)
Giap
Andrew (Certified RST Instructor)
Luis
Craig (Certified RST Instructor)
Luis
Dan
Andrew (Certified RST Instructor)
Jay
Craig (Certified RST Instructor)
David
Craig (Certified RST Instructor)
Richard
Craig (Certified RST Instructor)
Richard
Gary
Craig (Certified RST Instructor)
Christian
Craig (Certified RST Instructor)
Christian
Craig (Certified RST Instructor)
Christian
Christian
Lawrence
Craig (Certified RST Instructor)
Stan
Craig (Certified RST Instructor)
Lawrence
Craig (Certified RST Instructor)
Tom
Craig (Certified RST Instructor)
jennifer
Howard (Certified RST Instructor)
sambhu
Craig (Certified RST Instructor)
Ken
Craig (Certified RST Instructor)
sambhu
Craig (Certified RST Instructor)
gordon
Craig (Certified RST Instructor)
Tom
Craig (Certified RST Instructor)
John
Craig (Certified RST Instructor)
w
Craig (Certified RST Instructor)
Asle
Craig (Certified RST Instructor)
Yuefeng
Craig (Certified RST Instructor)
Yuefeng
Craig (Certified RST Instructor)
Yuefeng
w
Craig (Certified RST Instructor)
thomas
Craig (Certified RST Instructor)
John
Craig (Certified RST Instructor)
Michael J
Chris (Certified RST Instructor)
Corby
Craig (Certified RST Instructor)
Bradley
Craig (Certified RST Instructor)
Anthony
Craig (Certified RST Instructor)
Joe
Craig (Certified RST Instructor)
Tom
Craig (Certified RST Instructor)
Martin L
Craig (Certified RST Instructor)
Martin L
Mary
Mary
Craig (Certified RST Instructor)
Mary
Jordan
Craig (Certified RST Instructor)
Justin
Craig (Certified RST Instructor)
Tim
Craig (Certified RST Instructor)
sambhu
Craig (Certified RST Instructor)
sambhu
Anthony
Chris (Certified RST Instructor)
T David
Craig (Certified RST Instructor)
Greg
Craig (Certified RST Instructor)
Eduardo
Craig (Certified RST Instructor)
Eduardo
Craig (Certified RST Instructor)
Eduardo
Craig (Certified RST Instructor)
Kent
Craig (Certified RST Instructor)
Andy
Craig (Certified RST Instructor)
Andy
Craig (Certified RST Instructor)
T David
Chris (Certified RST Instructor)
T David
Chris (Certified RST Instructor)
David
Chris (Certified RST Instructor)
David
Chris (Certified RST Instructor)
George
Chris (Certified RST Instructor)
George
Chris (Certified RST Instructor)
George
Chris (Certified RST Instructor)
Brian
Craig (Certified RST Instructor)
Tom
Craig (Certified RST Instructor)
Tom
Tom
Craig (Certified RST Instructor)
Tom
Craig (Certified RST Instructor)
Tom
Craig (Certified RST Instructor)
Tom
Craig (Certified RST Instructor)
Berly
Craig (Certified RST Instructor)
Berly
Anthony
Craig (Certified RST Instructor)
charles
Chris (Certified RST Instructor)
Greg
Craig (Certified RST Instructor)
George
anthony
Steven (Certified RST Instructor)
George
Steven (Certified RST Instructor)
George
Bryant
Craig (Certified RST Instructor)
Michael
Craig (Certified RST Instructor)
Michael
Craig (Certified RST Instructor)
dennis
Craig (Certified RST Instructor)
John
Craig (Certified RST Instructor)
John
Craig (Certified RST Instructor)
John
Craig (Certified RST Instructor)
Richard
Craig (Certified RST Instructor)
Richard
Vivek
Craig (Certified RST Instructor)
Maury
Craig (Certified RST Instructor)
Tomas
Craig (Certified RST Instructor)
Tomas
William
Chris (Certified RST Instructor)
William
Chris (Certified RST Instructor)
William
Chris (Certified RST Instructor)
Carver
Carver
Craig (Certified RST Instructor)
Ed
Craig (Certified RST Instructor)
Kevin
Craig (Certified RST Instructor)
Jeffrey
Chuck
Keith
Craig (Certified RST Instructor)
Keith
Craig (Certified RST Instructor)
Lewis
Craig (Certified RST Instructor)
Richard
Craig (Certified RST Instructor)
Richard
Craig (Certified RST Instructor)
Michael
Craig (Certified RST Instructor)
David
Craig (Certified RST Instructor)
Matthew
Craig (Certified RST Instructor)
Sharan
Craig (Certified RST Instructor)
Kevin
Craig (Certified RST Instructor)
Rich
Craig (Certified RST Instructor)
Preston
Craig (Certified RST Instructor)
Fred
Craig (Certified RST Instructor)
Andrew
Craig (Certified RST Instructor)
David
Craig (Certified RST Instructor)
David
Craig (Certified RST Instructor)
Jason
Craig (Certified RST Instructor)
Mark
Craig (Certified RST Instructor)
Preston
Craig (Certified RST Instructor)
Gary
Craig (Certified RST Instructor)
Gary
Craig (Certified RST Instructor)
Gary
Craig (Certified RST Instructor)
Charles
Craig (Certified RST Instructor)
David
Craig (Certified RST Instructor)
Djamil
Craig (Certified RST Instructor)
Anthony
Craig (Certified RST Instructor)
Evan
Craig (Certified RST Instructor)
David
Craig (Certified RST Instructor)
Fred
Craig (Certified RST Instructor)
Gerben
Steven (Certified RST Instructor)
David
Craig (Certified RST Instructor)
Terry
Craig (Certified RST Instructor)
Terry
Craig (Certified RST Instructor)
Terry
Masato
Craig (Certified RST Instructor)
Masato
Justin
Craig (Certified RST Instructor)
David
Craig (Certified RST Instructor)
Frank J
Craig (Certified RST Instructor)
Yuefeng
Craig (Certified RST Instructor)
Alvin
Steven (Certified RST Instructor)
Gary
Craig (Certified RST Instructor)
Anthony
Craig (Certified RST Instructor)
Lester
Craig (Certified RST Instructor)
Lester
James
Craig (Certified RST Instructor)
Edmundo
Craig (Certified RST Instructor)
Edmundo
Craig (Certified RST Instructor)
Rob
Craig (Certified RST Instructor)
Jon
Craig (Certified RST Instructor)
Jon
Craig (Certified RST Instructor)
Jon
Craig (Certified RST Instructor)
Jon
Jason
Craig (Certified RST Instructor)
charles
Craig (Certified RST Instructor)
charles
Craig (Certified RST Instructor)
Stéphane
Craig (Certified RST Instructor)
Terry
Craig (Certified RST Instructor)
Terry
Anthony
Craig (Certified RST Instructor)
sambhu
Craig (Certified RST Instructor)
Denys
Craig (Certified RST Instructor)
charles
Craig (Certified RST Instructor)
Stéphane
Craig (Certified RST Instructor)
Stéphane
Craig (Certified RST Instructor)
Stéphane
Jarek
Craig (Certified RST Instructor)
Evan
Craig (Certified RST Instructor)
Mitchell
Craig (Certified RST Instructor)
Mitchell
Craig (Certified RST Instructor)
Floyd
Craig (Certified RST Instructor)
Floyd
Larry
Craig (Certified RST Instructor)
Larry
Craig (Certified RST Instructor)
Anthony
Craig (Certified RST Instructor)
Jason
Craig (Certified RST Instructor)
David
Craig (Certified RST Instructor)
Tony
Craig (Certified RST Instructor)
Brent
Steven (Certified RST Instructor)
Anthony
Craig (Certified RST Instructor)
Anthony
Craig (Certified RST Instructor)
Anthony
Craig (Certified RST Instructor)
Karen
Craig (Certified RST Instructor)
Kevin
Craig (Certified RST Instructor)
Ricky
Craig (Certified RST Instructor)
Ricky
Craig (Certified RST Instructor)
sambhu
Craig (Certified RST Instructor)
jeffrey
Craig (Certified RST Instructor)
jeffrey
Craig (Certified RST Instructor)
jeffrey
Francis
Craig (Certified RST Instructor)
Francis
Craig (Certified RST Instructor)
Francis
Craig (Certified RST Instructor)
JOHN
Craig (Certified RST Instructor)
Nhat
Craig (Certified RST Instructor)
David
Craig (Certified RST Instructor)
Terry
Craig (Certified RST Instructor)
Lee
Craig (Certified RST Instructor)
Anthony
Craig (Certified RST Instructor)
Anthony
Craig (Certified RST Instructor)
Michael J
Craig (Certified RST Instructor)
Lee
Craig (Certified RST Instructor)
Lee
Craig (Certified RST Instructor)
Lee
Craig (Certified RST Instructor)
Lee
Mark
Craig (Certified RST Instructor)
Louis
Craig (Certified RST Instructor)
Louis
Louis
Greg
R.J. (Certified RST Instructor)
Mark
Craig (Certified RST Instructor)
Mark
Craig (Certified RST Instructor)
Dan
Craig (Certified RST Instructor)
Dan
Craig (Certified RST Instructor)
Dan
Craig (Certified RST Instructor)
Ed
Craig (Certified RST Instructor)
Chadd
Craig (Certified RST Instructor)
Chadd
Christopher
Craig (Certified RST Instructor)
Paul
Craig (Certified RST Instructor)
Paul
Craig (Certified RST Instructor)
robert
Craig (Certified RST Instructor)
Nathan
Craig (Certified RST Instructor)
Edward
Craig (Certified RST Instructor)
robert
Craig (Certified RST Instructor)
robert
Craig (Certified RST Instructor)
robert
Craig (Certified RST Instructor)
Dan
Craig (Certified RST Instructor)
Dan
Craig (Certified RST Instructor)
Dan
Craig (Certified RST Instructor)
Robert
Craig (Certified RST Instructor)
Donald
Craig (Certified RST Instructor)
Alejandro
Craig (Certified RST Instructor)
Sergio
Craig (Certified RST Instructor)
Sergio
Seth
Craig (Certified RST Instructor)
Daryl
Craig (Certified RST Instructor)
howard
Craig (Certified RST Instructor)
Tim
Craig (Certified RST Instructor)
Tim
Craig (Certified RST Instructor)
Matthew
R.J. (Certified RST Instructor)
Matthew
R.J. (Certified RST Instructor)
Terry
Craig (Certified RST Instructor)
Matthew
Craig (Certified RST Instructor)
charles
Craig (Certified RST Instructor)
Rick
Craig (Certified RST Instructor)
Dave
Craig (Certified RST Instructor)
Dave
Craig (Certified RST Instructor)
Dave
Anthony
Craig (Certified RST Instructor)
Antonio
Craig (Certified RST Instructor)
Martin
Craig (Certified RST Instructor)
joel
Craig (Certified RST Instructor)
joel
Craig (Certified RST Instructor)
Jesse
Craig (Certified RST Instructor)
Jesse
Craig (Certified RST Instructor)
Jesse
Francis
Steven (Certified RST Instructor)
Dennis
Craig (Certified RST Instructor)
Miguel
Craig (Certified RST Instructor)
Anthony
Craig (Certified RST Instructor)
Earl
Earl
Earl
Craig (Certified RST Instructor)
Anthony
Steven (Certified RST Instructor)
Vincent
Dave
Steven (Certified RST Instructor)
dane
Craig (Certified RST Instructor)
dane
Anthony
Craig (Certified RST Instructor)
John
Craig (Certified RST Instructor)
Anthony
Craig (Certified RST Instructor)
Edward
Craig (Certified RST Instructor)
Chris
Chris (Certified RST Instructor)
Chris
Anthony
Craig (Certified RST Instructor)
alan
Craig (Certified RST Instructor)
Nacho
Craig (Certified RST Instructor)
Alan
Craig (Certified RST Instructor)
Lee
John
Craig (Certified RST Instructor)
Nguyen
Craig (Certified RST Instructor)
David
R.J. (Certified RST Instructor)
Nick
R.J. (Certified RST Instructor)
David
Craig (Certified RST Instructor)
David
Craig (Certified RST Instructor)
Jason
Craig (Certified RST Instructor)
David
Craig (Certified RST Instructor)
David
Craig (Certified RST Instructor)
Gautam
R.J. (Certified RST Instructor)
Tom
R.J. (Certified RST Instructor)
Nick
R.J. (Certified RST Instructor)
Jason
R.J. (Certified RST Instructor)
Paul
R.J. (Certified RST Instructor)
Paul
R.J. (Certified RST Instructor)
Paul
Craig (Certified RST Instructor)
Nick
R.J. (Certified RST Instructor)
Nick
R.J. (Certified RST Instructor)
Nick
R.J. (Certified RST Instructor)
Gary
R.J. (Certified RST Instructor)
Lee
R.J. (Certified RST Instructor)
david
R.J. (Certified RST Instructor)
joseph
Craig (Certified RST Instructor)
Robert
Craig (Certified RST Instructor)
Martin
Craig (Certified RST Instructor)
Martin
Craig (Certified RST Instructor)
jeff
Craig (Certified RST Instructor)
Joseph
Craig (Certified RST Instructor)
Matt
Craig (Certified RST Instructor)
Gary
Craig (Certified RST Instructor)
Gary
Craig (Certified RST Instructor)
Gary
Craig (Certified RST Instructor)
Paul
Craig (Certified RST Instructor)
WILLIAM
Craig (Certified RST Instructor)
PU
Craig (Certified RST Instructor)
Niall
Craig (Certified RST Instructor)
Erich
WILLIAM
Craig (Certified RST Instructor)
Peter
Craig (Certified RST Instructor)
Dennis
Craig (Certified RST Instructor)
Sonny
Craig (Certified RST Instructor)
brandon
Craig (Certified RST Instructor)
don
Craig (Certified RST Instructor)
William
Craig (Certified RST Instructor)
George
Craig (Certified RST Instructor)
yuji
Craig (Certified RST Instructor)
George
Craig (Certified RST Instructor)
George
Jim
Craig (Certified RST Instructor)
Jim
Scott
Patrick (Certified RST Instructor)
Anthony
Craig (Certified RST Instructor)
kazuhiko
Craig (Certified RST Instructor)
David
Craig (Certified RST Instructor)
David
Frank
Craig (Certified RST Instructor)
Mark
Craig (Certified RST Instructor)
David
Craig (Certified RST Instructor)
Jon
Craig (Certified RST Instructor)
Jon
Craig (Certified RST Instructor)
Jon
Craig (Certified RST Instructor)
Jon
Craig (Certified RST Instructor)
dean
Craig (Certified RST Instructor)
david
Craig (Certified RST Instructor)
Freddy
Craig (Certified RST Instructor)
Gareth
Craig (Certified RST Instructor)
Trevor
Craig (Certified RST Instructor)
Trevor
Craig (Certified RST Instructor)
Trevor
Craig (Certified RST Instructor)
Trevor
Craig (Certified RST Instructor)
David
Craig (Certified RST Instructor)
Jason
Craig (Certified RST Instructor)
david
Craig (Certified RST Instructor)
Doug
Craig (Certified RST Instructor)
jake
Craig (Certified RST Instructor)
yuji
Craig (Certified RST Instructor)
Anthony
Craig (Certified RST Instructor)
William
Chris (Certified RST Instructor)
William
Chris (Certified RST Instructor)
borja
Chris (Certified RST Instructor)
David
Chris (Certified RST Instructor)
john
Chris (Certified RST Instructor)
mike
Chris (Certified RST Instructor)
Jan
Chris (Certified RST Instructor)
Jesse
Chris (Certified RST Instructor)
Justin
Chris (Certified RST Instructor)
robert
Chris (Certified RST Instructor)
Jason
Chris (Certified RST Instructor)
dean
Chris (Certified RST Instructor)
joseph
René (Certified RST Instructor)
Brian
Tim (Certified RST Instructor)
Brian
Tim (Certified RST Instructor)
Jason
Tim (Certified RST Instructor)
Brian
Jason
Tim (Certified RST Instructor)