My Favorite Videos
Day 1: Impact Control
Sorry, you need to be a member to access this video.
You Are Just Seconds Away - Become a member here!
Already a member? Log in now

Controlling impact is EVERYTHING in the golf swing and we're going to show you how to do it so the ball will start to listen to your every command.
As I mentioned in the intro video, you don'
t have to think about trying to hit every single ball perfectly, to shoot a good round of golf.
In fact, the opposite is true.
You have to realize that you'
re going to make mistakes, and it'
s all about learning how to manage those mistakes, and preventing the big mistakes from happening in the first place, that'
s going to allow you to shoot the golf scores that you want to shoot.
One more story I want to tell you.
When I first started playing professionally and won my first tournament, I had a friend of mine, who was a member of the website, come down, and wanted to play a round of golf with me.
I was like, "
Yeah, sure.
"
Never met him before, but we had talked quite a bit online and so become buddies, and he came down.
We played a golf .
A round of golf here in Orlando, and I played what I thought was a normal round of golf.
I managed my game, I shaped the ball a little bit to get the ball to do what I want it do, give me the greatest margin of error.
He went out there and tried to pound every ball past me, because he'
s playing with a pro, wants to beat the pro.
Put a lot of pressure on himself.
Tried to hit every ball right next to the hole.
Didn'
t manage his game well, even though he was a good golfer.
And he stru .
And he didn'
t break 80 that day.
And when we got done, he went to add up my score, because I have no idea what I shot until we add it up at the end.
I don'
t keep track of it.
So we got in there, he'
s like, "
What did you shoot?
"
And I said to him, "
I don'
t really know, let'
s go add it up.
"
And he'
s like, "
Well, it looked like you struggled out there a little bit, you didn'
t .
you weren'
t draining any big putts, and didn'
t hit the ball that close to the hole, but what do you think you shot?
"
And I said to him, "
I don'
t know.
Let'
s add it up.
"
And when we added it up, I shot a 68.
Four under par, and the reason was, that it looked really boring, and that'
s how golf should be when it'
s done really well.
It should be boring.
There shouldn'
t be this drama where I'
m smacking a snap hook out of the woods to try and save a par, or trying to bomb some drive 320 yards carrying it over some bunker, risking all this trouble.
That'
s how you start shooting 80s and 90s instead of in the 60s and 70s.
So the first step of this is understanding how to control impact.
That'
s the most important thing, at the end of the day, in golf, hands down.
What that club face is doing when it strikes the ball is all that matters.
So when we start understanding how to train ourselves how to do that, that'
s when we'
re going to start knowing where that ball is going to go every single time.
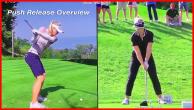
Now of course, I have a bunch of videos on impact, and the Five Minutes to the Perfect Release is my favorite video for that, and I want you to go back and check that out.
If you haven'
t looked at that video, it'
s one of the most important videos on the site and honestly one of my favorites, because it covers everything you need to know about getting the ball to start on line.
So I'
m not going to go over that type of stuff in detail.
The assumption is that you'
ve already watched those videos.
But what I am going to do is show you how to start working on that on the course, and start thinking about things in a shot-shaping perspective.
So of course in the Five Minutes to the Perfect Release video we stop at impact and then go on to the release and add the right arm and so on and so forth.
We'
re already past that stage, so what we'
re going to talk about here today, is how to start getting the ball to shape, even along the ground on these super short shots.
When we start getting the ball to shape on 10, 15, 20 yard shots, now of course the ball'
s not going to curve that much at all.
But it'
s going to start teaching you the feeling of the release, so that when you stack on and you go 40 yards, 50 yards, 60 yards, a hundred yards, so on.
That'
s when you'
re going to start doing it.
But when you .
Everybody tries to go from zero miles an hour to the Indie 500 kind of thing, it'
s not how anybody really learns.
Just like you, I'
m going to start out and I'
m working on hitting a little draw here.
I'
m going to start checking my fundamentals.
I'
m going to make sure that I'
ve got the club fully released.
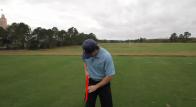
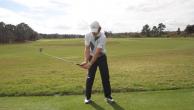
From your perspective up the line, when I'
m doing this left hand only, I'
m going to release the club more than I would when my right hand'
s on there, because my right hand is simply not going to allow .
It'
s not going to flip over that much.
So you want to over-release with the left hand to get that club face in this position.
Now the reason I emphasize this, is that nearly every single amateur that'
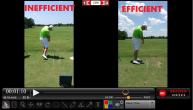
s gone through our golf clinics, when they work on this drill, they look like this.
If you want to hit a weak, slappy cut, that goes really high and doesn'
t go anywhere, that'
s what your club face should look like at this point.
But we'
re wanting to learn how to hit the ball powerfully and with control, so we want to get these knuckles to rotate under like this.
So when you look at your left hand, it'
s releasing the club face in this way that allows the club to rotate through the hitting area.
And that'
s how you'
re going to start hitting the little draws.
We'
re going to start with just the impact control position only.
So I'
m going to hit a little baby draw here.
It went a little bit left.
Club face is rotated shut.
Perfect.
So as I hit a little draw, and that went six inches off the ground.
I'
m learning club face impact control first.
So as I work up from that shot to hitting 50 yard shots, 60 yard shots, left hand only at first, that'
s starting to teach me club face control, which is critical for us learning how to start shaping the shots.
Which is going to become even more important as we start talking about course management in the upcoming videos here.
So now when we go to hit a cut, most of you guys are already good at this.
We'
re holding off the release a little bit.
There'
s a little trick that I want to add to this, and I'
ve talked about this in How to Hit a Fade video, so I won'
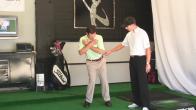
t go in-depth on it here, but I do want to talk about, is how to put it together with a little bit, a little bit of chest rotation.
Now understand that club face angle, at impact, what direction this club face is pointing, is the primary determinate of what that ball'
s going to do.
It'
s about 80 to 85% club face angle, and only 15 to 20% path that determines ball flight.
So many people think if they come way from the inside, that they'
re always going to hit a draw.
The club face is a much more important factor.
And that'
s why we start with club face angle here first.
Now to keep this club face from rotating closed through the hitting area, like we did when we wanted to hit a draw, and we wanted to release it.
Now we actually .
It'
s okay to add the feeling of a little bit of chest rotation.
Now again, talking tiny amounts.
I'
m not telling you to look like Jim Furyk at impact.
It'
s so small.
We'
re talking a couple of degrees difference.
But the reason that having a little bit of chest rotation is okay when you'
re starting to hit this little cut, is that it delays the release of the club face, because your chest rotation pulls the hand through the hitting area.
It'
s very easy for your chest rotation to overpower the hand.
And that'
s what we'
re trying to accomplish, is we want to guarantee that we hit that cut.
The worst thing in the world that you can do, when I go to .
In the upcoming videos I'
m going to show you how to set up for hitting these shots, is that you set up to hit a cut, and then you hit a draw, or a straight ball.
Now you'
re in trouble.
So you'
ve got to ensure that no matter what, that ball cuts.
That'
s the most important thing.
And same thing, if you'
re going to hit a draw, you have to slow down your chest rotation to give your hand that extra little fraction of a second to release.
The cut'
s the opposite.
You want to speed up the chest rotation, get a little bit in front of the ball, so now as I go to hit this little bit of a cut shot, the little baby cut, I rotated through just a little bit, and now as you look at the club face, it'
s open.
That'
s going to determine a cut or a draw.
It'
s that simple.
And I want you to start out hitting these little baby shots first, left hand only, so you start getting the feeling of letting the club freely release, and then holding it off just a little bit so that we can start building on these skill sets to start adding in the next few pieces.
Of course, just like in the Five Minutes to the Perfect Release video, eventually you add the right arm and you go through the same scenario of drills here, that'
s going to give you those release positions.
But first, it all starts here.
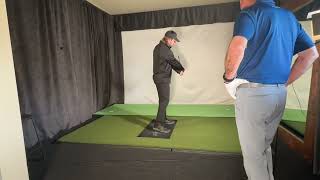
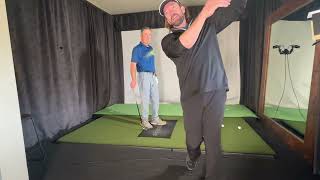
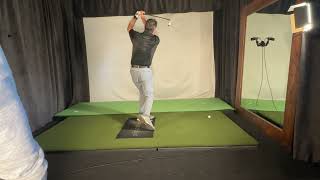
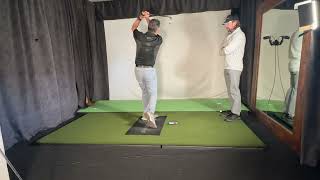
So I want you to work on every day, 10 to 15 shots at 10 to 20 yard intervals.
So what I mean by that, is you wake up in the morning, you go to the range, you'
re loosening up.
10 yard shots, 10 of them.
Draws, cuts.
Draws, cuts.
Notice the change in trajectory as you do this stuff.
Then as you add .
You feel a little more loosened up, you hit 10 good ones, you go to 30 yards and then 50 yards and so on.
And you keep adding a little bit more speed.
At some point you can put your right hand on there, when you'
re comfortable.
And start doing the exact same drill, so if I want to go .
I'
m up to, let'
s say I'
m going to hit this one 90 yards, this is a seven iron.
So I'
m going to do just a little baby shot, and now I'
m making sure that I still released it here.
When I want to go to hit the cut, it'
s the exact same thing, but I'
m going to get my chest a little bit more open.
And I hit a little five yard, maybe eight yard, cut.
I rotated my chest through, this .
On the draw, I keep my chest back and let my left hand release properly.
If you put those two together, you start building up baby shots, and you slowly, slowly start working up to a full speed shot, and then you'
ll be ready for the next pieces of this series.





































































































































Robert
Chuck
Dan
Craig (Certified RST Instructor)
Dan
Craig (Certified RST Instructor)
Jesse
Craig (Certified RST Instructor)
Marcel (Certified RST Instructor)
Craig (Certified RST Instructor)
tim
Craig (Certified RST Instructor)
ROY
Craig (Certified RST Instructor)
Patrick
Aaron (Certified RST Instructor)
charles
Craig (Certified RST Instructor)
charles
Craig (Certified RST Instructor)
Sam
Craig (Certified RST Instructor)
Michael
Craig (Certified RST Instructor)
michael
Craig (Certified RST Instructor)
Gerald
Chris (Certified RST Instructor)
Tom
Craig (Certified RST Instructor)
Gerald
Craig (Certified RST Instructor)