Video Menu
My Favorite Videos
My Favorite Videos
Reshaping Your Golf Swing for Lag
Sorry, you need to be a member to access this video.
You Are Just Seconds Away - Become a member here!
Already a member? Log in now
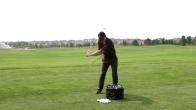
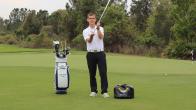
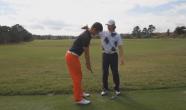
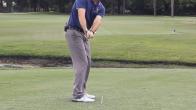
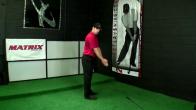
It's no secret that you want more lag in your swing. In this incredible video, I give you a 4-Step Sequence that will teach you how to become a "Lag Monster!" Reshape your golf swing to make lag your primary speed source!
- Work with each arm separately to reshape the golf swing for lag
- Each arm will relearn how to swing the club correctly, from backswing to follow through
- Use an impact bag with each arm to focus on form at impact
- Swinging freely, check that the divot is bottoming out consistently for each arm
- Add a ball in front of the impact bag with each arm, then work on hitting balls without the bag
- Introduce the right arm back into the left arm's swing as a "passenger" at first, and vice versa
A lot of times when you're working on your golf swing and you get into the website and there's a lot of videos on there.
And you're working on little tiny things and getting into the nuts and bolts of things, a lot of times what you really need to focus on is just building the shape of your swing.
And so I call what we're going to work on today reshaping your golf swing.
And what I mean by that is it's training yourself to learn how to swing the club and how the club works, and how the wrist works and how the arms work.
Rather than worrying about getting my takeaway perfect and my setup perfect, and all those things which are extremely important, of course.
But a lot of times we just need to kind of reshape the swing because you have so many little things going on that you don't have the basic idea and the basic concept of how the basic swinging motion of the swing works.
And so that's what this video is all about.
So this video is ideal for a couple of people, a couple of sets of people.
One, it's winter time and you're just wanting to reshape and start from scratch because what you have isn't working for you.
So this video is perfect for that.
So you have winter to work on it, you're not going to hit a lot of balls although I'm going to show you how to use this drill to hit balls.
But it's going to be more for learning how to just build the shape of a great, world class golf swing.
Without getting into the nuts and bolts of getting every single little step along the way perfect.
Once you have the basic shape of the swing, that's when we can go back and start making a change in the takeaway makes a huge difference.
But if you have no idea how to swing the golf club, having a perfect takeaway, it's going to take a long time to get to the point where you can really enjoy hitting the ball correctly.
The second piece is for those of you who really don't get the concept of how to train the arms independently.
And that's how I always, always work on the golf swing when I'm working on something like this is I train the left hand by itself and then the right hand by itself.
And I usually start with the left hand first.
It depends on the golfer.
But the reason for that is the left hand really controls the left arm, left side, controls the position and the impact alignments of the club, which is obviously everything and for the clubs in the right position at impact, we got a good shot of hitting good shots.
So the right hand is really primarily there for speed.
So we're going to focus on the left arm first and then we're going to train the right arm.
And this is going to be critical for learning how to just build the shape of a golf swing.
And then we're going to go back and you can go back and watch the other videos and get the details of it.
But this video is going to be really critical for just about everybody.
But those people specifically, you're working on reshaping your swing for the winter.
You really don't know what's going on in your golf swing.
This is going to help you with that.
And then those of you who really need to learn how to train the arms independently so that when you train the left hand, the right hand just doesn't take over and vice versa.
So let's get started.
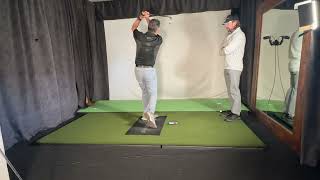
When we start shaping the swing, we're going to focus on the left arm first.
As I mentioned in the introduction, that's really what's controlling the overall shape and width of the swing and those types of things and the impact positions most importantly.
So, we're going to focus on the left arm first and I'm going to teach you the basic swinging motion.
This is going to look a lot like what you perceive as a golf swing.
So it's very simple at first, we're just going to, before we get into this progression of drills, we're just going to get the basic shape of the swing.
And so there's a couple of key points that we're going to focus on.
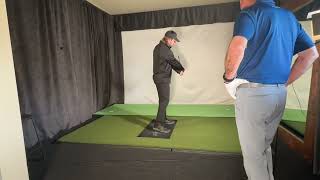
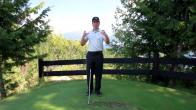
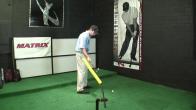
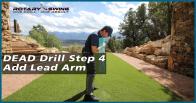
So, the first thing that I'm going to do is obviously grip the club with my left hand only.
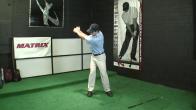
And then what I'm going to do is I'm going to turn back and get my arm to a position at the top that resembles a golf swing.
Don't worry about getting it perfect just yet, we're building the overall construct of the swing.
So, I'm going to keep my left arm straight, I don't want to see this, but I'm going to turn back, I don't want to see this.
So as I turn back to the top, weights on the right, all the basic stuff, any piece that you're working on on your golf swing, whether it's a down cock or weight shift, stuff like that, you can still do that in this drill.
So to the top and turn.
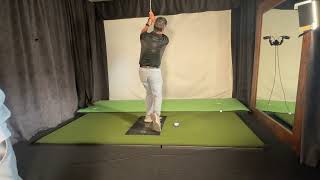
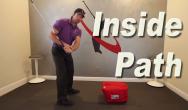
And now what I want to do is I'm going to just shift laterally just a little bit just to get my weight back to the left side, and then I'm going to let my left hand swing down.
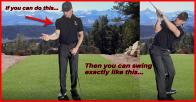
And what you're going to notice is I'm not going to do this.
That's what most people perceive as a golf swing.
The only reason you turn in the downswing is because both hands are touching the golf club.
That's going to force you to turn.
But because I only have one hand on the golf club, I only need to shift and let my arm swing.
And you'll see I don't turn very much.
Now the only reason I turned at all is because the momentum of the club swinging, because I didn't try and slow it down, pulled me around.
I'm not trying to turn.
That's critical.
Most golfers, especially the guys who get stuck a lot, add a lot of rotation.
The club can never catch up, and that's what causes that problem.
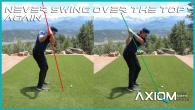
So this drill is critical for those of you who, A, either come over the top, because when you're going down, you're not going to rotate.
That's what causes most people to come over the top.
They turn back, and then they do this coming down, and that's how they learn to come over the top.
And B, for those of you who spin out and get stuck, this drill is awesome for that.
So for over the toppers and guys who get stuck, kills two birds with one stone.
So we're going to go back, shift, release.
Now what you'll notice is that as I do this, there's going to be a natural little bit of down cock in there if my wrist stays supple.
Now you don't need to get nutty with it and get really, you know, super, I actually hit myself in the shoulder with my shaft.
But you can.
That's okay if you need to exaggerate it.
If you're used to feeling a casting motion from the top, and especially if you're used to going rotating a lot, Having a significant down cock to exaggerate it, where it touches you in the shoulder, like you can see here, is really easy when that right arm's not in play.
So the third group of people this is really important for is for those who don't really have any lag or down cock in their swing.
It's really easy when you have just your left hand on there.
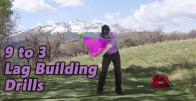
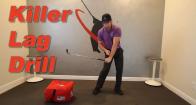
You just keep your wrist soft, and as you start down and shift, you can see I have tons of lag and I can really exaggerate it and get a lot of lag.
But I don't want that much lag, that's a little excessive.
So now what I'm going to do is we're going to start building this into a drill.
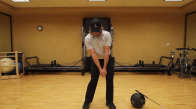
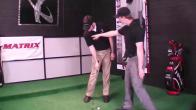
And the first thing we're going to do is with our buddy the impact bag.
You have to have one of these impact bags from the website or wherever you get one.
They're so important for this drill.
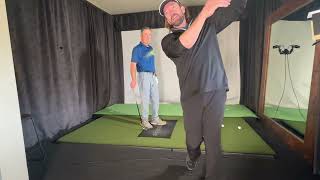
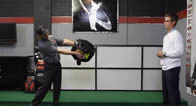
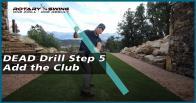
So, what I'm going to do first is the exact same drill, but I'm going to focus on getting into the impact bag.
And the reason the impact bag is good is for a couple things.
One, you're not going to tend to want to keep turning through because the impact bag is going to stop your forward motion.
And the second thing is, It's going to allow you to focus on releasing the club into the bag and get some speed into the bag.
Rather than just trying to rip yourself around to a follow through.
So I'm going to focus all my energy into releasing here, and I don't have to worry about squaring the club face or hitting the ball solid.
We're going to get to that step next.
So here, and I'm just going to release it.
And so you'll see that as I come through, my body is still going to be squared up.
And now I've got myself into a good impact position here.
This is going to be awesome for those of you who've really flipped the club, because it's going to keep you from flipping the club into the bag, and it's going to just teach you the basic shape and basic motion of what a golf swing really is, okay?
Once you have that motion, we're going to take the impact bag out for a second.
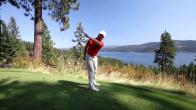
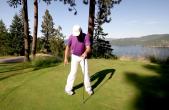
And now we're just going to go back to what I was doing earlier, but you're going to focus on how your divots bottom out now.
And what I mean by that here on the grass, we'll be able to see it a little bit easier.
As I do this drill, my divot bottoms out and starts in the exact same spot every single time, okay?
That's not me being coordinated and being able to put it in there, I'm just letting physics and the motion do the work.
So I'm letting my arms swing very soft, I'm letting my wrist be soft and down cock, and then gravity and physics are what are forcing the release of the club here.
So I'm not doing anything.
I can even get a little sloppy with it, and it still bottoms out in the exact same spot every time.
So what you want to do is start getting that to happen without a ball in the way so that you're not focused on hitting the ball correctly.
And then what we're going to do is we're going to go to this third step.
So once you've got your divots bottoming out in the same spot, now we can put a ball in front of the bag.
So now we're going to kill two birds with one stone.
We're going to get over that little nervous system hurdle where people always freak out and say, I do the drill perfectly and I put a ball in there and then it doesn't work.
Well, it's not that the drill doesn't work, it's that your brain is now trying to make a compensation to hit this little white demon, okay?
So now that you've got the impact bag, which you'll build a lot of confidence really quickly hitting the impact bag, you'll get to the point where you can swing and down cock and shift your weight and not spin out really quick.
When you take the impact bag away, it'll be a little bit more challenging, but you'll get it.
But now when you put the ball in there, the reason we have this third step is to just get over the hurdle of actually just having to hit nothing but the ball.
That gets a little scary at first for a lot of people.
So, this is going to allow you to focus on hitting the impact bag and the ball is just going to get collected.
You're going to hit it whether you want to or not.
So all I'm going to do now is the exact same drill, back, and you'll see I hit the bag and the ball just fine.
And the ball's not going to go anywhere.
I'm using a seven iron here, it'll fly into the bag and stop.
So, What you want to start doing is trying to replicate the free flowing shape and swinging motion that you have.
Without a ball and just the impact bag, or without the impact bag, with the ball in the way.
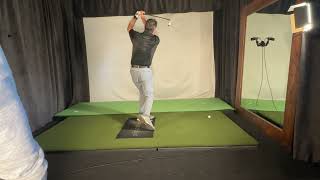
And then, of course, the fourth step is to take all of our crutches and hurdles away and just hit and start out really easy.
Just like our little five minutes of the perfect release video.
Just little shots at first.
But eventually, you'll be able to work up to the point where you can make a pretty full swing and hit the ball just fine.
So, that'll be the last step.
So these four steps are really, really critical for building the shape of your golf swing.
Once you have the basic shape, then you can worry about all the details and the positions and the nuts and bolts.
But if you don't have a clue what the shape of the swing and what it's supposed to feel like, this nice free -flowing, gravity-driven, how your arms come down, that's one last thing I want to talk about here, is that as I'm coming down, I'm not trying to pull my arm really hard like I did there.
I'm letting gravity take over and so that's how I get a nice, smooth acceleration and get my divot to bottom out in the same spot, is because I'm not putting any muscular effort into it.
I'm literally going to the top, turning to the top, and then just turning this muscle off.
And you'll see, I'm not trying to move my arm at all, but if I turn this off, my arm moves really fast.
I'm letting gravity get me from here to here.
And I have some initial research coming on out and that's going to be very interesting.
I won't finish it until this winter, but you get the idea that from here to here the hands are going to move about, my research so far has shown about 85% of your normal max speed of a tour player can get there solely by gravity.
But we'll get to that to another day.
So here, relax, let the club work through.
That's the basic swinging motion.
You need to train this left arm first.
Get into these impact alignments that are discussed on the site.
Once you have that down, that'll take a little while, it'll be different for everybody, but make sure that you're pretty skilled at this.
You don't have to hit the ball, you know, Dead perfect.
With your left arm only, and you don't need to hit the ball very hard because that's where the right arm is going to help and add some speed.
And that's what we're going to talk about next.
So now we've got the left arm basic motion.
Now how does the right arm work in conjunction with the left arm?
That's what we're going to talk about here.
So now what we're going to do, the drill is a little bit different.
It's got two basic steps to it.
The first one is just swinging the arm back by itself.
Notice that I didn't talk about rotating back.
We're going to add that, but that complicates this drill quite a bit.
So we're just going to swing back, shift forward, swing through.
And the same thing is true here that I'm just letting my arm drop and release.
And you'll notice that as I'm doing this with just my right arm only, I'm turning a little bit here, but the big key is I'm not turning coming down.
I'm trying to keep my body very, very quiet and I'm teaching this arm how it swings and releases.
Now what you'll notice, even though I'm trying to keep my body really square, what happens to my body?
That looks like a golf swing.
I turned through, but I did not turn my body at all.
It got turned by my club and the momentum of the club releasing.
So that's what you want to feel here.
That's the big goal of this drill is that as I go back, I'm really just teaching this arm how it works in the swing.
Same thing is true of the left arm, that I want it to be soft, I want it to be relaxed, and I want that wrist to down cock a little bit to get a little snap out of the wrist.
That's where 60% of your club head speed comes from, is just the wrist.
So you'll notice as I go back, I get a little bit of a down cock here because my wrist is soft, and then I get speed into it.
Same thing as we did before, exact same progression.
I'm going to go impact bag first, and then once I got that, I'm going to go back, start making my divots bottom out in the same place, making sure I'm not rotating through.
Same deal, I put a ball in the way, same deal here, back and through, and then eventually learn to hit balls without the bag in there.
So once you get that whole sequence, eventually you're going to learn to put those two hands together.
So that's the last piece of this.
One last thing I want to say about the right arm is that you can eventually start learning to turn and then release through.
But it is harder once you rotate back with the right arm to not want to rotate through.
So that's why I'm not too worried about just keeping your body pretty square going back and releasing it.
We're just trying to teach the right arm by itself exclusive of the body.
We're trying to break it down to smaller pieces.
So now we've got these right arm and left arm trained independently.
It's going to take a while, but that's going to teach you the basic shape and swinging motion of the golf swing.
Now how do we get these two to play nicely together?
That's the trick.
Well, if we go back to the left arm only drill, as you start becoming proficient with it, you're going to go back to that same four step progression that I went through, but slowly introduce the right hand.
Well, how do we do that?
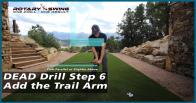
Well, first what we're going to do is we're going to put the right hand on there, but it's barely touching the club.
I call it a passenger.
So I still want to feel 100% left armed, but now I'm going to put my right hand back on the club, but you'll notice it's just barely touching the golf club.
So now I can still feel 100% left handed, but I can let my right hand start to get involved a little bit.
It'll add some support, some stability, and some speed to the club.
If you struggle with not letting the right hand start to take over right away.
And you start getting into this.
Where you're turning a lot and you notice your right hand tensing up against the club and you're pushing against the shaft, then what you want to do is start letting it come off in the downswing.
So it's on the right, it's on the shaft here, but now I let it come off so that I can still focus on getting into that impact position.
So once you've reintroduced the right hand, like I said, things are going to be a little bit different, but just keep working through it and keep letting the club, the hand, come off the club.
And you can hit balls like this as well so that when you come down, let your right hand come off and let the left hand continue to release just like it did in your normal drills.
The key is to not let that right hand start to change the feeling of what you just did with the left hand.
We trained this left hand for a reason, it has a very important job to do, and now you're just going to, you don't want the right hand to start to muck it up.
But now we've got to start training the right hand and we go through the exact same thing that we did with the left.
The difference is here, when you do the drill with your left hand only, or with your right hand only and the left hand, you start reintroducing it so that it's a part of the show here, you want to do the same thing that it's just barely touching the golf club, but what you're going to notice now when you do that drill is that it's going to force you to turn.
Before we could just do right arm only, you can't do that now that the left hand is on there, we're going to have to turn.
So that will change the feeling of the drill slightly, but then the big key here is once you go back, let the right hand still be doing all the work, and you want to focus on really releasing and slinging that club head into the impact bag with the right hand.
Notice that I didn't try and shove it through with my shoulders or push against my arm, I released it like this, like think about, I always use the analogy of either swinging a hammer, you don't keep your wrist really tight when you swing a hammer, or playing ping pong and you use your right hand to get the little snap in the forehand with your right hand topspin shot, with the forehand that you get that speed from the release, or from the wrist, not from your body like that, that's obviously doesn't make any sense to hit a ping pong ball like that, doesn't make any more sense to hit a golf ball like that, barely weighs an ounce and a half.
So, you'll notice here that now that I got the left hand back on there, which is going to provide a little bit of stability and control, I can be a little more aggressive with my down cock, and get a little bit more snap into the release, so turn back, and now I can start to get some speed, and I'm really releasing the club head into the bag.
Same thing, you go through the same progression, now go back and we'll do it without a ball, and we'll release it, and then we'll go back and we'll put a ball in there, go through the same thing, and so on and so forth.
So, that's the progression that you're going through to reshape your golf swing, so you train the left arm first, slowly start reintroducing the right hand, and you train the right arm by itself, and then you start reintroducing the left hand, and you want all these things to slowly learn to work together.
So once you have that, you have what is the basic construct and shape for a golf swing.
Then worry about the position of the takeaway and the position at the top of the swing and your wrists and impact and all those things, but get the basic motion down first.
Once you have that, you're well on your way to building a world class golf swing.



























































































































Harry
Craig (Certified RST Instructor)
Scott
Craig (Certified RST Instructor)
Douglas
Craig (Certified RST Instructor)
Kyaw Thet
Craig (Certified RST Instructor)
Fred
Craig (Certified RST Instructor)
Mohnishkumar
Craig (Certified RST Instructor)
David
Craig (Certified RST Instructor)
Michael
Craig (Certified RST Instructor)
Andre
Craig (Certified RST Instructor)
Andre
Robin
Craig (Certified RST Instructor)
Phil
Craig (Certified RST Instructor)
Scott
Craig (Certified RST Instructor)
Jeff
Craig (Certified RST Instructor)
Jeff
Craig (Certified RST Instructor)
Jeff
Craig (Certified RST Instructor)
Ronan
Craig (Certified RST Instructor)
Scott
Craig (Certified RST Instructor)
Duncan
Craig (Certified RST Instructor)
Duncan
Craig (Certified RST Instructor)
michael
Craig (Certified RST Instructor)
michael
Craig (Certified RST Instructor)
michael
Craig (Certified RST Instructor)
Diane
Craig (Certified RST Instructor)
Pete
Craig (Certified RST Instructor)
Mark
Craig (Certified RST Instructor)
Colin
Craig (Certified RST Instructor)
Colin
Craig (Certified RST Instructor)
Colin
Craig (Certified RST Instructor)
Caleb
Craig (Certified RST Instructor)
Caleb
William
Chuck
William
Chuck
James
Dominic
Craig (Certified RST Instructor)
GC
Craig (Certified RST Instructor)
arthur john
Craig (Certified RST Instructor)
arthur john
Christopher
Craig (Certified RST Instructor)
Robert
Craig (Certified RST Instructor)
Colin
Craig (Certified RST Instructor)
sambhu
Craig (Certified RST Instructor)
Brian
Craig (Certified RST Instructor)
Shane
Craig (Certified RST Instructor)
sambhu
Craig (Certified RST Instructor)
Leslie John
Chris (Certified RST Instructor)
Joseph
Craig (Certified RST Instructor)
Joseph
Craig (Certified RST Instructor)
Joseph
Craig (Certified RST Instructor)
Andy
Chris (Certified RST Instructor)
Bunsun
Craig (Certified RST Instructor)
Skyler
Craig (Certified RST Instructor)
Christoph
Craig (Certified RST Instructor)
Jason
Craig (Certified RST Instructor)
Michael
Craig (Certified RST Instructor)
gary
Craig (Certified RST Instructor)
Greg
Craig (Certified RST Instructor)
Rob
Steven (Certified RST Instructor)
Gavin
Craig (Certified RST Instructor)
Gary
Craig (Certified RST Instructor)
Gary
Craig (Certified RST Instructor)
Gary
Craig (Certified RST Instructor)
Gary
Craig (Certified RST Instructor)
Gary
Craig (Certified RST Instructor)
Gary
Craig (Certified RST Instructor)
mark
Craig (Certified RST Instructor)
mark
Gary
Gary
Craig (Certified RST Instructor)
Gary
Craig (Certified RST Instructor)
Gary
Craig (Certified RST Instructor)
Gary
Steven (Certified RST Instructor)
Gary
Craig (Certified RST Instructor)
Reg
Craig (Certified RST Instructor)
Reg
Craig (Certified RST Instructor)
Reg
Craig (Certified RST Instructor)
Reg
Craig (Certified RST Instructor)
Steven (Certified RST Instructor)
Reg
Craig (Certified RST Instructor)
Jeffrey
Craig (Certified RST Instructor)
gary
Craig (Certified RST Instructor)
sambhu
Craig (Certified RST Instructor)
Jason
Craig (Certified RST Instructor)
sambhu
Craig (Certified RST Instructor)
Nick
Craig (Certified RST Instructor)
Ravi
Craig (Certified RST Instructor)
Shane
Craig (Certified RST Instructor)
Mitchell
Craig (Certified RST Instructor)
Damien
Craig (Certified RST Instructor)
Damien
Craig (Certified RST Instructor)
larry
Craig (Certified RST Instructor)
jeren
Craig (Certified RST Instructor)
Brandon
Craig (Certified RST Instructor)
david
Craig (Certified RST Instructor)
david
Craig (Certified RST Instructor)
Pino
Steven (Certified RST Instructor)
Pino
Steven (Certified RST Instructor)
Sanjay
Steven (Certified RST Instructor)
Sanjay
Preston
R.J. (Certified RST Instructor)
Kevin
Craig (Certified RST Instructor)
Preston
Craig (Certified RST Instructor)
Ken
Craig (Certified RST Instructor)
JONATHAN
Craig (Certified RST Instructor)
George
Craig (Certified RST Instructor)
George
Craig (Certified RST Instructor)
George
Craig (Certified RST Instructor)
George
Craig (Certified RST Instructor)
George
Craig (Certified RST Instructor)
Steve
Craig (Certified RST Instructor)
Darran
Craig (Certified RST Instructor)
David
Craig (Certified RST Instructor)
Shane
Craig (Certified RST Instructor)
Shane
Craig (Certified RST Instructor)
JONATHAN
Craig (Certified RST Instructor)
Charles
Craig (Certified RST Instructor)
Sergio
R.J. (Certified RST Instructor)
Randy
Craig (Certified RST Instructor)
Randy
Craig (Certified RST Instructor)
Randy
Fred
Craig (Certified RST Instructor)
Fred
Miguel
Craig (Certified RST Instructor)
Miguel
Jesse
Craig (Certified RST Instructor)
Jesse
Caleb
Craig (Certified RST Instructor)
Greg
Craig (Certified RST Instructor)
Caleb
Nicolas
Craig (Certified RST Instructor)
Randy
Craig (Certified RST Instructor)
Ron
Craig (Certified RST Instructor)
Stephen
Craig (Certified RST Instructor)
Lee
Craig (Certified RST Instructor)
Jason
Craig (Certified RST Instructor)
Jaime
Craig (Certified RST Instructor)
Anthony
Craig (Certified RST Instructor)
Anthony
Craig (Certified RST Instructor)
Anthony
Craig (Certified RST Instructor)
Colin
R.J. (Certified RST Instructor)
Colin
Craig (Certified RST Instructor)
Alan
Craig (Certified RST Instructor)
Alan
R.J. (Certified RST Instructor)
Peter
Craig (Certified RST Instructor)
Peter
Craig (Certified RST Instructor)
WILLIAM
Sujit
R.J. (Certified RST Instructor)
thomas
Craig (Certified RST Instructor)
Jack
Craig (Certified RST Instructor)
James
R.J. (Certified RST Instructor)
James
Jacob
R.J. (Certified RST Instructor)
Gavin
R.J. (Certified RST Instructor)
Gavin
R.J. (Certified RST Instructor)
Hub
R.J. (Certified RST Instructor)
Moe
R.J. (Certified RST Instructor)
Moe
R.J. (Certified RST Instructor)
joseph
Chris (Certified RST Instructor)
joseph
R.J. (Certified RST Instructor)
bryan
Craig (Certified RST Instructor)
bryan
Tim (Certified RST Instructor)
Paul
Craig (Certified RST Instructor)
Carlo
Craig (Certified RST Instructor)
Stephen
Craig (Certified RST Instructor)
Joe
Craig (Certified RST Instructor)
Anthony
Craig (Certified RST Instructor)
Anthony
Craig (Certified RST Instructor)
George
Craig (Certified RST Instructor)
Mark
Aaron (Certified RST Instructor)
George
Craig (Certified RST Instructor)
George
Craig (Certified RST Instructor)
George
Craig (Certified RST Instructor)
don
Craig (Certified RST Instructor)
Thomas
Craig (Certified RST Instructor)
Leigh
Craig (Certified RST Instructor)
Craig (Certified RST Instructor)
Leigh
Craig (Certified RST Instructor)
Andre
Craig (Certified RST Instructor)
Frank
Craig (Certified RST Instructor)
Patrick (Certified RST Instructor)
John
Craig (Certified RST Instructor)
Michael
Craig (Certified RST Instructor)
Michael
Craig (Certified RST Instructor)
Kevin
Craig (Certified RST Instructor)
gary
Craig (Certified RST Instructor)
William
Craig (Certified RST Instructor)
charles
Craig (Certified RST Instructor)
Rob
Craig (Certified RST Instructor)
Michael
Craig (Certified RST Instructor)
Vince
Craig (Certified RST Instructor)
Christopher
Craig (Certified RST Instructor)
Kevin
Craig (Certified RST Instructor)
Kevin
Frederik
Craig (Certified RST Instructor)
Iain
Craig (Certified RST Instructor)
Ryan
Craig (Certified RST Instructor)
james
Chris (Certified RST Instructor)
fionn
WILLIAM
Chris (Certified RST Instructor)
lou
Craig (Certified RST Instructor)
lou
Craig (Certified RST Instructor)
lou
Craig (Certified RST Instructor)
david
Yoshi
Chris (Certified RST Instructor)
Barbara
Chris (Certified RST Instructor)
Yoshi
Chris (Certified RST Instructor)
Yoshi
Chris (Certified RST Instructor)
Barbara
Chris (Certified RST Instructor)
Hector
Chris (Certified RST Instructor)
Mike
michael
Dan
Chris (Certified RST Instructor)
Dan
Chris (Certified RST Instructor)
Dan
Martin
Chris (Certified RST Instructor)
michael
Chris (Certified RST Instructor)
Chris (Certified RST Instructor)
george
Chris (Certified RST Instructor)
george
Chris (Certified RST Instructor)
jack
Christopher
Chris (Certified RST Instructor)
Michael
Tim (Certified RST Instructor)
WILLIAM
Chris (Certified RST Instructor)
steven
Chris (Certified RST Instructor)
john
Chris (Certified RST Instructor)
Alejandro
Chris (Certified RST Instructor)
Carole
Chris (Certified RST Instructor)