Video Menu
My Favorite Videos
My Favorite Videos
Key to Creating Lag
Sorry, you need to be a member to access this video.
You Are Just Seconds Away - Become a member here!
Already a member? Log in now

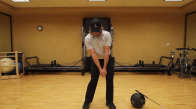
The secret key to creating lag has been an elusive thing for most amateur golfers. In this video, I show you the key to producing tons of lag and the one key movement that is detrimental to losing lag.
- Lag is the angle between the RIGHT forearm and the shaft - not the left as many teach
- To improve lag, you should feel you're bringing the club down almost entirely with the right arm
- Left shoulder stays shut, feels lower than the right all the way into impact
- Practice with the right arm only - it will feel like the club is coming straight down
- Add a little bit of forearm rotation to square the club face
All right, we're going to do a two-part video series here.
The first part's going to be what you see on the screen here, me talking about a student.
The second part's going to be me demonstrating the drills that I had the student do to get him into these ideal positions.
This is a student who flew over from Ireland to work with me for a couple days and is trying to turn pro.
So he takes golf very seriously, just like you guys do, and had a couple really common faults that so many golfers struggle with.
And led to inconsistent ball flight.
He had a path that was a little bit too far from the inside, hit a very high ball flight, Would have a tendency to block it high, right, or hit kind of a high draw, and neither of those work at a professional level.
We need a much more penetrating ball flight and get the path straightened out.
So long story short, what all of this had to do with, or not all of it, but a good chunk of it had to do with the amount of lag that he was losing coming down.
Now of course lag is this big elusive thing to the average amateur golfer.
They think that there's just no way to get it.
You either have it or you don't or they figure that they'll never have it and it's just nonsense.
Lag is a simple byproduct of doing a few things correctly.
And in the drill, in the second half of the video that I'm going to show you, You're going to see exactly how to produce it and see exactly how I got the results that you see here in less than 10 minutes.
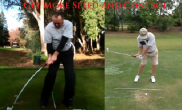
So with Greg here, this is his first swing that I filmed without me looking, working with him at all.
It's just his first swing of the day or after he had already warmed up.
And this is me working with him for 10 minutes on lag.
And you can see a pretty radical difference.
And just to use a couple simple lines to start out with, we could draw a line basically from the butt of the club.
I'll try to get both of those pretty accurate here in just a second.
Excuse me.
Okay.
So with the, uh, with the first one, there's the butt of the club and he chokes up on it a little bit and there's the butt of the club.
Obviously at one point when the shaft is parallel to the ground, now this, or maybe a half a frame off here, but this is as close as we can get.
Notice that his hands or the butt of his club are actually in front of the ball when the shaft is parallel to the ground.
And on this one, it's well behind the ball.
And you can see a couple other things.
Uh, the butt of the club is, is now in front of his head here.
It's kind of over his left eye or underneath his left eye.
And the big thing that you can see that you're going to start looking at is that you can see some of his right thigh here, Which is basically part of our goal in doing.
The drill that I'm going to give you was getting the hands back here in front of the right thigh, when the shaft is parallel to the ground.
The key is the drill that I'm going to give you, but these are the things that you want to look at.
And when you start looking at angles here, you'll notice that the angle between his right forearm and club shaft is, is plus 90 degrees here.
It's about 90 degrees.
So he's in a much better position here.
He's maintained much more lag coming down.
And then we're going to see a couple other things as we start working down a couple more frames on each of them.
Notice now that his hands get two more frames here are much more in front of the ball.
He's going to have a much more descending blow.
And notice that the position of his hands are much more in front of his chest.
So if I clear out this line on both of these, It's pretty easy to see that his hands are right here, back in the center of his chest, and here they're well back behind.
So the line's going the opposite direction.
That's a little bit off there, but you can get the idea.
So what, uh, What this is going to do is it's going to cause him to obviously release the club early and lose speed power.
So he's going to have to do something to compensate for it.
And what he's doing is really working hard to turn his body and hit really hard with the heart, with the body.
You can see just how much his muscles and his left arm are strained here, whereas here they're basically relaxed.
And that's another key piece that you'll learn as we go into the drill.
Now in learning this, he's going to obviously tend to overdo a couple things.
And we're going to see that at impact where he's got his hands a little too far forward at impact, but that's a much better problem to have.
Notice again, still got a lot of angle between that right arm and the shaft here.
He's losing it quite a bit just before impact.
We've really lost a lot of angle, which we want to at some point, we need to release the club, but notice how he's going to have at impact a lot of forward shaft lean.
And again, there's a point of having too much here.
And in the same frame here on the left, the club head is actually passing his hands.
Whereas here, he's actually driving the ball, compressing it properly, and has a lot of forward shaft lean.
And again, technically, this is something we were going to work out getting a little bit less shaft lean.
He's overcooked it here just a little bit, but we're in a close position to being absolutely perfect here.
There's a massive difference here between these two impact positions, these two release positions, and more importantly, the ball flight.
The ball is going to come out and you can see the ball is coming out very high here.
Here, the ball is going to come out very, very much more penetrating, which was the result of these shots, obviously.
See here, as he continues on, go one more frame on each.
Ball's coming out much higher on this side versus here, where he's still got his hands ahead of the club head.
Now again, obviously, at some point, we want that to release, but working on one thing at a time.
So the big thing here was maintaining lag.
Lag is the key to the golf swing.
It is the key to power, and it is the key to consistency, believe it or not.
A lot of people don't realize that.
But as we get into this drill that I'm going to show you in the second half of the video, you're going to start to see how you can create these positions.
No matter what handicapped golfer you are, you can see yourself in this very, very powerful position where the hands are back in front of the body.
You've got a ton of lag between the right form.
The hands are in front and see yourself start hitting penetrating golf shots like you've never seen.
And I'm going to show you that in this next half of the video.
So by now, You've watched the first half of the video showing a student who made a tremendous improvement in the amount of lag that they had in the downswing.
And I promised you I'm going to give you a drill to show you how to do the exact same thing.
But first, before we do that, I want to talk about what lag is so that everybody's on the same page and they understand what we're defining as lag.
And the second thing I'm going to show you is how you get rid of lag in the incorrect way.
And then the third thing is finally the drill to show you how to create it.
So first things first, The most important thing to understand is, let's all be on the same page.
For what lag is, because there's a lot of misconceptions out there about what lag is in the golf swing.
Most people, including teachers, will define lag as the angle between the left forearm and the club shaft during the downswing.
So right now I have basically a 90 degree angle and that would be considered, depending on the point it is at the downswing, that I would have a lot of lag.
The problem is the left arm has nothing to do with it.
It doesn't matter what the angle between the left forearm and the shaft is.
Because that needs to get released during the downswing.
Because that's part of what squares a club face.
So what we actually need to look at is the angle of the right forearm and the club shaft.
That's what lag really is.
It's this angle that determines what kind of power you're going to have in the swing versus how much effort you're going to put into it.
So that's that whole powerful, powerful effort or effortless power depending on which one you're putting into your swing.
We want that effortless power feeling, and that the vast majority of that comes from conserving this angle, this lag into the downswing so that we have a good angle.
So what would be a good angle?
Well, A simple check that I always use for most of my students is that when the hands start to get back in front of the thigh or about in front of the pocket, I want to see that club shaft parallel to the ground.
So in other words, you can see here that my club shaft is parallel to the ground.
My hands are back in front of my thigh, and I can see just the bare, slight edge of my right thigh on the outside of my arm.
The opposite of that would look like this.
Now I've lost all my lag.
This is where most amateurs are or you could be really extreme and be up in this angle.
We don't need that much.
That's going to alter how strong of a grip we need.
So clubs parallel to the ground, hands are back in front of the thigh.
You can just barely see the outside of your thigh.
So in a downswing motion, it would look about like this, anything more than this.
And then you're going to start running into issues where the club face is going to come in open.
Or you're going to have your hands too far forward at impact.
You're going to deal off the club face too much, so on and so forth.
A lot of issues with it.
This is a great place to be.
And if you got here for 99% of you amateurs out there, it would completely transform your game.
So we know what it is.
We know where it, what it needs to look like.
Now we need to know first, what do most people do wrong to get rid of it?
That's the key.
The first thing that most people do is they go to the top of the swing and they unwind their shoulders as fast as they can.
That's the worst thing that you can do for conserving lag.
And here's the reason why.
What you're doing when you go to the top and start spinning your shoulders is you're creating centripetal force.
You're creating a rotational force and that's going to act on the golf club.
The further part out away from you is going to want to throw out this way when you start moving this way.
It's just a simple cause and effect basic physics 101 problem that you've created.
Think of a little kid on a merry-go-round.
If you're in the center of the merry-go-round and it's spinning really, really fast, what happens?
The little kid's sitting on the end of it.
They want to get flung off.
You're the center of the merry-go-round.
When this starts spinning fast, this starts wanting to get flung off the merry-go-round.
So that's why most golfers for, there's lots of little reasons, but that's why most golfers lose a lot of lag as they get here and do this.
And it's really hard because you're creating so much force to maintain any angle.
So that's the first key is that what we want to do is feel that this shoulder, the left shoulder stays shut as we start bringing the club down.
Now the key is this is the drill.
This is how we maintain that lag.
If our shoulders are staying shut, how does the club get down?
This is the key.
As we go back and we start down and we shift into our left, we're pulling the club down.
What for most of you is going to feel like exclusively with the right arm.
That's how we get back to here.
All I'm doing is this pulling my club back while I'm shifting my weight back into my left side, bringing the club here.
Now when I pull both hands on it, now I have lag and impact and release.
It's not spin your shoulders, spin your hips, all of those things.
Those are going to change your secondary axis till the angle of your shoulder, so on and so forth.
So here's some simple checks for you to do it correctly.
So as we go down, we want to feel that my left shoulder, as I talked about, stays shut.
But a second feeling is for that left shoulder to feel like it's always lower than the right.
And what I mean by that is you can see that this shaft is angled such that the left, my left shoulder is lower than my right.
This would be higher than my right.
So what we want to feel is that as we come down, That left shoulder stays low and what we would call in the shot as you continue to bring the club down with your arms to the impact position.
What you don't want to feel is this.
Now I have a lot of secondary axis tilt.
My left shoulder is very high.
It's going to cause me to lose lag and so on and so forth.
It's going to change your swing plane and path.
Yeah.
So first feeling is shoulder shut.
Second feeling is left shoulder staying below the right all the way into impact.
It won't, but it needs to feel that way for most of you left shoulder low, Continue to bring the right arm to that checkpoint that we had.
Where I've still got a full 90 degree angle between my right forearm and my shaft, and my hands are just about in front of my thigh.
All we're doing to do that again is taking the right arm, forgetting about all this stuff and pulling it straight down.
This is all I'm doing top of my backswing, pulling my arm down.
So this is the simplest way for you to start to feel what a proper golf swing would feel like.
Most golfers are too left side dominant.
And so that's why this motion happens where they spin out early.
They pull the left shoulder up, they pull the left arm down early.
That's why they lose lag.
So you're going to start practicing right arm, to start getting the feeling of pulling the club straight down.
Because now, what we're doing instead of creating all this centripetal force by spinning, we're just creating vertical movement.
That's what it's going to feel like that your arm is moving straight down.
And let's look at that from down the line.
Because that's another key piece for golfers who used to are used to spinning their shoulders and getting the club stuck way behind them.
They're used to coming away from the inside with a really shallow club.
And then they learned to time a flip creates a block or a hook as you well know.
What we want to do is as we've come down, it should feel like that that shaft is coming down.
I'm going to exaggerate this for the video that the shaft is coming down vertically.
It's not.
So when I put these two together, you're going to see that as I start pulling just my right arm down, it's definitely not steep.
It's coming down right exactly where it should be and into impact.
But when you do this yourself, what you're going to feel is that that shaft is coming straight down into the ground.
Now, I just demonstrated to you that it's not.
But even to me, as many times as I've done this drill, it feels like the shaft is coming down straight down.
It should feel very steep, especially if you're used to pulling out with that left shoulder, spinning the hips on and so forth, and you're used to getting the club stuck coming from the inside.
This right arm down drill is going to feel like the club shaft is coming down vertical.
Okay, that's the first thing.
Now, The second key to this, when you're looking from down the line, is that.
If you did everything else perfect.
And you started coming down and you start doing this right arm drill, and you just pulled your arm down, the club face is going to come in and it's going to look a little open.
And so what the tendency is for you to come through with an open club face and have to try and time a flip.
Obviously, that's no good.
So there's one last little piece to get with this right arm only drill coming down.
And that's a little bit of rotation in this fashion.
Okay, so you can see how my hands working here, and you're going to watch what happens to the club head as I do that.
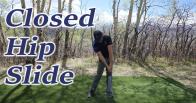
So I'm going to the top, closed hip slide, I'm sitting into my left side, keeping the shoulders shut, left shoulder low, feeling like I'm just pulling my right arm straight down, feels like the club shaft is very vertical.
And now I'm just going to rotate just a tiny bit.
I'm going to try to get away from the inside.
First, this would be stuck and open.
Now I'm going to rotate my arm, my forearm just slightly.
And you'll notice that as I do that, it pulls the club from being stuck and behind my hands to being in line with my hands, the club back out in front, and now I can release.
So this slight amount of rotation is going to be the last key to help.
Start squaring the club face early because you don't want the club face to be sitting here wide open and then try to time a flip at the last second.
We want it to be squaring early.
So now you can see it's starting to look at the ball, look at the ball.
Now it's square and then releasing without me having to put a ton of timing and effort into it.
So those are the keys to learning how to create lag in the swing is to quiet all of this stuff down because most golfers overdo it.
Not all golfers, a lot of golfers who start to learn to use their body correctly, but because most of the members of the website are better golfers, we target things that they tend to do, which is overuse the body.
So you're going to feel nobody pulling your arms straight down the elbow back in front of the body.
You can see it's back in front of my hip, the arm rotating.
You can see a little bit on my right thigh here and then release the clip.
So that's the key to creating lag.
Start working on right arm only drills, right arm pulling straight down.
It's the shaft's going to feel vertical.
And see if you don't improve your lag and post your pictures and videos on the forum.








































































































































































































































































Jesse
Craig (Certified RST Instructor)
Jesse
Greg
Craig (Certified RST Instructor)
Greg
Craig (Certified RST Instructor)
Greg
Craig (Certified RST Instructor)
Dan
Craig (Certified RST Instructor)
Dan
Chris (Certified RST Instructor)
Michael
Craig (Certified RST Instructor)
Michael
David
Craig (Certified RST Instructor)
David
Craig (Certified RST Instructor)
David
Craig (Certified RST Instructor)
David
Craig (Certified RST Instructor)
David
Craig (Certified RST Instructor)
Douglas
Craig (Certified RST Instructor)
Douglas
Douglas
Craig (Certified RST Instructor)
Douglas
Craig (Certified RST Instructor)
Douglas
David
Craig (Certified RST Instructor)
David
Jason
Craig (Certified RST Instructor)
Roger
Craig (Certified RST Instructor)
Hector
Craig (Certified RST Instructor)
Lance
Craig (Certified RST Instructor)
Paul
Craig (Certified RST Instructor)
Paul
Craig (Certified RST Instructor)
Toby
Craig (Certified RST Instructor)
Stéphane
Craig (Certified RST Instructor)
Stéphane
Craig (Certified RST Instructor)
David
Craig (Certified RST Instructor)
Jarek
Craig (Certified RST Instructor)
Stéphane
Craig (Certified RST Instructor)
Stéphane
Craig (Certified RST Instructor)
Evan
Craig (Certified RST Instructor)
Evan
jeren
Craig (Certified RST Instructor)
Stephen
Craig (Certified RST Instructor)
Stephen
Mark
Craig (Certified RST Instructor)
Mark
Craig (Certified RST Instructor)
Ray
Craig (Certified RST Instructor)
howard
Craig (Certified RST Instructor)
Greg
R.J. (Certified RST Instructor)
Peter
Craig (Certified RST Instructor)
Seth
Craig (Certified RST Instructor)
Terry
Craig (Certified RST Instructor)
richard
Craig (Certified RST Instructor)
Terry
Chris (Certified RST Instructor)
Dave
Craig (Certified RST Instructor)
Terry
Craig (Certified RST Instructor)
Greg
R.J. (Certified RST Instructor)
WILLIAM
Craig (Certified RST Instructor)
WILLIAM
joseph
Craig (Certified RST Instructor)
joseph
Craig (Certified RST Instructor)
George
R.J. (Certified RST Instructor)
Jim
Craig (Certified RST Instructor)
Steve
R.J. (Certified RST Instructor)
gordon
Chris (Certified RST Instructor)
gordon
hank
Craig (Certified RST Instructor)
Donna
Craig (Certified RST Instructor)
John
R.J. (Certified RST Instructor)
John
R.J. (Certified RST Instructor)
John
R.J. (Certified RST Instructor)
John
R.J. (Certified RST Instructor)
JOE
R.J. (Certified RST Instructor)
Mark
Craig (Certified RST Instructor)
DENIS
Craig (Certified RST Instructor)
Tom
Craig (Certified RST Instructor)
ralph
Craig (Certified RST Instructor)
George
Craig (Certified RST Instructor)
David
Craig (Certified RST Instructor)
Juan Eduardo
Craig (Certified RST Instructor)
Jim
Craig (Certified RST Instructor)
Earl
Craig (Certified RST Instructor)
Earl
Craig (Certified RST Instructor)
Ola
Craig (Certified RST Instructor)
JACK
Craig (Certified RST Instructor)
patrick14
Craig (Certified RST Instructor)
James
Chris (Certified RST Instructor)
jason
Chris (Certified RST Instructor)
jason
Chris (Certified RST Instructor)
Ronnie
Chris (Certified RST Instructor)
brian
Chris (Certified RST Instructor)