Video Menu
My Favorite Videos
My Favorite Videos
Add Lead Hand to Chipping Stroke
Sorry, you need to be a member to access this video.
You Are Just Seconds Away - Become a member here!
Already a member? Log in now

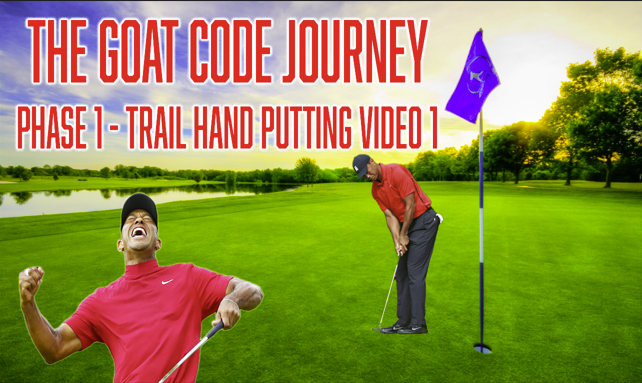
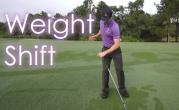
Got a good "grip" on your trail hand only chipping stroke? Now put it on automatic by adding back in the lead hand.
Once you're ready to add the lead hand back into your chipping stroke, The body movements become so important to get them right at this stage in the development.
Because it's going to help you understand how to build into a full wedge swing, into a full iron swing, into a full driver swing.
So getting these details right is super important.
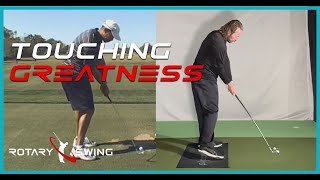
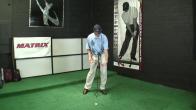
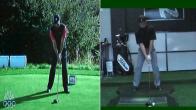
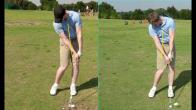
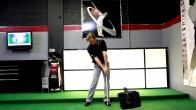
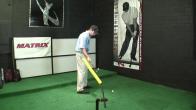
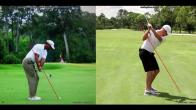
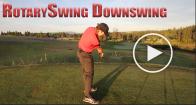
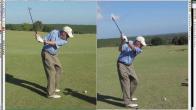
So I've got myself up here on the left.
I'm using a 60 degree here.
Tiger's hitting, I'm not sure, maybe a sandwich.
He's hitting a little bit longer shot than I am, But it's not that far off, as you'll see in terms of distance and how far back we're going to swing and so on.
But what you're going to notice, I'm going to point out very, Very critical details that are going to help you understand how to move your body correctly.
Once you add this lead, hand back in there.
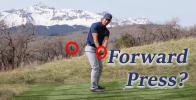
So the first thing we're going to look at is now that you have the lead hand back on there, How do we get this forward press to get that initial tension built in the fascia and the body?
To help us get that free ride?
So that we don't feel like we're having to, like, mechanically, force the club back, but it's kind of starting automatically on its own.
So one of the things that you're going to notice, I'm going to draw a couple lines here.
We're going to look at a lot of different details of the stroke, But I'm going to put a line just kind of on the top of my left shoulder and the top of Tiger's left shoulder, give or take a little bit.
What you're going to notice is as we start our forward press, as we start down, both lead shoulders are working down.
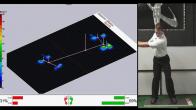
Now the key to this is how our left leg is moving.
In the golf swing, What most golfers do is they push off the trail leg incorrectly, and that you can see that right here when you're chipping.
I'm going to show you what it looks like to do it right and what it looks like to do it wrong.
Because this is what leads to early extension in the full swing.
So what you want to feel is that that left shoulder is working down and that left knee is flexing.
It's moving in toward the ball while the right knee is not really doing much of anything.
So if we back it up a little bit and you focus on both of our right knees, you're going to see that not a lot happens.
We're certainly loading into it just a little bit, but both right knees are pretty frozen basically in terms of how much movement there is.
But now if you focus on the left knee of both myself and Tiger, You can see that left knee kick in and the left hip kind of rotate and kind of lean toward the target.
And so if we look at how much our heads are moving here, You're going to see that we're actually both kind of moving our heads toward the target just a little bit.
We're kind of falling more into that lead side.
So I'll put a couple lines up here on our left ear, give or take a little bit just to give you a reference point.
And now watch, the Tiger's camera's moving a little bit, but you'll see he starts moving further into that line even though the camera's moving.
So it's normal as that left knee flexes and the right knee stays straight, that the left hip is going to get a little bit lower than the right.
And you're going to fall more into that lead side, that's going to create a little bit of lateral move in the downswing.
It's going to make it happen automatically.
So, as I was talking about earlier that in the previous video, that it's okay for your head to move forward, and you can see that's again, the Tiger's camera has moved here quite a bit.
But if you look at the guy behind him, if I remove these lines, just watch his left ear in reference to this guy's arm here.
You're going to see it immediately start to move forward.
This is because he's falling more into the lead side, that left knee is flexing and more pressure is moving forward.
This helps you ensure that you catch chips clean.
If you tend to hang back on the back foot, you're going to want to push off the back foot.
And I'm going to show you what that's going to look like in just a moment.
But what you want to feel is that right leg is just kind of braced.
You know, it's not rigid, but you're bracing into it and that left knee is bending forward.
Your hips are moving forward just like your head is.
If you watch in the background here, again, I'll try to draw a couple lines, but because the cameras are moving a little bit for Tiger, it's not going to be exact.
But you're going to see him fall into that left side more.
And I've also fallen into that left side because my camera's on a tripod.
You can see my left hip actually moves forward in front of that line.
And that's helping me get my pressure and my centers forward of that ball to make sure I get a clean strike.
Now, as we start down, that left knee is going to begin to straighten from its flexed position.
And that's going to allow us to clear that left hip to help bring the body around.
So both, everything is working together, especially once you get that lead hand on there.
But you're going to want to start to feel how your hips have to move.
It's much more involved than the putting stroke.
The putting stroke is doing this also, but just to a tiny degree, the wedge, the chipping shots make it bigger.
And then as we get to the wedge swings, it's going to be more so, but we're going to have a wider stance.
So you're not going to tend to fall forward.
But the feeling and the mechanics are the same.
Now, let's go back here again.
And I want to show you the, I want you to focus on the hands at this point.
So now as we forward press, you can see both of us have this forward press that actually tilts the shoulders.
So if you watch, it's very easy to see on me because I've got a little bit better video quality here.
But you can see as my hands move forward, my right shoulder drops down a little bit.
You can see the same thing over here on Tiger is right shoulders dropping down.
As I was talking about in the forward press part of the putting video, the whole body's involved.
The fascia connects everything.
And so as you're starting to move your hands forward to get that little preset in the wrists, then your shoulders, your right shoulder is going to move down and left hip is going to start to move forward.
Your head is going to start to move forward.
Now, as we go back, I still feel I'm having control of that club face with my right hand, but the left hand is definitely helping.
It's helping take some load, Some burden off that trail hand, so that I can focus on sensitivity and feel and touch and what that club face is doing.
So now as I start back down, you're going to see my left leg start to straighten.
Shoulders are rocking back through.
And now as I get into the strike, I'm going to control that release of that club face with my trail hand all the way through the strike.
Now, again, Tiger's made a little bit bigger shot, longer shot here.
So he's made a bigger swing.
He has a little bit bigger follow through.
Club face is released a little bit more.
My swing is shorter.
I'm probably hitting it, you know, five, 10 yards shorter than he is here.
But you can see that the basic mechanics that you learn in the putting stroke and the one -handed chipping stroke are exactly the same once you add both hands on there.
But now your body's going to have to move a little bit more dynamically.
It's going to have to move together.
And one of the things that I like to focus on as I start my stroke is I feel like once I start my forward press, the whole swing works together at this point.
So let me play it first at full speed.
And everything, once I do this, the whole swing is starting.
My whole body starts moving with this forward press.
So I don't ever feel like it's a separate movement from the actual backstroke.
It's part of the backswing.
But you get the idea that once you start that forward press, it's all one motion.
The whole swing, once you start that forward press, it's all one thing.
So everything starts to work together to control that club face.
Now, let me show you what it looks like if you're going to use your right leg incorrectly.
If you have too much pressure hanging back on the right side, and you're going to start to push too much off that right leg.
So in this stroke, I purposely started to drive hard off the right leg.
So you could see the difference between when you're going to do it right or wrong, and help you understand what shots you're going to have.
If you start missing the ball to the left of your target, if you're a right-handed golfer, this is the first place to check.
Now obviously you can see the hands are keeping the club face very quiet throughout the stroke.
So there's not a whole lot that I'm going to do to mess up with the club face itself with my hands.
But watch as I start to pivot.
You can see how my right foot starts coming up off the ground.
My right knee is driving in.
My body has rotated a lot more.
This is going to cause you to hit it thin.
This is going to cause you to pull it to the left quite a bit for right-handed golfers.
So what you want to again focus on is that left hip.
Make sure that your pressure falls onto that lead side and then you're pivoting there, straightening up that left leg, using that left hip to straighten the leg and move the body through, not driving hard off of that right leg.
That's going to completely change the shot and make it very difficult to control the club face through the strike.
And what you're focusing on here, more than anything, is making sure that you hit the ball in the center of the face every time.
And I've got a little trick for you.
You can actually see it here.
If I zoom in here on my club face, what I do, you can see the little wear spot there.
That is I go and hit a couple of bunker shots before I practice chipping.
And then I start chipping.
And then the sand starts wearing off where I'm hitting the ball in the face.
So if I hit, you know, I probably hit 50, 60 chips out of the, after hitting the bunker shot.
So the sand is still on the club face, But this allows me to start checking where I'm hitting it on the club face every time, without having to put wear tape on there.
This way I still got my grooves working and you shouldn't see the ball bouncing all over the place.
This is a drill to teach you precision and control.
And so you should be hitting it right in the center of the face every single time.
If you're not, then you need to go back to that one handed drill and start working on that first.
But once you start hitting it in the center of the face every time, which put the lead hand on there, make it so much easier because your hands are now working with everything together.
Your body's working everything together.
You don't have to just feel control with just that one hand.
Everything's going to work together with you to get the control of the club face.
Now let's go outside and give you, I'm going to give you a simple drill, how to get this lead side to work.
So you don't push incorrectly off the trail side.
It's a drill that Tiger does all the time when he's working on his chipping.
And it's going to help you get the feel as we start moving into bigger swings.
The simplest and most important drill that you're going to do as you're getting ready to go into your wedge swings and full iron swings.
And driver is getting a feel for how your body has to work together.
And this is the challenge of the golf swing.
We've got two arms, two sides of our body.
They're all doing different things all at the same time happening really, really fast.
So it's really challenging when you try to isolate something and break it down from everything else that's happening at the same time.
What's great about this chipping drill is it's going to teach you how to feel everything working together.
Now that we're adding that lead and back in there and getting you the lead side of your body, how to move correctly so that you don't push incorrectly in early extend and so on.
So all you need to do to get a feel for this drill is simply drop your trail foot back.
You're going to have all, almost all of your weight on your lead foot, and you're going to hit two handed chips like this.
And what you're going to find is that if you're a person who tends to hang back off their back foot or have too much weight on your back foot at a dress, this is going to really feel awkward at first, But it's going to teach you how to feel the flexion at the beginning of the stroke and the extension in the lead leg.
So your body's kind of doing this.
And as you're working through the core activation drills, you're getting that same feeling.
When you go to throw a medicine ball, your leg has to brace so that your body, your upper body can rotate.
And as you know, from that core activation drill and the chair drill, your trail foot is going to slide back now, obviously, as we're hitting a short chip like this, I'm hitting just a, you know, 10 yard chip or so your trail foot.
There's not enough energy.
There's not enough rotational speed for that trail foot to slide back.
But as we move into the wedge swing, that's exactly what's going to happen.
So it's very important for you to get the feeling of not having so much weight on this back foot.
And then having to drive off of it late in the downswing and cause you to stand up out of your shot and lose your posture.
So all you're going to do, put most of your weight on your lead foot, your trail foot's just, it's stepped back basically almost behind my heel.
There's not a standard rule for this.
You just want to get it back there quite a ways so that you're basically up on your toe.
You don't have to have it back that far if you don't want to, But this will help you start to feel balance and coordination that is necessary on the lead side in the swing.
So I'm going to stand it back quite a ways and I'm going to get all my pressure on my lead foot, take my setup and then start just hitting basic little chip shots.
So that flag with all of my weight on my lead leg.
So there, all I'm doing is just letting my leg extend or excuse me, letting it flex and extend.
And you can see how that's rotating my body and all of this is working together.
So as I begin to rotate from my core, my leg is going to extend, This foot is going to want to be pulling back and that's going to give me that torque that I need in the stroke.
So from down the line, it's just going to look like this.
Just get your foot back, get all of your pressure on your lead leg and start hitting some chips like that.
Once you have a feel for it, then put both feet back together, but have this foot still feel pretty light, especially the chipping shot.
Now, as we advance through this series, as we go into a wedge swing, there's going to be a little bit more weight on the right foot, iron swing is going to be a little bit more weight on the right foot, driver swing is going to be a little bit more weight on the right foot.
So you can see I'm just a little bit incrementally moving back into that trail leg, but just like you saw in the chipping at the beginning of this video, that trail leg, it's not moving a whole lot.
It's really there for a brace and support and stability, to be able to load up our core, to be able to have some power to rotate through.
So now I'm going to just hit another shot.
I'm going to put almost all of my weight on my lead foot, But I'm going to put my foot back in my normal stance to get used to this feeling of balancing on this lead leg.
Now, the lead leg for most people is not the dominant side of their body.
So when you feel this, it may feel kind of awkward and uncomfortable and hard to balance.
And you may find that your leg doesn't straighten.
I see this all the time.
This leg needs to straighten.
And this is where you're going to start learning how to do that is with these smaller shots, versus trying to do this at full speed with a driver.
That's going to be much more challenging.
So put your, put your pressure back on your lead foot.
I'd say now I'm 70, 30 on favoring my lead side.
So I'm just going to kind of exaggerate.
So I'm going to have the ball up in my stance a little bit to help me get comfortable with this lead side.
And I'm going to have my foot just be really, really light.
Just like I said, 70, 30, and then just make the same stroke and just let the ball roll out.
Now, once you get comfortable with that, then you can start messing around with ball position and different setups, different club face angles.
You'll notice at the beginning of the video that I, that when I showed Tiger, he actually bowed his lead wrist in the backstroke.
There's so many different things that you can do to start working with this, to get a feel for how you can alter shots around the green.
But for right now, I want you to try to get the basic chip shot.
So we're going to do a series here.
I'm going to put the ball back where I would normally put it.
So I'm going to move it for a shot like this, where I've got a big, you know, second tier here that I've got to get up on top of.
I don't want to risk, you know, the ball coming back to me.
So for a shot like this, I'm going to play the ball like we started more off the back toe, but my pressure is still forward.
So now as I've moved onto my lead side, I've got the ball back.
Now this is going to deal off the club a little bit.
And as I forward press, it's going to allow me to hit a ball.
That's going to roll up that slope instead of risking it spinning and, you know, coming back down the hill.
And that's how you want to practice.
So once you get comfortable with that and you can hit it very consistently, doing the same shot over and over again, then you can start playing with ball position and so on.
But first get it to where you can hit a basic 10 yard, 15 yard, 20 yard chip shot the same way every single time.
And you will be able to take what you're learning here and transfer it over all the way to throughout every club in the bag, all the way up to the driver.







































































































































Ewan
Ewan
Craig (Certified RST Instructor)
Jack
Craig (Certified RST Instructor)
Vivien
Craig (Certified RST Instructor)
Vivien
Craig (Certified RST Instructor)
Vivien
Craig (Certified RST Instructor)
Vivien
Craig (Certified RST Instructor)
Stephen
Craig (Certified RST Instructor)
David
Craig (Certified RST Instructor)
Paul
Craig (Certified RST Instructor)
David
Freddie
Craig (Certified RST Instructor)
Freddie
Craig (Certified RST Instructor)
Carver
Craig (Certified RST Instructor)
James
Craig (Certified RST Instructor)
Tim
Craig (Certified RST Instructor)
Jari
Craig (Certified RST Instructor)
Mark
Craig (Certified RST Instructor)
Franco
Chuck
Kendall
Chuck
Kendall
Chuck
Kendall
Chuck
David
Chuck
Thomas
Chuck
Thomas
Thomas
Thomas
Chuck
Thomas
Jeremy
Chuck
Michael
Chuck
Mark
Chuck
Jesse
Chuck