Video Menu
My Favorite Videos
My Favorite Videos
The GOAT Setup
Sorry, you need to be a member to access this video.
You Are Just Seconds Away - Become a member here!
Already a member? Log in now

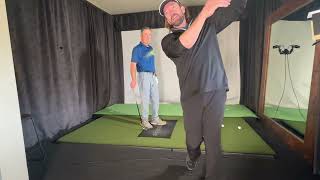
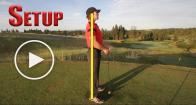
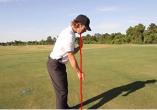
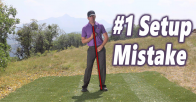
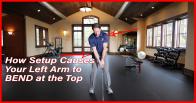
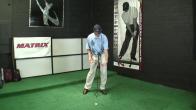
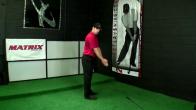
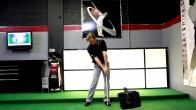
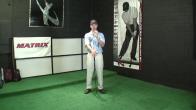
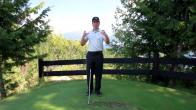
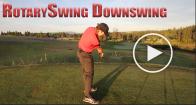
Getting setup correctly to the golf ball is a make it or break it deal, most golfers have their "rear ends" sticking out way too far which will make your lower back ache and make you swing your arms around your body too much, so let's get this key detail dialed in!
Getting set up to the golf ball correctly is hugely important, and especially as you learn to fire and engage your core, that starts right at setup.
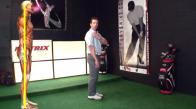
One of the things you're going to find that's a little bit unique about a proper setup that you'll see in Jack Nicklaus and Tiger Woods swing is that they all tended to stand very tall through the legs.
And most amateurs get kind of squatty.
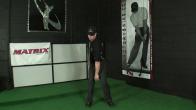
What I mean by that is they have a lot of knee flex and they kind of, you know, hinge forward like this.
And then it's really hard to move very athletically from there, and certainly almost impossible for you to use your core.
Because as you get squatty like this, your chest tends to be very upright and you tend to stick your rear out a lot.
So that's going to hurt your lower back.
So if you've got back soreness, this is the first place to look.
So as you kind of do that, you lengthen this part of your abdominal wall and then your chest kind of stands upright.
Now, guess what's going to happen from here?
Your arms are going to want to swing really flat, and your arms need to be able to work up without you having to pick them up.
So, just by making this simple setup mistake of squatting with your knees a little bit, sticking your rear out, arching your back, letting your arms sit.
Like this, your arms and club are almost always going to want to go inside because of the angle of your chest.
To fight that, The first thing you need to do at setup is start to feel that your chest is pointing down at the ball.
So you can see, like in Nicholas and Tiger Swings, they actually have a bit of rounding through their spine to keep their legs nice and tall.
You can see as I round from my thoracic spine, the middle of my back.
That's going to get my chest pointing more down at the ball so that my arms can hang freely.
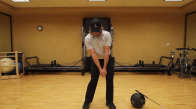
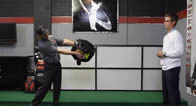
So So when you start to do these medicine ball drills, This is going to feel a lot better to you to use your core to swing that ball back and forth than this.
This is going to feel like you're holding the arm your arms and the ball up.
You want to feel like the gravity is pulling your arms down, and you've got to engage your core to do that.
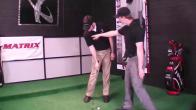
So take your fingers like this and just poke yourself in the belly so you kind of flinch and that will help you feel this engagement.
So now that your core is starting to engage, your chest can point more down at the ball, your belly button is going to point down at the ball.
And you're going to be nice and tall through your legs.
And your arms are going to be able to hang freely so that your core can move them back and forth.
That's the first and most important fundamental in your setup.
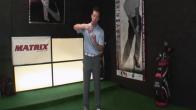
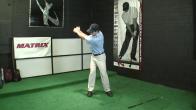
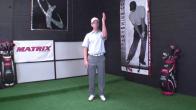
Now both arms should feel what we call supinated at address.
Now, what that means is if you just held your thumbs up like this and you rotated them externally, this is supination.
You'll see that that puts my elbow pits facing out away from you.
Now, your lead arm is not going to be fully facing out away from you, but your trail arm.
If you're right handed, that's your right hand.
Right arm is going to be facing directly away from you at setup.
You'll see, my lead arm is going to be internally rotated just slightly because of the nature of the grip.
My trail, my lead hand grip, needs to be clocked over a little bit to have a stronger grip than neutral.
And so that's going to keep my arm from being able to face straight away from me.
But my trail arm, because of the trail hand grip, is rotated to match the lead hand.
That one is going to point almost directly at the camera, and that's what you want to feel.
Again, if you're kind of like this at setup, it gives your arms a lot of freedom of movement to move independent of your body.
And that just makes it darn near impossible to be consistent, because we're trying to time all of the stuff, moving independent of each other.
We We want the swing to feel very connected, very compact.
And the supination of your arms.
So if you just take your arms and externally rotate really the upper part of your arms.
That'll connect the arms to the body and so you'll feel a nice connection to your rib cage.
And as I get set up now, and I have my shoulder pulled back and this elbow pit's pointing at the camera.
This one is pointing just a little bit, maybe one or two Once you've got your arms supinated, we then want to start paying attention to where the butt of the club is pointing at setup.
Again, If you're used to having your shoulders really rounded and your arms very disconnected from your body, so they can kind of fling all over the place.
Instead of pulled back and supinated, and you will notice that your trail shoulder is obviously got to pronate or protract.
Just a little bit to get down to the club because it's lower on the shaft than the lead hand.
This shoulder is not going to be pulled back as much as the lead arm.
The lead arm is the primary one that's pulled back.
The trail arm's got to come forward just a little bit to get on the club.
But as it pulls, as it goes forward, I don't want to start lowering the handle.
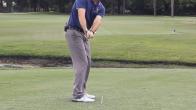
The handle of the club, when you're looking at it from down the line, should point right at your belt buckle.
And your belt buckle should be about an inch or a couple inches beneath your belly button.
That's a great checkpoint.
And so now what I want to imagine is that that the club, the butt of the club, is coming right out of my belt.
Buckle to the ball.
You'll see that if you have too much knee flex, too much rounding in the shoulders, your shoulder, lead shoulder not being retracted, That club will the club handle.
Want to sit really low.
And that again gives you all this freedom of movement with your arms and hands to move independent of your body.
But as soon as you pull the shoulder back, watch what happens.
So right now you can see the butt of the club is pointing more towards my zipper.
It's too low.
As soon as I pull the shoulder back, it raises the handle, connects my arm and club to my body and gets that club pointing straight at my belt buckle.
And now as I go back, everything again is going to want to move perfectly in sync together.
And what about the alignment of your body, your arms, your feet?
All of that is very simple.
Once you have everything connected the way that you've learned so far, all you're going to need to do with your feet is you're going to set with your feet very square.
What I like to think is my right foot, both of my feet are pretty much square to the target line, but once I flare my lead foot a little bit, and that's going to be about 20 or 30 degrees and my trail foot is square, that might create the appearance from down the line that my stance is a little bit open.
So here's where my foot is before I square it.
And as soon as I open it, it drops it back a little bit.
So it's going to create the appearance that your feet might be slightly open when you're looking at the toes, but when you look at it from behind at the heels, it should look very square.
But your shoulders are going to look a little bit open, just slightly, because remember, We're pulling this lead shoulder back to give the arms some support and connection with the body to help move everything back together.
And when you get to the top of the swing, when you find that this shoulder is connected, you're going to find that your lead arm is going to, again, run into this chest and make your swing a lot more compact and short at the top.
But once we have this feeling of our feet square and our shoulder retracted, you're going to see that my trail arm forearm is going to be slightly above my lead arm.
But you don't want them directly parallel to each other, because that's going to get your shoulder rolled forward.
And then you're going to want to push the club back to the inside.
In order to keep the club and your body and arms connected, your trail arm is going to be slightly higher trail forearm than your lead arm.
So you'll see, you can actually see the bottom of my forearm just slightly.
If I take my setup here, my trail arm, because it's nice and straight, we want this to be very straight address.
You don't want a lot of slack in here, because we start adding power in the swing, you're going to understand that these joints have to be relatively, some of them relatively firm, in order to stretch the muscles and the fascia properly to produce effortless power.
So you're going to keep this nice and straight at setup.
Your lead arm is also nice and straight.
And so now, with my trail arm slightly above, you're going to see that my shoulders, because remember, this one is pulled back slightly or retracted.
And this one to get down on the club has got to be protracted slightly.
My shoulders are going to look slightly open in relationship to the target line.
Now, what about axis tilt and weight distribution?
For those of you that don't know, axis tilt is simply my spine angle at setup here.
I have zero degrees of axis tilt.
And as if I start sliding my hips toward the target, my spine is going to lean back.
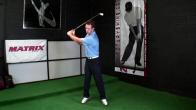
For the goat swing, how much axis tilt do you need?
Not very much at all.
I'd say zero to eight degrees is going to be pretty typical.
And it's going to depend slightly on the club, as we're going to talk about in just a moment.
And that's also going to affect your weight distribution.
So let's just say, for instance, I have a six iron here.
With a six iron, my weight distribution is going to be about 60-40 favoring the left side, just slightly.
It's very slight.
It's almost insignificant in terms of what you're going to feel.
You're going to feel just a little bit more pressure on this lead side, Which we want with an iron to help us create a little bit more of a descending blow than with the driver and woods.
That we're going to talk about in just a moment.
So if I'm 60-40, my shoulders retracted, this one's slightly protracted, you're going to see that I don't really have a lot of axis tilt.
My spine is going to be pretty upright, But I'm going to have the appearance of more axis tilt than I actually have because my shoulders are going to be kind of like this.
This left shoulder is going to be a little bit higher than neutral, and this one's going to be a little bit lower than neutral.
And so that's going to create the appearance that my spine is tilted back, but we're really not going to have much with an iron, if any.
Now you can change this if you like to shape the ball flight.
So if you want to hit the ball a little bit more left to right as a right -handed golfer, A little bit less axis tilt and feeling more on top of the ball that you're covering with your chest, and you can rotate through a little bit more, will help you hit it lower and hit a little bit more of a cut.
And if you want to hit a draw, you can alter this to have a little bit more axis tilt.
And so I can feel my pressure go back kind of 55-45, just favoring the trail foot just a little bit.
And that's going to make it a little bit easier for me to come from the inside and hit a little bit of a draw.
Now, as you get to the woods, what you're going to find is that you're going to go from 60-40 with an iron, especially a short iron.
As you start getting to the longer clubs, your fairway woods, you're going to start going back to 50-50.
So you're going to have a little bit wider stance, and stance width is going to be just outside of your pelvis, the width of your pelvis.
So you can see if I dropped a club shaft here from where the center of my hip socket is, my foot is just about an inch outside of that on either side with a standard shot, standard iron shot.
When I go to a fairway wood, I'm going to drop my trail foot back just a little bit more.
And a driver, I'm going to drop it back just a hair more.
Now, as I do this, I'm going to stay behind the ball a little bit more because I want to be able to release the club and keep my hip back behind my foot.
At impact with the driver.
And that's going to allow me to create a little bit more speed, get a little bit more rotation.
So I want to favor this trail side a little bit more with the driver than I would with any other club.
Because it's the only one we're creating with a hitting, with a positive angle of attack.
But with an iron and most shots that you're going to hit, you're going to feel very neutral.
The ball is going to be just off the left side of your ear.
Your weight's going to be a 60-40 for most iron shots.
And then the final thing to start to think about is, where's your weight distribution from heel to toe?
From heel to toe, you want to be toward the middle of your foot, toward the back of the ball of your foot.
So from here to here is about where you're going to feel most of your pressure.
If you're too far back on your heels, you're going to have a really hard time moving.
If you're too far out on your toes, you're going to be struggling to maintain your balance.
So find your balance between the ball of your foot and the middle of your foot.
And that's going to allow you to move very quickly, which is what you want in the golf swing.
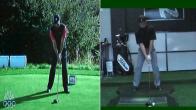
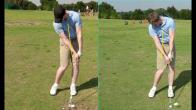
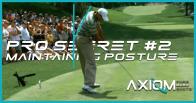
When we looked at Tiger at setup from face on, you're going to see he has literally zero, maybe one degree of axis tilt, if any.
There's hardly any tilt if there is.
He's hitting a knockdown shot here, so the ball is played back in his stance a little bit more.
The normal is more off of his left eye.
You can see again, the left foot is flared out 20 to 30 degrees.
Right foot is pretty much square to the target line.
His hips are slightly forward set up.
That's getting him just a little bit more pressure on the lead side.
You can see the lead shoulder is retracted here.
If you look at how much higher his lead shoulder is and the angle of it, And the trail shoulder is kind of sloping down again because he's got to reach forward to get that right hand lower on the club than the left.
And so you'll see that the right shoulder looks a little bit wider from the space from his ear to his shoulder, whereas this one is pulled back and up slightly.
And the perfect grip here, everything here is spot on.
When we look from down the line, I want you to pay attention to the angle of his spine.
And then you can see just this little hump here outline, and that is his lead shoulder blade being pulled back.
It's actually pulled back behind deeper than his spine further away from the ball.
That's what I'm talking about with getting that left arm connected to the body.
Here you can see his left form beneath his right form.
It's more visible in the right form straight, but above the left slightly.
So his shoulders, because the shoulders are pulled back, is actually aimed a little bit more left.
His feet are pretty close to this line, but again, his foot is pulled back.
So if you look at his heels, the heel line is actually much more closed than his toe line there because the foot is pulled back.
The butt of the club, again, going right through the belt buckle and the legs relatively nice and tall.
Tiger's pretty tall, so he's going to have a little bit more knee flex than somebody who's a little bit shorter.
But overall, you can see all the things that you just learned here is head is pulled back, back is nice and flat, abs are pulled in, a perfect setup.
From there, you've got a good setup.
Really, The key fundamental is getting your core engaged so that you feel like you can begin to move athletically between your feet very quickly and dynamically.
Use your core to rotate back to be able to start to deliver some power and load up in your swing.
And you've got a great setup that's going to get you on the stage, ready to rock and roll and fire powerfully to deliver power to that trail hand.














































































































































Emmanuel
Craig (Certified RST Instructor)
Lowindu
Craig (Certified RST Instructor)
Lowindu
Craig (Certified RST Instructor)
Diego
Craig (Certified RST Instructor)
Thomas
Craig (Certified RST Instructor)
Thomas
Michael
Michael
Craig (Certified RST Instructor)
Ewan
Craig (Certified RST Instructor)
Ewan
Craig (Certified RST Instructor)
Ewan
David
David
Craig (Certified RST Instructor)
David
Craig (Certified RST Instructor)
David
Zack
Craig (Certified RST Instructor)
Benjamin
Craig (Certified RST Instructor)
Benjamin
Craig (Certified RST Instructor)
Benjamin
Craig (Certified RST Instructor)
Joel
Chuck
Jayden
Chuck
Jayden
Chuck
Jason
Chuck
Scott
Chuck
Tony
Chuck
Chris
Chuck
philip
Chuck
Craig
Chuck
ECTOR
Chuck
Scott
Chuck
Stanley
Chuck
Matthew
John
Chuck
John
Chuck
Jayden
Chuck
Lee
Chuck
Lee
Chuck
Lee
Alex Francis Ver
Chuck
Jayden
Chuck
Jayden
Lee
Chuck
Lee
Chuck
Lee
Chuck
Lee
Lee
Jayden
Chuck
Jayden
Jayden
Jayden
Chuck
Jayden
Chuck
Jesse
Chuck
RJ
Chuck
Stefano
Chuck