Video Menu
My Favorite Videos
My Favorite Videos
How the GOATs Trained Their Lead Hand
Sorry, you need to be a member to access this video.
You Are Just Seconds Away - Become a member here!
Already a member? Log in now

Use Tiger Woods' lead hand drill to train both sides of the body to work together in the golf swing rather than fighting each other.
Do you struggle with not catching the ball clean first, having shaft lean and impact and compressing the ball?
The reason is almost definitely because you don't move laterally far enough in the downswing.
As I'm about to show you, the goats all had a tremendous amount of lateral movement in their downswings with rotation, of course, as well as you're going to see in just a moment.
And most amateur golfers that we see in our swing reviews have less than half what the goats did.
Let me show you.
The great Bobby Jones.
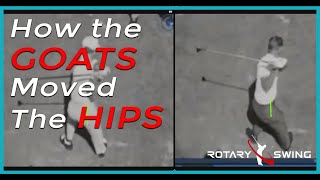
Look at the pelvic shift from the belt buckle to belt buckle, from setup to impact.
Approximately 10 inches of pelvic shift.
The great Ben Hogan.
Take a look at his pelvis shift.
Again, it's the core, not the pelvis itself.
The pelvis is what you're seeing as the most obvious reference point, but you've watched his belt buckle all the way into impact.
Eight inches of lateral move into the ball.
Now watch the great Tiger Woods.
Watch how much his belt buckle moves from set up back to where he started, all the way into impact, eight inches of lateral movement with that belt buckle into the ball.
From the face on view, it's pretty clear that the Greats had what looked like a tremendous amount of lateral shift.
And while that's somewhat true, it's a bit misleading to look at it only from the face on view.
So when we look overhead, We'll start to see the truth of what's really happening and start to get a better visual of how the swing really needs to feel and work in order for you to swing like the greatest of all time.
So I've drawn a long vertical line here that shows roughly where the center of Tiger's pelvis is.
You can imagine this is just a line between his two butt cheeks here.
And as he goes to the top of the swing, You'll see he moves in front of it just a little bit to this second line that I have drawn the shorter line on the left.
And then as he goes for starts his downswing, you're gonna see him move in front of that.
But then as he begins to rotate, you can see at this point he's quite a ways in front of it.
But as he rotates back, you'll see he gets much closer to that second line.
That I just that I mentioned where he was at the top of his backswing.
Now this is at impact, and when we look at this from the face on view, we can clearly see the belt buckle or the center of gravity.
The belly button moved eight inches forward, but from the rear view, the back of the pelvis.
We're only seeing a couple inches of lateral movement, and that's because it's really not just a lateral slide.
The relative movement of the the lateral movement of the pelvis is relatively, very, very small.
And I'm going to help you feel this and understand what's really happening here.
So that you can start to get a great visual of what it feels like to swing like the greats.
As you just saw, The goats all have a tremendous amount of lateral movement and rotation that creates the look when you're viewing from face on.
That, their belly button or their belt buckle is moving way farther forward than where it started at address.
Most golfers actually do almost the exact opposite.
They will actually shift backwards if you're really hanging back on your trail foot or they'll shift a little bit but not very far.
They'll stop and then they'll start pushing through with their trail side.
And this is what creates the old chicken wing and scoop and flip.
You have to understand that you've got to move laterally, but the feel of this is very, very difficult for most golfers at first because it involves the lead side of your body helping provide balance in your swing.
I'm going to show you how to start doing this move in your swing and how to start drilling this so that you start getting this feeling of proper shaft, lean and compression.
Let me show you how to drill this.
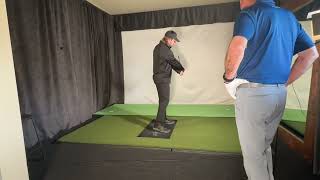
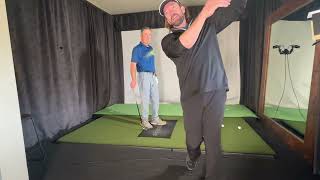
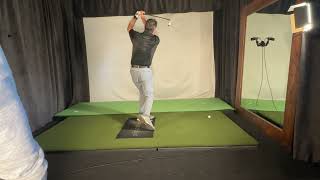
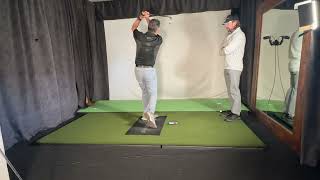
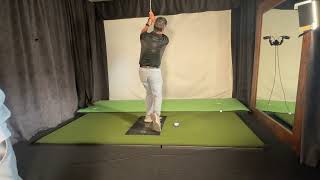
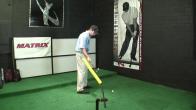
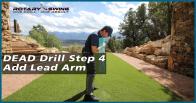
The key to drilling this move is doing hitting balls with just your lead hand only at first.
This will help get you the feeling of the pendulum action of your shoulder because this is how your arm works.
Your arm is swinging freely from your shoulder.
You don't want to be pulling the club through.
You want the club, your arm to be relaxing so that the hand can decelerate and impact.
And in order to do that, The club head has to be overtaking the hands now.
Golfers are terrified of this because they think that's what leads to a flip and scoop is when the club overtakes your hands, but it has to overtake your hands.
That's where all the speed is.
A lot of times, golfers are trying to hold this off or not allowing it to release properly, and it kills your club head speed.
The reason you flip and scoop is because you're not moving laterally first.
That's the key movement.
And this is what helps create this pendulum action that your hips are swinging laterally, which helps your upper body tilt back, which helps the shoulder go up, this one go down, and that helps create this pendulum action for your hands.
But your hands must actually be actively releasing the club early as you shift laterally.
If you remember, Jack Nicklaus said you can throw the club as hard as you want from the top as long as you're moving left.
That is what you have to feel.
And so the drill for this is to, and I'm going to break this down in slow motion in just a moment, but what you're going to do is start with your lead hand only, take a step with your lead foot, just a little step to help give you some dynamic movement.
So the club's moving one way and you're already starting to get the feeling of falling back into your lead side.
Then from there, don't start turning or trying to pull the club down.
That kills your speed.
What you want to feel is as you take this step, you're just going to let your hips slide laterally.
So your belt buckle is going to move toward the target and this is going to help bring the club and arms down.
But the key here is you've got to start actively using your hand to start releasing the club now.
The trick to doing this is not obviously releasing it like this, you're releasing it like this.
This is what we call ulnar deviation.
You're just taking your thumb from being in this angle with your forearm to being in line with the top of your forearm.
So when you do this with the club, if you just look at it this way.
It's this motion.
This is what you need to actively be doing during the downswing in order to get the club to catch up.
Now, again, you're thinking, oh my gosh, if I do this, I'm going to stick the club in the dirt.
If you don't move laterally, you will, or that you're going to scoop and flip.
If you don't move laterally, you will.
But as you'll see in just a moment, what actually happens is, is this is how your wrist gets into the strongest, most stable position to get it bowed at impact.
You don't try and bow your wrist, you try and deviate your lead wrist.
And obviously this is working with supination of your trail hand, but we're gonna focus just on the lead hand for this video.
As you're doing this, and everything is moving back to the lead side, your wrist is naturally going to start to bow.
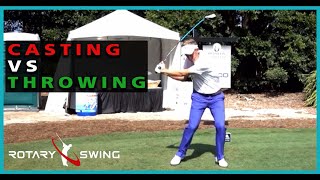
You don't try and bow it, you're trying to cast it or throw the club with this motion so that it can catch up.
And so what I want you to practice at first is just making little swings before you start getting into these full shots.
That I'll show in a moment that you're just making little swings and getting your wrist to start to release.
And you want the club to snap past your body, it's not pulling the club or pushing the club, you're wanting that wrist to sling through the ball.
And so that feeling of your hand starting to deviate, and as you start to deviate, you're going to start to rotate it.
This is all going to happen because the club's being swung on an arc, and that's going to help you start to bow this wrist naturally.
These knuckles are going to roll under, and then you're going to zing the club through and get it to come around to a full release.
And your checkpoint for this release is that your palm should be facing the sky in the follow-through.
If your palm's facing like this, you didn't let the club release.
You held the release off.
But you want to feel that the club fully takes over the palm of his face in the sky and the club head is slightly angled in.
So now when we start to put all this together, so I'm going to take a step or I'm going to step to the left as the club's going back to the right.
So I'm just kind of doing this motion and then let it release.
More importantly, actually help it release.
Start getting that club to pass your hand so you can start to hear a little swoosh.
So do this without a ball first.
I'm going to take a step and I hear a little swoosh there.
That's what I'm looking for.
Take a step, swoosh.
Now let's take a look at this in slow motion so you can start to understand what's happening.
So I did these shots in 10 yard increments from 55 yards to about 95 yards of carry.
And this will help you start to see what you can do out on the golf course or on the range.
When you're practicing this, to help you understand how far you should hit these.
This is not about power and speed when you're doing it with just your lead hand because it obviously needs the trail side to help out with power.
But it'll start to give you an idea of how the technique of this is going to help you hit the ball far without you trying to swing hard.
So I'll play this one first.
This is the shortest one.
So this one's only 55 yards of carries.
And these are all done with eight irons.
So as I go back, you'll see that my feet are pretty quiet on this one.
So I'm not going to use my body very much to help out here.
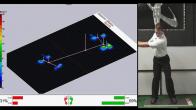
I'm going to start to move laterally, as you'll see here, the swing centers, these orange circles.
My pelvic swing center is in front of my chest swing center as it needs to be.
And then you'll see I'm starting to early, like way back here, immediately starting to try and get that club head to overtake my hands with this ulnar deviation, This getting that thumb to point down toward the ground.
And I'm holding on to the club firmly with the last three fingers.
I'm not just pushing on it with my thumb, I'm starting to pull down or hold on to it firmly with the three fingers.
I can use my forearm to start to release that golf club and you'll see that.
By the time I come down into impact, my wrist is bowed and flat, or in a good position there.
And I'm going to come into a short follow-through now as we go to a little bit longer shot.
64 yards.
I'll play this one.
Again, it's not going to be this big powerful swing.
It's just all about getting the timing and sequence of this.
So this one is the first one that I take a little bit of step.
You're going to see here.
So this buys me a little bit more of a dynamic stretch.
So now you'll see that my lead foot is going toward the target while my hand is still going back.
I'm balancing on my right leg.
This is what the golf swing feels like when you start putting it all together.
This is obviously just slowing everything down and just isolating one thing at a time.
And now I'm starting to try and widen this angle between my thumb or between my left arm and shaft.
I'm not trying to get narrow and create a ton of lag.
I'm trying to get rid of all of it so that the club can zip through the ball.
And then you'll see as I do this, it looks like my left wrist is bowing.
I'm not actively trying to do anything.
I'm trying to get into ulnar deviation and that gets me into this flat left wrist and shaffling at impact because my pelvis has moved laterally toward the target.
Now we'll go a little bit longer swing.
So 74 yards, 75 yards.
So each one, again, is 10 yards longer than the last.
Again, not some big powerful swing, but you're going to see the same thing.
But this time my feet are a little bit more active.
So the first one, my feet were kind of frozen to the ground, which is how I see most golfers.
This is a really bad habit.
What you want to do is start getting your feet and your legs to be awake.
So you'll see I actually take a little bit of a step with my right foot and then my left foot.
And so I get a little bit more dynamic stretch.
Pelvis leads.
I'm casting the club as best I can to get that club head to catch back up with the pendulum motion of my left arm.
And now I start to come more around into a full follow through.
You can see that club head starting, the toe starting to be past the heel.
My palm facing up toward the sky.
And then we've got an 84 yard shot, so club head speed's picking up a little bit here.
Sorry about that, we'll play this one through like this.
So now you're going to see the same thing.
My pelvis is just going to move a little bit quicker laterally, that helps move the hands faster.
And now I'm coming around more to a full follow-through, and then we'll look at the last one, 94 yards.
And so now, as we get into this swing, it looks like everything's moving faster.
I have about four miles an hour more club head speed.
What I'm doing to move faster is using my wrist and hand to start casting the club earlier from the top more aggressively, while I'm also moving to the left.
And that gets me again into this nice impact position with shaft lean.
My upper chest is staying back behind my hips, but my hip has moved a great deal laterally.
So if we look at the blue circle, this is where I was at setup.
And now you can see just how far my pelvis, my belt buckle, has moved laterally toward the target.
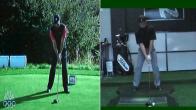
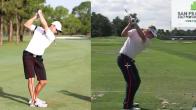
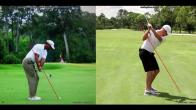
Now let's take a look at this and compare it to the Goat.
Because he also does this drill, this motion that Tiger is doing in this drill is exactly what we're doing here.
I'm just going to play this a few times.
So you start getting the feeling of the timing and sequence and tempo of this motion.
It's not some big powerful motion.
I'm hitting this ball further on the left, so my arm's going back a little bit further.
But you can see how Tiger takes a little step with his left foot and then moves laterally.
Upper body stays back.
Clubhead coming down.
You can see his clubhead.
Watch how fast that club in his hand moves on the way down.
This is not happening passively.
This is not happening by him just hoping the club's going to magically release.
He is forcing it to release.
He is making that club start to release down immediately from the top.
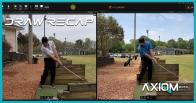
So now if we start walking through this again you're going to see both of us take a little step.
So watch our left foot here.
Tiger takes a little step.
I take a little step and then the club's going back.
And then again, as we go down, you're going to see the pelvis moving laterally.
And then Tiger's really getting that club to release aggressively.
With that left hand.
And this kind of set this position just after impact or at impact.
Note If we draw some lines here, we measure some angles, you'll see that the swing centers.
We use the belt buckle for a reference.
here, my belt buckle is 20 degrees ahead of the buttons on my shirt.
We'll take Tiger's angle here.
His is about 18.
So this is the feeling that you want to start getting yourself into is that your belt buckle is way closer to the target.
I've just rotated a little bit more, but you still see that the nearly the same angles between the swing centers that your pelvis and your chest or your chest and your belt buckle, which is kind of a more easy point to reference if you don't have software to help you see this stuff but then as we're doing this we're not trying to then open our chest and turn through we're letting that club release and it's pulling us around into a nice full follow-through and this is where you see again the toe of the club is closer to the target than the heel palm is facing the sky and we're nice and balanced up on this lead side so go out and practice if you're really flippy and scoopy and you tend to chicken wing it and you're not hitting the ball clean you're probably pushing way too hard with the trail side of the body and you've got to balance it out using the lead side


























































































Richard
Craig (Certified RST Instructor)
Matt
Craig (Certified RST Instructor)
Chris
Craig (Certified RST Instructor)
David
Craig (Certified RST Instructor)
David
Craig (Certified RST Instructor)
Steve
Craig (Certified RST Instructor)
David
Craig (Certified RST Instructor)
charles
Craig (Certified RST Instructor)
charles
Craig (Certified RST Instructor)
charles
Craig (Certified RST Instructor)
Steve
Steve
Chuck
Chris
Chuck
Chris
David
Chuck
David
David
Chuck
David
Asle
Chuck
J david
Chuck
Chuck
Jim
Chuck