


RSA GOAT Drill Week 2
Sorry, you need to be a member to access this video.
You Are Just Seconds Away - Become a member here!
Already a member? Log in now

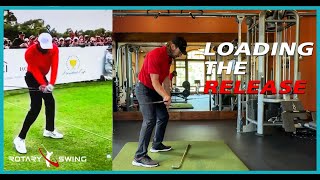
For week 2 we are focusing on how to load to be able to snap the release
All right, RSA crew, thank you so much for helping me on Saturday, coming in and giving me your feedback over the weekend.
I saw some of you were starting to see some really awesome results, But one of the biggest things I noticed in the group as a whole is not really understanding how to load to be able to throw the club head properly.
And so the goal for this week, I'm going to talk about the release a little bit more, But the big thing we're going to focus on is how to get your body and your arms and club to work together, especially in the backswing, so that you load up properly to be able to throw.
Because if you don't get loaded up correctly, what I see all the time is a lot of times the shoulders turning really flat, a lot of head movement off the ball, then you got to lift because that forces the club inside.
And so it's really, really difficult, if not impossible, to really have an efficient swing.
And efficiency is what we're really all about.
And so what you're going to learn today is we're going to start to understand how to move the body to work with this proper release, because it's very simple when you do it correctly.
So the first thing that we're going to do, and I've talked about this before, we're going to kind of take a little bit deeper look at this, is that I want you to set up with a staggered stance.
Now, the reason that this is important is because, again, so many times we don't really know where to drive our force.
And that's really what we're doing in the swing, is we're creating force and then just directing that force and that energy somewhere.
But a lot of times our forces are going all over the place, right?
We're going up and down and sideways and so on.
So the way that I want you to think about this is diagonal.
And that's the easiest way to really understand how to create resistance for a throw.
And there's going to be a few things that are very different.
If you're coming from a lead side pattern, where we want more body rotation to help propel this lead arm, and we're not using nearly as much trail arm.
In this, you're going to actually want to set up more on the balls of your feet.
And the reason for that is we need to create resistance for this throw to snap at the bottom.
And if I'm on my heel and turning, pivoting, or on my ankle and pivoting, then that gives me a lot of rotational freedom.
But I don't really get that resistance that I need for that towel snap.
And that's really what the trail side vibe is kind of all about, is getting that efficient snapping speed from the wrists.
So what I want you to do, set up diagonal.
So drop your trail foot back.
And I'm going to have you put most of your weight, let's call it for right now, 90%, 80 to 90% of your weight on your lead ball of your foot.
So it's going to look a bit like this.
So my head doesn't have to be over here.
I'm just pushing, I'm pushing pressure down through the ball of my foot into my toes even.
And I'm pushing that foot down.
That knee's a little bit more forward than this one, because I'm, I'm setting up kind of diagonally.
Because again, the dead drill was about rotational speed.
So we're kind of working everything a little bit more around to the left.
And this, you're kind of going to feel more out to the right if you're a right handed golfer.
So when you visualize this diagonal pathway, that's how you want to kind of get everything set up.
So this is again, exaggeration.
So let's just say this was straight, I'm going to set up this way to kind of match the shaft with this closed setup.
And then I'm going to direct my force along this pathway.
And that's the key.
Because that's when you're going to start to feel how little your body has to do in a trail side release, and how much resistance that you're trying to create, and where you're directing that force.
Because that's really the trick.
Aiming this force is what you're trying to do.
So I'm going to set up with my feet, kind of parallel to the shaft, which was a closed setup, more pressure on my lead side.
Now, here's the key.
As we go back, my hip path, where I'm moving is along this diagonal line.
A lot of times we kind of either slide or we rotate a lot.
It's so much simpler when you think about it as I'm just going to move diagonally.
So if I showed you face on, I'm moving my pressure along this diagonal line into my feet.
So my pressure is going back.
I'm on my ball of my foot.
It's going to go back to the middle towards the heel.
Again, this is all happening super fast.
So, you know, it goes to the heel for just a tiny brief moment.
But if you think about driving this energy back diagonally, that's going to help the club move back correctly.
So what I mean by that is, if you're struggling with, do I take the club outside?
Do I take the club inside?
If you think about it all going in one diagonal closed line going back, It'll help you get the club loaded and shallower at the top, and make it much easier to shallow it on the way down.
Because if I'm closed like this, and then I start to shift my pressure back, The club is naturally going to want to track back and be more over my thighs instead of if I'm, you know, more square, and I'm not really sure where to direct this force, so I kind of go out this way, or I go this way.
If you think about it all working together, so my hands and everything, my pressure, my force is all moving diagonally closed along that line, then I've got a great takeaway position.
And if I was just to go back to normal setup, it's going to look like that.
But it's easier to think about it all working diagonally closed.
From here, once I'm at this point, so just like you saw in the goat drill, my elbow pits out, my wrist is kind of bowed a little bit to get everything working under control here.
Now, as I go back from right here, once I'm loaded up from here, all I have to do is resist this force that's coming back this way.
Because once I start throwing, I don't have to think about shifting my weight.
You shouldn't have to think about shifting weight is what I mean.
If you're having to think about shifting your weight, you probably were way too far off the ball at setup, or shifted your head or whatever too far off the ball in the backswing.
The shift back to the lead side should be truly automatic, and it's really a relatively small move, which is again why I'm having you set up with 80-90% of weight on your lead side, and this foot's light.
And so then as I go back, as I start to come down, I'm already there.
Like, it's that small of a movement.
And of course, you know, once we go to a normal swing, which we'll do in a minute, it's obviously slightly more, but the feeling should be very much the same, that I just kind of move back diagonally, then as I'm doing this, my shoulder, I'm going into side bend, my left hip and knee are coming with me, and so this diagonal pivot is keeping my head nice and centered.
A lot of times, again, I see this all the time with the head moving way off the ball, but when you think about everything just kind of moving diagonally, and if I was to really exaggerate it and let my hips slide out, I would get into a reverse pivot, but this would help.
This is still the right idea, just a reverse pivot, because it's allowing me to move diagonally, which allows my shoulders to get steeper.
This left shoulder has to go down in the backswing.
It can't go across your body.
That's, it just throws everything out of whack.
So to get that shoulder to go down and get it naturally into side bend, this diagonal move makes that really simple, and from here, now as I come back down, I'm already on my lead side.
I'm driving force into the ball of my feet, ball of my left foot, and my big toe to push to create resistance, so that as I come down to throw, I've got force that's going to allow this to stop everything from wanting to keep going forward with momentum, and it's going to allow that risk to snap.
Now as I do this, one thing that you'll start to be aware of is that, And I see this all the time when golfers are trying to turn their hips and don't really understand how to do it, or what that really means.
In this pattern, what I want you to do is not try and turn your hips at all.
Now your hips are going to turn.
They're absolutely going to turn, but what I want you to understand is that what really happens, and especially in somebody's swing like Tigers, who's very efficient, and that's why he's such a wonderful role model for the golf swing, is because he just isn't working very hard.
He's got everything dialed in to the nth degree, and he makes it very, very simple, which should be all of our goals, But what you'll notice in Tiger's swing is that that lead knee stays bent for a long time into the downswing, and it doesn't straighten until right before impact, and this is hundredths of a second, if not thousandths of a second, because the club's about here.
That lead knee's still bent, and then it extends right as he's releasing that club.
That's the same feeling you want.
That's why I want you to move diagonally.
So to exaggerate it, my feet are closed to the camera.
I'm going diagonally back.
That's helping me get my shoulders steeper, and then diagonally down.
I'm not trying to turn my hips.
I'm not trying to straighten my leg.
I'm just moving diagonally and giving resistance in this ball of this foot, and then right as I get here, that leg is just going to straighten, but I'm not trying to turn my hips, but you can clearly see if I do this, my hips are obviously very turned.
I didn't turn my hips.
What I did was move diagonally this way, and then straighten that leg right at the last second as I was releasing it.
So when you go out to hit balls, set up with a closed stance, but most of your pressure on your lead side, get it back to the goat drill feel.
Go to the top.
Now from here, obviously, there's a little bit of supination.
It's going to turn to deviation, and then right about here, I'm going to post and release.
So let's see what this looks like as we do it all together.
So most of my pressure's on my lead side, elbow pit out, stronger right hand.
That's a nuked six iron.
No body speed, no body force, no body, and I mean by trying to turn my body or turn my shoulders.
All that was, and I'll do it face on, pressure on my side to create some resistance.
On the ball of my foot, I'm creating resistance for the throw.
My body is just responding to that and creating resistance, not trying to turn my hips, not trying to turn my shoulders, not trying to move my arms.
I'm going to the top, throwing.
This is bracing and resisting, and there.
So now a couple other feels that I want you to work on this week.
Once you start doing this with speed, with a normal stance.
So you don't have to hit a ton of balls like that.
It just depends on where you're at with it, but get the feeling for having that leg acting as a resistance.
And when you do that, when all that pressure's on that foot, you should be able to lift this one up and should find that it wants to kind of go back behind you.
To get the feeling of how to release this club correctly with this diagonal kind of feel in your movement, what you want to feel, as we've talked about with the goat drill, that this elbow pit and palm are facing out, you want to feel like the club is going from your perspective straight up.
Now, it's not going to because it's coming from inside and it's going to work around you.
But if you're used to doing this, which I see all the time, trying to drive the shoulders through, head moving forward and turning the body through, that's going to get the club exiting very low left.
And that's when you're just trying to turn your hips or rotate your shoulders.
What I want you to practice the feeling of is coming more underneath this way, just like the goat drill, and then getting that right, that palm facing the target at impact.
If you have to start doing this and start pronating, your grip is way too weak.
You've got something else going, opening the face, and then everything else starts falling apart.
But when you do this correctly, You should feel like you're the palm is facing the target and the club face is staying nice and square for a long time through the strike.
And the club is exiting what I would call more under and then up instead of across and around.
So the more you get that feeling of resisting on that right, big or left ball of your foot and big toe, and coming more underneath in your release.
So if I do it with both hands, it's going to look like this.
That's coming from here, snapping that wrist and getting all that speed truly from my hands.
Your body in a trail side pattern, when you're doing the goat drill correctly, your body's just providing a stable base.
It's providing resistance for this throw and getting on that left ball of the foot, Big toe to push back so that you can throw instead of trying to get here and turn.
Should give you that all that effortless zip that you're looking for in your swing.
So as you're working on this this week, get a feel, keep working on the goat drill, the club shallowing out this way.
But as long as you're no longer trying to turn, you're trying to kind of move diagonal and stay more closed so that the club can then release.
You'll get rid of all those bad habits because as soon as you start turning and going like this, You cast the club because you're moving out in front and your body and club start going in opposite directions.
But as you're going this way, you're maintaining that leverage to be able to snap at the bottom.


Stuart
Chuck
Tausif
Chuck
L
Chuck
Christopher
Chuck
Christopher
David
Chuck
Patrick
Chuck
Talmadge
Chuck
Talmadge
Chuck
Talmadge
Talmadge
Chuck
Eric
Chuck
Eric
Chuck
Harold
Chuck
Eric
Chuck
Eric
Chuck
Talmadge
Chuck