


How to Cure the Shanks in 3 Steps
Sorry, you need to be a member to access this video. You Are Just Seconds Away!


The golf shank is the ugliest, nastiest, rottenest, and most frightening shot in golf. If the shanks hijacked your swing or they happen to sneak up on you, I have some good news for you… In this video, I’ll show you a 3-step process that identifies what kind of shanker you are and the corresponding drill you need to end the shanks once and for all. Check out this video now to cure the shanks and start enjoying golf again!
- Evaluate what sort of shank you are experiencing
- Fine tune your release
- Correct your path and body movements
- Shanks are gone forever
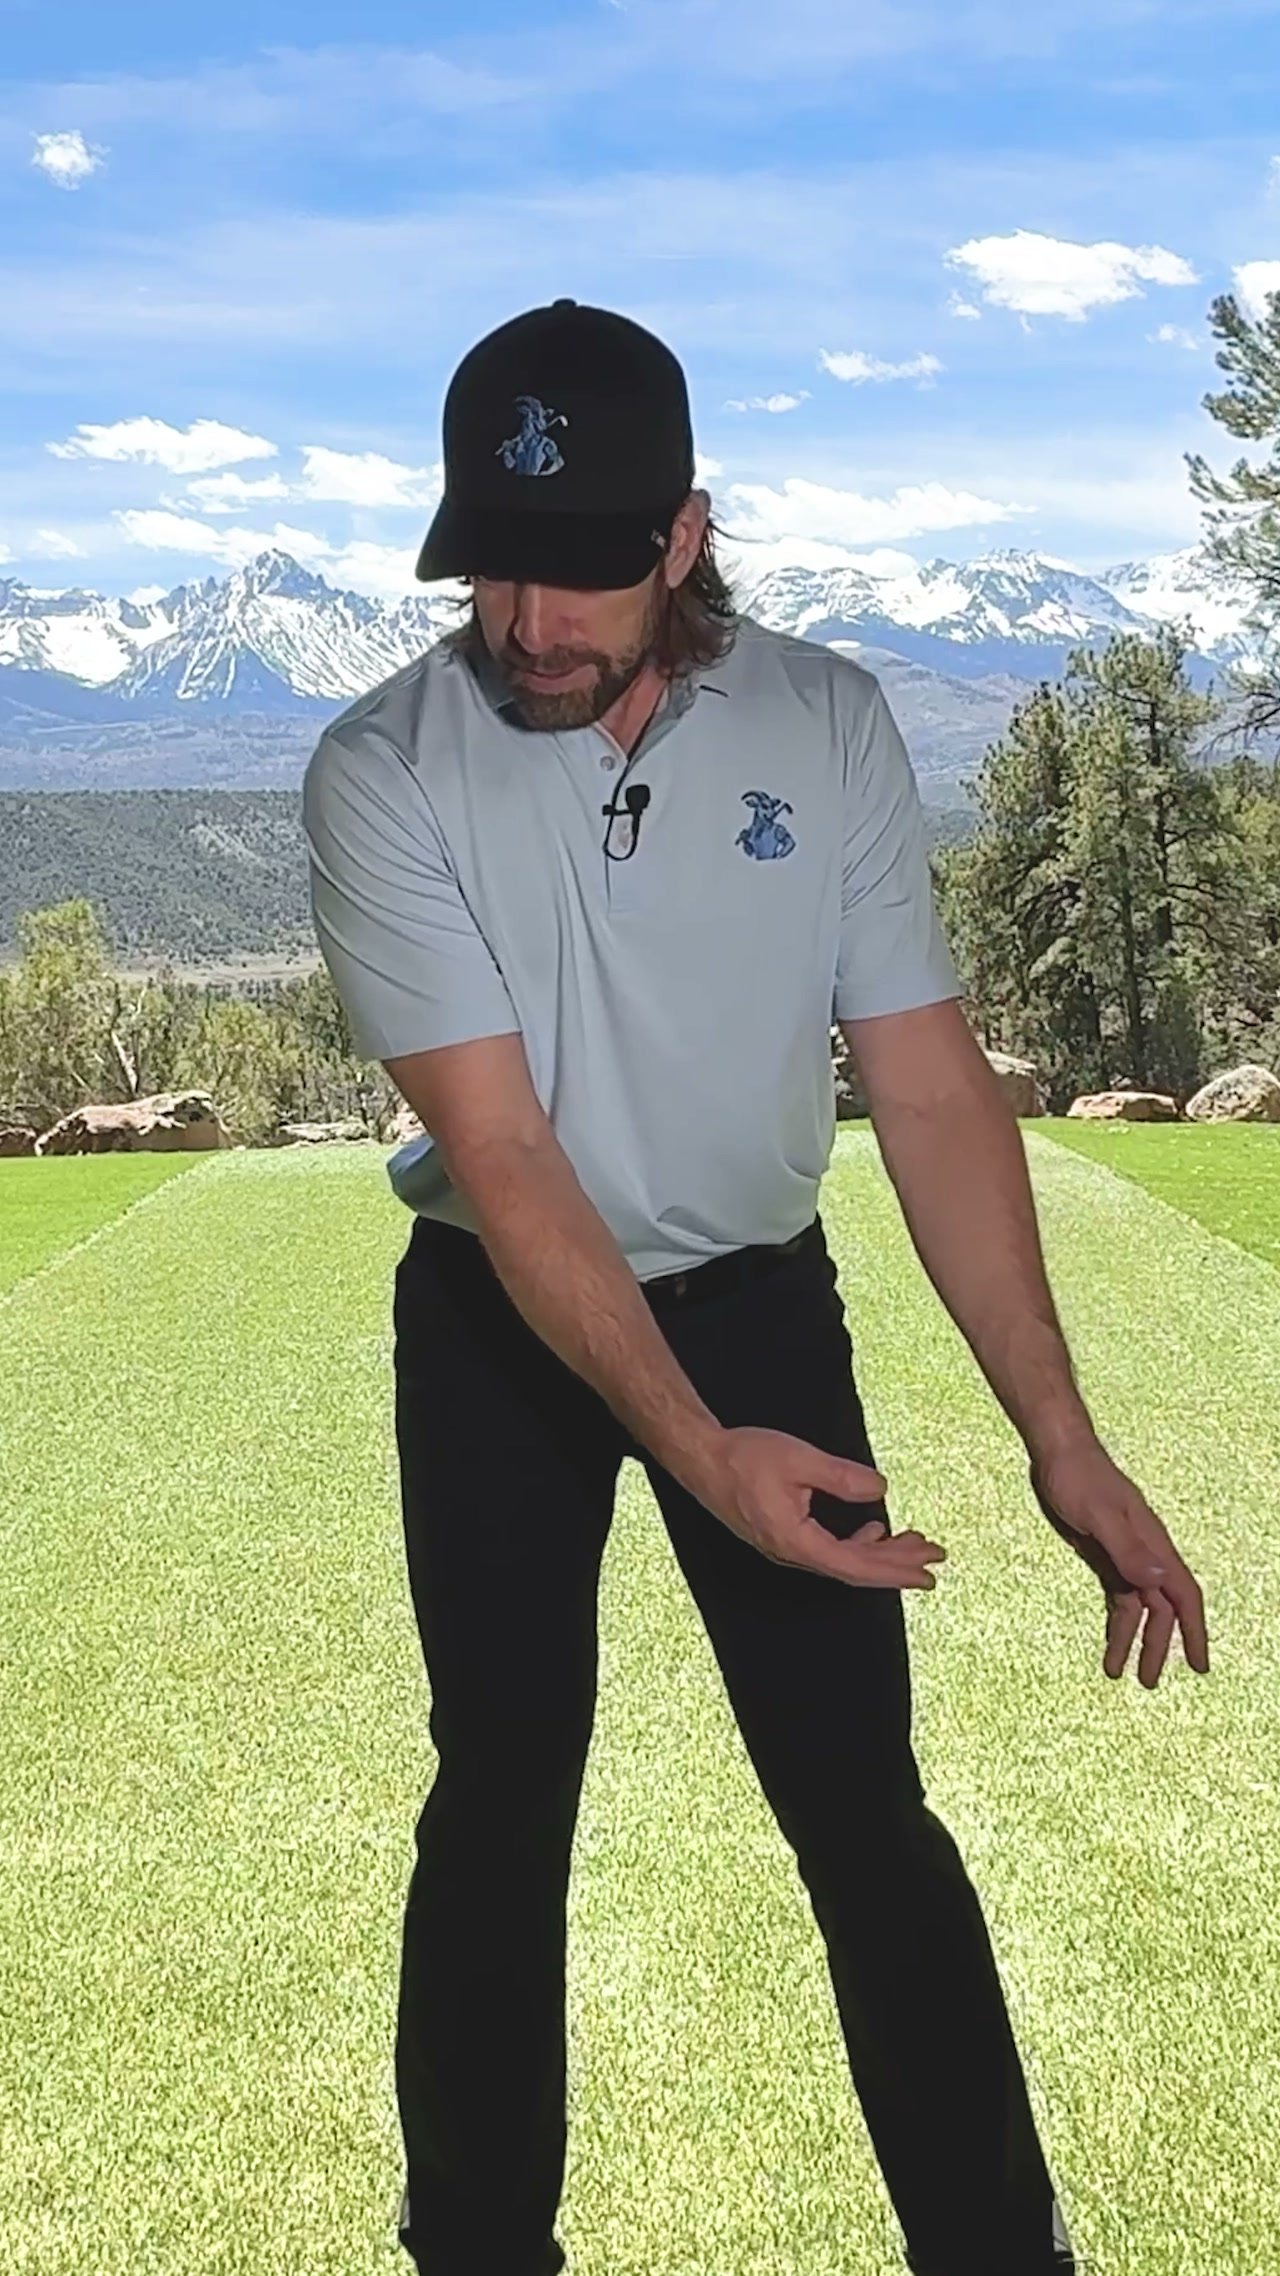
Hi guys, I'm Rotary Swing Instructor Chris Tyler and today we're going to get rid of that embarrassing problem once and for all, the shank.
I'm going to walk you guys through a three-step process on how you're going to get rid of the shanks once and for all and never deal with it again, never embarrass yourself, never embarrass your friends, and certainly never put yourself in danger.
Let's go ahead and get started.
All right, so if you've ever been plagued with the virus of the shanks, I'm going to go ahead and walk you through the first step of correcting it, and that's being able to understand what kind of shank you have.
Okay, and I've drawn three very critical lines on here for us, and I'm going to go through what these lines mean.
The first one being on the left-hand side of the screen here, this one going up from the hosel through the elbow is going to be a plane line here.
It's going to be an elbow plane.
The second line here is going to be called the knee line, and the third line is going to be called the tush line.
Okay, so I'm sure you've probably heard of the tush line and you've heard of the elbow plane line, but the knee line is going to be different here.
All right, so I've drawn both those lines on here for Chuck and our student that has a little problem with the shanks at this point that we're working on.
And I'm going to go ahead and work through into a position here where we're going to be able to identify what kind of shank you have.
All right, so let me back Chuck up just a little bit.
All right, so we're virtually in the same spot here as far as positions are concerned.
You're going to notice a couple of things here.
First thing I want you to notice is how low the club head is in relation to this plane line, where Chuck's club head is actually tracing perfectly down this plane line.
Okay, and this is a very common thing.
This is a shank from the inside.
This is a very common area for people that are known as hip spinners, people that like to spin the body wide open, and that makes the club come into the plane line shallow.
And now what's happened as well, the most important part, is that this right knee has broken through this line, which has caused his body to get closer to the golf ball.
The right side of his body is going to be closer, which means the hosel of the golf club is now working into that area where we can strike the golf ball.
Also take note that his tush has come off this line, which is another indicator that he's moved closer to the shot and thus leading the hosel in.
So you can see over here the difference is that Chuck has got his tush still up against this line, and his right knee has not broken through at all.
And if I were to go through another frame or two here, past impact, you can see that his right knee is well in front of this right knee line.
You can see how Chuck's knee has still stayed past, or stayed behind it, and his tush is still up on the line where his tush has come way off of it.
And this is going to be a shank all day.
So this is a shank from the inside.
Now, if you notice from the position, this position, that your club is on top of this line, then you're going to be an over-the-top shanker.
And that's why I want you guys to be able to understand.
There's two separate drills that I want you to understand that you can work on to correct these.
But you have to understand what kind of shanker you are at that point.
All right, so admitting that we have a problem is the first thing.
The step number one to the correction process is to evaluate it.
And then let's go ahead and head out to the range and get started by giving you some drills.
All right, so hang tight.
I'm going to show you a couple of really important drills that are going to help you get over this once and for all.
You can put those hard hats away and get out there and enjoy the game.
Okay, so now that we've looked at the first step on how to identify your particular style of shank, whether it be over-the-top or inside-the-line, I'm going to go ahead and give you step number two, which is going to pertain to both golfers.
And I think this is one of the most critical steps, and it's one of the most important videos on the site, and you're going to hear me say that a lot, that five minutes to a perfect release in the downswing section is going to teach you how to release the golf club properly.
Because both shanks, whether it be from over-the -top or whether it be from the inside, is going to have a hung-on-to release.
You're going to have the hosel of the golf club leading into the golf ball.
So you really want to go ahead and fine-tune your release.
That's going to be step number two.
I want you to spend as much time as possible working on that, and make sure you get yourself an impact bag.
And when you're working on the left hand only and hitting that bag, you want to make sure that your left wrist is good and flat, the club face is good and square, and you have a limited amount of tension within the forearm and the wrist.
Okay, you're going to be having a golf club in your left hand quite a bit throughout this correction process.
But that's step number two.
I want you to really pay close attention to five minutes to a perfect release.
Let's move on to step number three and get these things handled once and for all.
So we don't have to be an embarrassment on the golf course any longer.
Okay, here we are at step three, the correction process of getting rid of those shanks once and for all.
We're almost graduated.
We're almost putting those things to bed and never seeing them again.
Now let's go ahead and get you guys a couple of good, solid drills that are going to help you, give you some time to correct those paths that we talked about in that step one.
But make sure that you understand that there's a lot of information in five minutes to a perfect release.
That needs to be held on to as we're starting to fix these other problems.
Okay, so five minutes to a perfect release better be nailed down before we start working on these drills.
One of the things that is very common aside from the release is that the shoulders like to spin open into impact.
And they can cause a lot of the shanking problems as well.
So both styles of shank over the top and inside the line, make sure that your shoulders are nice and square at impact.
Now I'm going to go ahead and give you guys a drill for those inside the line shankers and I've gone ahead and set myself up here an alignment stick.
I'm going to have my toes right up on it and I've got myself an impact bag.
All right, so I'm going to go ahead and work this drill a bunch.
I'm going to load up to the top.
I'm going to shift left and then I'm going to hit the bag.
And I'm going to try to keep my knee from not moving in front of this line as we talked about in step one.
If you see that your knee is covering this line on the ground, then chances are you've spun yourself open and you've got that heel leading into the golf club again.
So now if you think about it this way, you're moving closer to the golf ball, the heel of the golf club is going to lead and that's the danger zone.
That's where you start to put that hard hat back on, everybody else four right.
Okay, so that's a great drill for you guys to try out.
I'm going to show you guys one more time.
Make sure that you stand right up on this line.
Okay, toes right up on it.
Load up to the top.
Shift left.
Hit the bag and make sure that knee does not go in front of the line.
All right, so now for the over-the-top shankers.
For you guys, we can do a very simple drill here.
What the objective is is that we're trying to get more of an inside-out path.
There's a great video on the website that Clay did called the Over-the -Top Stick Drill.
So you can use that video in conjunction with this drill.
This is going to help you work more of an inside-out path.
It's going to help you keep from spinning everything wide open, get that club throwing away from you, and have it being dead across the line in the Shankville, Indiana.
Okay, so when we go ahead and set up here, what do we want to do?
We want to keep everything regular as far as all of our RST fundamentals with setup and posture.
All right, so we're going to take our setup here.
Then what we're going to do is we're going to drop our right foot straight back.
And when I drop this right foot back, I'm trying to keep the same amount of width that I had in my normal stance width.
Okay, so just guesstimate.
You want to have that right foot back behind the left.
And you want to keep, this is the most important part of the drill, is that we want to keep both feet very flat on the ground.
Okay, if you notice that that right foot comes up, all right, when you get to the top and that right foot comes up, that's going to give you a chance to get everything spinning back open.
So your checkpoint is to keep both feet really flat on the ground, and you're going to just hit some shots.
Okay, so you can't shank it from that direction.
For those of you that want to try to put more power to this, you're going to run into the opportunity where you can push off that right side, and now we're back into that shank territory.
Okay, so now we've got a three-step process that's going to help you correct these shanks and put them to bed and never see them again.
Start out, make sure you evaluate your shanks, work on five minutes to perfect release, and then try these drills out, and never use, or never have a shank ever again, embarrass yourself, and make your friends put their hard hats back on.
Salut les gars, je suis l'instructeur de Rotary Swing Chris Tyler et aujourd'hui nous allons nous débarrasser une fois pour toutes de ce problème embarrassant, la tige.
Je vais vous guider à travers un processus en trois étapes sur la façon dont vous allez vous débarrasser des tiges une fois pour toutes et ne plus jamais y faire face, ne jamais vous embarrasser, ne jamais embarrasser vos amis et certainement ne jamais vous mettre en danger.
Allons-y et commençons.
Très bien, donc si vous avez déjà été en proie au virus des jarrets, je vais vous expliquer la première étape pour y remédier, à savoir comprendre quel type de jarret vous avez.
D'accord, j'ai tracé ici trois lignes très critiques pour nous, et je vais passer en revue ce que ces lignes signifient.
Le premier étant sur le côté gauche de l'écran ici, celui-ci allant du hosel à travers le coude va être une ligne plane ici.
Ce sera un rabot à coude.
La deuxième ligne ici sera appelée la ligne du genou, et la troisième ligne sera appelée la ligne des fesses.
D'accord, je suis sûr que vous avez probablement entendu parler de la ligne des fesses et de la ligne du plan du coude, mais la ligne du genou va être différente ici.
Très bien, j'ai donc dessiné ces deux lignes ici pour Chuck et notre étudiant qui a un petit problème avec les tiges à ce stade sur lequel nous travaillons.
Et je vais continuer et travailler jusqu'à une position ici où nous pourrons identifier quel type de tige vous avez.
Très bien, alors laissez-moi revenir un peu en arrière avec Chuck.
Très bien, nous sommes donc pratiquement au même endroit ici en ce qui concerne les positions.
Vous allez remarquer quelques choses ici.
La première chose que je veux que vous remarquiez est à quel point la tête du club est basse par rapport à cette ligne plane, là où la tête du club de Chuck suit en fait parfaitement cette ligne plane.
D’accord, et c’est une chose très courante.
C'est une tige vue de l'intérieur.
C'est une zone très courante pour les personnes connues sous le nom de hip spinners, des personnes qui aiment faire tourner le corps grand ouvert, ce qui fait que le club entre dans la ligne du plan peu profondément.
Et maintenant, ce qui s'est passé également, la partie la plus importante, c'est que ce genou droit a traversé cette ligne, ce qui a amené son corps à se rapprocher de la balle de golf.
Le côté droit de son corps va être plus proche, ce qui signifie que le hosel du club de golf travaille maintenant dans cette zone où nous pouvons frapper la balle de golf.
Notez également que son derrière est sorti de cette ligne, ce qui est un autre indicateur qu'il s'est rapproché du tir et qu'il a ainsi dirigé le hosel vers l'intérieur.
Vous pouvez donc voir ici que la différence est que Chuck a toujours ses fesses contre cette ligne, et son genou droit n'a pas du tout percé.
Et si je devais parcourir une ou deux autres images ici, après l'impact, vous pouvez voir que son genou droit est bien en avant de cette ligne du genou droit.
Vous pouvez voir comment le genou de Chuck est resté derrière, ou est resté derrière, et son derrière est toujours sur la ligne où son derrière s'est éloigné de lui.
Et ça va être une journée difficile.
Donc c'est une tige vue de l'intérieur.
Maintenant, si vous remarquez depuis cette position, cette position, que votre club est au-dessus de cette ligne, alors vous allez faire un shanker exagéré.
Et c'est pourquoi je veux que vous puissiez comprendre.
Il y a deux exercices distincts que je veux que vous compreniez et sur lesquels vous pouvez travailler pour corriger ces problèmes.
Mais vous devez comprendre quel genre de connard vous êtes à ce moment-là.
Très bien, donc admettre que nous avons un problème est la première chose à faire.
La première étape du processus de correction est de l’évaluer.
Et puis allons-y et dirigeons-nous vers le stand de tir et commençons par vous donner quelques exercices.
Très bien, alors accrochez-vous.
Je vais vous montrer quelques exercices vraiment importants qui vous aideront à surmonter cela une fois pour toutes.
Vous pouvez ranger vos casques et sortir pour profiter du jeu.
Ok, maintenant que nous avons examiné la première étape sur la façon d'identifier votre style particulier de tige, qu'il soit au-dessus ou à l'intérieur de la ligne, je vais continuer et vous donner l'étape numéro deux, qui va concerner les deux golfeurs.
Et je pense que c'est l'une des étapes les plus critiques, et c'est l'une des vidéos les plus importantes du site, et vous allez m'entendre le dire souvent, que cinq minutes pour une sortie parfaite dans la section downswing vont vous apprendre à libérer correctement le club de golf.
Parce que les deux tiges, qu'elles soient tirées par le haut ou par l'intérieur, auront une libération à laquelle il faudra s'accrocher.
Le hosel du club de golf va pénétrer dans la balle de golf.
Vous souhaitez donc vraiment aller de l’avant et peaufiner votre version.
Ce sera l’étape numéro deux.
Je veux que vous passiez autant de temps que possible à travailler là-dessus et que vous vous assuriez de vous procurer un sac d'impact.
Et lorsque vous travaillez uniquement sur la main gauche et que vous frappez ce sac, vous voulez vous assurer que votre poignet gauche est bien plat, que la face du club est bien carrée et que vous avez une tension limitée dans l'avant-bras et le poignet.
D'accord, vous allez avoir un club de golf dans votre main gauche pendant un certain temps tout au long de ce processus de correction.
Mais c’est l’étape numéro deux.
Je veux que vous fassiez très attention aux cinq minutes nécessaires à une libération parfaite.
Passons à l’étape numéro trois et réglons ces problèmes une fois pour toutes.
Nous n’avons donc plus à être une source d’embarras sur le terrain de golf.
Bon, nous voici à l’étape trois, le processus de correction pour se débarrasser de ces tiges une fois pour toutes.
Nous sommes presque diplômés.
Nous sommes sur le point de mettre ces choses au lit et de ne plus jamais les revoir.
Passons maintenant à quelques bons exercices solides qui vont vous aider et vous donner le temps de corriger les chemins dont nous avons parlé à la première étape.
Mais assurez-vous de comprendre qu'il y a beaucoup d'informations à fournir en cinq minutes pour une sortie parfaite.
Il faut s’en tenir à cela pendant que nous commençons à résoudre ces autres problèmes.
Bon, il vaut mieux que cinq minutes pour une sortie parfaite soient fixées avant de commencer à travailler sur ces exercices.
L’une des choses très courantes, en dehors de la libération, est que les épaules ont tendance à tourner vers l’impact.
Et ils peuvent également être à l’origine de nombreux problèmes de fracture.
Donc, les deux styles de tige sur le dessus et à l'intérieur de la ligne, assurez-vous que vos épaules sont bien carrées à l'impact.
Maintenant, je vais vous donner un exercice pour ceux qui sont à l'intérieur de la ligne et je suis allé de l'avant et je me suis installé ici un bâton d'alignement.
Je vais mettre mes orteils dessus et je me suis procuré un sac d'impact.
Très bien, je vais donc continuer et travailler sur cet exercice un tas de fois.
Je vais charger jusqu'en haut.
Je vais me déplacer vers la gauche et ensuite je vais frapper le sac.
Et je vais essayer d'empêcher mon genou de bouger devant cette ligne comme nous en avons parlé à la première étape.
Si vous voyez que votre genou recouvre cette ligne sur le sol, il y a de fortes chances que vous vous soyez ouvert et que votre talon soit à nouveau dirigé vers le club de golf.
Donc maintenant, si vous y pensez de cette façon, vous vous rapprochez de la balle de golf, le talon du club de golf va mener et c'est la zone de danger.
C'est là que vous commencez à remettre ce casque, tout le monde a raison.
Ok, c'est donc un excellent exercice à essayer.
Je vais vous le montrer encore une fois.
Assurez-vous de vous tenir droit sur cette ligne.
Ok, les orteils dessus.
Charger jusqu'en haut.
Décalage vers la gauche.
Frappez le sac et assurez-vous que le genou ne passe pas devant la ligne.
Très bien, passons maintenant aux plaisanteries exagérées.
Pour vous les gars, nous pouvons faire un exercice très simple ici.
L’objectif est d’essayer d’obtenir un cheminement plus orienté de l’intérieur vers l’extérieur.
Il y a une excellente vidéo sur le site Web que Clay a réalisée, intitulée Over-the-Top Stick Drill.
Vous pouvez donc utiliser cette vidéo en conjonction avec cet exercice.
Cela va vous aider à travailler davantage de l’intérieur vers l’extérieur.
Cela vous aidera à éviter de tout faire tourner à vide, à faire en sorte que ce club ne vous lance pas et à le faire mourir de l'autre côté de la ligne à Shankville, Indiana.
D'accord, alors quand nous allons de l'avant et que nous nous installons ici, que voulons-nous faire ?
Nous voulons que tout reste régulier en ce qui concerne tous nos fondamentaux RST avec la configuration et la posture.
Très bien, nous allons donc prendre notre configuration ici.
Ensuite, ce que nous allons faire, c'est que nous allons laisser tomber notre pied droit directement en arrière.
Et lorsque je laisse tomber ce pied droit en arrière, j'essaie de garder la même largeur que celle que j'avais dans ma position normale.
Ok, alors faites juste une estimation.
Vous voulez que ce pied droit soit derrière le gauche.
Et vous voulez garder, c'est la partie la plus importante de l'exercice, c'est que nous voulons garder les deux pieds bien à plat sur le sol.
D'accord, si vous remarquez que ce pied droit se lève, très bien, lorsque vous arrivez en haut et que ce pied droit se lève, cela va vous donner une chance de tout faire tourner à nouveau.
Votre point de contrôle est donc de garder les deux pieds à plat sur le sol et vous allez simplement frapper quelques coups.
D'accord, donc tu ne peux pas le faire dans cette direction.
Pour ceux d'entre vous qui veulent essayer de mettre plus de puissance là-dedans, vous allez rencontrer l'opportunité de pouvoir pousser sur ce côté droit, et maintenant nous revenons dans ce territoire de tige.
Bon, nous avons maintenant un processus en trois étapes qui va vous aider à corriger ces problèmes et à les mettre au lit pour ne plus jamais les revoir.
Commencez, assurez-vous d'évaluer vos tiges, travaillez cinq minutes pour une libération parfaite, puis essayez ces exercices et n'utilisez plus jamais, ou n'ayez plus jamais de tige, embarrassez-vous et faites en sorte que vos amis remettent leurs casques de sécurité.
Hola chicos, soy el instructor de Rotary Swing Chris Tyler y hoy vamos a deshacernos de ese vergonzoso problema de una vez por todas, el shank.
Voy a guiarlos a través de un proceso de tres pasos sobre cómo deshacerse de las shanks de una vez por todas y nunca volver a lidiar con eso, nunca avergonzarse a sí mismos, nunca avergonzar a sus amigos y, definitivamente, nunca ponerse en peligro.
Vamos adelante y comencemos.
Muy bien, entonces, si alguna vez te ha afectado el virus de las patas, voy a seguir adelante y te guiaré a través del primer paso para corregirlo, que es poder entender qué tipo de patas tienes.
Bien, he dibujado tres líneas muy críticas aquí para nosotros y voy a repasar lo que significan estas líneas.
El primero que está en el lado izquierdo de la pantalla aquí, este que sube desde el casquillo a través del codo va a ser una línea plana aquí.
Va a ser un avión de codo.
La segunda línea aquí se llamará la línea de la rodilla, y la tercera línea se llamará la línea del trasero.
Bien, estoy seguro de que probablemente hayas oído hablar de la línea del trasero y de la línea del plano del codo, pero la línea de la rodilla será diferente aquí.
Muy bien, entonces he dibujado ambas líneas aquí para Chuck y nuestro estudiante que tiene un pequeño problema con las patas en este punto en el que estamos trabajando.
Y voy a seguir adelante y trabajar hasta llegar a una posición aquí en la que podremos identificar qué tipo de vástago tienes.
Está bien, déjame retroceder un poco con Chuck.
Muy bien, entonces estamos prácticamente en la misma situación en lo que se refiere a posiciones.
Notarás un par de cosas aquí.
Lo primero que quiero que notes es cuán baja está la cabeza del palo en relación con esta línea del plano, donde la cabeza del palo de Chuck en realidad sigue perfectamente esta línea del plano.
Bueno, y esto es algo muy común.
Esta es una caña desde el interior.
Esta es un área muy común para las personas conocidas como hip spinners, personas a quienes les gusta girar el cuerpo completamente abierto, y eso hace que el palo llegue a la línea del plano poco profundo.
Y ahora lo que ha ocurrido también, lo más importante, es que esta rodilla derecha ha roto esta línea, lo que ha provocado que su cuerpo se acerque más a la pelota de golf.
El lado derecho de su cuerpo va a estar más cerca, lo que significa que el cuello del palo de golf ahora está trabajando en esa zona donde podemos golpear la pelota de golf.
También tome nota de que su trasero se ha salido de esta línea, lo que es otro indicador de que se ha acercado al tiro y, por lo tanto, está llevando el hosel hacia adentro.
Entonces, como pueden ver aquí, la diferencia es que Chuck todavía tiene su trasero contra esta línea y su rodilla derecha no ha logrado atravesarla en absoluto.
Y si vuelvo a ver uno o dos cuadros más aquí, después del impacto, se puede ver que su rodilla derecha está muy por delante de esta línea de la rodilla derecha.
Se puede ver cómo la rodilla de Chuck todavía se mantiene más allá, o se mantiene detrás de ella, y su trasero todavía está en la línea donde se ha separado mucho de ella.
Y esto va a ser un caos todo el día.
Así que esto es un vástago desde el interior.
Ahora, si notas desde la posición, esta posición, que tu palo está encima de esta línea, entonces vas a ser un golpeador exagerado.
Y por eso quiero que vosotros seáis capaces de entender.
Hay dos ejercicios separados que quiero que entiendas y que puedes realizar para corregir esto.
Pero tienes que entender qué tipo de chapucero eres en ese momento.
Muy bien, admitir que tenemos un problema es lo primero.
El paso número uno en el proceso de corrección es evaluarlo.
Y luego sigamos adelante y vayamos al campo de tiro y comencemos dándoles algunos ejercicios.
Está bien, entonces aguanta un poco.
Voy a mostrarte un par de ejercicios muy importantes que te ayudarán a superar esto de una vez por todas.
Puedes guardar esos cascos y salir a disfrutar del juego.
Bien, ahora que hemos visto el primer paso sobre cómo identificar su estilo particular de shank, ya sea por encima o por dentro de la línea, voy a seguir adelante y darle el paso número dos, que se aplicará a ambos golfistas.
Y creo que este es uno de los pasos más críticos, y es uno de los videos más importantes del sitio, y me escucharás decirlo mucho, que cinco minutos para una liberación perfecta en la sección de downswing te enseñarán cómo liberar el palo de golf correctamente.
Porque ambas cañas, ya sea desde arriba o desde adentro, van a tener una liberación aferrada.
Vas a tener la boquilla del palo de golf apuntando hacia la pelota de golf.
Entonces, realmente quieres seguir adelante y afinar tu lanzamiento.
Ése será el paso número dos.
Quiero que dediques el mayor tiempo posible a trabajar en ello y te asegures de conseguir una bolsa de impacto.
Y cuando trabajas solo con la mano izquierda y golpeas esa bolsa, debes asegurarte de que tu muñeca izquierda esté bien plana, la cara del palo esté bien cuadrada y tengas una cantidad limitada de tensión en el antebrazo y la muñeca.
Bien, vas a tener un palo de golf en tu mano izquierda durante bastante tiempo durante este proceso de corrección.
Pero ese es el paso número dos.
Quiero que prestes muchísima atención a los cinco minutos para un lanzamiento perfecto.
Pasemos al paso número tres y solucionemos estos problemas de una vez por todas.
Así que ya no tenemos que ser una vergüenza en el campo de golf.
Bien, aquí estamos en el paso tres, el proceso de corrección para deshacernos de esas patas de una vez por todas.
Ya casi nos graduamos.
Estamos prácticamente dejando esas cosas de lado y no volviéndolas a ver nunca más.
Ahora sigamos adelante y consigamos un par de buenos y sólidos ejercicios que los ayudarán y les darán algo de tiempo para corregir esos caminos de los que hablamos en el paso uno.
Pero asegúrese de comprender que hay mucha información en cinco minutos para un lanzamiento perfecto.
Es algo que tenemos que mantener mientras empezamos a solucionar estos otros problemas.
Bien, entonces es mejor tener claros los cinco minutos para un lanzamiento perfecto antes de comenzar a trabajar en estos ejercicios.
Una de las cosas que es muy común aparte de la liberación es que los hombros tienden a abrirse en el impacto.
Y también pueden causar muchos problemas de shanking.
Por lo tanto, con ambos estilos de shank, tanto en la parte superior como dentro de la línea, asegúrese de que sus hombros estén bien alineados y en escuadra en el momento del impacto.
Ahora voy a seguir adelante y darles un ejercicio para aquellos que están dentro de los vástagos de línea y seguí adelante y coloqué aquí un palo de alineación.
Voy a poner mis dedos de los pies sobre él y tengo una bolsa de impacto.
Muy bien, entonces voy a seguir adelante y practicar este ejercicio un poco.
Voy a cargar hasta arriba.
Voy a desplazarme hacia la izquierda y luego voy a golpear la bolsa.
Y voy a intentar mantener mi rodilla sin moverse delante de esta línea como hablamos en el paso uno.
Si ves que tu rodilla cubre esta línea en el suelo, entonces es probable que te hayas abierto y que tu talón esté apuntando nuevamente hacia el palo de golf.
Ahora bien, si lo piensas de esta manera, te estás acercando a la pelota de golf, el talón del palo de golf se dirigirá hacia adelante y esa es la zona de peligro.
Ahí es donde empiezas a ponerte el casco de nuevo, todos los demás cuatro, ¿verdad?
Bien, este es un gran ejercicio para que ustedes prueben.
Os lo voy a mostrar una vez más.
Asegúrate de permanecer de pie sobre esta línea.
Está bien, con los dedos de los pies bien arriba.
Cargar hasta arriba.
Desplazarse a la izquierda.
Golpea la bolsa y asegúrate de que la rodilla no quede delante de la línea.
Muy bien, ahora vamos con los trucos más exagerados.
Para ustedes, podemos hacer un ejercicio muy simple aquí.
El objetivo es intentar conseguir un recorrido más de adentro hacia afuera.
Hay un gran video en el sitio web que hizo Clay llamado Over-the-Top Stick Drill.
Así que puedes usar ese vídeo junto con este ejercicio.
Esto te ayudará a trabajar más bien desde adentro hacia afuera.
Te ayudará a evitar que todo gire demasiado, evitar que el palo se aleje de ti y llegar justo al otro lado de la línea en Shankville, Indiana.
Bien, entonces cuando procedemos a instalarnos aquí, ¿qué queremos hacer?
Queremos mantener todo regular en cuanto a todos nuestros fundamentos de RST con configuración y postura.
Muy bien, entonces vamos a tomar nuestra configuración aquí.
Luego lo que vamos a hacer es dejar caer nuestro pie derecho hacia atrás.
Y cuando bajo este pie derecho hacia atrás, trato de mantener la misma cantidad de ancho que tenía en mi postura normal.
Bueno, solo es una estimación.
Quieres tener ese pie derecho detrás del izquierdo.
Y lo que queremos mantener, esta es la parte más importante del ejercicio, es que queremos mantener ambos pies muy planos sobre el suelo.
Bien, si notas que ese pie derecho sube, muy bien, cuando llegues a la cima y ese pie derecho suba, eso te dará la oportunidad de hacer que todo vuelva a girar y se abra.
Entonces, tu punto de control es mantener ambos pies bien planos sobre el suelo y vas a realizar algunos tiros.
Bueno, entonces no puedes golpearlo desde esa dirección.
Para aquellos de ustedes que quieran intentar ponerle más potencia a esto, se encontrarán con la oportunidad de empujar desde ese lado derecho, y ahora volvemos a ese territorio de la caña.
Bien, ahora tenemos un proceso de tres pasos que te ayudará a corregir estos problemas, dejarlos atrás y no volver a verlos nunca más.
Para empezar, asegúrate de evaluar tus piernas, trabaja durante cinco minutos para lograr una liberación perfecta y luego prueba estos ejercicios, y nunca uses ni vuelvas a tener una pierna rota nunca más, avergüénzate y haz que tus amigos vuelvan a ponerse los cascos.
Hallo Leute, ich bin Rotary Swing-Trainer Chris Tyler und heute werden wir dieses peinliche Problem ein für alle Mal loswerden: den Shank.
Ich werde euch durch einen dreistufigen Prozess führen, der euch zeigt, wie ihr die Stäbe ein für alle Mal loswerdet und nie wieder damit zu tun habt, euch nie wieder blamiert, eure Freunde nie wieder blamiert und euch ganz sicher nie wieder in Gefahr bringt.
Lassen Sie uns loslegen.
Also gut, wenn Sie schon einmal unter dem Virus der Schenkel gelitten haben, werde ich Sie durch den ersten Schritt der Korrektur führen, und zwar herauszufinden, welche Art von Schenkel Sie haben.
Okay, und ich habe hier drei sehr wichtige Linien für uns eingezeichnet, und ich werde durchgehen, was diese Linien bedeuten.
Die erste ist hier auf der linken Seite des Bildschirms, diese hier, die vom Hosel durch den Ellbogen nach oben geht, wird hier eine ebene Linie sein.
Es wird ein Winkelhobel.
Die zweite Linie hier wird Knielinie genannt und die dritte Linie wird Po-Linie genannt.
Okay, ich bin sicher, Sie haben wahrscheinlich schon von der Po-Linie und der Ellbogen-Ebene-Linie gehört, aber die Knielinie wird hier anders sein.
Also gut, ich habe diese beiden Linien hier für Chuck und unseren Schüler gezeichnet, der an der Stelle, an der wir arbeiten, ein kleines Problem mit den Schäften hat.
Und ich werde jetzt weitermachen und mich bis zu einer Stelle vorarbeiten, an der wir feststellen können, welche Art von Schaft Sie haben.
Also gut, lassen Sie mich Chuck ein wenig unterstützen.
Also gut, was die Positionen betrifft, sind wir hier praktisch an der gleichen Stelle.
Ihnen werden hier ein paar Dinge auffallen.
Als Erstes möchte ich, dass Sie bemerken, wie niedrig der Schlägerkopf im Verhältnis zu dieser ebenen Linie ist, wobei Chucks Schlägerkopf tatsächlich perfekt dieser ebenen Linie folgt.
Okay, und das kommt ganz häufig vor.
Dies ist ein Schaft von innen.
Dies ist ein sehr häufiger Bereich für Leute, die als Hüftspinner bekannt sind, Leute, die den Körper gerne weit aufreißen, und das führt dazu, dass der Schläger flach in die Plane-Linie kommt.
Und was jetzt noch passiert ist, und das Wichtigste ist, dass sein rechtes Knie diese Linie durchbrochen hat, wodurch sein Körper näher an den Golfball gekommen ist.
Die rechte Seite seines Körpers wird näher sein, was bedeutet, dass der Hosel des Golfschlägers jetzt in den Bereich hineinarbeitet, in dem wir den Golfball schlagen können.
Beachten Sie auch, dass sein Hintern von dieser Linie abgekommen ist, was ein weiterer Hinweis darauf ist, dass er sich näher an den Schlag bewegt hat und somit den Hosel hineinführt.
Sie können hier also den Unterschied sehen, dass Chucks Hintern immer noch an dieser Linie anliegt und sein rechtes Knie überhaupt nicht durchgebrochen ist.
Und wenn ich hier noch ein oder zwei Bilder nach dem Aufprall durchgehen würde, könnten Sie sehen, dass sein rechtes Knie weit vor dieser rechten Knielinie liegt.
Sie können sehen, dass Chucks Knie immer noch darüber oder dahinter geblieben ist und sein Hintern immer noch oben auf der Linie ist, wo sein Hintern weit davon abgekommen ist.
Und das wird den ganzen Tag ein Scherz sein.
Das ist also ein Schaft von innen.
Wenn Sie nun von dieser Position aus feststellen, dass Ihr Schläger über dieser Linie liegt, dann werden Sie ein übertriebener Shanker sein.
Und deshalb möchte ich, dass ihr das verstehen könnt.
Ich möchte Ihnen zwei verschiedene Übungen erklären, mit denen Sie diese Probleme beheben können.
Aber Sie müssen verstehen, was für ein Schwindlertyp Sie zu diesem Zeitpunkt sind.
Also gut, das Erste ist, zuzugeben, dass wir ein Problem haben.
Der erste Schritt im Korrekturprozess besteht darin, ihn auszuwerten.
Und dann gehen wir zum Schießplatz und beginnen mit ein paar Übungen.
Also gut, bleiben Sie dran.
Ich werde Ihnen ein paar wirklich wichtige Übungen zeigen, die Ihnen helfen werden, dies ein für alle Mal zu überwinden.
Sie können Ihre Schutzhelme weglegen, rausgehen und das Spiel genießen.
Okay, nachdem wir uns nun den ersten Schritt angesehen haben, wie Sie Ihren speziellen Shank-Stil identifizieren, sei es Over-the-Top oder Inside-the-Line, werde ich nun mit Schritt Nummer zwei fortfahren, der für beide Golfer gilt.
Und ich glaube, das ist einer der wichtigsten Schritte, und es ist eines der wichtigsten Videos auf der Site, und Sie werden mich das noch oft sagen hören: In fünf Minuten bis zum perfekten Abschlag im Abschwungabschnitt lernen Sie, wie Sie den Golfschläger richtig loslassen.
Denn beide Schäfte, ob von oben oder von innen, werden einen hängenden Auslöser haben.
Der Hosel des Golfschlägers führt zum Golfball.
Sie möchten also wirklich weitermachen und Ihre Veröffentlichung optimieren.
Das wird Schritt Nummer zwei sein.
Ich möchte, dass Sie so viel Zeit wie möglich darauf verwenden und sich unbedingt einen Impact Bag zulegen.
Und wenn Sie nur an der linken Hand arbeiten und auf den Sack schlagen, müssen Sie darauf achten, dass Ihr linkes Handgelenk gut und flach ist, die Schlagfläche gut und rechtwinklig ist und die Spannung im Unterarm und Handgelenk gering ist.
Okay, Sie werden während des gesamten Korrekturvorgangs ziemlich oft einen Golfschläger in Ihrer linken Hand haben.
Aber das ist Schritt Nummer zwei.
Ich möchte, dass Sie den fünf Minuten bis zur perfekten Veröffentlichung wirklich große Aufmerksamkeit schenken.
Fahren wir mit Schritt Nummer drei fort und erledigen diese Dinge ein für alle Mal.
Wir müssen auf dem Golfplatz also nicht länger peinlich sein.
Okay, hier sind wir bei Schritt drei, dem Korrekturprozess, um diese Schäfte ein für alle Mal loszuwerden.
Wir haben unseren Abschluss fast geschafft.
Wir sind fast dabei, diese Dinge zu Bett zu bringen und sie nie wiederzusehen.
Lassen Sie uns nun ein paar gute, solide Übungen für Sie durchgehen, die Ihnen dabei helfen und Ihnen etwas Zeit geben werden, die Pfade zu korrigieren, über die wir in Schritt eins gesprochen haben.
Stellen Sie jedoch sicher, dass Sie verstehen, dass in fünf Minuten eine Menge Informationen für eine perfekte Veröffentlichung enthalten sind.
Daran müssen wir festhalten, während wir beginnen, diese anderen Probleme zu beheben.
Okay, also sollten die fünf Minuten bis zur perfekten Freigabe besser feststehen, bevor wir mit diesen Übungen beginnen.
Eines der Dinge, die neben der Freigabe sehr häufig vorkommen, ist, dass sich die Schultern beim Aufprall gerne öffnen.
Und sie können auch viele Probleme mit dem Schaft verursachen.
Achten Sie bei beiden Schaftarten über der Oberseite und innerhalb der Linie darauf, dass Ihre Schultern beim Aufprall schön gerade sind.
Jetzt werde ich mit euch eine Übung für die Shanker innerhalb der Linie machen und ich habe mir hier einen Ausrichtungsstab aufgestellt.
Ich werde mit den Zehen ganz oben dabei sein und habe mir einen Impact Bag besorgt.
Also gut, ich werde jetzt weitermachen und diese Übung ein paar Mal machen.
Ich werde bis ganz nach oben laden.
Ich werde nach links gehen und dann auf den Sack schlagen.
Und ich werde versuchen, mein Knie davon abzuhalten, sich vor dieser Linie zu bewegen, wie wir in Schritt eins besprochen haben.
Wenn Sie sehen, dass Ihr Knie diese Linie auf dem Boden bedeckt, besteht die Möglichkeit, dass Sie sich aufgedreht haben und die Ferse wieder in Richtung des Golfschlägers zeigt.
Wenn Sie es sich so vorstellen: Sie bewegen sich näher an den Golfball heran, die Ferse des Golfschlägers führt und das ist die Gefahrenzone.
Da fängt man an, den Schutzhelm wieder aufzusetzen, alle anderen auch, richtig.
Okay, das ist eine tolle Übung, die ihr ausprobieren könnt.
Ich werde es euch noch einmal zeigen.
Stellen Sie sicher, dass Sie genau auf dieser Linie stehen.
Okay, die Zehen sind direkt drauf.
Bis ganz nach oben laden.
Nach links verschieben.
Schlagen Sie auf den Sack und achten Sie darauf, dass Ihr Knie nicht vor die Linie gerät.
Also gut, jetzt zu den übertriebenen Shankern.
Für euch können wir hier eine ganz einfache Übung machen.
Unser Ziel besteht darin, einen Weg zu finden, der mehr von innen nach außen geht.
Auf der Website von Clay gibt es ein tolles Video mit dem Titel „Over-the-Top Stick Drill“.
Sie können dieses Video also in Verbindung mit dieser Übung verwenden.
Dies wird Ihnen dabei helfen, eher von innen nach außen zu arbeiten.
Es wird Ihnen dabei helfen, zu verhindern, dass alles völlig aufgeht, den Schläger von sich wegzuwerfen und ihn direkt über die Ziellinie in Shankville, Indiana zu bringen.
Okay, also, was wollen wir tun, wenn wir hier weitermachen und uns einrichten?
Wir möchten alles regelmäßig halten, was unsere RST-Grundlagen hinsichtlich Setup und Haltung betrifft.
Also gut, wir nehmen unser Setup hier.
Dann lassen wir unseren rechten Fuß gerade nach hinten fallen.
Und wenn ich den rechten Fuß nach hinten setze, versuche ich, die gleiche Breite beizubehalten, die ich bei meiner normalen Standbreite hatte.
Okay, also nur eine Schätzung.
Sie möchten, dass der rechte Fuß hinter dem linken steht.
Und Sie möchten – und das ist der wichtigste Teil der Übung – beide Füße ganz flach auf dem Boden halten.
Okay, wenn Sie bemerken, dass der rechte Fuß hochkommt, also, wenn Sie oben ankommen und der rechte Fuß hochkommt, dann haben Sie die Chance, alles wieder in Gang zu bringen.
Ihr Kontrollpunkt besteht also darin, beide Füße wirklich flach auf dem Boden zu halten und einfach ein paar Schläge auszuführen.
Okay, aus dieser Richtung können Sie es also nicht vermasseln.
Diejenigen unter Ihnen, die versuchen möchten, mehr Kraft einzusetzen, werden die Möglichkeit haben, sich von der rechten Seite abzustoßen, und jetzt sind wir wieder im Schaftbereich.
Okay, wir haben jetzt einen dreistufigen Prozess, der Ihnen dabei helfen wird, diese Schäfte zu korrigieren, sie zu beseitigen und sie nie wieder zu sehen.
Beginnen Sie damit, Ihre Shanks zu bewerten, arbeiten Sie fünf Minuten lang an der perfekten Freigabe und probieren Sie dann diese Übungen aus. Verwenden oder haben Sie nie wieder einen Shank, blamieren Sie sich und sorgen Sie dafür, dass Ihre Freunde ihre Schutzhelme wieder aufsetzen.


Paul
Craig (Certified RST Instructor)
Ryan
Craig (Certified RST Instructor)
TOM
Craig (Certified RST Instructor)
TOM
Craig (Certified RST Instructor)
TOM
Craig (Certified RST Instructor)
Matt
Craig (Certified RST Instructor)
Mickey
Mikko-Pekka
sjahari
Colin
Craig (Certified RST Instructor)
Colin
Craig (Certified RST Instructor)
marshall
Craig (Certified RST Instructor)
Konstantin
Craig (Certified RST Instructor)
Benjamin
Craig (Certified RST Instructor)
Benjamin
Chris (Certified RST Instructor)
James
Craig (Certified RST Instructor)
Michael
Craig (Certified RST Instructor)
Lisa
Chris (Certified RST Instructor)
Lisa
Craig (Certified RST Instructor)
Craig (Certified RST Instructor)
Craig (Certified RST Instructor)
Ernie
Craig (Certified RST Instructor)
Steven
Craig (Certified RST Instructor)
Steven
Steven
Craig (Certified RST Instructor)
Donald G
Craig (Certified RST Instructor)
Peter
Craig (Certified RST Instructor)
James
Craig (Certified RST Instructor)
will
Craig (Certified RST Instructor)
Eugene
Chris (Certified RST Instructor)
Geoff
Chris (Certified RST Instructor)
William
Chris (Certified RST Instructor)
Luc
Chris (Certified RST Instructor)