My Favorite Videos
Golf Grip Checkpoint Tips
Sorry, you need to be a member to access this video.
You Are Just Seconds Away - Become a member here!
Already a member? Log in now

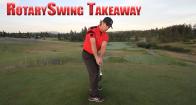
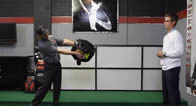
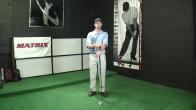
For years, golf instructors have put band-aids on your golf grip and your golf swing by making nonsense golf grip changes. In this video, RotarySwing.com head instructor Chris Tyler will show you a simple process to gripping the golf club perfectly every single time. No more golf fixes that are only bandaids!
So, one of the most common mistakes in golf instruction these days is the band -aid fix of changing your grip.
So if you've battled a slice or a hook, the first thing that golf instructors tend to turn to is what you're doing with your grip.
Well, Did you know that that grip change could essentially be costing you tons of club head speed and making it nearly impossible for you to square the club face up at impact? Yeah, that's right.
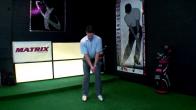
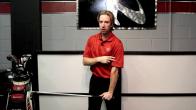
Hi guys, I'm Rotary Swing Instructor Chris Tyler, and in today's video, We're going to be talking about a detailed list of checkpoints to get you a good, solid foundation and a good grip to start from.
So that you're not costing yourself any more speed and putting band -aids on your swing any longer.
Let's go ahead and get started.
Okay guys, So, the objective of today's video is not to really spend a lot of time going into the sciences behind how your grip can affect your release, or how it can affect your swing plane.
We've got a couple videos on the website that can help you out that really dive further into the sciences behind that.
The goal of today's video is to look at this and give you a couple of clear checkpoints of how you're going to approach your grip and make sure that you're not affecting your golf swing.
So let's go ahead and take a look at checkpoint number one.
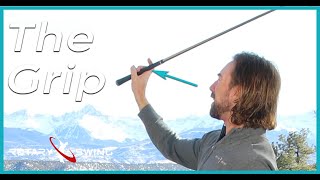
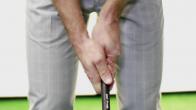
Okay gang, So the first checkpoint I want to show you today is how we're going to have the club resting in our left hand or lead hand if you're a right-handed player.
Okay, So the point of this is where we want to make sure that the grip of the club is resting right at the base of the fingers.
Okay, not up all the way in the fingers, not down here in the palm, right across the base of the fingers.
That's our first checkpoint here and then we're going to let our fingers wrap around it.
Now what I want you to pay close attention to, and this is where we talk about a short thumb, is we want to have our thumb and our pointer finger pinching together.
Not tight, okay, but you want to make sure that when you grab the club that you make this V and it's put together.
If your thumb's over here on this side, you're going to potentially lose control of the golf club at the top of the swing.
So checkpoint number one is get the golf club to be right at the base of the fingers.
Then go ahead and wrap your hand over the top, just like so, and have this thumb and your pointer finger pinch together just slightly.
Okay, so now that you've seen checkpoint number one, Let's look at checkpoint number two.
And this is going to help you with how strong or weak of a grip that you should be having anatomically in your golf swing.
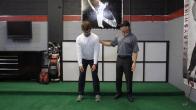
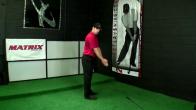
So what I want you to do is I want you to go ahead and take your setup position, no golf club in your hand.
You can rest it against your right thigh here.
I want you to get in a good neutral posture here with your shoulders.
Don't let your shoulders round forward here.
Get your shoulders to where they're, in nice, neutral posture.
And what your goal here is is that we're going to slowly and we're going to keep that pointer finger and our thumb pinch together.
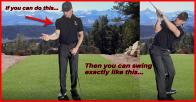
We're going to slowly move our arm across to our center.
So our left arm is right underneath the logo on my chest.
Okay, so I'm going to slowly let it swing underneath.
Okay, my shoulder stays neutral.
It doesn't round forward to where my palms now facing in.
Okay, so you can see here now my left arm is moved across.
Now, what I want you to do at this point is go back to checkpoint number one and go ahead and let the club get right into that hand the same way.
And what your goal here is is without having to look and go see it, or change or manipulate your hand position, I want you to be able to see about two to two and a half knuckles.
That's a good focus point for you.
So two, two and a half knuckles, that's what I can see here without having to change.
Okay, so that would be checkpoint number two.
Now we're going to learn how to get the right hand back on the club.
Okay, so now let's talk about how to get that right hand on the golf club.
And now this is where golf instruction tends to go back and forth on things as far as should we interlock or should we overlap.
And there's no real data that supports either one being better than the other.
I personally use an interlock grip.
And the reason for that is because I feel like I've got more control of the golf club.
Because I've got a little bit shorter fingers, I've got a little bit more of a fat, fat palm and it allows me to feel like I've got control of things.
I did try the overlap grip again, It felt like I didn't have as much control of the face.
And that's really the most important part of golf is.
Making sure that you can control that thing down in the hitting area and release it with tons of speed at the same time.
So I'm going to show you guys the interlock grip first.
Okay, So the first thing that we want to do when working on an interlock grip is we're going to go ahead and get the club in our left hand again, just as the way we did in checkpoint number one.
Okay, make sure your thumb and your pointer finger are pinched together just slightly, okay, not tons of tension there.
Remember we want our grip pressure to be between like a two and four on a scale of one to ten.
What we're going to do here now is we're going to lift the club straight up in the air.
And we're going to point our pointer finger back at you at home here.
Okay, And now, with my right hand, what I want to do is almost make one of those little shadow puppets that we used to do as kids back in the day.
So you can see I'm making that little shadow puppet dog.
I'm going to have my pinky down here.
And then what I'm going to do is bring my thumb down into that same position that I showed you with the left hand.
And our goal here is, as we start to move the right hand in, we're going to interlock these two fingers and the.
And you're going to hold the golf club right at that same point, right at the base of the fingers, where it meets your palm.
And then you're going to go ahead and wrap your fingers around it and then place your hand right on top of the club.
So you can see that club moves in fingers around it, and now I've got my pointer, pointer finger and my thumb close together.
Okay, so that is the interlock grip.
Now, your final checkpoint here to make sure you're in a good position is that.
This V right here should be right up at your right ear, and this V right here should be bisecting your right shoulder.
So now if you watch going back to checkpoint number two when I move my left hand across now, I'm going to move my right hand in same way, and you can see that.
I've got that V right up my right shoulder, and this V is right up at my right ear.
Okay, so those of you that feel comfortable with an overlap grip, It's going to be done the exact same way, except for instead of making that little pointer gun here back at you at home, We're going to keep that finger right on the golf club, still maintaining that little pinch between the thumb and the in the pointer finger here.
And we're going to make that same shadow puppet here.
Okay, thumb down and rather than locking these two fingers together, we're going to take our pinky and overlap it between the pointer finger and the middle finger.
Okay, and then we're going to make sure it's resting in the same spot right at the base of the fingers.
Go ahead and set the club down.
And your same checkpoints here are the V right up at your right shoulder in the right hand, and your V in your left hand is right up at your right ear.
Okay guys, so now that you've seen the checkpoints, Let's recap this real quick, so that you have a good, clear understanding on how you're going to do this at home.
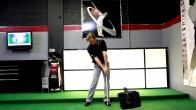
So what I want you to do is go ahead and get your setup position here and rest the golf club across your right leg, good neutral posture.
I want you to slowly bring your arm under into center, here, to where it's underneath your logo on your chest, pointer finger and thumb are pinched together.
We're going to go ahead and get the club in our left hand, just like we talked about in checkpoint number two.
Okay, I can see two two and a half knuckles without having to go over there and look at it.
I'm going to reach across now with the right hand, interlock grip and now my V in my right hand is up towards my right shoulder, my V in my left hand is up towards my right ear.
Okay, So, use these checkpoints to make sure that your grip's in a very good spot to start your golf swing off.
You don't need to start to strengthen your grip, you don't need to weaken your grip based off a hook or a slice.
There are probably other contributing factors to your hook or slice that, such as path or club face.
And those things need to be addressed with other fixes of the golf swing.
So let's get out there and play some great golf.





























































































































David
Craig (Certified RST Instructor)
Nigel
Craig (Certified RST Instructor)
Robert
Craig (Certified RST Instructor)
Eric
Craig (Certified RST Instructor)
Lee
Craig (Certified RST Instructor)
Gary C
Craig (Certified RST Instructor)
Matthew
Craig (Certified RST Instructor)
Roy
Craig (Certified RST Instructor)
William
Craig (Certified RST Instructor)
Pat
Craig (Certified RST Instructor)
Ron
Craig (Certified RST Instructor)
Harold
Craig (Certified RST Instructor)
Harold
Craig (Certified RST Instructor)
Harold
Craig (Certified RST Instructor)
John
Craig (Certified RST Instructor)
Theunie
Craig (Certified RST Instructor)
Daniel
Craig (Certified RST Instructor)
James
Craig (Certified RST Instructor)
James
Craig (Certified RST Instructor)
James
Craig (Certified RST Instructor)
James
Craig (Certified RST Instructor)
gordon
Craig (Certified RST Instructor)
gordon
Craig (Certified RST Instructor)
Ronald
Craig (Certified RST Instructor)
Ronald
Craig (Certified RST Instructor)
Daniel
Craig (Certified RST Instructor)
Nicholas
Craig (Certified RST Instructor)
Robert
Craig (Certified RST Instructor)
T David
Craig (Certified RST Instructor)
Peter
Chris (Certified RST Instructor)
Wayne
Craig (Certified RST Instructor)
tim
Craig (Certified RST Instructor)
William
Chris (Certified RST Instructor)
Lance
Craig (Certified RST Instructor)
Lance
Craig (Certified RST Instructor)
Lance
Craig (Certified RST Instructor)
Lance
Craig (Certified RST Instructor)
Nigel
Craig (Certified RST Instructor)
Ryan
Craig (Certified RST Instructor)
Scott
Craig (Certified RST Instructor)
Scott
Craig (Certified RST Instructor)
Keith
Craig (Certified RST Instructor)
Jonathan
Craig (Certified RST Instructor)
Jonathan
Craig (Certified RST Instructor)
Jonathan
Stephen
Craig (Certified RST Instructor)
Stephen
Craig (Certified RST Instructor)
Stephen
Craig (Certified RST Instructor)
gary
Craig (Certified RST Instructor)
gary
Craig (Certified RST Instructor)
gary
Craig (Certified RST Instructor)
Cavan
Craig (Certified RST Instructor)
Cavan
Craig (Certified RST Instructor)
William
Craig (Certified RST Instructor)
Corey
Craig (Certified RST Instructor)
JAMES
Craig (Certified RST Instructor)
James
Chris (Certified RST Instructor)
James
Chris (Certified RST Instructor)
IJAZ
Chris (Certified RST Instructor)
Jon
Chris (Certified RST Instructor)
Edward
Chris (Certified RST Instructor)
Scott
Chris (Certified RST Instructor)