Video Menu
My Favorite Videos
My Favorite Videos
Common Golf Setup Faults and Fixes
Sorry, you need to be a member to access this video.
You Are Just Seconds Away - Become a member here!
Already a member? Log in now
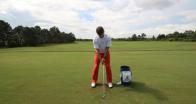
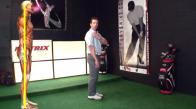
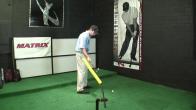
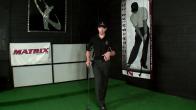
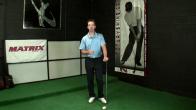
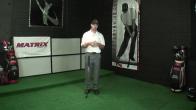
Having a poor golf setup position can cost you clubhead speed and make it difficult to fix some common swing faults. This video will show you how to get a perfect golf setup every time you address the ball.
- Make sure that your weight is even distributed, even with axis tilt.
- Make sure your hips do not open when bumping your hip towards the target.
- The back of your lead wrist should be to the inside the lead thigh.
- Back of the knee should be over the center of the ankle.
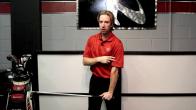
Hi, I'm rotary swing instructor Chris Tyler.
Did you know that your setup position could be costing you a ton of power?
Did you also know that your setup position could be making it nearly impossible for you to overcome a lot of those common swing faults?
Yep, that's right.
So in today's video, I'm gonna show you guys some of the common pitfalls that we see right at the address position, And I'm gonna give you guys a very detailed list of checkpoints that are gonna help you get into a perfect position every single time.
Even if you think you have the setup mastered, You wanna pay close attention to this video because you might pick up one thing that's gonna change the way you dynamically move throughout the entire golf swing.
Let's go ahead and get started.
Okay guys, so before we get into the real main substance of today's video, I do wanna put a little warning or a little disclaimer here at the front in that any time we make an adjustment to our setup, it becomes extremely uncomfortable.
I'm not gonna lie to you, I've been there, I've done that.
And the reason for that is that we are so used to setting up over the golf ball one particular way, that feels comfortable to us, that feels natural to us, that even feels athletic to us, that to make an adjustment to that, you will feel maybe a little uncomfortable with it, but I promise you that if you put the time in, it doesn't need to be out on the range, it doesn't need to be out on the golf course, you can do this stuff right at the comforts of your own home, really.
And go through that checklist that I give you at the end, you will get comfortable with this new setup position, and you won't be putting yourself into a position where you could be costing yourself speed, or even making it difficult to overcome a lot of your swing faults.
So again, if you've played this game for a long period of time, I encourage you to stay committed to a lot of these changes at the address position, because you'll see that when you start working on things later in the swing, it becomes way easier to overcome a lot of those problems.
Also, if I mention any videos during this whole process, Those videos are gonna be over on the right-hand side of the video player under the Recommended Videos tab.
Just go ahead and click that tab, all those videos will populate.
Okay, guys, so let's get into this now.
Okay, guys, so in this first common mistake that we see has to do with weight distribution.
Now, what are we looking to achieve from an addressed position?
We wanna be as evenly balanced as possible.
So we wanna be really stable, and we wanna feel as evenly balanced as possible.
It's okay to have a slight fluctuation, maybe five or 10% one way or the other, not a big deal.
But the big mistake that we see from a lot of golfers is that in order to achieve their axis tilt, what they're doing is they're just leaning their spine away from the target, and they're getting most of their weight preloaded into their trail side.
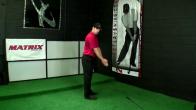
Okay, so you can see here that I got most of my weight over here.
You can see that my right shoulder is pretty well outside my right ankle.
Okay, And now, this can actually cause a number of issues in the golf swing as far as loading up those muscles too early.
They can start to fatigue.
They can start to push and they wanna fire.
It can make it very difficult for you to get back over to your lead side before your hands and arms get down to the hitting area.
So you can see that there's a lot of chain reaction of events that can happen from not having proper weight distribution.
So how do we fix it?
Well, the best way to get proper axis tilt, and you can try this out at home, stand up with me, is getting proper stance width.
And if you're not sure on what proper stance width is, check out determining proper stance width.
But what we're gonna be doing here, we're gonna stand vertical, we're gonna feel like we're 50-50, like we're having a conversation, we could stand here all day.
And all I want you to do is keep your head very quiet.
And as you're keeping your head quiet, I want you to move your hips just slightly towards where your target would be.
Okay, and as you notice, if I'm keeping my head still, my spine is starting to lean away.
Now, because my mass, my lower half, is moving towards the target and my spine's leaning away, it's acting as a counterbalance.
And that, when you have your spine now inside the lead knee, you should still feel roughly 50-50 on both legs.
Okay guys, so if you've been battling with some weight distribution issues, or been really unclear as to what side you've been preloaded in, stand up, vertical, head still, and just move your hips towards the target just a little bit.
And now, I've met the requirements of axis tilt.
So you can see that as I move my hips here, see how my spine is now just inside my lead knee, and I'm still evenly distributed.
So try this out, make sure that you have proper axis tilt and proper weight distribution.
Okay guys, so in this second common mistake that we have with the address position, has to do with axis tilt as well.
And I'm going to turn, this is going to be a quick one here.
So, what we see from a lot of students is, is when they're moving their hips towards the target to get that axis tilt, okay, when they move the hips this way, the hips tend to open up just a slight amount.
So double check to make sure that your hips are nice and square.
If you feel like they're open, you might feel your weight starting to squeak to the forward part of your trail foot.
So when you pull them back to square, you'll feel really rock solid, stable to the ground.
So just double check when you get your axis tilt, that you make sure your hips are nice and square.
All right guys, so in this third common fault that we see at the address position, has to do with the hand position.
Now, a lot of us have been taught in the past, we want to forward press our hands, but all that's doing is starting to create a lot of tension in your hands and your arms.
So when you get into proper axis tilt, proper stance width, you want your hands and arms to be hanging freely from the shoulders.
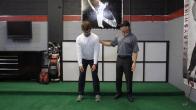
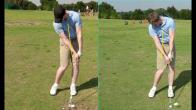
And what you're going to notice here, without pressing your hands forward, is that the back of my lead hand is just inside the back of my lead thigh.
Okay, so make sure with proper ball position, proper axis tilt, proper stance width, that when you look at yourself from a face-on perspective, that the back of your lead wrist here, lead hand, is right inside the lead thigh.
Don't press the hands forward, don't have your hands back here.
That's probably a big reason why your hands would be back here in the first place, and it probably has to do with weight distribution.
So you want your hands and arms to hang freely from the shoulders, proper ball position, and notice that your lead hand is just inside your lead thigh.
All right guys, So, in this final piece, of the common faults or mistakes that we see with the setup position or your dress position, I'm also going to walk you through this detailed checklist of things that you're going to be able to do at home to get yourself perfect in your setup position.
This common thing that we see is adding too much knee flex.
Okay, so when we get too much knee flex here, you can see that my butt, my hips are kind of pulled up underneath me, and in turn, what you're going to see is you're going to see some roundness from your thoracic spine up.
So you'll see some curvature there, and you'll probably see a lot of roundness to your shoulders.
Now, this is obviously an exaggerated look at this, and what I want you to stay focused on is that even though this feels really stable, okay, because we feel like we can't be moving anywhere at all, we feel like we're stuck to the ground.
In turn, What that's doing is getting your quads more activated and going to make it very difficult for you to load your glute muscles up, believe it or not.
Also, because you have roundness to the shoulders, it's going to make it very difficult for you to rotate properly throughout your golf swing.
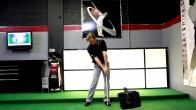
So what you're going to be looking for, and this is where I'm going to start to go into this checklist, is that we want the back of the knee to be over the center of the ankle.
We only need just enough knee flex just to relax the knees, okay, and this is the one that's really uncomfortable for a lot of golfers at home.
So the checklist is, because I want you guys to get proper stance width.
We're going to get axis tilt last on this list, okay, proper stance width, and what I want you to do is just lock your legs into a straight position here, okay, and what we're going to do is if we were to stretch our hamstrings, we would keep our legs locked very straight here, all right.
We don't want to flex our knees at all.
So I'm going to feel like I'm doing a hamstring stretch, and I'm going to push my hips back, okay.
So you can see how I'm hinging from my hips.
My hips are going back.
My butt's going back here.
My chest is now going over the ball.
Now, what you want to do is you want to continue to hinge until your toes start to feel really light.
So you can see that my toes are starting to try to come off the ground.
So now what I want to do from this is just soften the knees, and then we're going to allow the arms to hang freely from the shoulders.
Now, if you've seen a lot of roundness to your shoulders, you want to double check the total amount of knee flex you have, because you could see that, all right, it feels like I've got just a softened amount here, But you want to double check to make sure you've got your hips back far enough and you're in true balance, with your weight locked underneath your ankles.
So encourage yourself to get your butt to stick out, chest a little bit more over the ball, and make sure that we don't have a lot of roundness to the shoulders.
So you might want to try to find a neutral position for your shoulders.
One of the common mistakes that we see when starting to hinge forward is because your shoulders start to bear mass, okay, shoulders bear mass, not start to bear mass, but you'll see that because we're hinging, our shoulders want to round.
Okay.
That's our way of being a little bit lazy.
So you want to kind of fight that with gravity, kind of pulling it in that direction.
So a good way to overcome that, shrug your shoulders up to your ears, depress them, and then go ahead and keep your legs locked straight, don't have any knee flex, and just hinge forward slowly until your toes become light, and then just soften your knees, arms hang freely from that shoulder line, and now you're ready to rock and roll.
Now, the final bit, and you thought I was going to let you get away with it, is adding that axis tilt.
So we're going to do it from a face-on perspective here.
I'm going to hinge forward until my toes become light, soften my knees, okay, and all I'm going to do is move my hip towards the target just a little bit, keeping my head still, and now I'm in a good setup position, ready to start to shift my weight, load things up, and rotate properly.
All right, guys.
So now you've seen a lot of those common pitfalls.
Double check that your setup position is perfect, and you'll be well on your way to helping yourself overcome a lot of those nagging swing faults.





























































































































Gavin
Chris (Certified RST Instructor)
Gavin
Craig (Certified RST Instructor)
Brian
Chris (Certified RST Instructor)
Brian
Chris (Certified RST Instructor)
James
Craig (Certified RST Instructor)
James
Craig (Certified RST Instructor)
Brian
Chris (Certified RST Instructor)
Brian
Brian
Chris (Certified RST Instructor)
James
Craig (Certified RST Instructor)
Jim
Craig (Certified RST Instructor)
James
James
Craig (Certified RST Instructor)
James
James
Craig (Certified RST Instructor)
James
Craig (Certified RST Instructor)
James
James
James
James
Craig (Certified RST Instructor)
James
Craig (Certified RST Instructor)
James
Craig (Certified RST Instructor)
James
Craig (Certified RST Instructor)
James
James
James
Craig (Certified RST Instructor)
James
Craig (Certified RST Instructor)
James
Brandon
Chris (Certified RST Instructor)
Brian
Craig (Certified RST Instructor)
Brian
Craig (Certified RST Instructor)
Kevin
Craig (Certified RST Instructor)
jane
Craig (Certified RST Instructor)
jane
Craig (Certified RST Instructor)
jane
Craig (Certified RST Instructor)
jane
jane
Craig (Certified RST Instructor)
jane
jane
jane
Craig (Certified RST Instructor)
jane
Craig (Certified RST Instructor)
Ronan
Craig (Certified RST Instructor)
Ronan
Craig (Certified RST Instructor)
Ronan
Craig (Certified RST Instructor)
Ronan
Craig (Certified RST Instructor)
Ronan
James
Craig (Certified RST Instructor)
James
Craig (Certified RST Instructor)
Chuck
Craig (Certified RST Instructor)
Eric
Eric
Craig (Certified RST Instructor)
Jaleel
Craig (Certified RST Instructor)
Steven
Craig (Certified RST Instructor)
Jeffrey
Chris (Certified RST Instructor)
Jeffrey
Jeffrey
Nicholas
Chris (Certified RST Instructor)
Nicholas
Daniel
Craig (Certified RST Instructor)
Daniel
Craig (Certified RST Instructor)
Daniel
Eric
Craig (Certified RST Instructor)
Ryan
Craig (Certified RST Instructor)
bradford
Craig (Certified RST Instructor)
Eric
Craig (Certified RST Instructor)
Eric
Craig (Certified RST Instructor)
lawrence
Chris (Certified RST Instructor)
Ian
Craig (Certified RST Instructor)
Ian
Craig (Certified RST Instructor)
Brandon
Craig (Certified RST Instructor)
James
Craig (Certified RST Instructor)
Dave
Chris (Certified RST Instructor)
Tram
Craig (Certified RST Instructor)
T David
Craig (Certified RST Instructor)
Loran
Craig (Certified RST Instructor)
Dominique
Chris (Certified RST Instructor)
Dominique
Chris (Certified RST Instructor)
Eric
Eric
Chris (Certified RST Instructor)
Michael
Chris (Certified RST Instructor)
Brent
Craig (Certified RST Instructor)
Zach
Craig (Certified RST Instructor)
Brent
jerry
Craig (Certified RST Instructor)
Lance
Chris (Certified RST Instructor)
Ray
Chris (Certified RST Instructor)
Ray
Chris (Certified RST Instructor)
Cullen
Craig (Certified RST Instructor)
Christian
Craig (Certified RST Instructor)
Michael
Craig (Certified RST Instructor)
Michael
joe
Craig (Certified RST Instructor)
Jason
Craig (Certified RST Instructor)
Jason
Craig (Certified RST Instructor)
Jason
Craig (Certified RST Instructor)
Larry
Craig (Certified RST Instructor)
Larry
Greg
Craig (Certified RST Instructor)
Rob
Craig (Certified RST Instructor)
Ken
Craig (Certified RST Instructor)
Jeff
Chris (Certified RST Instructor)
Jeff
Chris (Certified RST Instructor)
Louis
Craig (Certified RST Instructor)
Paul
Steven (Certified RST Instructor)
Troy
Craig (Certified RST Instructor)
William
Craig (Certified RST Instructor)
Romain
Craig (Certified RST Instructor)
Cavan
Steven (Certified RST Instructor)
Cavan
Steven (Certified RST Instructor)
Chad
Greg
Craig (Certified RST Instructor)
sambhu
Craig (Certified RST Instructor)
Jason
Craig (Certified RST Instructor)
Jason
Craig (Certified RST Instructor)
Chan
Craig (Certified RST Instructor)
William
Chris (Certified RST Instructor)
William
Chris (Certified RST Instructor)
vince
Chris (Certified RST Instructor)
Ray
Chris (Certified RST Instructor)
jamie
Chris (Certified RST Instructor)
Jay
Chris (Certified RST Instructor)
joseph
joseph
Chris (Certified RST Instructor)
Thomas
Jeffrey
Chris (Certified RST Instructor)
Jason
Chris (Certified RST Instructor)
Robert
Chris (Certified RST Instructor)
Sean
Chris (Certified RST Instructor)
john
Sean
Robert
Chris (Certified RST Instructor)
Chris (Certified RST Instructor)