Video Menu
My Favorite Videos
My Favorite Videos
Step 5 - Add the Trailing Arm
Sorry, you need to be a member to access this video.
You Are Just Seconds Away - Become a member here!
Already a member? Log in now
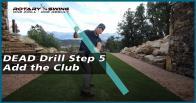
Finally, we can add the trailing arm back into the 5 Step System.
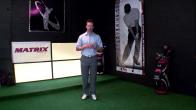
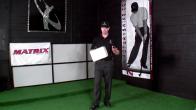
All right, guys, it's graduation day, you've gone through the first four steps of the RST five-step system, and now it's time to add the hard part.
This dreaded right hand, the hand that you do everything in your daily life with, The hand that you're so used to using, and you've been probably dominating your entire golf swing with it, we've got to slowly start adding it back in because we need it there.
It's a good conduit, it's a good transfer, or a good way to transfer energy from your rotating and powerful trunk to the golf club, but most people way overuse this right hand, way way overuse this right hand, and so that's why we just take it completely off at first.
Your right hand will tend to screw things up more than it'll help, and so if you've been doing these drills a lot, you should be getting to the point where you're like, ah, you know what, maybe I don't even need my right hand in there, you should be moving correctly and powerfully just from your trunk, and everything else is starting to kind of settle into place, you look at your swing on video, it's looking really good, this right hand can start messing all that up.
So, if you find that, be very, very slow in the next few steps that I'm going to give you to add this right hand back on.
The first thing that we do is we call the mirror drill, and all that means is we just mirror the movements of the left hand with the right.
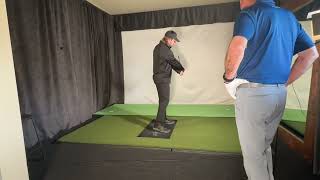
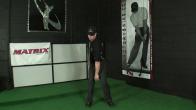
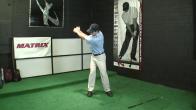
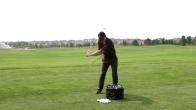
So I don't even want you to touch the club, I want you to open palm it, and the drill remains exactly the same from the beginning, shifting our weight, turning, using the momentum to help swing the left arm up, and then this guy still is not touching the club, and then you're going to shift and come back down into impact, and the right hand still is not touching the club.
It's just mirroring the movement.
The movement is still dominated by the core out and the lead arm.
This guy is not doing anything yet.
So as we do that, we get comfortable, and we shift back down.
Now, you do that, you get comfortable with it, nothing is changing, your videos, your drills look the same, and the mirror look the same on the videos.
Now you get to touch it with your fingertips, and no, I'm not kidding.
I literally want you just to touch it with your fingertips, and the second part of this drill is even more important.
So fingertips, and then as you go to the top, I want you to let your fingertips come off halfway down.
You can either stop it, impact it, or release it.
It doesn't matter.
If you're comfortable with releasing it, let that puppy go, that's the fun part anyway.
Fingertips only, rotate to the top, shift back down, let your hand come off.
What you're going to start doing with this is start holding onto the club longer and longer.
So at first, If you find that, you go to the top of your swing and all of a sudden things start looking really different, well, you need to let this right hand come off really, really early, right at the top, because you're going to start screwing everything up.
So you may start letting go up here, because that's where you're starting to mess it up and starting to push against the shaft.
But if you get comfortable with it and you feel like you don't have to use it, you can start holding onto it longer and longer.
So I'm not really doing anything against the shaft, but by the simple fact that it's touching it and my body is turning, it is transferring energy from my body to the club.
So it's helping speed it up without me having to actively huck my arm at it.
And that's where everybody gets really off.
They start trying to really overuse this right arm.
So once you get comfortable with that, you can wrap your fingers very lightly around the club, same drill, same procedure.
So you're going to let it come off as you get down to impact.
So notice that my hand is still coming off before or right around the impact area.
As I get more comfortable with this, I'm going to start holding onto it longer and longer.
And this is the key, as you start getting comfortable putting all of these pieces together, You're going to start working on keeping this right shoulder away from the ball and away from the target as long as humanly possible.
If you start pushing your right side into it, Everything that we've just done and worked so hard on building these world -class level moves is going to be thrown into the garbage.
So, keep this out.
I want you to think about keeping your chest open, not contracting this pec and delt and trying to drive in with your right side.
So as you start down and you start releasing, notice that my right shoulder is still behind where the ball would be.
At this point in the release, it should be.
So now what I want you to do is start, just like in the five minutes of the perfect release video, start reaching under while keeping this shoulder back.
This is really what you're trying to learn to do as you start holding on longer and longer.
Notice that my shoulder is going to get steeper.
They're not going to turn really flat.
This is a very right side dominant look.
And you're going to wipe across the ball.
And slice it and chicken wing it, and cup it and scoop it, and everything else under the sun.
You keep the shoulder back, you release it.
As I start holding on longer and longer, you'll notice that my right shoulder doesn't look like it's really moving that much.
It's not moving out toward the target unless I push really hard off my right side.
We don't want to do that.
We want to release this club and throw that club at the ball for maximum speed.
And so that right shoulder stays back and the right hand is releasing it.
Think the VJ release video.
Let's look at this from down the line.
So the first thing, I'm just going to mirror it, go to the top, not touching it, come down, release it.
So here, just relax my arms.
Everything's working out just fine.
Put my fingertips on it here, shift and release fingertips, just helping support it.
I'm just barely touching it, helping support my left arm.
That's really what your right arm's job is.
Help support this left arm at the top of the swing and throughout, and help transfer energy from your body.
As I start getting more comfortable and nothing's changing, my drill still looks really good, I'm going to go ahead and start taking my normal grip very lightly with my right hand so that I can let that hand come off.
Everything else is staying the same.
So as I get down to impact, I'm still square with my shoulders.
My chest is still square.
I'm not driving in here with the right side.
And I'm throwing the club head for maximum speed here without any effort, just letting it release.
So those three steps are really key for helping you reintroduce this right hand, and I do want you to hit balls doing this drill.
At first, it'll be a little challenging, you'll find a couple little things as you keep working through the nuances, you'll get it.
But this is the final step.
Once you can put your right hand on there and do all these movements correctly, you have a world class golf swing.
Your ball striking will be completely different than what it is right now, most likely unless you're already playing on tour, then maybe it'll just be a little bit better.
But either way, as an average amateur golfer, these are world class moves.
These are the fundamentals of the golf swing that all elite players do really well.
So, work through these in this very specific sequence and you will see amazing results in your ball striking.






























































































































































































Kyaw Thet
Craig (Certified RST Instructor)
Kim
Craig (Certified RST Instructor)
Bernard
Craig (Certified RST Instructor)
Bernard
Craig (Certified RST Instructor)
Matthew
Craig (Certified RST Instructor)
Mariam
Craig (Certified RST Instructor)
Mariam
Craig (Certified RST Instructor)
John
Craig (Certified RST Instructor)
Ed
Craig (Certified RST Instructor)
Dominic
Craig (Certified RST Instructor)
David
Craig (Certified RST Instructor)
sambhu
Craig (Certified RST Instructor)
Paul
sambhu
Craig (Certified RST Instructor)
Yuefeng
Craig (Certified RST Instructor)
Ryan
Craig (Certified RST Instructor)
Yuefeng
Craig (Certified RST Instructor)
Yuefeng
Craig (Certified RST Instructor)
Yuefeng
Craig (Certified RST Instructor)
david
Craig (Certified RST Instructor)
Adam
Craig (Certified RST Instructor)
Scott
Chris (Certified RST Instructor)
Scott
Chris (Certified RST Instructor)
Matt
Craig (Certified RST Instructor)
Brenda
Craig (Certified RST Instructor)
Anthony
Craig (Certified RST Instructor)
Scott
Craig (Certified RST Instructor)
Stephen
Chris (Certified RST Instructor)
Stephen
Chris (Certified RST Instructor)
Charles
Craig (Certified RST Instructor)
Charles
Craig (Certified RST Instructor)
Dean
Craig (Certified RST Instructor)
Nicholas
Craig (Certified RST Instructor)
Andy
Chuck
gary
Chris (Certified RST Instructor)
Douglas
Craig (Certified RST Instructor)
Roderick
Chuck
Roderick
Scott
Craig (Certified RST Instructor)
Terry
Chuck
Howard
Chuck
Tony
Chuck
Lance
Chuck
joseph
Chuck
joseph
Chuck
joseph
Chuck
Anthony
Chuck