Video Menu
My Favorite Videos
My Favorite Videos
Charl Schwartzel - Perfect Swing Plane
Sorry, you need to be a member to access this video.
You Are Just Seconds Away - Become a member here!
Already a member? Log in now

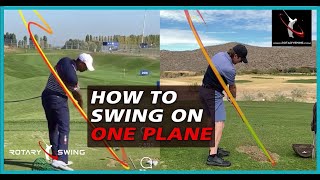
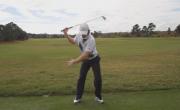
Charl Schwartzel has one of the best swings on the PGA Tour and is consistently on plane in his backswing. In this video, I'll show you 3 key steps to help you build your own perfect on plane backswing just like Charl.
- Rotation - body and wrists.
- Elevation - slight upward movement of the arms.
- Flexion - trail arm flexes a bit to help the hand and arms move more into the vertical plane.
Hey everyone and welcome back to RotarySwing.
com.
This is RST instructor Chris Tyler.
And we are back with this week's tour analysis with Charles Schwartzel, who just picked up his fourth Alfred Dunhill Championship this past weekend.
So congratulations to Charles.
This week we are going to be focusing in on how to build a perfect backswing just like Charles.
He's been known amongst his competitors out there that he's got one of the best swings and it's an incredible golf swing that we can learn a lot from.
So this week, we're going to be focusing in on three key components that are going to help you build a perfect backswing that is on plane every single time.
Let's go ahead and get started.
Okay guys so as I said in the opener our primary focus is going to be on the backswing this week.
We're going to be talking about the three key components on how to build a perfect looking backswing every single time.
And we're going to also lay out a game plan of things for you to work on in order so that you can have a beautiful looking golf swing like Charles.
Charles has got a great golf swing from beginning to end.
And we're going to be drawing what we call an elbow plane line here.
This is a line up from the hosel of the golf club through the base of the elbow.
So if you want to do some self-analysis, obviously use the self-analysis feature that we have on the website.
Lots of good tools in there to help you give you a good understanding of where you're at with your golf swing.
And what we're going to be focusing on here is an acronym that we use around the website quite a bit.
It's called REF and that stands for rotation elevation and flexion.
We're going to go through what each of those things mean, Each of those key components, and we're going to lay out a prioritized list of how you're going to work through those things yourself.
So the first thing we want to talk about is rotation.
Well what's rotating?
We're going to be talking about the body rotating throughout the entire takeaway and into the backswing.
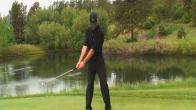
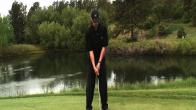
So you can see that his chest here has now turned about 45 degrees from where it was at the starting point.
Okay so the arms have stayed fairly straight and fairly relaxed here.
Now, this is a big issue that a lot of amateur golfers struggle with is that we get the golf club moving really quickly.
With pushing the club back very quickly.
And what happens is when you start to push your lead arm back very quickly, the club can get a little bit flat inside.
You would notice that your club head would be underneath this plane line.
And in turn, you're going to continue to run in.
The risk of getting the club a little bit deeper.
And you'll get the hands and arms a little bit deep at the top of the swing, which is a difficult spot to recover from.
So we want to talk about also the club face rotating.
Okay so the club face is rotated as well off of the golf ball and that's what it's designed to do.
That's why the club shaft is located where it is.
It's at the hosel of the golf club, and it's designed to rotate around its axis, and especially because we're swinging on an incline plane here.
Okay so you can see that this club is just a little bit north of the plane line here.
Also could be attributed to a little bit of the camera angle that we were loading up here today.
See that the camera angle is actually almost a little bit behind it.
But we still can use this view to still have a good idea of where we're at swing wise.
So the main goal of a perfect looking takeaway position is to rotate your body.
Okay and try to keep your hands and arms very relaxed.
If you rotate your body your hands and arms will move.
Now there's one other small component that's a part of this.
Okay and that would be elevation.
For those of you that don't know what elevation is.
Okay shoulder elevation is often what we call it around the website.
But if you were to take your arms, and you were to just lift them straight up from a dress to where your elbows were right at the base of your chest.
Okay if you were to lift them up right to where your elbows are at the base of the chest.
That is what we consider shoulder elevation.
Okay, so there's just a slight upward movement of the arms, and that's a gradual move that happens throughout the takeaway, in the backswing.
And what we use, as far as a checkpoint is concerned, is as we start to rotate and we're going to start to elevate our arms here.
Okay, to get the club.
And he's actually got a good amount.
Elevation here is that his hands are going to be right in line with the base of his pocket.
So this is pretty much a textbook looking takeaway.
Again both arms are very straight and relaxed.
He's turned his body about 45 degrees.
Very minimal hip rotation you can see here.
So again as far as the takeaway is concerned we have rotated our body.
We have rotated the club face to virtually where the toe of the club is up towards the sky, and our hands are right at the base of our pocket.
Now to finish this backswing we're going to go with all three components.
We're going to continue to rotate our body.
That's the first, most primary thing that we need to focus on is always getting our body to feel like it's rotating throughout the takeaway and backswing.
So you're going to see that he continues to rotate his body.
Watch the center of his chest.
You can actually see his logo moving here as well.
Continues to rotate and now he's adding what we call flexion, right arm flexion.
So through a completed takeaway you're going to notice that this right arm starts to break.
Okay and then in turn that's helping give the golf club lift into the top of the swing.
Also the last bit of elevation was added here.
Now this is a very very good spot here as well.
We use the base of the chest, The base of the pectoral muscle right here, as kind of the focus point of where we want to have our elevation.
So, right arm flexion and elevation are what's going to help give the golf club lift into the top part of the swing.
And if you couple that with good rotation of the body and good rotation of the club face, you're going to have a perfectly on plane golf swing just like this.
So extremely important that you focus on those things in order.
So if you've been struggling with getting your golf swing to look like it's on plane, it's always best to start with rotation of your body.
Okay, and then work on rotating your club face, and then work on adding the slight amount of elevation and the slight amount of right arm flexion.
And in turn that'll help you move the golf club into a perfect spot every single time.
And we've got some videos that help you out with that guys.
We've got five minutes to a perfect backswing.
We've got five minutes to a perfect backswing checkpoints video.
We also have an elevation video that can help with a small drill.
It's called the pool noodle shoulder elevation video.
That gives you a couple checkpoints where you can use to start building in your takeaway and also build into your backswing perfect elevation.
And then we also have one that talks about the rotation of the wrists.
It's how to use your wrists effectively and efficiently in the golf swing.
All right.
So these movements alone will help you overcome a lot of your swing faults.
You won't see the club getting flipped inside too early.
You won't see the hands popping out away from the body much.
You won't run into these positions at the top of the swing that you're going to have to, in turn, recover from, which can make the game very difficult.
Because now you're relying on a lot of compensations and you're relying on a lot more timing.
All right.
So if you've been looking to build a perfect backswing, this is a great one to mimic here.
This is pretty much textbook throughout the entire golf swing, and this will certainly make your golf swing get on plane every single time.
All right, guys.
So that's this week's analysis.
Get out there.
Let's put rotation, elevation, inflection to work and let's play some great golf.

























































































Loran
Craig (Certified RST Instructor)
charles
Chris (Certified RST Instructor)
David
Chris (Certified RST Instructor)
Thomas
Chris (Certified RST Instructor)
Ross
Chris (Certified RST Instructor)
Anthony
Chris (Certified RST Instructor)
Jason
Chris (Certified RST Instructor)
William
Chris (Certified RST Instructor)