There are few things worse in golf than hitting a huge drive off the tee, wedging it to 8 feet and then completely missing the hole with your putt. To make it worse, your playing competitor just skanked a drive into the trees, skulled his second into the bunker, chunks his bunker shot to 15 feet and then drains it for par.
You both walk off with 4's, but it feels like you should have had him by at least a couple; this is golf. But, becoming a better putter to compliment your better rotary swing ball striking is very simple, and I've found the absolute perfect training aid to get you on your way in less than 20 minutes of working with it.
The story above is practically a true one for all golfers, including me. My putting had gotten neglected with all the work I was doing on my driver for the "Bomb Your Driver" series.
So, when I finally decided that my putting needed some serious work, I tried all sorts of things. My typical drills that really got me through, like the Putting Shaft Drill, checking my Forearm Alignment, and working on my Distance Control didn't seem to help.
I was particularly struggling because our greens have gotten horrible and so they were extremely bumpy and grainy. Couple this with a stroke that was wobbly at best and too long, and I missed more than I made.
On slow, bumpy greens especially, it is absolutely critical to strike your putts solidly with an accelerating stroke. If you don't the putt will never hold its line.
So, I tried a heavier putter, a long putter, putting with my wedge, and finally thought to myself that I was working way too hard and there had to be a simple fix.
Enter the Eyeline Golf Putting Plane. As you guys know, I'm EXTREMELY slow and cautious when it comes to endorsing or promoting a training aid. There are so many useless and gimmicky items out there that I usually ignore all of them. In this case, I'm glad I took a second look.
We teach that the putter should work back and through on a slight arc. This arc is completely natural to a stroke where the shoulders rock slightly, but not nearly as severe as what Stan Utley teaches.
You could say that it is in between a Dave Pelz Pure Inline Stroke that goes straight back and straight through and the very curved arc that Utley advocates. Not too severe, not too straight, just right in the middle. But, visualizing or teaching someone what this very slight arc feels like can be challenging, but not anymore.
The Putting Plane is tilted at only 72° compared to Utley's which is tilted at 68°. This allows the golfer to make a simple stroke with no manipulation whatsoever with the hands or arms, just a simple shoulder motion with minimal movement in the arms and hands.
As soon as I made my first few strokes, I was sold. The instant feedback was perfect, my stroke was smooth and solid and best of all, I started draining putts and haven't stopped yet. Not being one for just a one off experience, I started trying it with my students and the results were the same.
Immediately, they could feel what the stroke should feel like and look like. I continued to use it and continue to putt the most confident I ever have by using this Acceleration Drill that I'm going to show you in this video today. I assure you that if you do this drill, combined with using the plane fin on the aid, you will see a dramatic improvement in your putting just as I have and all my students.
You can tell a great training aid by two things. First, it's simple, and second, it works. Simple concepts always hold the ultimate truths in golf and this training aid is very simple but shows you a lot about your stroke.
The mirror lets you know where your eyes are over the ball, whether or not your head moves during your stroke, whether or not your shoulders are square, whether or not your shaft is angled toward or away from the target, on top of letting you see and feel a perfect stroke.
This would normally take an instructor and a two camera setup and laptop to analyze this much information. Instead, you can do it for barely more than a sleeve of Titleist Pro V1's.
Video Transcription: Putting Acceleration Drill
Let's face facts. Putting? Not exactly the most fun, exciting, or exotic part of the game. We all have to make putts. We take the majority of our strokes on or around the green, but it's not as much fun to practice and a lot of times it's simply because you don't get the results that you're looking for.
It's a lot easier to see, when you hit a 300 yard drive, that the work that you're putting into your golf swing is paying off. But in putting, it's such a finite and minute type detail-oriented aspect of the game that it's very difficult to measure things in small amounts and small degrees, and it's hard to see when you're off.
Even with a video camera you can't measure one or two or three degrees of being open or closed or the putter face moving off track. It's a very hard aspect to teach of the game, simply because explaining the amount that the putter works on an arc and how it works through the ball and the grip and all these things, it's very difficult for the average golfer to see and understand.
In teaching putting, what I've always taught or tried to explain to golfers; they ask me, "What's your philosophy on putting?" I always tell them that the putter works on a slight arc. I don't like any hands or arm manipulation, similar to what we teach in the golf swing. It carries over into putting.
Once we take our grip, that we've explained in the grip video, just rock our shoulders back and through and the putter will work on a slight arc.
Now people ask, "OK, so that's different from Pelz's pure in line stroke?"
I'm like, "Yes, I don't believe that the putter works straight back and straight through, but it's very close."
They're like, "OK, well you're teaching that it works on an arc. Is that similar to what Stan Utley teaches?"
Well yes, I do believe that the putter head works on an arc back and through, but not to the same severity to what Stan Utley teaches, which is a very handsy, wristy, arms-dominated stroke in order to get the club to work on such a narrow arc.
Basically, I've fallen in the middle. It works back on an arc, but it's very slight. It doesn't work straight back and straight through; that's not a natural stroke either.
It's very difficult to explain such a finite thing. How much of an arc does it work on? How do you set up to it? How does everything work?
Finally, after years and years of searching, I've found something that explains everything perfectly. It's the most simple training aid I've ever seen, and as you guys know I'm extremely slow to ever come out and say, "You know what? This is a good training aid," or "This is a great training aid."
In fact, in the four years that the site has been up I've only offered or mentioned two training aids that I believe are good. One is an impact bag, which is as simple as it gets and extremely inexpensive, and the other one is a swing speed radar, that you use to measure your club head speed. Both are extremely simple training aids.
For the most part, to be honest with you, I think most training aids that come out are not worth the money. I don't believe that they're very good at all so I'm extremely slow to say, "You know what? This is worth buying."
Finally I've found something that helps me explain how much the putter head works on an arc. It explains how to set up and shows you how to set up and best of all, just like everything else we do, it's simple.
It's a product from Eyeline Golf called the Putting Plane. Basically, it has two rails on it that are adjustable for your putter head, and it's built on an 18° tilt. That allows the putter head to slide, as it works back to the inside, up, which moves it on a slight arc. Then as it comes through it comes back square and then as it works back up on the arc it moves through on an arc.
It's a very slight arc as the putter head works up and down. It's perfect. This is exactly what I teach. It allows you to work back and through on this simple arc.
Best of all, this simple training aid has simple little holes drilled into it that allow you to do some different drills. I'm going to talk about one today in particular that has helped me personally, not only in teaching but also in my own putting stroke.
I've always been told by many, many people that I have a great putting stroke, "Why would you want to change your stroke?" I don't want to change my stroke but I do want to understand why I don't make more putts, as I feel like I should. This training aid actually helped show me exactly why.
The first time I used it, I was sold. I didn't realize, even though I look at my stroke on camera, that my shoulders were open at address. By simply setting this up, there's a shoulder alignment line that you can see down here. This is a mirrored plate at the bottom.
I could see that my shoulders were very open at address. This is something where we're talking maybe a few degrees. It wasn't enough that I could see it on video camera, but immediately with the mirror I could see exactly why.
The second thing, I could see that my eyes were much behind the ball. This caused me also to open my shoulders and tend to pull putts. Getting my eyes aligned properly, which using this tool was great for, that helped me as well.
The second thing is learning how to take the club back to one of the tee holes that we're going to look at in a second, then accelerate through.
My stroke was always complimented on its pace. People have told me I had a very smooth stroke, but I always tended to pull putts because the tendency when you take the putter back really smooth and slow is that, as you take it back, you tend to shut it as you start to release it coming through.
If your timing and tempo isn't really good every single time, you're going to run into a lot of trouble. Taking it back on a shorter stroke and accelerating through helps take a lot of those misses, the pulled putts, taking it back hooded, all those things, and helps you get it working back and through on that proper arc.
We're going to look at this first drill, the acceleration drill that we're doing for the website, using this training aid. You can buy them through the site, and of course as an illustrious member of the site you get a discount, just as always. I believe for this training aid you get 15% off, which again basically covers your cost of membership for a month. Just for being a member you get that much money off the training aid.
We're going to talk about setup for this acceleration drill and explain how that works next.
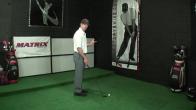
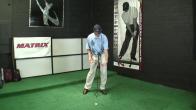
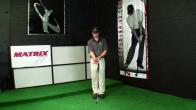
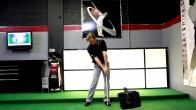
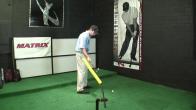
In this first drill, the acceleration drill, you can see that I've got a tee in the ground here, and the ball set up in the middle, in the slot.
This is of course indoors, so you're going to find that you would actually stick a regular tee in one of these holes here on your green, which will just put a hole in the green. That would help you stop the putter going back too far, but using a rubber tee I can do the same thing indoors.
I'm going to use this without the ball first. What I want to do is, as I set up - and we'll talk about setup and things more in future videos - but as I take the club back I want to take it back to where it just about hits that tee and then I want to really accelerate through.
It's almost coming through about a third faster or twice as fast going through, as when I took it back. I don't want to take it back really slow and rock it really slow because what that's going to tend to do, as I take it back I'll tend to shut the putter face and really shut it coming through.
If you take it back on a good tempo back and through and just let the heel of the putter slide up and down this arc, you'll find that your stroke gets much, much quieter and you'll be able to accelerate through the ball.
Now I'm going to put the ball here in place and you'll find that as soon as you hit your first putt, you'll strike it very, very solidly.
This first putt was hit dead on line. The putter worked up and down the plane. Again, we'll talk more about that stuff later but for right now all you're going to do is work on getting it to go back right to that tee.
For the second tee back, on a typical green, you should be able to hit it about 8-10 feet on a normal putt. If you're just hitting it three feet you'll know that you're not accelerating enough going through the ball.
Work on this tee drill and it will teach you how to accelerate. We'll look at some video of this stroke in action.
Watch part 2 now to see how you're moving your body in the opposite direction of the pros!


