


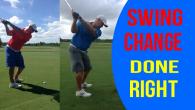
Improve your swing - 4 steps
Sorry, you need to be a member to access this video.
You Are Just Seconds Away - Become a member here!
Already a member? Log in now

You MUST have a game plan in place and you MUST stick to the game plan if you want to improve your swing. This video shows you a simple 4 step process that will help you get a perfect game plan in place.
- Diagnose - Swing Reviews or Self Analysis
- Start on body movments first.
- Slowly add the club and ingrain through reps.
- Stack in the next piece.
Hi everyone, I'm Rotary Swing Instructor Chris Tyler and I got some great news for you today.
I just got done giving a two day golf lesson with one of our students here at Rotary Swing and we were able to get some fantastic progress.
And I wanted to show you guys some of the work and some of the progression that we took throughout the two days.
And we were able to get Matt some fantastic results.
From a better position at the top of his swing, to a better impact position, to a much better release.
And by the end of the session, he was hitting some very nice compressed golf shots, he couldn't believe it and the ball was flying nice and tight at the target.
So if you've been battling with some backswing positions, or if you've been battling with downswing sequence, or possibly even you know your release, you want to pay close attention to today's video.
Let's go ahead and get started.
Okay gang, So, the purpose of today's video is to give you a four step process.
That we were able to use with Matt and correcting his golf swing and we were able to get some really good results.
And this is a good way to start to go about your own swing corrections at home.
I know a lot of times we are simply just overwhelmed with the amount of video content that's out there.
We don't really necessarily know where we need to focus.
We try to take on way too many things at one time, and we're going to simplify that process for you today.
Okay, so in step number one of this process, This is what we would call the diagnosis part of the process.
And we had to start to look at Matt's golf swing from a big picture perspective, to understand what some of the cause and effect relationships were that were giving him such a hard time in his golf swing.
And a lot of times students will start to do a lot of self diagnosis on the website.
They'll start getting focused in areas of the golf swing that really aren't the most critical areas, and that's what's great about the swing.
Review system.
And it's part of your membership is that you can submit face on and down the line swings every couple of weeks to us where we can go in, take a look at it, Do a really good, thorough analysis on where you're struggling the most and give you a good game plan of things that you need to work on.
In between swing reviews.
So if you're not taking advantage of that system, I really encourage you to do so.
So you're going to see things like this.
I'm going to go ahead and show you.
So we had to figure out what the problem with Matt's golf swing was and why he was so inconsistent.
So from a face on perspective, I'm going to just go ahead and get him down here and impact.
And you're going to notice that during the diagnosis phase of this, we see that he's got a little tiny bit of a chicken wing starting to evolve here, a little bit hung back onto his right side.
And he's also not got his lead side nice and stacked up.
So you can see that the right hand kind of flips at it and that his impact position of his body has got him, got him not in necessarily in a position where he can control the bottom of the swing arm.
Now, when we started to look at the whole shape of the golf swing, we, you can see here at the top of his swing, that his hands are very flat in relationship to the vertical plane.
So you can see that his hands and arms are a little bit flat and a little bit deep.
But one of the things that I noticed from an instructional standpoint was, is that, okay, why are the hands and the arms deep?
That's the big question that I had to, I had to better understand, why are they back in this position?
Well, let me show you.
Okay.
So I'm going to draw a line right down off of his chin, okay, right straight down.
I'm going to draw a line right off the back of the tush.
If you're unfamiliar with this tush line, we have a good video on the website called Losing the Tush Line.
But when you, you'll notice here as we start to get him up to the top of the swing, even though the camera moves just a little bit, you're going to notice that his chin has moved forward quite a bit, and so have his hips.
So now this has allowed his hands and arms to continue to work around his body.
So his brain is actually acting as a counterbalance while his hands and arms start to work around.
So we had to look at it and say, okay, is this causing an impact issue?
Well, yes it is.
It is causing a way that he gets down into the hitting area, it's not allowing him to get into a stacked position.
So he's going to have to make compensations from this particular position.
So that's why I said, okay, now we need to focus on a backswing position.
That's where a lot of people at home go wrong and they start to focus on areas like, okay, I want to put elevation in this and I want to get my hands way up in the air.
I want them to look like Tiger.
I want them to look like Chuck.
And that's not really the process that we had to do here.
We actually had to focus on an area of the golf swing that didn't have anything to do with the hands and the arms.
I'm about to show you that now.
So let's go ahead and take a look.
Okay, gang.
So this is going to be step number two, and this is where the drilling and taking a lot of the distractions out of the process is really, really critical.
And I want you guys to see over here on the right-hand side of the screen, I'm going to mark these same lines, okay, right down from the bottom of the chin, I mark the tush line.
And you can see that we've got the golf club flipped over.
We've got the light end down here.
And the reason for that is because I had to get him to focus on the movements of the body first.
All right, we actually start without a golf club and then we add the golf club back to it.
And we're recreating those movements within the body.
So let's go ahead and take a look here now.
Okay.
So up to the top of the swing, what you're going to notice is that his chin now has not moved forward towards the ball.
You can see that his hands are going to be much higher in the air at the top of the swing.
Okay.
And this was literally probably about 20 minutes worth of body work.
For him to be able to move up to the top of his swing without having to think about a hand and arm position.
He's always wanted to have a backswing position like this, but he never knew how to get to it.
And what we did here is.
We worked on loading his right leg up and we worked on rotating his body properly in the golf swing without getting his head to move forward.
So if your head's moving forward, Chances are that's a good signal to you that your hands and arms are starting to work around your body, and that's acting as a counterbalance.
So step two of this process is to work very slowly.
Start with body movements first.
If you're going to make a change to a movement pattern, you've got to focus on body movements first.
Eliminate the distractions, eliminate the golf club, get a mirror, get a camera, and focus on the movements first.
And then slowly start to put the golf club back in the mix and do a number of reps on it.
And once you become more comfortable with it, then flip the golf club over and go to the heavy end.
All right.
So that's step number two.
So let's look at step number three here and we'll continue on with this process.
Okay, guys.
So step number three in this process is ingraining it.
And this is where you need to spend a lot of time getting a bunch of quality reps in.
And so the reason why you see Matt in a different set of clothes here is because this was in between days.
And so Matt spent a good amount of time really ingraining this new backswing position, with just focusing on the really critical areas of loading his right side up and rotating his body properly.
And you can see he's gone into a really good backswing position here at the top.
So actually when we get done our lesson over here on the left hand side, I saw him go down to the other end of the range and spent a good amount of time really working hard on drilling it, making sure that the reps, each and every rep was of high quality.
That's really important for this process.
So what I asked him to do is the very following day is.
I asked him to start running through the things that we talked about, just to see how comfortable he was with it.
With a change before I started stacking in the next piece.
And what he did here is I said, okay, go ahead and perform the move for me.
He goes up to the top of his swing beautifully.
And then I said, okay, let's go ahead and start making some golf swings from the top.
And let's see how you look on the way down.
And so I wanted to see how his body responded to that particular change.
We weren't going to hit a ton of golf balls, but we did end up hitting some golf balls at the latter part of the session.
But you're going to see here in just a second, when I load up the before video, You're going to see a much different impact position, and you're going to see now that this new position at the top of the swing that's in balance has now got him a lot more space.
So let's take a look at that now.
Okay.
So as you can see over here on the right hand side of the screen, this is the day after you can see that this is a new impact position.
Obviously he's not used to releasing the club from here.
So that was some, we had to spend some time working on the release, but notice the difference here.
We have the hips that have come forward, we don't have a lot of space for the hands and arms to pass in front.
We've been able to maintain our spine angle much better, get less of that curvature from the thoracic spine up.
We've got our heel closer to the ground.
And this is all a derivative of getting into a much better backswing position at the top of the swing.
And again, that was one of those areas that when you stop and look at this, okay, if you're doing self diagnosis or if you've had some instruction in the past, people would say, okay, we need to get our hands and arms more vertical.
Just like I said in step number one, but you need to focus on the big picture stuff first.
That's the whole point of today's video is that we got to a really good end result by focusing on the most critical areas.
And the critical area of his golf swing was making sure his setup was refined, making sure his load and his rotation were in a good spot.
And then the hand and arm movements became so much more simple.
So let's look at step number four now and we'll get you guys out of here.
Stay tuned.
Okay, guys.
So in this final step, I just want to go through how important it is to have a game plan and stick to the game plan.
And really make sure that you're disciplined on the idea that you don't want to stack in more pieces until you are really comfortable with the first, the original piece that's causing you the most problem.
And there's no point.
And I know that Matt came in town from a long ways away and there's no, but there was no point of us going too fast through these lessons no matter how far he came in from.
The point was is that we had to make sure that these things were in place first.
And then we worked on the next piece, and then we worked on the next piece.
So stacking in things and a level of progression is very, very key, but making sure that you do things in order is even more key.
All right.
So that's a really big part of your swing correction, and that's a great way to get to your end results a lot sooner than later.
So let's go ahead and take a look down here, what we were able to do.
And I'm going to give you guys a couple of good drills that you can work on this off season.
All right.
So you're going to see Matt here at impact on the left-hand side.
That was our starting point.
And here's our impact now, a little flippy still, obviously, but that's a work in progress.
But notice here a much different lead side.
He actually had a little tiny bit of a chicken wing over here on the left, but you can see that the left side is much more stacked up over here.
Okay.
Proper secondary axis tilt.
He's not flat footed over here like he was, but you can see that this is a very big difference in impact position.
And even though he's not at full speed, that's quite all right.
Okay.
He's actually still making progress.
And he now knows, now that he's gone home, he now knows the processes in which he's going to work on things.
He's not going to try to take on setup, load, and rotation.
He's not going to try to take in this downswing transition.
He's not going to try to take on the release all at the same time.
He's going to work on these things piece by piece.
And in turn, he's going to be ready to rock and roll come this next season.
And that's the point, guys, is I want you to take your time, get a game plan in place, and stick to your game plan.
And you will be playing some great golf just like Matt, and hopefully you'll get some great results just like he did as well.
All right.
So to help you out with this off season, there's a couple of good videos I want you to really pay close attention to.
These are videos.
All the stuff that we do on the website is stuff that you can do right in the comforts of your own home.
But really start to get sharp with a nine to three drill.
It's a great drill that you can work on trying to control the hitting area, getting into a good impact position.
And it's a great drill to start to train your release as well.
That's a good thing to try to take on this off season.
Also five minutes to a perfect backswing, checkpoints to five minutes to a perfect backswing.
All these videos that I mentioned are going to be over here to the right-hand side of the video player, underneath the Recommended Videos tab.
That's a great thing to use.
That'll help you get some good idea of what we started to work on with these particular videos.
And you'll be well on your way to playing some great golf guys.
All right.
So thanks for listening in today.
I know this is a little bit of a lengthy video, but the processes of swing correction can be very difficult at times.
And I wanted to help you guys get a good game plan in place so that you are well on your way to playing some great golf.


Evan
Craig (Certified RST Instructor)
Evan