


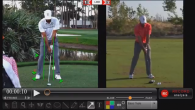
Tiger Woods Swing Analysis - 2018 PGA Championship
Sorry, you need to be a member to access this video.
You Are Just Seconds Away - Become a member here!
Already a member? Log in now

Tiger Woods had an incredible final round at the 2018 PGA Championship! In this swing analysis video, we'll go over the key points that make him such a powerful ball striker even at age 42, and how you can incorporate these simple adjustments into your own swing.
Okay guys, so if you got to watch any golf this past weekend, then you would have definitely seen a very exciting conclusion to the 2018 PGA Championship, where ultimately Brooks Koepka pulled out another victory.
So congratulations to Brooks.
And you would also have seen the man himself, Tiger Woods, back up in contention, which is awesome for the game of golf.
I don't know about you, but I have a couple of friends that don't even like the game of golf.
But when Tiger is in contention for some reason, they are glued to the TV screen.
So you can see that he brings a lot of excitement, and it's definitely good to see him back up there.
And I think he's definitely on the cusp of winning on the Sooner side.
So I know that we've done a plethora of videos on Tiger in the past, and I know that we've done a ton on Brooks as well.
So this week I wanted to spend some time answering a common question that we get about the setup, And then I also wanted to talk to you about a move into the lead side with the lower half of the body that Tiger does really well.
And I'm going to give you access to a premium video that's going to teach you how to do this same move, and then also be able to maximize your stability, maximize your power.
But on top of that, it's also going to be able to maximize the safety in your body.
That's one of the key areas in golf instruction that's always really lacked is doing things as safely as humanly possible.
So what we're going to talk about here first is we're going to just talk about the setup adjustments from a driver versus an iron.
Now, as far as a setup position is concerned with stance width, okay, Now I know that we've heard that age old expression as far as stance width is concerned, that we need to stand shoulder width apart, okay?
And that's absolutely, your legs have nothing to do with your shoulders.
But let's take a step back and look at this objectively for a second and then come up with some requirements.
Well, what are the requirements?
What are we looking for out of stance width in the golf swing?
Well, number one, I would think that we want to be as stable as humanly possible, right?
So now think about it this way.
If I told you to get as stable as you possibly could because I'm going to come push you over, what would you do?
Well, you would get really wide, right, with your stance, and you'd probably get low to the ground.
That would be your way to combat that force, right?
Now, what's the problem with going too wide with our stance width?
Well, that doesn't allow us to meet the second requirement of what we're looking for out of our base, and that would be able to shift our weight without our head moving all over the place.
Because we do want to be able to shift our weight, right?
And so if you go to this really wide base, you're going to have to have a lot of movement from your center, and that's going to make things very, very difficult to get things lined back up and get things consistent at the bottom of the swing arc.
So knowing the two requirements, What we've come up with is two inches outside of neutral joint alignment is going to be the maximum that we want you to stand with an iron swing.
And you're probably looking at your computer screen going, what the heck does neutral joint alignment even mean, right?
And so I'm going to drop a line down that's going to be as close as possible as I could possibly get to where the center of the hip socket is.
Now, if you look, if you were standing in neutral joint alignment, okay, the center of the knee and the center of the ankle would be directly in that line, in the green lines on both sides.
What we're looking for is about two inches outside of this on both sides.
That would be the maximum amount of stance width.
What this is going to allow us to do is it's going to allow us to maintain stability, And it's also going to allow us to shift our weight in the swing without our head moving all over the place.
Okay, so now that we've come up with the proper stance width, let's talk about the driver's stance.
With a driver's stance, we are going to be widening the base a small amount, not a ton, maybe an inch, inch and a half or so.
Okay, now what is this going to do for us?
Well, number one, this is going to help promote more stability, obviously, like we talked about in the first part, but also number two, it's going to help promote a difference in impact position.
Let's go ahead and fast forward to that right now.
Okay, so, and now let me get on the left -hand side of the screen, let's get down into impact, and there's going to be one small change here as far as the position of the spine is concerned.
It might be a little bit hard for you to see perfectly, but on the right-hand side of the screen, if I draw a line right down the center of the spine, you're going to see that there's quite a bit of tilt to the spine, where on the right-hand side of the screen, drawing the line right down the spine, you're going to see that there's far less.
Okay, so this angle, and I'll go ahead and draw a red line on where the iron swing is, so you can see that would be the amount of tilt.
So this is what we call secondary axis tilt.
Now, secondary axis tilt, it helps shallow the golf swing, but also with a driver's swing, what it does is it helps promote more of an ascending blow, which would get the club swinging more upward at it, right?
So it creates more of an ascending blow rather than a descending blow.
So with modern-day technology with these drivers, they're all set up for very high launch conditions with very low ball spins, so we don't want to have the club coming straight down to the golf ball like we would with an iron.
We want to have more of an ascending blow rather than a descending blow.
So that's why we widen the base and we move the ball position a little bit more forward.
So let's go ahead and go back in time here to the setup position, and you're going to see the two differences, okay?
So you see that the stance width is just a fraction wider, maybe an inch wider than what you would set up with an iron swing, not drastically wide, and then you can see the ball positions move forward.
Now, what we're looking for as far as a ball position with an iron swing is concerned, typically we want to have it up off the left ear, okay, because the bottom of the swing arc is going to be just inside the lead shoulder.
Tiger's got a little bit back here.
I'm not sure if he's trying to hit a little bit of a cut, But the ball position will remain constant from one iron to the next if you were hitting a stock golf shot, regardless of what you've heard in the past, okay?
The bottom of the swing arc is the bottom of the swing arc, and at impact, It will bottom out in the same spot every single time, based off of the position of the lead shoulder.
And so you need to have the ball position at correct spot, and it would be off of the left ear or the logo in your chest, depending on what you like to use best.
Okay, so now that we understand the setup, okay, it's going to be two inches outside of neutral joint alignment, ball position off the left ear.
With a driver, we're going to just widen the base a little bit, maybe an inch wider than you would stand with an iron swing, and we're going to move the ball position up.
Typically, we'll hear off the left heel.
Some people, even Brooks, actually likes to go quite a bit even further up than that.
Those are things that I want you to be able to play around with.
You'll need to get some data based on your launch angle and your ball spin on that.
So if you have your ball position off your left heel, and you see that your launch angle is maybe a little bit lower, then go ahead and maybe try to move it up a little bit and maximize the efficiency out of it.
So now let's move into the second part of this video.
We'll start talking about the lower half and get that premium video over to you guys.
Okay, guys, so in part two of this video, I just wanted to focus on the iron swing and talk to you about the move that he makes with the lower half of his body.
That's really, really good.
And then I want to relate a video to you guys that you can use to help maximize stability and then also maximize the safety in your downswing.
So when you look at Tiger's downswing, what you're going to see is that his head drops quite a bit.
Now, if you watch the lower half of his body, the lower half is actually dictating this sort of movement.
So let's actually just mark the head position here, and you'll see that it drops just a little bit as he turns on his right side.
But now he's getting ready to make his classic sit move.
We call this the Tiger squat on the website.
There's actually a video on that.
But what we're looking for at this particular junction, The swing is to move the hip socket all the way over into neutral joint alignment on the lead side of the body.
And so let's watch that.
And there's a good way to actually clearly see this, this little belt loop right there.
That's a good indicator as to where the hip socket is on the lead side of the body.
Most men's pants actually have a belt loop that's pretty close to where your hip socket is.
Now, when you watch him make this first move, what you're going to see is that hip socket shifts all the way over on top of the ankle.
Okay, so you're going to see it drop down just a little bit.
So he's making this little tiny squat move, but it's also shifting laterally.
Okay, it's not just rotating, and it's not just dropping, right?
It's moving in this direction quite a bit.
Okay, you can see that it's moved a good four, five, six inches or so.
And this is a position now that's going to be where we start to post up and we start to stabilize the lower half.
If the hip moves out past neutral, okay, where that hip socket gets out past neutral joint alignment, like we talked about in the first video, that's going to put a ton of stress in the outside part of your hip girdle.
If it stays inside of neutral, then it leaves a lot more mobility in your hips, and your hips can actually race and spin out more, And it makes it much harder for you to stall the body and allow the hands and arms to act independently.
So it's really critical that the lead hip socket works over into neutral joint alignment.
And then from here, it's much easier to get the glutes activated, stabilize the pelvis, And then also post up properly so that you can have the club at maximum speed at the bottom of the arc.
So in order for you to be able to make this move, we have a mission critical video for you.
Actually, there's two videos.
There's one called Squat to Square, okay, there's and then the other one is going to be sitting into the left side.
Both of those videos are going to teach you how to use your legs properly from the top of the downswing.
And what I want you to look for when you start working on this move is that there's a subtle drop of the belt line when you make your first move over to your lead side.
Okay, that's subtle.
Don't try to add tons and tons of squat in there, okay, because all that's doing is adding timing variables to the swing.
So you want to add a little tiny drop of the belt line, But you also want to make sure that your hip socket moves into neutral joint alignment when you make your first move over to your left side.
Okay, so let's go ahead and get to work on that.
Let's take a look at that video.
I hope you guys have a wonderful day, and let's get out there and play some great golf.


John
Craig (Certified RST Instructor)
John
Craig (Certified RST Instructor)
Ron A. Sr.
Craig (Certified RST Instructor)
Ron A. Sr.
Craig (Certified RST Instructor)
Ron A. Sr.
John
Craig (Certified RST Instructor)
Marc
Craig (Certified RST Instructor)
David
Chris (Certified RST Instructor)
Paul
Chris (Certified RST Instructor)
Craig (Certified RST Instructor)