


Martin Kaymer Golf Swing Analysis
Sorry, you need to be a member to access this video.
You Are Just Seconds Away - Become a member here!
Already a member? Log in now

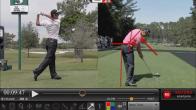
In this video, I’ll show you how Martin Kaymer leverages the ground and generates a ton of club head speed. You’ll find out: - How pushing too much from your right side triggers a compensation that hurts your posture, - Where the pros get 60% of the increase in their club head speed, and - Why you should finish in the same stacked position, regardless of what club you’re using. Check out this video now to create more power like Martin Kaymer!
- Keep the hips back while sitting into the left side
- Use the left side of the body to control the speed of the hips
- Check your impact alignments face on and get stacked
Hey everyone, I'm rotary swing instructor Chris Tyler.
And this week, former world number one player Martin Keimer gets back into the winner's circle with a great win at TPC.
And I'm going to show you exactly how he pulls the power out of the ground and then turns it into massive speed at impact.
So stick around.
Okay so the Players Championship, a fantastic event at that, Proved to be another doozy this weekend, with Martin Keimer winning and over a very resilient Jordan Spieth, Jim Furyk, late charging Jim Furyk, Sergio Garcia, always some of the better names in golf at this event.
They call it the strongest field in golf.
So congratulations to Martin for going wire to wire at TPC at Sawgrass.
And this week, we're going to focus in on three really critical areas as far as being able to pull power out of the ground, when to turn it into speed, and how to keep it more consistent.
So let's go ahead and get started.
We're going to look at the down the line view first, and we're going to focus on the most critical area.
And that's going to be able to, that's going to be maintaining posture through the hitting area.
So what I'm going to do is I'm going to draw what we call the tush line.
And if you're not familiar with the tush line is, there's a video in the advanced downswing session called Losing the Tush line.
I want you to take a look at that video.
And this is a good line for you to be able to draw on yourself.
To be able to indicate if you're maintaining posture through the hitting area.
So I've drawn also a line on his spine here.
And you're going to see as he gets down into the hitting area that his tush is still back against this line.
There's no space between the tush in this line.
If you ever watch your golf swing and you see that your hips are quite a bit far forward, or your tush is far forward, Nine times out of ten.
What's going to happen is is that the spine is going to move to a more of a vertical position.
And you're going to see a lot of drooping to your shoulders.
Okay and if you see a lot of drooping to your shoulders that's a very, Very good indicator for two things that number one, you've lost posture into the hitting area, and number two, you're not maximizing the power out of the trunk.
Because when you get protraction from the shoulders, or drooping, or roundness to the shoulders.
That's actually taking the scapula and moving it away from the big muscles that are absolutely pivotal for being able to deliver power out of the trunk.
There's a big research study on any hitting or throwing sport that you need to have the scapula down and in connected to those big muscles in order to take the power out of the trunk.
And the best way I think of this is like, think of a boxer.
A boxer doesn't hold his shoulder up and throw a punch, his shoulder stays down and he's able to drive and pull the power out of the body.
And that's what we're going to learn to do today.
We want to make sure that we can pull the power out of the ground.
Turn it into speed at the correct area and also be able to maintain posture into the hitting area the correct way.
Because there's a lot of people around the site that are trying to do too much of a squat move.
And if you're doing too much of a squat, you're nine times out of ten.
You're going to get yourself into problems with with early extension of the spine because you're not able to use the correct side of the body.
In order to control the speed of the hips and control the posture in the hitting area.
So I'm going to draw a line here for us up the center of the left ankle.
This is going to be great for us to take a look at impact alignments face on here.
That's another video in our downswing advanced section so you might want to have a look at that.
So let's go ahead and load him up to the top part of his golf swing.
Big wide turn on Martin, he makes a big wide turn.
He He gets the hips a little bit over rotate, which allows the club to go a little bit longer.
But what I want you to do is take a good close look at this right knee.
You can see that it's moved to a little bit more of a straight position.
And as we start to work in transition, sitting into the left side here, you can see that that right knee increased in flex.
Okay, so you can see in his pants there that it's increased in flex.
And now he's getting fully into that left side.
And what we're doing here when we're sitting into the left side is we're loading up that left heel left ankle with probably about 80 percent of your weight, 80 to 85 percent of your weight.
And the idea is that we're going to try to control the speed of the hips with your left obliques.
Okay, we're going to try to use those left obliques to pull that left hip away from the target.
And if you get a lot of pushing movement from the right side of the body here, what's going to happen is you're going to push your hips forward and you're going to lose posture.
And your shoulders are going to start to round to compensate for that particular move.
But because he's gotten fully seated left here, he's actually starting to roll to the inside part of this right foot already.
You can see that he's gotten nice and stacked there now.
He's got a ton of lag in this golf club.
And you're going to see that he's going to straighten this left leg as the club starts to release.
Okay, so here he is starting to release.
You can see that leg starting to move to a straight position there, and then he's at maximum speed, right at the hitting area.
And one of the things that you'll have to understand is that 60 percent of your clubhead speed is coming three feet prior to the golf ball.
Okay, so 60 percent of your speed is increasing by three feet prior to the golf ball, so through lag and release and being able to leverage the ground.
But you need to be able to make sure that you sequence this properly in order to be able to move efficiently.
So you want to look at the straight left leg video in the downswing section?
That's another advanced downswing section video.
That's going to teach you the correct muscles and give you the correct kinesthetic awareness on what muscles are used to control the speed of the hips.
And you also want to make sure that you're not overdoing your squat move, okay, because if you're overdoing any sort of squat or sitting into the left side.
What's going to happen is is you're going to try to jump up and that's going to make the hips come forward, the shoulders around.
And then you're losing all that efficiency and you're Max, you're losing all that that max speed at the bottom of the arc.
All right, so I've drawn another line on here that we're just going to take another quick look at.
And you can see here.
At the hitting area.
He's got a nice stacked look from the left heel.
Or of off to the side just a little bit.
And you would see if it was dead face on that.
He's got that left hip in a great, great position there.
And I know that's another misconception around the site with people.
Or am I supposed to appear the same with a driver and a three wood as I am a wedge at the hitting area and out?
Yes, absolutely.
Under any stock shot format, you always want to have the same look with a nice stacked left side.
That way, you're controlling the bottom of the arc and leading to maximum consistency.
All right, guys.
So let's work on getting seated left.
Let's use the left side of the body properly to be able to keep the hips back.
And then let's work on trying to drive that leg to left leg to a straight position.
As we're releasing the golf club at the proper time to maximize that speed in your club head.
Now get out there let's go bomb some drives and let's play some great golf.
I look forward to working more with you guys in the future I hope you have a great day.


julian
Chris (Certified RST Instructor)
Ronan
Chris (Certified RST Instructor)
Wayne
Chris (Certified RST Instructor)
Wayne