Video Menu
My Favorite Videos
My Favorite Videos
Bubba Watson Wide Narrow Wide Shape
Sorry, you need to be a member to access this video.
You Are Just Seconds Away - Become a member here!
Already a member? Log in now

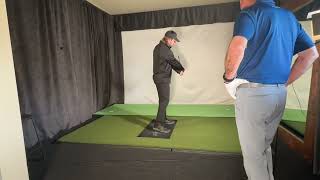
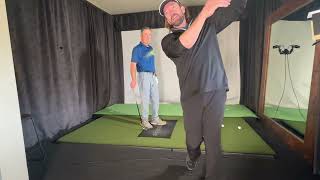
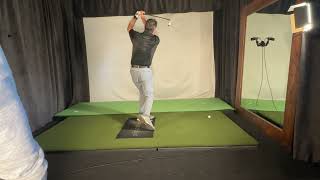
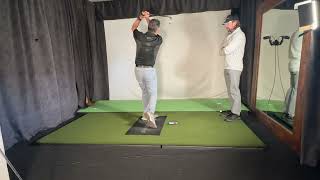
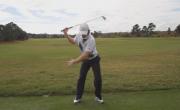
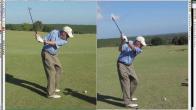
Bubba Watson has a very unique looking golf swing that often appears to be long and out of control. In this video, I'll show you how he uses the common swing shape of wide-narrow-wide found among all great players. I'll also show you how he stabilizes the lower body before he explodes upwards at impact giving viewers at home the appearance that he is swinging out of his shoes.
- Keep both arms straight and relaxed as you big to rotate the shoulders.
- Make sure you load the trail glute for stability in the back swing.
- Keeping the trail arm straight for as long as possible will help you rotation and width at the same time.
- Motor the downswing with the lower body and stabilize by stomping the left heel into the ground
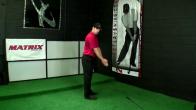
Hey guys, This is Rotary Swing Instructor Chris Tyler and Bubba Watson gets his next big victory at the HSBC World Golf Championship this past weekend.
I'm going to show you how he uses the wide, narrow, wide swing shape and a ton of lower body stability to build a lot of club head speed.
Let's go ahead and get started.
Okay, So the tour is wild man, and always fun to watch.
Bubba Watson gets his next victory at the HSBC Championship this past weekend.
So, congratulations to Bubba.
And this week, I want to talk to you about some of the critical areas of his golf swing that help him maintain a lot of width and also build a swing shape.
That's very common amongst all some of the best players in the world.
And I also want to kind of get over a little bit of the myth about his lower body and how unstable it is.
And actually show you what he does in his golf swing.
To stabilize and use it for a lot of effective and efficient power.
And I'm going to give you guys a list of checkpoints that are going to help you build a better swing shape.
That, in turn, is going to help you get over a lot of the mountains that you've been trying to progress through.
And a lot of times in amateur golf we see a different swing shape where we see a narrow, wide, narrow shape.
And if we work on trying to establish this wide, narrow, wide, you're going to be able to maintain more lag.
You're going to be able to make a lot more speed in the hitting area where it counts.
And then in turn you're going to be able to play a lot better golf.
So taking a look at Bubba, I flipped him around this week.
We're going to look at him from a right-handed perspective.
And this is no knock or no offense to you left-handed players.
We just have more right-handed golfers on the website.
So we're going to look at the takeaway position here.
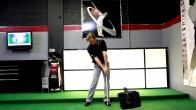
And Bubba has a very textbook-like takeaway where he keeps both arms very, very straight into his turn.
And he's got a very loaded upright side.
So his first move off the golf ball is to make a small shift to the hips to feel that weight hit that right heel, right ankle.
You'll actually hear Bubba talk quite a bit about that, making sure that he keeps his weight locked underneath the ankle area, And making sure that he can feel the weight shift and push down into those heel areas so he can stabilize his hips.
So he's done that very well at this point, and he's established a lot of width.
And for those golfers that have struggled for this particular area of the golf swing, you always want to make sure that we keep that right arm very straight into your turn.
If you see your right arm breaking, chances are your lead side or your left arm is starting to push across your center.
And when you push, the right arm will eventually break, And then, in turn, you've now narrowed the that risk of throwing the club from the top part of the golf swing down, or get the hands and arms into a deeper position.
Now from here, he actually maintains a ton of width, and you're going to see he still continues to rotate, and his hands are right at about sternum height here, and he's kept both arms very, very straight at this particular point.
So if you've noticed in your golf swing, when you're doing some self-analysis, that you see your right arm breaking, or you see that you've shut down rotation at the top of your swing, we have a fantastic video on the website called the Keep the Right Arm Straight to Turn video.
That's a video that Chuck did that shows, number one, not only how to establish a lot of width in your golf swing, But also make sure that you're using the right arm to focus back on making a big rotation or a big wide turn with the shoulders.
Those two areas are going to be critical for us to have this wide narrow wide swing shape.
So definitely check that video out.
I'm going to attach that video here into the recommended videos to the right of the video player, And that's one of those that will help you overcome two really big parts in the golf swing.
If you've been struggling with collapsing the right arm and then not rotating.
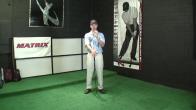
So as we start to work further into this golf swing, you're going to notice he gets the hands at about shoulder height.
You're going to see this right arm start to flex, and you're going to see that he gets fully loaded up.
You're going to see his lead knee here actually starting to kiss over into the trail knee.
Okay, you can see how that lead knee is kissed over in there.
Big wide turn, probably about 95, almost 100 degrees of shoulder turn.
But notice how he's kept this lead arm very, very straight and only has roughly about 90 degrees or so of trail arm flexion.
If you've noticed in your golf swing that your lead arm is starting to break at all, Then that's generally a sign that you've got too much right arm flexion or too much trail side flexion.
So if you've seen that your left arm is starting to break, then check to make sure that you don't have too much flexion in there, And that will help you maintain a lot of that straightness in that lead arm, because that's absolutely pivotal for consistency's sake.
So at this particular junction of the golf swing, this is where he does a lot of great things to motor his golf swing with the lower part of the body.
Now a lot of misconceptions out there is that when we get to this top part of the golf swing, we want to start to pull our arms down really, really quickly, and that's just not correct.
We want to get things moving with the lower half, and if we sequence up our downswing by trying to work on getting the lower half to shift first, Then the hands and arms will start to move into a good area.
To where you can start to release it and start to widen that arc back up and get a lot of max speed at impact.
So what I want you to take notice of here is he's externally rotating his lead hip quite a bit.
He's getting his hips to unwind, And he's also moved his lead knee back into a neutral position, So he's got that left knee stacked right over top of the left ankle, and you're going to see that the hands and arms look like they're moving quite a bit, but they're not because he's actually allowing gravity to pull them down, and he's still maintaining that narrow width by keeping that right arm flexed.
So you're going to see right at this particular point, so he's actually got his belt unwound here.
He's almost back to a square position with the hips.
Now, look at this lead side foot here, how stable it is on the ground.
It's not rolled to the outer portion of the foot.
He's very, very stable at this junction of the golf swing, and what you'll notice here is that now that he's gotten fully seated over there, he's going to start to push that left heel into the ground, and he's going to start to pull that left hip away from the target.
Just as outlined in the straight left-legged impact video, that's another good video for you guys to check out.
If you're wanting to really kind of learn how the lower body works in the downswing sequence, or what you're supposed to be doing with that lead side.
So you start to push that left heel on the ground, you'll see that belt start to come back up, and as the belt starts to come back up, the hands are going down.
So it's almost like a lever here, and as you see the hands are starting to approach in front of the right thigh, you can see that the hands are about pocket height at this particular point.
That left leg is nearing a straighter position.
So let me show you from the next few angles here, you're going to get the hands back down to about pocket height.
This is right at the junction where he's going to start to push that left heel into the ground.
He's got kind of a signature move.
If you watch his golf swing at all from face on or down the line, you'll see him slam his left heel on the ground to start his downswing transition.
We have a good video on the website on how the lower body works where we talk about a stomp drill, And we actually have you pick the left foot up and slam it down on the ground to make sure that the weight's fully over there, and then also that you have the correct muscles activated to help stabilize.
So again, if you watch his hips at this particular junction of the golf swing, They're not going to do very much at all because he's controlled them by getting the glute muscles to activate.
And then also notice that he's still got about 90 degrees of flexion in that right arm.
Because he's allowed gravity and the rotation to pull them down into this particular area of the swing.
And then from this point, You're going to see him stall the hips and then release the angles and then go back to that wide swing shape and maximize speed right at impact.
It's awesome, awesome stuff.
Very textbook as far as a wide narrow wide swing shape is concerned.
All right, so if you're looking to build a better swing shape that's going to be more effective and efficient, obviously check out the wide narrow wide video.
That's a great video.
Also if you've had problems with closing up your width and not rotating properly, then check out the keep the right arm straight to turn video.
And then also work on not doing much with your hands and your arms and your downswing sequence.
Let the lower body really drive the move, get fully seated left, use those left glutes to help stabilize, stall the hips, and then go ahead and release that thing for max speed.
All right, guys, so let's get out there and play some great golf.
I look forward to working more with you guys in the future.
Now let's make it a go.
































































































Chris
R.J. (Certified RST Instructor)
david
R.J. (Certified RST Instructor)
rick
Craig (Certified RST Instructor)
Robert
Chris (Certified RST Instructor)
Thomas
Chris (Certified RST Instructor)
Ken
Chris (Certified RST Instructor)