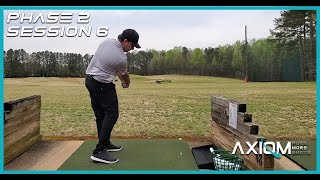
Play The Best Golf Of Your Life in 6 weeks | 3 of 6

Sorry, you need to be a member to access this video.
You Are Just Seconds Away - Become a member here!
Already a member? Log in now

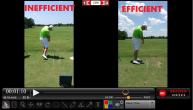
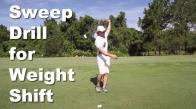
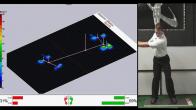
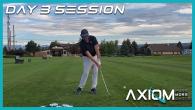
Lesson 3 Play the Best Golf Of Your Life In 6 Weeks, the keys to proper weight shift in your golf swing. Learn to create a powerful golf swing that requires minimal effort. The only Scientifically and biomechanically correct golf swing on the internet.


Week 3 of our special golf lesson series, "Play the Best Golf Of Your Life In 6 Weeks."

Today, we're going to learn to control the swing arch and work on weight shift. The key to conistent ball striking and lowering your golf score, we to create consistency with where your golf club bottoms out each and every swing.  The main difference between your golf swing and that of a PGA tour pro is that a golf pro has ultra-consistentcy thanks to a honed swing arc. 

Let's learn how to control where the club bottoms out by using this golf drill.  Step one is to make sure you have light tension in your grip and golf swing.  That is the critical element that we covered in our second video.  Once you're loose and free of tension, iI want you to take two golf balls and place them on the ground to use as guides.  Use them to set up a stance that is 2 inches outside of neuetral joint alignment.  Once you're set up in a stable RST address position with 50 . 50 weight distribution, I want yout to shift your weight sligthly to the left.  With the club addressing the ball, you are now going to get an accurate idea of where the bottom of your swing arch is.  

Once you've established where your swing bottoms out, you should use your leead arm to take a half swing (waist high) and focus on shifting your weight and while taking a half swing.  Do this move for 20 reps.  You will get the swing sensation of a simple swing arc.   After the first 20 swing reps, then do another 20 reps at shoulder height.  NOTE: your swing will continue to bottom out in the SAME EXACT SPOT.  This is critical to establish consistent contact. 

Finally, once you've done 40 swing reps at 1/4 and 1/2 swing arc, it's time to take a full swing and complete 20 reps.  What you will establish is the correct and duplicatable position for your particular swing, making it possible to build a RotarySwing arc that will lead to ultimate golf swing improvement. 

Hey, Rotary Swing golfers, welcome back to week number three of the "Playing the Best Golf of Your Life in Six Weeks" series. First off, I want to start off by apologizing that we didn't get week number three video out in time. We had a little bit of a production error in that video, and we had some mic issues as well. So, we wanted to be able to circle back, redo that video and make sure that you got some really high quality content here so that you can start to progress your way into playing some of your best golf. So, I know the first couple weeks we talked about ... number one, we were working on making sure that we didn't have a lot of big time head movement, also working on loading up our trail leg and maintaining our spine angle while we rotate our body. And number two, we worked on really shaking out the tension in the arms.

                Now, this week, what we're going to be doing is is we're going to be working on adding weight shift, okay, to a centered off body position, and we're going to be working on controlling the bottom of the swing arc. Now, what does that mean to control the bottom of the swing arc? Well, why are golf professionals so good day after day with their ball striking? Well, they get the golf club to bottom out in the same spot pretty much every single time with their irons. That's a really critical part to good, consistent ball striking is getting the golf club to bottom out or knowing where it's going to bottom out every single time. So, that's what we're going to be focusing on this week is getting the club, allowing our body to feel like it has some movement in it to help us create some momentum, help us create some of that speed, but also get the club to bottom out in that same spot for good, consistent ball striking. 

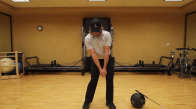
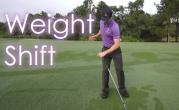
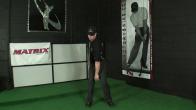
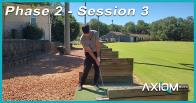
                So, let's go ahead and take a look at that drill now, and we'll start to lay out a rep range for you, and then we'll start to talk about what we're going to be doing in week number four. Okay guys, so the way I've got this drill set up this week is we're going to be focusing in on adding weight transfer and getting the club to bottom out in the same spot every single time. So, if you're having a hard time with this and you're really starting to lose some of the stuff that we talked about in video number two, I would suggest that we circle back to that. Really work on eliminating some of that tension in the arm because it's going to be really critical for us to be able to get the club to bottom out and not really feel like we're manhandling the club here. So, what I've done is I've grabbed three golf balls, okay? This is something you can do right at your house, and these first two balls that are closest to me are going to indicate my stance width.

                Now, I've got the ball just on the inside of my toe here on both sides here, okay? And that's just going to be a representation of my stance width, and this is going to make sense to you here in just a second. And what I want you to know here is that we're going to be setting up about two inches outside of neutral joint alignment on both sides, and if you're unclear as to why we suggest that you set up two inches outside of neutral joint alignment or what the heck that even means, then I've got a great video that's in the link in the description below. You can go ahead and click that video, we'll talk about the importance of determining how to get proper stance width based off of neutral joint alignment and not worrying about shoulder width apart, which is something that we've always heard through golf instruction. All right, so we're going to be two inches outside of neutral joint alignment here on both sides, okay. And this third ball is going to be a representation of where I want the golf club to bottom out.

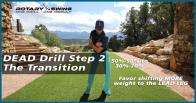
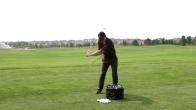
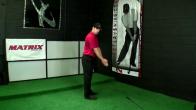
                Okay, now, how did I determine where this ball is going to be? So, here's what I want you to do is I want you to set up about 50/50. Both arms are going to be hanging relaxed. So, 50% of my weight in my right leg, 50% of my weight in my left leg, and all I'm going to do is I'm going to keep my arms and my head really still, and I'm going to shift my weight over to my left side by rolling to the inside part of my right ankle here. So now, what I want you to notice here is because my arms are going to be hanging freely, you see how my club moved forward a little bit here? This is where the golf club would be bottoming out, this is the lowest point of the golf swing here. So, that's where the golf club is on its last point down and it's first point up. So, we want to understand that that's the bottom of the swing arc because I've shifted my weight left, both my arms are relaxed, okay, and they're in a straight position.

                Now, normally, because we want to hit the golf ball ... We want to hit down on the golf ball to help compress it, we would want the ball just behind the bottom of the swing arc. So, you can see that this is where my bottom would be so my ball position would be right here. Now, the reason why I have this ball up in the position where the bottom of the arc is, is that's just an indicator, okay? It's just for you to have a little piece of notification if you're getting the club to bottom out in the same spot. So, again, the way this drill's going to work is we're going to set up, we're going to have our left arm hanging freely, okay? Our lead arm. And we're going to go ahead and move our lead foot in towards our right, and we're going to swing the club back to about hip high, okay? So now, what I want you to try and focus on here is we're going to step back out, so you can see that I'm back into my proper stance width, and at that point, I'm just going to let the arm fall and release.

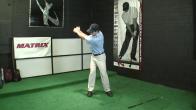
                So, I pull it back in, hip high, step out, head still, you can see that that club bottomed out in a pretty good spot there, step out, let the arm fall and release, okay. That club bottomed out in a pretty good spot. Step out, okay? Once you get 20 of these in a row, then you can start to increase the amount of width to the golf swing. So, we're going to start out with going hip high, now we're going to go back to about shoulder height, okay? So, we're going to pull our foot in, we're going to shift our weight, and the arm is going to fall and release. Now, if you notice that your club's coming down a little bit on the steeper side, chances are you're allowing your head to move a little bit too much. So once you step out, I want you to hold your head really still, and what that'll do is it's going to help you create some secondary axis tilt which is just simply the spine leaning back which helps shallow the golf swing out.

                Once you get 20 of those in a row, then I want you to go a little bit further. You're going to almost go in almost a full swing mode here. So we're going to step out, let the arm fall and release, once you get 20 of those in a row, then start the process over the next day. I want you guys to work on this at least five out of seven days. If you can't get 20 in a row, don't worry about it, circle back to video number two, start to work on tension, and then come back to this video, and you'll start to see that, "Okay, now, I'm adding weight shift, I'm eliminating that tension in the arm, I'm stepping out, the arm is swinging, and the golf club will bottom out in the same spot every single time," all right, guys?

                I wish you guys the best of luck this week. Good luck, post up in the comments below if you have any sorts of questions on this particular drill, this is going to be mission critical to make sure we get this down before we start talking in video number four about how to maintain spine angle through the hitting area properly so you don't have any early extension of the spine. Good luck, guys, let's make it a great day, we'll see you next ...

Must be Premium Member to Comment

64x64
Roy
Would you explain where the weight should end up when you shift (backswing & downswing). Should it go to the inside of the the foot, the center of the foot/ankle or the heel? Also, please explain why one is preferred over the others. Thanks.
December 1, 2019
64x64
Craig (Certified RST Instructor)
Hello Roy. You will have the ankles slightly rolled in at setup to help engage the inner adductors (Anchor to the Ground Video). It all actuality the weight will move a little bit like a figure eight. However, you are striving to get over the center of the ankle in the backswing and downswing. Too far forward will make the primary balancing joint your knees which hurts stability and puts excessive pressure on your knees. The heel can cause some counter balance issues. Center of the ankle joint is safe and balanced for the body.
December 2, 2019
64x64
Tram
With your advice in a previous comment , I start to practice this drill. One of purposes is to get the correct timing of shift to left leg and post up. In this drill, we see Christ displaces the left leg at initial position first and followed by the bottom out after. It was not precised if the left leg is posted up when the club reaches the bottom out spot. Please clarify. Thank you very much.
February 13, 2019
64x64
Chris (Certified RST Instructor)
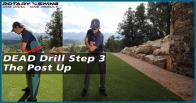
Hi Tram, yes you want to post up when the club is hitting the bottoming out point for sure.
February 13, 2019
64x64
David
While doing this drill I noticed I'm also a little inconsistent with bottoming out either closer or farther away from my body. (i.e. a heel shot or toe shot off the club). I noticed you said if you're coming down too steep (hitting fat?) then you're allowing your head to move too much and solution would be to keep head still which maintains axis tilt. So what could be the causes of bottoming out too close or far away from the body? Thanks.
February 8, 2019
64x64
Craig (Certified RST Instructor)
Hello David. Sounds like tush line issues. Make sure you aren't getting towards your toes. Chair Drill Video.
February 8, 2019
64x64
Amaury
When I do the drill with a ball, I have a hard time hitting it. And when I manage to hit it “well”, it is mostly a push. Any comments on what I may be doing wrong? Any recommendations on club selection to begin to do this drill?
August 8, 2018
64x64
Craig (Certified RST Instructor)
Hello Amaury. Any shorter iron should do 9-7. Sounds like the club isn't releasing soon enough or a little shoulder spin. Take a step back and work on impact. Gradually build up to this drill. Start the Perfecting Your Golf Impact Position Series.
August 8, 2018
64x64
T David
I just started working on this drill for a couple days. At first, I was kinda wondering about the whole point, but after staying on task, I realize how critical this drill is to assure a determined flight path. However, it seems that the tempo/timing is also necessary element to add in here to make sure that the club bottoms out at the right place. Or am I missing something?
April 11, 2017
64x64
Craig (Certified RST Instructor)
Hello Dave. Smooth shifting of weight and allowing a nice/tension free release should solve the tempo issue. Weight and tension usually control that aspect.
April 12, 2017
64x64
T David
Ah yes, I see that now, Craig. I don't know if this a good idea, but I now started a 1-2-3-4-5-6 count with every swing.... 1-2-3 (backswing) to the top.... 4 (step forward weight shift)... 5 (impact)... 6(finish). Kind of an expanded version of Chris's Ernie Els tempo thing. However, this appears to drive that "smooth shifting" that you mentioned. Great video... Going keep working on this one daily for the next few weeks. Thanks for the great responses. Question: Do you normally keep the same tempo with all clubs and swing types?
April 13, 2017
64x64
Craig (Certified RST Instructor)
Hello Dave. Tempo can be somewhat relative to the player. Some players naturally have a faster rhythm, than others (Nick Price vs Fred Couples). But, the tempo should stay relatively the same throughout the bag.
April 13, 2017
64x64
T David
Just started working on this drill. I see the point is to get the proper weight shift and bottoming out at impact. Does this mean that our weight transfer should be close to 95% at the top of the swing on the right and close to 100% on the left at impact?
April 10, 2017
64x64
Craig (Certified RST Instructor)
Hello Dave. Slightly exaggerated in the drill. Most players don't "feel" a weight transfer. And, need a little extra to start understanding weight movement. In the real swing, weight will be around 80% to the trail side and 80%-90% at impact.
April 11, 2017
64x64
stephen
I see no link to explanation of 2 inches behindvneutral joint alignment as mentioned in the video. I have no idea what you are talking about. Please supply the link.
March 25, 2017
64x64
Craig (Certified RST Instructor)
Hello Stephen. The video was filmed under the old build of the site. I apologize. Take a look at Determining Proper Stance Width and Stance Too Wide Video.
March 25, 2017
64x64
Iain
Hi, did I hear you say that the ball position on the course would be back of where the club bottomed out so that you get the ball first then the ground? This could partly be why I am struggling to keep the hands ahead of the club head at impact and am having to flip to get the ball? Many thanks Iain
May 13, 2016
64x64
Craig (Certified RST Instructor)
Hello Iain. You want the club bottoming out after the ball. Ball placement is very important. You need to be just behind the bottom of the swing arc (Proper Ball Position and Problems Caused By Poor Ball Position Video). This could be a reason why you are struggling to keep the hands ahead.
May 13, 2016
64x64
Richard
Hi Chris: I miss you guys. Working hard on those exercises. However, I played 9 holes and my tendency was having my right hand too active which resulted in over drawing the ball left maybe even pulling. Would you suggest overlapping my last 2 fingers of my right hand. If not, can you suggest a solution which will work in order not to be over dominant on that side. Thank you, Richard.
April 22, 2016
64x64
Craig (Certified RST Instructor)
Hello Richard. Using a overlap grip can definitely help. Requires less trail hand on the club. In future videos we will be discussing adding the trail arm and how best not to over work him.
April 23, 2016
64x64
Peter
Technically what you espouse is correct. However, it adds too much technical self-consciousness that leads to tension. You need to emphasize motion with tempo from start to finish, together with correct stance, grip, and ball position. These are the hallmarks of good golf swings. From my experience, segmenting the golf swing into mini-parts is okay to an abstract thinker. Most golfers, however, do not have the time to practice drills hundreds/thousands of times to perfect mini moves. that form a good golf swing. Maybe that explains why there are very few who can swing like professionals. But your analysis of the golf swing is excellent.
April 22, 2016
64x64
Craig (Certified RST Instructor)
Hello Peter. Thank you for the compliments of Chris's Video and analysis of the golf swing. I would like you to watch the Truths of Instruction - Part 4 and Part 5. Also, Learning How to Learn. The issue has to do with Neuromuscular Re-Education. The brain is very stubborn at learning new motor patterns. Especially when a certain move has been trained over and over again. To get over the proverbial hump you have to learn the way the brain is designed to learn. When learning any new motor pattern you have to detail all the little intricate parts. When learning how to drive a manual transmission or even reading. You don't learn at full pace or 100 mph. For example reading a book. You learn letters, vowels, words, how to form a sentence and so on. You don't just pick up Gone with the Wind and read fluently. I agree it would be much easier to piece together one flowing movement with all the parts in correct sequencing. But, the brain isn't very good at training new motor patterns when you throw a vast load of information at it. It might sound like a daunting task to get in the required reps. But, after 100 quality reps myelin in the brain start to break down to form new neural pathways. After about 1000 you will get pretty proficient and 3000-5000 to master. So, if you took 2 weeks getting 100 reps a day in (1400 reps) you would start getting very proficient at the new move and would be well on your way to retraining the brain to perform the proper move.
April 23, 2016
64x64
Peter
Craig, your point is well taken. It takes patience and dedication to get good at anything requiring skill. Knowing what to do and executing properly do not always come together resulting in inconsistency. , ,the bane of most amateur golfers.

April 23, 2016
64x64
Nacho
Hi Chris/Craig, Working hard (without ball) on shifting my weight to the left heel. The club is relatively well at the top. Nontheless i see that my first move in transition is pulling my arms dow. How can avoid this move? I see that if i try (hard) to shift my weight with more (lets say flow) this move almost dissapear. Could you pls assist with this? Many thanks in advance
April 22, 2016
64x64
Craig (Certified RST Instructor)
Hello Nacho. Go back to Video 2 of 6. It seems that you are creating tension to force pull down the club. This will help get the "flow" back.
April 23, 2016
64x64
Barry
Chris, I don't see the link for the neutral stance video you referred to. Can you give it to me again?
April 22, 2016
64x64
Craig (Certified RST Instructor)
Hello Barry. It is located under the Recommended Tab on the top right of this page. Or, Determining Proper Stance Width in the Setup Section.
April 22, 2016
64x64
hubert
Chris, outstanding drill. This I'm sure will help me on my weight shift, and keep my head still.
April 21, 2016
64x64
Craig (Certified RST Instructor)
Hello Hubert. Glad you like the video.
April 21, 2016
64x64
Martin
Thanks for this, it was worth the wait. One suggestion, to help see where the club is bottoming out, especially on hard practice mats, I sprinkle a little talcum powder along the swing line. In your drill you should see the talc kicking up level with the 3rd ball. This also helps with focus as you can get used to concentrating on seeing the powder move rather then looking up to see where the ball is going.
April 21, 2016
64x64
Craig (Certified RST Instructor)
Hello Martin. Good suggestion. I actually told a student in a swing review yesterday to use the same method when practicing of a mat.
April 21, 2016
64x64
Rocco
My right arm will not straighten out Jerad
April 21, 2016
64x64
Craig (Certified RST Instructor)
Hello Rocco. Could you provide a little more detail of what your trail arm is doing and at what point?
April 21, 2016
64x64
Rocco
It was dislocated playing football and will not straighten completely out
November 22, 2018
64x64
Craig (Certified RST Instructor)
Hello Rocco. Allow the trail arm to stay as straight as possible to not cause pain. You will have to keep hyper focus on making sure you rotate and not allow the early folding to cause lack of shoulder rotation.
November 23, 2018
64x64
Rocco
Trail arm and elbow stay pretty close to side in my swing
November 26, 2018
64x64
Craig (Certified RST Instructor)
Hello Rocco. I would have to see it to better diagnose a good plan. However, stay as wide as you can. But, make sure you rotate the shoulders and the trail arm stays in front of the chest back & through. Don't let it saw behind you in the backswing.
November 26, 2018
64x64
Rocco
Here is a pic of swing
November 27, 2018
64x64
Craig (Certified RST Instructor)
Hello Rocco. That's pretty darn good shoulder rotation with the issue you have in the trail arm. From here keep rotating and go up with the arms! Don't let them slide behind. 4 Square Drill and Pool Noodle Drill Video.
November 27, 2018
64x64
Rocco
Here are photos from yesterday.
November 29, 2018
64x64
Craig (Certified RST Instructor)
Hello Rocco. Could use just a hair more hip bump when adding the tilt. Axis Tilt at Setup Video Video. You added some shoulder tilt, but didn't seem like you bumped the hip when adding axis tilt.
November 29, 2018
64x64
Rocco
The backswing photo
November 29, 2018
64x64
Craig (Certified RST Instructor)
Hello Rocco. Try to stabilize some of the leg work. Laser Beam Knee Drills and Left Knee Movement in the Swing. Also, I know we have the issue with the trail arm, but try to get the lead arm as straight as possible. How to Keep the Left Arm Straight Video.
November 29, 2018
64x64
Tim
where is it????
April 20, 2016
64x64
Craig (Certified RST Instructor)
Hello Tim. Are you having trouble viewing the video?
April 21, 2016
64x64
alan
A. Jackson is having tbl viewing the video. I get over 1 minute of action with no sound after you sign off.
April 21, 2016
64x64
Craig (Certified RST Instructor)
Hello Alan. Are you using Chrome and/or Firefox? Can you give me the time frame you are losing sound in the video. It is playing properly on my end, but that doesn't mean there may not be an issue.
April 21, 2016

We're after one thing: Real Results - Real Fast. And that's exactly what our members achieve. And that's why they say the AXIOM is: Mind-blowing. Game changing. Revolutionary.

Check it out ...

Here at RotarySwing, talk is cheap and the proof is always in the pudding. Come see the massive transformations we can achieve together in your swing.

See for yourself ...

From beginner to pro, we have what you need to get you where you want to go.

See how inside ...

RotarySwing was founded out of frustration with the current state of golf instruction. Quinton knew a better way had to exist to learn this game we all love.

Learn more ...