AXIOM BootCamp 4, Chris Tyler, Jan 2022, Session 2
Session 2 of 4
Okay, welcome back.
Happy Saturday to everyone and whatever part of the world you're in.
Good morning, good afternoon to some of you already, and good evening to those folks of you that are on Australian time, because I know we've got quite a few Aussies in the room today.
A special congratulations to our VIP, or I shouldn't say VIP, I should say our MVP, Robert M.
from Australia, who I don't think is going to be joining us live.
sent in a review yesterday where his movements were absolutely freaking perfect.
So congratulations to you for winning the MVP award.
Hopefully everybody is having a wonderful start to their weekend so far.
For those of you that just got to see me about an hour and a half ago, or about two hours ago, I should say, in the learning how to practice program, welcome back.
For those of you that are just joining us now.
Welcome back.
It's nice to see you guys.
Hopefully you guys were able to get some good success with the stuff that we talked about this last week.
Hopefully you guys can hear me a little bit better today.
I was, I think that the lav mic that I wear, I'm wearing a lav mic.
I think what happened was is because of the midst of all the internet catastrophe that I was having on Tuesday, that I didn't get a chance to do a whole bunch of mic testing before I went on.
And I think that the mic pack that I had on was not.
registering through the software.
So I think it was registering through the camera back at home.
And so that may be why you guys couldn't hear me.
But I've also added the rug back to this room to take away a little bit of the bounce and a little bit of the echo.
So for those of you that are here in the chat, check it in from where you are from.
If you can hear me loud and clear and you're comfortable with the sound, please let me know.
All right, Robert says yes.
Okay, that's good.
Excellent.
Loud and clear.
Perfect.
I like it.
10-2, I mean 10-4.
All right.
Thanks, Craig.
Nice to see you again today, sir.
Tom from South Bend checking in.
See that we are all good in the hood.
Today is a very, very important day of our camp because guess what?
We are going to start working on impact.
We're going to start working on trying to hit the golf ball today.
And we're going to be working on the most important area of your golf swing.
It's called the hitting area.
So we're going to be identifying what the hitting area really is.
And I'm going to show you what your goal is between now and Tuesday.
But we're also going to recap some of the stuff that we talked about this last Tuesday, because we did have a couple of write-ins where people didn't necessarily gather a good way to be able to practice this stuff.
And that's not on you guys.
That's back on me as a golf instructor.
right?
So I'm the one standing here in front of you guys.
And if I leave anybody in this room with any sort of question as to what they're doing, why they're doing it, or how they're going to get it done, then I didn't do my job.
And that's just not, I'm not going to settle for that.
So we're going to answer some of that stuff out of the gate today.
As always, okay, as always, if you can, do me a huge favor.
I know we're excited to be here.
Okay.
I know that we're excited to be here on a Saturday.
taking up time out of your day to listen to me ramble at you for an hour plus.
But if you can, please keep the chat really quiet for us unless there's something really pressing, Unless all of a sudden I'm dropped offline, or if my mic stops working, or if anything pops up.
Or if there's some sort of emergency -like question that you need to ask, then you can ask it.
Craig's in here to help me out as well.
I know a lot of you guys have worked with Craig in the past.
I know a lot of you are excited to see him as well.
Please try to do me a favor, just hang on till the end so that we can keep things flowing.
Um, but I also do want to say that I am very, very impressed with the few people that I did see swing reviews from this week.
I'm not sure how many Craig handled, I'm sure he was handling quite a few, but for the few people that I did get to see that were in boot camp.
Going through the movements, just very, very subtle adjustments to certain pieces of those movements.
And you were able to show me some really good stuff, so My hat's off to you.
And as I said to you, for those of you that are just joining us now, Robert M.
from Australia.
I know that you're not joining us live today, but you're going to be watching the replay.
Congratulations.
You are the MVP for the week for what I saw.
Now, Robert sent me in videos of not tying it all together, but he was doing these in three separate pieces.
Okay.
He showed me that he was getting himself into a good setup position.
He showed me his pressure shift to his trail side and his body turn.
He showed me his squat to square, and he showed me his post-up.
Now, the only points of deduction that I gave him was that in transition, his head didn't come fully back into the position of where it was at address.
It was just slightly back.
So I gave him a practice plan to help get the head back into position.
And then my end of review, I told him I want him to start trying to blend those three things together, which leads me into exactly what we're going to be doing at the start of this session.
And this is where I have to apologize to you guys that I didn't give you guys a very clear plan on how to get this stuff done.
So the way that I want you to practice this stuff at home is I want you to start out by breaking it up into pieces, breaking it into a setup first, which we're going to go into the setup position here now, but we're going to go two inches outside of neutral joint alignment.
We're going to hinge from our hips.
So we're going to go butt back, chest over the golf ball.
We're going to keep our chin up.
We're going to soften our knees and let our hands and arms hang freely.
Okay.
Slide our hip towards the target just ever so slightly.
Now I have my axis tilt.
I'm going to cross my arms back over my shoulders.
And now the first piece that we want you to work on is that little pressure shift to the right.
So you're going to see my hip move diagonally towards my right ankle.
My upper body is kind of freed up.
It's working with it.
I'm taking my right shoulder and moving it back behind my head, trying to pull the right shoulder back as far as I possibly can.
So we're going to do 10 or 12 reps just like that.
Three.
Four.
Pressure shift, big turn.
I'm going to turn down the line here for you guys to see it.
So we're going to start from a vertical position.
We're going to hinge from our hips.
Butt back, chest over the golf ball.
Soften the knees.
Arms hang freely.
Okay.
Nudge my hip towards the target just slightly.
I'm going to cross my arms over my shoulders.
Now I'm going to make that little pressure shift to my right.
I'm going to take the right shoulder and pull it back.
I'm going to try to maintain some flex in my right leg.
It's one rep, two, three, four, five.
Okay.
So you've now done setup and your backswing movements.
Now what we're going to do is we're going to blend in the backswing movements and squat to square.
So we're going to go ahead and get our setup position.
Okay.
We're going to get over the golf ball, soften our knees, arms hanging freely.
Arms across your shoulders.
We're gonna pressure shift right, turn our body.
Okay, so our head has moved off the ball.
We're gonna slowly come back into position.
Hips and knees are gonna come back to square.
Shoulders are still gonna be very closed.
90% of my weight or 80% of my weight is underneath my left ankle joint.
Okay, so we're gonna pressure shift right, big turn.
Squat to square, head and chest come back into position.
Chest stays closed.
Squat to square.
Okay, let's turn down the line.
Squat to square.
You can still see a little bit of my lead thigh.
You can see my chest is pointing back to you guys at home.
Okay, pressure shift, turn, squat to square.
Make sure your butt goes back a little bit.
Okay, 90% of my weight on my left side.
Trying to keep your shoulders as closed as you can.
So trail shoulders up, lead shoulders down.
Pressure shift right, big turn, squat to square.
Okay.
So now you've just done setup, backswing and transition.
Now what's the final piece?
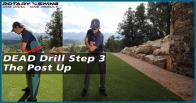
Post-up.
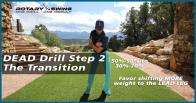
But I'm going to show you how to get to your post-up position first so that you have a kind of a place that you're going to try to move to.
How do I want you to do it?
Good setup position.
Arms hanging down freely.
Nudge that hip towards the target if you need a little bit of axis tilt.
Cross your arms over your shoulders.
Okay.
Now move your hips left.
and open your hips up 45 degrees and try to keep your head and chest back, okay?
Hold that position static for a moment, okay?
Your left leg should be passively straight, it should be a neutral joint alignment, and your hips should be open 45 degrees, okay?
So you feel that spot, reset yourself, pressure shift right, pull the shoulder back, squat to square.
Now when I make my post up, I'm gonna make sure that my hip continues to move laterally to get to neutral and opens up.
I'm keeping my head and chest down.
Don't let your head and chest come up and don't let it turn past.
Go here, okay?
Pressure shift right, turn, squat to square, post up.
Keep your head and chest down.
Pressure shift right, pull the shoulder back, squat to square, post up.
Let's turn down the line and I'll turn up the line for two reps here as well.
Pressure shift right, turn, squat to square.
Post up.
So you can see that my hips are open 45 degrees.
You can see my big rear end.
You can see that my shoulders are square.
My right foot is cantered in.
I don't have any weight on that side at all.
Okay, let's do one more rep from down the line and I'll turn up the line.
Pressure shift.
Keep a little flexing that right leg.
Squat to square.
Post up.
Okay, up the line.
So we're going to pressure shift right.
Pull the right shoulder back.
Squat to square.
Left hip goes back, shoulders are square.
Okay, you're trying to get this hip to move back and away.
Now, that's how I want you to practice.
I want you to practice with each one of those checkpoints in mind.
Pressure shift, big turn.
That's your backswing.
Making sure that you maintain some knee flex.
I want you to practice your squat to square, making sure that your head and chest come where?
Back into position.
Shoulders stay closed, 90% of your weight on your left leg, or 80% of your weight on your left leg, sorry.
Then I want you to finish off the movement by going to impact in that post-up position.
Each of those things, you cannot practice enough.
Now, in a real world or a golf course situation, we never just hit those positions.
I gave you guys a way at home to move through those positions.
How are we moving through those positions, getting to impact?
Well, we're using the axiom, but I'm using a hybrid of the axiom movement where I'm not going to have you go all the way around the clock unless you want to.
That's a personal preference.
What is the pressure shift doing?
Well, that pressure shift that you're doing is moving your weight right to six o'clock.
So rather than having to go 12 o'clock, one o'clock, two o'clock, three o'clock, four o'clock, five o 'clock, six o'clock, you're going right to six o'clock.
Why do I like to do that?
Well, because I've seen most of you guys respond to that movement very well.
For those of you at home that are real locked up in your lower half, real frozen, start out with some movement.
Perfectly fine.
Okay.
Get yourself working around the clock.
Now, the big ticket item on here on this movement is that when you're going from six o'clock up to seven, eight, nine, is that you are using your right leg to help push your hips and your body in the direction of the target.
So your head can move back into position.
Okay.
Your hips are shifting left and you're counterbalancing it with that secret sauce movement that some of you missed, right?
The secret sauce movement.
is virtually what the clamshell drill is.
For those of you that haven't seen the clamshell drill, these videos that are referenced on your PDF, you can go back and you can click on them and that should take you right to the video.
It's called the clamshell drill, okay?
It is the first time in Rotary Swing Tour history that you hear us actually talk about the increase of spine angle and transition.
Why have we never talked about it so much in the past?
Well, because it's such a minimal change to the spine that people would get kind of lost in trying to measure how much angle increase they're having.
But what it is, is also a very good way for you to be able to perform your post -up movement.
And so that's all that chrysium that I told you is all about, or the hybrid axi movement, is just pushing from your trail side up through six, seven, eight, nine, and thinking about your left butt, your lead butt for you left-handed players at home.
Sorry, I don't mean to leave you guys out.
but you're just thinking about this left butt going down and back.
Now, everybody at home is like, well, my left hip is supposed to go up and away.
Trust me, if your left butt is moving down and back and you're pushing from your right side, it moves to that open position that opens your hips up.
The rotation of your hips is what's moving your left leg to that straight position, okay?
And that and driving your left foot into the ground.
So you're pushing back against the ground.
That's ground force, okay?
Ground force is a good thing.
So how do I want you to practice that?
Well, I want you to take your setup position.
I want you to press your shift to your right side, and I want you to push as hard as you want from your right side to your left, and I want you to get to this spot right here, okay?
That's all I want you to do.
Now, if you notice a fault that pops up, like your head position didn't return, maybe you didn't load into your right leg properly, then how do you think I want you to start your next practice session off?
Well, I want you to work on loading into your right leg, maintaining some knee flex, making good body turn.
Then I want you to start.
trying to move through those positions.
Everybody's going to practice a little bit different because everybody's going to have, they're going to be in different phases of this stuff.
But you at home, I'm trying to arm you with all of the tools and all of the arsenal that you need in order to be able to look at it on camera and say, I'm missing this piece.
Maybe it's in transition where your shoulders have come back to a square position.
They haven't stayed closed.
Maybe you haven't transferred enough weight.
I gave you all three of those big key movements first, on purpose.
Why?
Because if I just led you into Axiom, and this is what we said to you guys at the start of the first session, is that if I just led you into Axiom, gave you all of this big free reign movement, that doesn't ensure us that you're going to load your right leg.
That doesn't ensure us that you're going to turn your body.
That doesn't ensure us that your whole body is going to move back onto your left side.
That doesn't ensure us that you're not going to come down here and hump the goat with the right leg going like this.
Excuse the poor terminology, but you can see what I'm saying.
So we break it up into the dead drill components on purpose.
Because you at least have to have some of this baseline stuff in a good spot before you start trying to blend it together.
So that's why we give you the secret sauce at the end of it, right?
And we can call it something else if you guys have a better name for it, right?
So what I'm trying to tell you is this.
If I left you unclear as to how to practice this stuff in the last session, or I didn't give you all of the information that you needed, My sincerest apologies because that is absolutely just not going to work for me, right?
We're here to work with you guys.
So I will make sure today, as we go through the nuts and bolts of the release, that I teach you exactly how to practice this stuff.
Because this, my friends at home, is where golf is made, right?
We know two very important things about golf.
That.
You have to have the club face square at the point of contact, right?
And you got to have the club shaft leaning forward.
We know that those two things are extremely important for compression and for us to be able to hit the golf ball in a reasonable direction.
Now, obviously, path does play an important role in this, but I want you to remember the stuff that we're going to be talking about today is 80% of your golf shot's DNA.
80% is face angle.
The other 20% is dictated by the path.
Yes, like I said, path does play a very, very important role.
With the way the club face wants to rotate through the hitting area.
Now, before I get into that, I'm going to make one little disclaimer that I thought I made in the first session.
But I still got a note on it.
And I'm going to just nip this in the bud.
Some of you have been around the website for a long time, seven, eight, nine, ten years.
Some of you have been around the website for a year.
Some of you have been around the website for this is your first experience.
I want you to remember that if I talk about every single little small detail that goes into every single body position, as far as like a setup, right?
Where you might've heard ankles rolled in or get your glutes activated all for the sheer fact of getting stability out of dress.
I'm not leaving that stuff out of the program on purpose, right?
The way that I got you set up over the golf ball, regardless of your level of competency is going to get you into a stable position.
Now, if you find that you're unstable, you specifically, when you start moving at home, then post that up in the comments.
Let us help you because I can give you a little tip that might help the class by saying, roll your ankles in a little bit out of dress.
That helps activate some of the muscles in your inductors.
That helps get some quad activation.
That helps get some glute activation.
So my point is this, this program that we worked our butts off on is not just something we grew out of thin air.
In fact, I remember the day that when Craig, myself, The days my Craig, myself and Chuck were sitting in Chuck's office writing The dead drug.
That was a very, very long, tedious process, and it was a lot of trial and error.
And a lot of the stuff that we as instructors know.
And how people are going to respond to this information.
And so the same thing that unfolded when we started writing the axiom program is that axiom.
When we beta tested it.
We learned very quickly that we were way behind swing faults.
We were way behind, and we don't like causing swing faults.
We like building nice looking golf swings that produce.
So my point is, Is that the information and the way that we've written it and the way that we've put it together?
Is the fastest way to get you guys swinging the golf club and moving through positions, right?
And getting to the point where you can actually start hitting golf balls, right?
Think about that.
Now, I don't expect you guys at the end of this two weeks to be out there ready for the PGA tour, but you're going to leave here.
with better movements that you showed up here in the first place.
You're going to leave here with a better understanding on how to work your way away from faults.
You're going to learn, you're going to find a better way to practice and you're going to learn that it's okay to start small and then work big.
That's it.
And that's what you're going to be doing from today into next Tuesday is I'm going to teach you really small movements.
And a lot of you guys are at home and be like, that's it.
Watch what happens.
This is how Chuck, myself, and Craig used to teach our clinics, is we started with a release.
And everybody came in from all over the world.
They spent two days with Paul, I'm sorry.
Am I boring you?
I just got to cover this stuff, all right?
So we spent two days working from hip high to hip high.
And everybody was like, that's all I'm doing is just hip high to hip high swings.
Yep.
Guess what?
By the end of the weekend, we got them hitting steamboat nine to three swings.
And they were compressing the golf ball.
Everybody was like.
So.
That's what you're going to learn today.
Now, when we're done the session today, you're going to work on two things.
You're going to be working on the release drills and you're going to be working on your body movements.
You're going to be working on those as two separate pieces as much as you possibly can between now and Tuesday.
Okay, Paul, if you want, you can just watch the recording because I got a lot of stuff to cover because of the stuff that was missed in the last session.
So no, let's go, baby.
Oh, okay.
All right.
Sorry.
I took you out of context.
I like your excitement.
So this right here is my favorite thing to teach.
Why?
Because you guys at home, regardless if you're good at golf or you suck at golf, can start compressing the golf ball.
I promise you, if you follow this plan and you do this and this only between now and next Tuesday, you will have compressed the golf ball.
If you can do this where your left wrist goes from here to here, okay, that's it.
If you can go from here to here and it's flat or slightly bowed, you can play golf.
Now, you're going to hear me talk about lead side versus trail side stuff.
You're going to hear me as a golf instructor push you in one direction.
Why?
Well, because I've been doing this for a long time.
You're going to hear that I'm very biased towards a lead side release.
I personally am a lead side dominant releaser of the golf club.
I am.
I teach it.
I do it myself.
The trail side, we just started introducing about a year, year and a half ago.
I'm not a huge fan of it.
Why?
Well, because I don't do it.
And number two, I understand that you guys at home are not good at golf sometimes because you overuse your troublemaker, right?
Your right hand for right-handed golfers is unfortunately your very out of control brother that screws up the party all the time.
And your lead hand is your conservative brother that shows up and does the right thing.
He shows up and he's on time.
He's like your accountant.
This guy is, he's the crackhead wacky one, right?
So when your right hand sits behind the club, It can affect some very, very important parts of the swing, folks.
It can affect face angle, right?
It can change the complexity of face angle.
It can change your angle of attack.
It can change the swing plane and the path that the club is on very quickly, very quickly.
And so if you actually look at how precise you have to be in the world of golf to hit a straight shot, you would be mind boggled, okay?
A lot of you would probably pack your bags up and head over to the go-kart track and try to do something different with your life, okay?
I promise you, okay?
When you look at playing professionals, and you look at their data, and you guys can go look at TrackMan data after we're done here today, because I like studying this stuff, you will see that most of them have a face angle that's a degree or better.
Face angle is a byproduct of your path versus your face-to-path.
Angle of attack does play a role in there, but that's where you get that number from.
So if you have control of your face angle, which all of those guys do, then you have a fighting chance to play this game.
So we're going to teach you how to do that today.
Okay.
And we're going to do it stripped down and then we're going to build it up.
Okay.
It's going to feel maybe a little bit on the mundane side at first.
It might feel a little bit not exciting, but guess what?
I will do my best to spice it up for you guys and give you some of the ins and outs of this stuff.
Now, some of you have heard some of this stuff before.
Some of you haven't heard any of this stuff.
I still want you to practice this no matter if you feel like you're really proficient with a release, because quite honestly, you can't do enough of what I'm going to teach you today.
Okay.
Now, for those of you that have your PDF up, what we're going to do is go through these bullet points real quick, and I'm going to teach you guys how to practice this.
And we're going to talk about trail side versus lead side.
And no matter what you do, whether it's trail side versus lead side, I don't care if you swing it with your right leg, trying to help your arms through there.
I don't care.
If you can get your wrist into this position where it is towards the middle of your lead thigh, it is flat, okay, or slightly both, then you can play golf.
This right here is what most of you look like at impact.
where you have your left wrist cupped, the club is past your hands.
Now, why can't you play golf like that?
Because when you have the club adding loft to it, you can't compress the golf ball.
When you have this position right here, the toe of the club is rotating around its axis much too quickly, and you're going to create all sorts of different deer effect on the golf ball.
So you cannot play with a cupped left wrist position at impact, okay?
If you go and look at golf across the board, and you look at it from the last 100 years, and you look at all of the best ball strikers, look at the one thing they have in common.
you're just going to see the left wrist position.
It is flat at impact.
Promise you.
Now you can go down the pathway of KVEST where they've measured every single person under the sun and they give you all this really, really bad data that doesn't do us a lick of good, right?
Because all those guys sustain a golf related injury that keeps them out of golf for eight weeks or more.
You can go look at it.
But the thing, the only thing that they're doing in common is the left wrist position.
Okay, trust Got it?
All right.
So the release should be freewheeling.
Lead side dominant releasers of the club are going to feel out of control.
You're going to feel out of control.
There's this great movie that nobody on this planet saw, including myself.
It's called Fast and the Furious Tokyo Drift.
If any of you saw it at home, I'm sorry.
And I just heard it was terrible.
I did see the trailer for that movie.
And Little Bow Wow says, you ain't in control unless you're out of control.
And I was like, that's it.
He finally said something of substance in this world.
It's being out of control.
When you get to the point of delivery, okay?
And when I talk about delivery, I want you to understand what this looks like.
When your hands get down in front of your trail thigh and you have your club shaft parallel to the ground, this is your delivery point.
Now, looking at it from a down the line perspective, Your delivery point when your hands in front of your trail thigh is going to be when your club head is in line with your hands and the club shaft is parallel to the ground.
This is a delivery point.
Out here, no bueno.
Back here, no bueno.
You want it right here.
So if you get it to this delivery point and you're a lead side dominant releaser, all you have to do is let go, baby.
That's all you got to do is just let her go.
That's why if you look at all of these still images of Phil Mickelson and Freddie Couples and Vijay Singh, their trail hand is off the golf club at impact.
It's coming off the club.
Why?
Because they're not using it to move through the hitting area.
They're letting it go.
They're letting the club do what it's designed to do.
Let's talk about that for a moment.
Golf clubs are designed to rotate.
They're designed to rotate.
And if you look at the way the shaft comes up off the hosel here, it's designed to be swung on an incline plane.
So here's something that I do for students all of the time.
And this is very much in line with what Homer Kelly was able to uncover back in the early 80s, late 70s, early 80s.
For those of you that don't know who he is, you don't need to go look him up.
But he basically took a golf club and he put it on the end of a string.
And he started swinging it around in circles.
And every time that club went to the bottom of the circle, what did the club What did it do?
Well, I'll answer for you.
It squared itself up.
You mean the club pulled itself down to the bottom of the circle and it rotated square.
Exactly.
This is where a lot of you guys are going to have a problem with this.
Why?
Because you want to be in control of something I don't want you to be in control of anymore.
Think about that.
This game is already really freaking hard as it is for us to go out there and to get this little ball and this little club head lined up with one another.
And for us not to feel like we're doing things with our hands and our arms.
No way, Chris, no way.
I'm going to hit it all over the place today.
You got to just trust it.
Okay.
And this is where if you follow along with these movements and you think about your body and you only think about your body, guess what the club and the ball are going to be doing.
They're going to be reacting.
Okay.
I promise you.
So a lead side dominant releaser is going to have a very free-flowing release.
A trail side dominant releaser is going to have a little bit more effort.
We'll get into that here in just a moment.
Your grip pressure should be in the back three fingers of your left hand.
So the back three fingers, your pinky finger, your ring finger, and your middle finger.
I didn't mean to flip you guys off at home, but you get it.
Those three fingers, lightly, on a scale from one to 10, 10 being rigid and tense, I like you hold it between a two and four.
Now, you're probably thinking to yourself, Chris, That is very subjective because my two and four could be a lot different than your two and four.
Okay, I'll give you something a little different.
Think about it as being a tube of toothpaste that you have the cap on or the cap off, I should say.
You're going to hold onto it where you're just hanging on to it enough to where you don't have toothpaste flying out of the tube.
We all have these crazy analogies, right?
Like the baby bird.
Hold onto it like a tube of toothpaste.
So between two and four, that should get you in the ballpark.
Now, a drill that I do for people quite often is I will hold the club and I'll swing it back and forth.
And if you look at my hand really closely, it's a little hard to see it because I'm standing far away.
You're going to notice that I'm holding the club where?
I'm holding it in just my pinky.
And I take video of it and I'll show students.
And they're like, so you're not trying to hang on to the club?
No, I'm trying to let the club fly.
We have plenty of videos on the website, the VJ release drill.
All of those videos talk about how free -flowing you want the release.
So we want your grip pressure to be in the back three fingers of your left hand.
We want it to be between a two and a four.
Taking the club back outside the trail thigh, the lead wrist should begin to flatten slightly with your golf logo pointed directly in front of you.
So the way that your lead wrist works in the golf swing.
I'll roll this up.
And actually, you know what?
Let me put a glove on.
I think it's a little bit easier for you to follow when I have a glove on.
So your lead wrist at address is going to start out a little bit cupped.
Okay.
Just a little bit.
As you start to take your left arm back, this is going to begin to flatten.
It goes fully flat as you go from a takeaway up to the top of the backswing.
So for today's sake, when you actually start doing these reps, I want you to try to get it to perfectly anatomically flat.
Okay.
I want you to try because this is going to be where your delivery point starts and it's going to be flat on the way down.
Now from here, what you're going to do.
Is you're just going to allow your arm to fall down in front of your body?
And you're going to focus on getting your glove logo to be pointed directly down your target line.
Not like this, not like this, directly down your target line.
For those of you that have had a nasty flip or scoop, I want you to actually try to bow your wrist and get your glove.
Logo pointed in the direction of the target, to the point where you can look down through your palm and see a hole.
If you had a hole there, you could see the ground.
that's how much I want you to bow it.
This would be very exaggerated.
You would have the club shaft delofted too much.
It'd be very hard to hit shots.
So your lead wrist is going to be flat as it goes back.
So you're going to start a little cupped.
You're going to try to get it flat.
It's then going to work down and it's going to stay flat, or you're going to try to bow it off just slightly by the time it gets in front of your lead thigh.
Piece of cake, right?
At the finish of the release, your lead wrist should be still flat and it should be pointed directly behind you.
So your wrist position at the point of entry, so when we're getting into delivery, okay, in front of your trail thigh or just outside of it right here is going to be flat and pointed out in front of you.
It's gonna be flat and pointed down the target line and it's gonna be flat and pointed behind you.
Look at how it rotated from right here to here to here.
It's not being done here to here.
Okay.
That's not where I want you to train it at first.
You're learning the hitting area.
So as I just defined it for you, the hitting area is going to be right around hip high to hip high.
Okay.
Everything that's happening in here is your hitting area.
Okay.
So your main goal is to train it first to get to a flat position here at delivery point to a flat, slightly bowed position right here.
I want you to do that as many times as you possibly can with or without a golf club.
I would prefer.
And at home, you start out with a golf club.
You want to be able to go here.
Put your weight over on your left foot too.
Try to get your hips open up a little bit.
And then let your left wrist come down.
That's it.
Piece of cake.
For those of you at home, you might feel like that is pretty easy.
Try it out.
If you find that you're not doing it right, then stop what you're doing and make it right.
Once you start getting the hang of that, then start moving through to the lead side.
Think about these being done as very, very small swings.
Here's something that I want you to write all over your PDF on your forehead and on the ground.
I am going to keep my lead arm moving through the hitting area as my lead wrist is rotating.
Don't stop your arm when the club comes back in here and start trying to flip your wrist over.
You're going to think about your arm swinging back and forth underneath your shoulder like a grandfather club.
All I'm thinking about here is my arm moving back and forth.
And I'm going to try to get my glove logo now from being pointed out in front of me to pointed behind me.
Okay?
So when you see my left wrist at this point, it is pointed directly behind Okay?
And it is flat.
Okay?
If you look over and your wrist is cupped like this, fix it.
Put it in a flat position.
This is easy to do without the club in your hands.
Why?
Because we don't have a lot of the weight in the club pulling us all around.
You're going to notice here in a little bit when I get the club in my hands.
And when you guys get the club in your hands at home, that the momentum and inertia in the club is going to start pulling your wrist into a little bit of a cup position over there.
That's fine.
I care about you making sure that it's flat here and it is at least flat when it gets outside of your trail thigh or your lead thigh, I should say, and it is rotating.
Steve says, throughout the entire swing, should we have a swing thought?
Thinking about the foot movements, if no swing thoughts, then just the reps will ingrain the ax and then we just trust the non -thoughts.
Steve, So hang on to that question for me and copy and paste it to me at the end here so I can answer it after I'm done going through this.
Because this is, there's a lot of components to the release.
Okay.
And I'm trying my best to be able to move through this as cleanly as possible.
I'm sorry, I'm not trying to evade your question.
Okay.
So your main goal is to start out by getting your left wrist from this position to this position.
Then you're going to keep your arm moving.
Okay.
To where your left wrist is now flat and pointed directly behind you.
Okay.
So it's flat pointed out in front of you, pointed behind you.
Now.
Some of you at home may ask me exactly how many reps I want you to do like that.
I'm going to give you at least 25.
When you can do 25 reps and it looks great on camera, then you can start putting the club back in your hands.
And I want you to make these swings very, very small.
You can start out by stopping at impact.
So you can take your left wrist back, make sure it's flat, point it out in front of you, and you can let your left arm swing down and make sure it's flat and pointed down the target line.
You can stop right here.
You can actually even hit golf balls like this, believe it or not.
You can take the left wrist back and just let it stop.
And you can check to make sure your wrist is in the position of impact.
Okay.
That's a good thing for you to do at home.
Why?
Well, because now you're training your subconscious that you can do it with a ball there.
If you stop in that position and look at it, and if it's not right, fix it, then that's how you're going to be able to start progressing through this stuff.
Now, once you start getting the club in your hands and you're like, okay, I've got impact sorted out.
I know my left wrist is pointed out in front of me.
I know it's flat or slightly bowed and pointed down the target line.
Now I'm going to start actually letting it fully release.
When you do this, your job is to hold the club as lightly as you can.
You can even take your thumb and your pointer finger up off the shaft and just let your left arm swing through to the other side.
Now, what you're going to notice here is when I do these reps, watch very closely.
You can kind of hear it.
The club is doing what?
You can kind of hear it brush in the grass right here.
Look how relaxed this movement looks.
I'm not trying to make big swings.
You have to start small.
I can do this very easily.
Why?
Because I've done it for a long freaking time.
For those of you that are plus two, plus three handicaps, you still need to go slow and do this stuff.
For those of you that are just starting the game out, start slow and small.
If you make your movements happen, you keep your grip pressure light and you keep your arm moving through there.
The club does the work for you.
Now, you're going to notice that your club's probably not bottoming out at times.
What do you think is happening?
You're just holding on to too much tension up in your shoulder, up in your tricep and your bicep.
You're holding on to too much tension in your grip.
You're trying to be in command of the golf club, but I don't want you to be in command of Now, remember, when you're doing these reps and you're starting to let the club swing through to the other side, it's important that the club is going to be in line with your hands.
So I want you to double check at this position.
that your left wrist is flat and pointed out in front of you, okay?
I want you to make sure the club is in line with your hands and the toe of the club is up to the sky.
Then from there, you just let it release on through, and you want to make sure that the toe of the club is up or slightly toed left.
Can any of you see that at home?
So it's toed left just a little bit there.
This would be way to left, and this right here would be the reason why we're not good at golf, because when you see your club face look like that, okay, that means you added loft to the club and you didn't rotate the face, so the ball's going, High right.
Okay?
So again, it's going to look to be in line with the hands.
You're going to let it release.
That's it.
I want you to do as many reps as you possibly can with that movement and that movement alone.
If you can get your left wrist to get flat, to point down the target line, to be flat and pointed behind you, golf just became a much simpler game for you.
All of the other stuff that we're doing within the swing shape is to add speed to that movement.
Really, think about that.
So all we're doing in the golf swing is we're making all of these big movements to help propel the hands and the arms through the hitting area.
Really, that's what it is.
So you start out slow.
You start out like I'm holding your hand, right?
You start out by just doing left arm only swings without a club.
You get your wrist into the right spot.
You start letting it move through.
Then you start letting it go with a club in your hands.
Start trying to hit little shots.
These golf balls, when you hit these things, when you're letting it release, should only go about 10 to 15 yards.
If they go any further than that, then you're trying to get too much.
I don't want to see golf swings like this.
Okay.
You're not ready for that.
That's like the Indy 500 right now.
Okay.
Take your time.
Start out slow.
But now here's the piece to this that you're going to hear, maybe different than what you would hear from Craig or Chuck is.
I don't like you to stay doing a lot of left arm only swings without trying your best.
to get El Troublemaker back on there.
Why?
Well, because you've got to train this thing how it needs to coexist with those movements.
Now, in the past, you've heard us on five minutes to a perfect release or maybe even you're perfecting your impact series or whatever it might be.
You've heard us that we can have the right hand coming off at impact.
You certainly can do that.
But if you become a lead side dominant releaser, I want you to challenge yourself, even over the next couple of days when you go through this program, to start touching the club and letting it follow along.
And I mean by touching the club, folks, okay?
I'm gonna take my pointer finger and my thumb and I'm just gonna touch the shaft, okay?
This is gonna take my right hand and my right arm and try to deactivate it a little bit.
And I'm gonna take and make some swings here where I'm gonna let it follow along with my left arm from one side of the body to the other.
So I'm gonna literally take my right hand and touch it.
I'm gonna turn, so my left hand is just outside my trail thigh, it's flat, okay?
And I'm going to make sure that my weight gets over to my left side.
I'm going to let my left hand swing through and I'm just going to keep it touching there.
Now, you just heard something there just a moment ago that I didn't say before, right?
I just had to swing your arm back and forth.
When the right hand comes back to the club, now you want to start introducing normal movement to the mix, right?
How would we get our club to that position?
Well, we would turn our body, right?
From here, you want to shift your hips left and you want to let it release, but you want to try to keep your hand on the club.
If you notice that you're flipping it or you're scooping it, there's one thing that's happening here.
And a lot of you at home need to take a little bit of a deep breath and understand.
I'm telling you something that's going to be different than what you've heard on the videos for a reason.
Because again, we've always talked about the release being free flowing and letting the hands go.
But remember, at the release, when you're a lead side dominant releaser, the hands and The arms are working independent from the body.
What does that mean, Chris?
Well, think about it this way.
If I take my chest and I leave it right where it is, and I move my arm away from my body, that's my arm swinging in this direction independent from shoulder rotation, okay?
Now, if I keep my connection here, my arm and my chest, and turn, that's not me unhinging my arm.
That's my arms working with my body.
At the release, we're trying to get our arms to be independent from that shoulder rotation.
So one thing is happening for those of you that are flippy and scoopy is you're stopping your godforsaken freaking lead arm from moving.
Think about this for a second.
If I take my arm and I'm going to swing it back and forth, okay, and I keep my whole arm moving, I keep it always moving.
Now I stop my arm, what can the club do?
You just saw it, folks.
You just saw the reason why you flip and scoop because your arm stops moving.
So if you see that you're still flipping and scooping it, think about your arm, not your hands, continuing to move through the point of contact, into the finish of the release.
Think about your arm always moving to that hip high position.
If you do that, then you're going to see that your hands always stay in front of the club.
If you keep your grip pressure light, like you're supposed to, the club will have pulled itself to the bottom of the arc and it will have rotated in relationship to the swing plane that you put it on.
That's it.
That's it.
If you can do that, if you can focus on your left arm moving just like a pendulum underneath your shoulder with a right hand coexisting with it, now you can start hitting golf balls.
And when you start hitting golf balls, you should be hitting little tight compressed shots that go about 20, 25 yards max.
That's all you need to do over the next couple of days.
As you get to the point where you're hitting balls, okay, then what happens on Tuesday is I start marrying these two movements together that you just worked on with me.
I start giving you lower body movement.
more lower body movement and start giving you a little bit bigger swings.
So for now, what I like to do is I like to eliminate the thoughts of axiom when working on release drills.
Okay, we're working on release drills, not compression drills.
We're looking on release drills that lead to compression.
So I like to think about just little tiny bits of pressure shift and little bits of turn.
What I mean here is this, I'm going to shift my weight a little bit and I'm going to turn my body and I'm going to shift my weight back to my left side and let it release.
I don't want you to try to think about all of the moving parts to get you to impact at this point, working within the confines of the release drill.
You're just focusing on what your left arm and your left wrist are doing.
And you're trying to get yourself to allow the club to have some freedom.
You're allowing the golf ball to get in the way of it.
That's how I want you to think about it.
Now, if you want to give yourself a kick in the butt away from the release stuff, and you want to go back through the stuff that I just did at the start of the session, please do it.
I want you to do more of that.
Why?
Because those are the big movements that lead to better results for your release in the first place.
So now I'm going to clean this up here in just a minute, but I want to talk to you guys about the trail side versus lead side.
Some of you at home are not going to be able to be a lead side dominant releaser.
Some of you at home are just going to be fully convinced that you're just going to overuse your right hand or your right arm or your right shoulder.
for the rest of your golfing life.
We get that.
Okay, it's fine.
I'm not a fan of it, but I'm not going to evade it.
Most of the people that I worked with on this website over the 10-year span that I've been here, I had a few people that tried to dabble in some trail side release stuff, but they all came back to lead side.
Because again, the lead side is a more free-flowing release.
It's a release that I'm just going to tell you up front and honest, that is designed to work within the confines of the RST principles to keep the body safe.
For the trail side release, there's going to be a little bit more body turn, a little bit more effort that's exerted.
That doesn't mean that you're going to just all of a sudden blow your back out and you're going to be in a hover round.
What a hover round is, is those carts that you can drive around the supermarket and you can start putting your canned goods in them and they go up and down the aisles.
You know what I'm talking about.
You're not going to blow your back out, but it is going to be more work and it can potentially put your back in.
a more compromised position, right?
Because your body hates sheer force and it hates sheer compression.
So the trail side dominant release is going to be a little bit different because the body is going to work to help turn.
And then the right arm is going to work to extend down the target line, right?
Where the upper body is stalling in a lead side dominant release.
What you have to think about in a trail side dominant release is that the hips are going to fire, the shoulders are going to turn longer.
And then the right arm is working to push the club down the target line.
Now, under no circumstance, when you look at this, is the club ever going to be able to work perfectly straight down the target line?
Okay?
The club face has to rotate.
No matter what you hear these talking idiots on TV say that this person holds a club face square to the target longer than anybody on the planet.
No, they don't.
Okay?
I promise you.
The club face has to rotate.
If it doesn't, gear effect kicks in and the ball is going right field.
Okay?
The club face rotates between 250 to 350 degrees per second with good ball strikers.
So, But that's what it's going to feel like to you.
Trail side releasers is that you're trying to fight off some of that rotation of the club face by trying to push it down the target line.
Now, what are you actually using to square the face at that point?
Or to keep the club face rotating, I should say.
What are you using?
Think about it.
Body turn, right?
So you have two options to move the club from this side of the body to the other.
You can A, take your body and turn in the direction of the target.
Now, if you look at the club, it rotated through here.
or I can simply just take my wrist and do this.
One of those is gonna be way more efficient, right?
One of those is gonna move the club pretty quickly.
So what you're using is when you're firing your arm down the target line, like you would see in the tape drill, okay, is you would be using your body turn as the driver or the engine of your face rotation.
Again, you can hit good shots that way.
There are some playing professionals that use more of a trail side dominant release.
I personally will always try to push you at home to a lead side dominant release.
Because of the success that I got from it personally and the success that I've gotten from it in teaching it.
Plus, it's an easier way to swing the club.
So if you want to be a trail side dominant releaser, I would suggest that you go watch the tape drill on the website, where you actually watch how Chuck puts a piece of tape on the ground.
And he works to try to get you to extend the club down the target line.
Now, both of those style of releases have the exact same impact position when it comes to the left wrist.
Your left wrist still has to be flat or slightly both.
If you're pushing it, okay, your wrist cannot still be, it cannot be cupped, okay?
And it cannot be pointed out in front of you.
So you can see how both releases still have to have that left wrist into the spot.
So for those of you at home, before you start trying to dabble in one or the other, train your left wrist to go from here to here.
Just train it.
Do it as many times as you possibly can over the first quarter or the first half of this year.
Then train it to go from here to here.
As much as you possibly can.
Why do you think when you see us on TV or you see us on the back of the range talking with one another, do you see us with the club in our hands?
Excuse me.
Our left hand doing this.
Why?
Because that's where we're controlling the club face from, baby.
That's what we're doing.
That's where we're controlling things from.
You won't really see people flinging around with their right hand.
Not very much.
But you'll always see us kind of talking like this.
You'll see us kind of moving around.
And you'll see us really talking with a lot of our left hand.
That's what we're using to control the face.
most of us.
So both releases are going to have the same impact position as far as left wrist is concerned.
Okay.
Both releases are going to be very different though, as far as how you're moving the club from one side to the other.
The lead side dominant release is going to be the arms freed up from the body.
It's going to be tension free.
Trail side dominant release is going to be the body turning, extending the arm down the target line with more tension in there.
That's it.
You can say that you can, you can say that that would feel like more stability in the clubface for a lot of people.
I can tell you this right now.
If my hand is in front of the clubface, I feel stable in the clubface all day long.
Now, a lead side dominant release, I'm going to be upfront and honest with you.
It errors on the side of a draw bias.
Think about that.
Well, some of you don't want to hit a draw, right?
So if we talk about toe up to toe slightly left, that's going to be erroring on the side of the ball, having a little bit of right to left movement in it.
That doesn't mean that because it's going to error on the draw bias that You should keep yourself away from a lead side dominant release.
You can just take a little bit of face rotation out of there by just either actively moving your arm quicker.
Or trying to get the club to be towed up on the lead side of the body and it will not go left.
So how many of you at home are like, what the heck did Chris just talk about for these last 45 minutes?
Okay.
I'm going to do us all a favor because of the way that the information came in.
Because of what I saw, because of what I saw in the last camp, we're going to not try to blend lower body movements and release together yet.
We're going to save that for Tuesday.
So what I want to do is I want to walk you back through how I want you to practice this.
So there's no question, okay?
I want you at home to remember the number of reps that you're going to do in a session is between 100 to 300 reps.
How you do those 100 to 300 reps is entirely up to you and how you create awareness of your movements.
Write that down because I'm not going to give 22 reps of this, 42 reps of this because some people might have awareness very early on.
I want you to practice in this order though.
I want you to start out with your left wrist and your left wrist only going just outside your trail thigh, flattening off and coming down to this position right here.
all the way to the middle of your lead thigh and flat or slightly bowed.
However many reps you need to do, whether you're watching football today or you're making a soup tomorrow, I owe you guys a French onion soup recipe, sorry.
I just want you to be able to do that.
When you feel froggy enough and you've got enough reps and you know it's perfect, then I want you to be able to do this.
Left wrist out in front of you, left wrist flat and behind you.
However many reps it takes you to become proficient with that is going to be very different from one person to the next.
I know a lot of you at home are going to be like, watch this, watch this.
And you're going to be like, got it.
That's not how I want you to practice.
Don't do that, okay?
Take your time.
Have some pride in this process.
What at home did you ever learn this fast?
What did you learn?
Nobody did, right?
You're not Zorro and you're not in kamikaze mode here.
Think about how you learned how to drive a manual transmission.
It's slow, clunky, and it sucks.
Same thing with golf.
It's slow and clunky at first.
It's not sexy.
That's why if you listen back to what I said to you guys, when we used to teach this at the clinics, people were like, that's all I'm doing?
Yes, that's all you're doing.
There's so much more to it than you can even understand.
Those simple little movements are where golf is made.
Just doing this.
That's why if you were to go out and play golf with me right now, okay, any of you.
even if I'm not playing a lot of golf and practicing a lot, and Craig will say the same thing, we're going to go out there and we're going to compress the golf ball.
Why?
Well, because we know our left wrist is going to be in this position.
We know it is.
This is a lifelong change.
This is the reason why I petitioned to Chuck that I wanted to teach this on session number two, because if I give you this now and we come back on Tuesday and then I start getting you guys to do some of this, where you're actually moving through nine to three screens and you're literally hitting golf balls where you're hitting rocket ships.
then now you've got the whole golf swing figured out, really.
Because anything above this is just width and rotation, right?
So think about that.
So you're going to train this left wrist only from here to here.
Then you're going to get your left arm to move through to the other side.
Not big, long swings, just little baby swings.
Just keep your arm moving like my shoulder is nailed to the wall.
Do this from a rehearsed impact position, okay, where your hips are open a little bit.
Okay, your left side is stacked up.
Just doing this.
That's it.
Then you can introduce the club.
And you can do the same thing.
You can start with your weight on your left side, hips opened up.
Go right to here.
Stop.
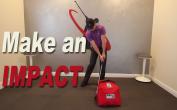
You have an impact bag at home?
Hit the impact bag.
Stop.
Don't look at the club.
Look at your wrist.
Look at the club last.
To a lot of you at home, it's going to look really shut.
Why?
Because there's some things that are happening there.
You don't have any axis tilt.
You don't have your right hand on the club down.
Pull it back.
Don't look at the club to know if you're doing things right.
Look at your wrist.
Every single time you do a rep, you stop and you check it.
My wrist in the right spot.
Yes.
Now watch.
When I start doing reps and I let things go, I'm not looking at the club.
I'm looking at my wrist.
I can see that my wrist has got a little tiny bit of cupping in it now because the club kind of pulled my wrist in that position.
I'm still going to try to get it back to a flat position and hold it static.
Okay?
Every single rep counts.
Don't just do this, okay?
Please, for the love of God, this is what we call rep stringing.
This right here is not gonna do you an ounce of good, okay?
Practice the way that you would play.
You don't go out there and hit 30 balls.
Some of you will, but you don't hit 30 balls in a row, right?
You hit one golf shot at a time.
So you get to the point where you can do this.
Guess what I want you to do?
I want you to bring the right hand back to the side of the club.
I want you to touch it.
Now, when the right hand touches it, Okay.
You're going to have to allow your body to turn just a little bit.
So you can come to a static address position and you can start turning.
Okay.
To get your hands just outside your trail thigh, shift back to the left and let it release on through.
You're checking the finished position.
Is my left wrist flat?
Is it pointed behind me?
Is my hands, my left arm straight and pointed out in front of me?
Yeah.
That's how you do it.
If you see that those positions aren't correct, guess what I want you to do.
Correct it.
Now, for those of you that just sat through, the 10 o'clock show with me.
This is a good example of how to put the foot on the accelerator and how to pull off.
If you notice that when the right hand is on the club and I have this really cut position on that side, or I noticed that I flipped down here in the middle, then what the heck do you think I want you to do?
Get the right hand off there and retrain the left arm.
Take the club out of there.
Go through these processes as a way to build awareness and to stack.
That's what Rotary Swing was founded on.
was teaching you guys in slow, methodical, mechanical movements and stacking in pieces after you got proficient with movements.
That's it.
And so now, once you get this right and you've done more reps with what we've done with the body, like I just showed you guys at the start of the session, then guess what we do on Tuesday?
Is I start teaching you guys how to blend it together.
And Tuesday to next Saturday is when you're going to start developing a full nine to three swing.
Big deal, Chris.
Nine to three swings.
You can go out there and hit nine to three swings.
This is my nine to three swing when I'm golfing my ball.
Nine to three swing will produce 80% of my normal distance.
Pretty crazy, right?
And so you're going to know that those positions that I just did in that nine to three format is going to be stacked on my left side.
It's going to be movement that gets me to a good solid impact position.
It's going to be the proper release.
So for those of you at home, that missed the part of how I said to practice, please stick around with me because I want to make sure that there's no questions on this stuff.
I would encourage most of you to try the lead side dominant release.
If you find that you're just screwing the pooch and you've got no chance and you just keep flipping the club, then you can try the trail side stuff to see if you get some success with it.
But based off of what I've seen over the last two camps that I've done, Everybody stayed lead side and everybody showed me forward shaft lane.
The two things that you need in golf to survive at this game is forward shaft lane and a square club face.
With every club in your bag except for driver, okay?
Driver's gonna be a little bit different because they're set up for high launch, low ball spin.
Talk about that on next Saturday, okay?
Your job is to get your wrist into this position.
You do that, train it as much as you possibly can between now and Tuesday, exactly how I outlined it for you.
challenge yourself to move forward in it, continue to get more reps on the stuff that I showed you at the start of the session with your body.
And now you're gonna show up on Tuesday ready to work because Tuesday is our big day, right?
Today was the important day as far as teaching you the nuts and bolts of the release.
But Tuesday is a big day, right?
And so I want you to get as many reps on this stuff, both with the lower body movements that we talked about and now with the release.
Now, for those of you that are, trying to absorb all of the stuff that I just said and maybe you just want to go away for a little bit and want to kind of take some time away.
I get it.
So go enjoy the rest of your Saturday.
Watch some football.
For those of you that want to stick around and do some Q&A with me, we'll do some Q&A.
If I didn't teach you how to practice, if I didn't teach you how to do this stuff, please stick around because I have no problem sitting here as long as I need to to get this stuff right into your brain because this day is important.
This little small movement.
that everybody feels like is a piece of cake can get really, really squirrely if we're not doing these things right.
Okay.
So your job is to get as much on the stuff that we talked about Tuesday and as much stuff on this release done between now and Tuesday.
Okay.
It's not a lot of time, but when you show up on Tuesday, we're going to start blending this stuff together.
And I'm going to teach you guys how to look at your swings and know when it's time to start moving up the ladder.
Okay.
You guys have been awesome.
Thank you so much.
Hopefully you guys have a great rest of your weekend.
Now let's do some Q and A.
It seems with a softer left hand grip, letting the club release by relaxing, allowing the club to do what it's designed to do.
Yep.
So exactly.
You might be wondering to yourself at home, and this is kind of, this is a question I get.
It's like, why did you just train my wrist to rotate when, if I'm, the club is going to do that anyways?
Well, some very lead side, or I'm sorry, some very trail side dominant players have trained their left arm.
If you watch my arm here, and I'll do it from up the line.
that when their arm swings underneath their shoulder, look at their wrist and forearm.
It doesn't rotate at all.
They've trained their wrist and forearm to resist that even with very little tension, right?
So yes, this is a movement that we start out without the club just to make sure that your wrist and forearm are capable of being able to have some movement, but it's not an active movement.
It's a very passive movement.
So when working on the drills this week, when using the axiom to get impact, I move my trail knee down the target once leaving the merry ground.
Does it eliminate the need?
Does that eliminate the need?
Sorry.
Think about the front hip going down and back.
So not necessarily.
So no, not necessarily at all.
So your trail knee, if it goes down the target line, it doesn't necessarily mean that your left hip is going to clear back, right?
I can move my right knee towards my left and not do anything.
right?
That right knee moving towards the left is a movement that's going to eventually be toned back, just so you know.
That's why you didn't hear me talk about it in session number one, right?
I talk about getting off the merry-go-round and moving your whole body.
This movement right here, the right knee moving towards the left, if you look at it, is way overcooked.
This is not, over the long haul, a great position to be in at impact.
A great position to be at impact is with your foot rolled to the instep.
Yes, this movement right here was taught through the initial axiom Y.
because you guys were at home, were afraid to move, right?
So it doesn't necessarily guarantee that the hips are going to get cleared out now.
So why is it important to initially cup the lead wrist?
So that's just to make sure that your grip is correct, right?
So you want to make sure that your grip, okay, there's grip videos on the website.
I'm not going to go through every piece of the grip, but you want to make sure that this V in your lead hand is up towards your right ear.
So you should be able to see two, two and a half knuckles, okay?
So you're going to start with a little bit of cupping there.
My apologies for earlier.
I thought the questions would just be in the queue.
No, Steve, you don't have to apologize, bud.
We're all good in the hood.
I don't get mad at stuff like that.
So I just don't know where the question So are we to focus on foot movements of the axiom?
Are we to rely on the reps to ingrain these movements and have zero swing thoughts?
So the foot movement, you're still focusing on it, right?
So if you're doing that lower body work, I would expect you to be thinking about six, seven, eight, nine, but you're using that movement and counterbalancing it from the lead side.
So you're going to be getting to a point where you're going to be doing a lot of reps, thinking about both of those things happening simultaneously.
So the six o'clock through seven, eight, nine is the important numbers.
So I want you to think about that.
And I want you to couple that with the lead side, but you're going to get to a point where that movement is just going to start happening without having to really think about it a whole lot.
Okay.
So when should I start to feel the shoulders too open?
Just pass squat to square during the squat phase.
So when should I start to feel the shoulders open?
Now, so your shoulders are going to stay really, really wound up as long as you can.
Squat to square, you're trying to keep them wound.
Even at post-up, you're trying to keep them wound.
Okay, your shoulders are getting pulled around into a square position.
Unless you're going to be a trail side dominant releaser, then the shoulders are going to keep turning as you're extending the arm.
So you're trying to keep your shoulders from rotating, right?
Your hips are going to lead the way.
Remember that analogy or that equation that I gave you guys in the last session is that if your hips are turned 45 and your shoulders are at 90, your hips are going to go from 45 degrees closed to 45 degrees open.
That's going to pull the shoulders back to a square position.
You want to try to restrict that as much as possible because the more you turn your upper body through the hitting area, the later the club face is going to be to release.
So think about this.
If I get up, and I start turning my body through the hitting area, look at the club base.
It's late.
You're going to have to flip at it with your hands and try to get it back to square or fire from the right arm.
So in the backswing, do you physically cock your front wrist on the way back or does the wrist cock automatically during the transition?
Great question.
So we're not talking about backswing.
I'll talk about the takeaway.
Your wrist will actually naturally start to set and support the club into your takeaway position.
And it should.
start to help support the club as it goes further back, right?
So what I mean by natural support is that it would feel very awkward if I took the club back and the club was just kind of lagging down here, right?
See how it's kind of pulling my wrist down?
So my brain is going to start trying to help support the club to keep it up.
We just don't want you moving from the wrist where you just start setting it heaps and heaps and heaps.
Why?
Well, because you start activating your fast-twitch muscles.
You start activating the muscles in your wrists.
They're just like any other muscle group.
And you start that stretch shortening cycle.
You get them like this.
They want to fire back in the other direction.
Okay.
So hopefully that answers that question.
All right.
So to be clear, we should practice movement through post-up.
Then work on left arm and hand at impact with a slightly bowed left wrist for forward shaft lean at impact.
Face point.
Exactly.
We should practice movement through post -up.
Yes.
And then the slightly bowed left wrist.
Yep, exactly.
So you got it.
Perfect.
Jeremy, thank you so much for the kind words, man.
You're awesome.
Thank you so much.
You keep skipping my question.
Sorry, I'm not trying.
Things are happening so fast here.
Sorry.
If and when I add the club, have a flat left wrist impact and the face is.
and the face is closed and not square, does that mean my grip is too strong or something?
So yeah, so it could be a grip issue.
So you want to double check the grip at address.
If you look down and it is shut, okay, don't think that you're doing anything wrong.
If your grip is right and you look down and your wrist is in this position, it does look shut.
Remember, I don't have one thing here.
I don't have axis tilt and I don't have my right hand on the club to pull the club back.
Okay, so that's where I need to move you away from.
the results of what the club looks like.
If you come down and you hit balls when the right hand is back on the club and you have axis tilt and the ball starts sharply to the left, then we would have to look at your rate of rotation of the club face going back.
We would have to look if there's some active influence from the lead wrist on the way down.
We would have to look at if there's any stalling at the arm.
That's the only true way to get the club face to start turning shut really fast.
So again, that example is that if I keep my left arm moving through the hitting area and I'm just holding the club lightly, the club is going to be rotating at a very constant rate, okay?
If I slow down my arm, watch, okay, the club can rotate really fast there, right?
So there's many different factors that can shut the face down.
I would start with a grip and then just make sure that when you're going back that the wrist and forearm rotate.
And then on the way through, you don't want to try to actively manipulate it.
Just let the club kind of release on its own.
If it's still shut, then let us look at Sorry, I didn't mean to miss it.
As I get to impact position, is it okay to have my left foot start to roll or should it stay flat?
Thank you so much for a refreshing take on learning golf a lot.
When my ball hits in the brain.
No, well, my pleasure.
So I want you to be flat on your left foot.
Okay, so when you're doing these drills, you should be flat here.
You're rolling to the outside.
That's not necessarily ideal.
You're going to see me in my golf swing.
I get onto the outside portion of my foot as I start rolling up into finish.
But if you look at it to impact, it's really solid through this point.
momentum and inertia and my ability.
I don't like side bend.
Okay.
I hate it because my back hates it.
So I don't stay in posture very long.
So I turn up and out of it.
So you see me roll to the outside part.
So Steve says six, seven, eight, nine.
One other question would be in regards to the right foot.
Should you be on the toe at impact?
Oops.
Where did that question go?
Yes, if you're working on the true axiom movement with helping getting the hips out of the way, you're going to be on the big toe at impact.
Over time, you're going to see that Greg and I will tone this back to be rolled to the instep.
When you get really good hip action, you're all the way on your left side, you're going to see that you're going to roll down onto the instep.
We talked about that in session one, where I talk about the role of the right foot in the downswing.
My favorite video on the website.
It's a video that every day that I've done golf instruction for the last 10 years.
I have used that video with somebody.
At impact, where should your left wrist be in relative to your lead thigh?
So when it's left hand only, you want it to be kind of towards the end of the left thigh.
When the right hand's on there, it's going to be to the middle of the left thigh.
So great question.
That's a variable though.
Okay.
So just so you understand that, what I mean by variable is some people like to have a lot of shaft lean.
Some people like to have very little shaft lean.
What I actually, I'm kind of like, I was kind of the opposite.
I liked my stock ball flight to be very high.
And I'll talk to you about that for a second here.
So my lead wrist at impact was kind of on the interior part of my lead thigh, just moving in.
You can still see I lean the shaft.
So my stock shot would be very high because I didn't de-loft it like some of the people all the way to the middle of the left thigh.
Now, I liked this approach because it was easier for me to hit the golf ball high and then try to flight it down.
By trying to bow my wrist off.
To be my specialty shots, where People that have a very low ball flight, to get them to try to hit it higher, what do they have to do?
Well, they have to try to fight off shaft lean.
So they have to feel like they're releasing the club a little bit on the sooner side, which feels like a flip or a scoop.
So that's my personal preference.
Again, that's very player dependent.
So shaft lean is considered a variable.
So if you have three degrees or four degrees of shaft lean, fine.
Some people like to have seven, eight degrees of shaft lean.
Okay, so.
Left wrist slightly cupped at address.
Do you work on rolling left knuckles under in the back swing to get the flat wrist at the top?
So now, so the left wrist is going to rotate and it's going to begin to set and it's going to start to flatten.
And a true takeaway, it's not fully anatomically flat.
But for now, I want you to try to get it flat because it's going to be easier for you to get it to here in a short space.
Okay, now, if it's a little bit cupped going back, it's fine.
Okay, as long as it comes down flat, you can change the pitch of the wrist very quickly by.
Just thinking about keeping your knuckles back in behind your wrist bones.
Okay, so this is cupped, right?
My knuckles are now back in behind my wrist bones.
This is bowed.
Okay, so as you start moving from this side down, if you think about your knuckles staying back in behind your wrist bones, it automatically starts to force you to bow it.
But what actually happens in the real golf swing is that the left wrist starts cupped.
It starts to flatten.
And then the weight of the club, as it starts to move into the vertical plane, is moving back in this direction.
So it's going to be pulling that wrist into that anatomically flat position, right?
And so the right hand helps act as a support system to it.
Great question.
All right.
So if I release the club and don't get my head back to the original spot, will I smother and hit it left?
Awesome question.
Yes, you will hit it left of the planet.
Why do I know that?
Because that's what took me out of professional golf, that and my mindset.
If your head stays back, so if you shift your weight over here and you turn and then you keep your head back, right?
So you're shifting your hips and your spine leans in this way.
Watch what happens.
So if I go to the top of my swing and I lean my spine away, what does that do to shaft plane?
Flattens it.
What's that do to the rate of closure on the way down?
That forces the rate of closure to become much higher.
The supination, okay, your left wrist is supinating on the way down, is a very weak movement.
Pronation is a very.
Strong movement.
So if you're coming down stuck because you're hanging on your right side and it's back in here, you're going to flip the club over really quickly.
And so your rate of closure is going to be 800 to 1000 degrees per second.
It's just too high, right?
So very good question.
How do you create speed with a lead side swing?
How do you create speed with a lead side swing?
Pretty easily.
Use the axiom movements, right?
So that pressure shift.
install the body and let the arm swing through, right?
So you're going to be turning aggressively and shifting left.
That movement right there is how you produce speed in the swing.
Then you also have the ability to be able to use your troublemaker a little bit, right?
You can actually take your troublemaker and as you're starting to post up and let the arm swing freely, now you can start adding a little bit of thrust like a throw the ball drill.
And so I swung the club when I was playing full time.
I was, I'm not going to say I was like 120 or 125.
That would be, I would, I was 115 to 118 is where I was.
Swinging the club from elite side dominant release.
And it was pretty easy to swing it that fast.
I'm not swinging that speed now just because I'm a little out of shape, right?
I had a little bit too much of the food during the COVID.
That's just what it is.
All right.
When shoulder turn is completed, should weight be at six o'clock or later?
Yep.
So as soon as you're finishing off your turn, that weight should be moving into six o'clock and you should be working to get off the merry-go-round, right?
That's the.
That's the beauty of it is that that six o'clock position should indicate that you're ready to start rocking and rolling.
Why we broke it up and gave you dead drill stuff is because we noticed that when people are working around the merry round, they were just turning like 40 degrees.
So you want to feel like that body turn is at 90 degrees and you should feel the weight get into six o'clock and settle and just drive off of it.
Good question.
What is your left wrist supposed to look like at the end after impact when you practice this with your right hand on the club?
So after impact, with my right hand staying on the club, you should try to still keep it as flat as you possibly can through this position.
If it's got a little, that's pretty flat there.
So you can actually do this.
You can swing the left arm over to the other side of the body, make sure it's flat, and then go get it with the right hand.
This is something that's taught in five minutes to a perfect release.
Stay back behind it.
All right.
Where are we at?
Did I miss any questions?
So John, thank you very much for the kind words.
I appreciate it.
You should have access to these videos for forever.
That's what I think we have it set up for.
In the past, we've had to lock the videos down after a certain timeframe because we had people sharing the videos, right?
This is information that we like to keep to this environment, right?
That's not fair to the rest of the people that are out there.
So you should have access to them for quite a while.
So I think we're winding down.
Paul, thank you very much.
You're awesome.
Do you ever increase tension in your arms and shoulders during the hitting area?
So, yeah, I'm gonna answer the question.
I'll be honest with you, yes.
There are very, I shouldn't say very few, or I'm not gonna give you a set number of times in a round.
but I'm hitting specialty shots.
I'm working the golf ball, right?
So what I can tell you is that in order for me to kind of get the ball or the club face not to rotate as hard, I need to firm up my left wrist a little bit down through there.
So I'm kind of fighting off some rotation.
That's when you start trying to hit little cuts.
Or if I'm trying to deal off the club a lot where I'm trying to get a lot of bowing of the wrist, I do feel an increase of tension in there.
But if I'm trying to hit a stock shot, what I mean by stock shot is just.
Like I'm trying to let things free flow, right?
I'm like, I'm set up.
This is a nine iron.
So my stock nine iron, I know when I was playing good golf is going to go 152, right?
So if I turn my body, okay, that would be a stock shot right there for me.
Okay.
So if I'm trying to hit 148 yard shot on trajectory, it's a little bit lower than I might firm up the left wrist.
So yeah, there's maybe some times.
How do you release tension in your arms and your shoulder?
Stop squeezing them.
Stop overusing them.
The arm movements in the swing are very subtle.
When we start getting into the compression drills and we start adding elevation and flexion, this movement and this movement are very chill.
It's not a workout program.
Your arms in the swing are getting propelled by what your body is doing.
Think about that.
If I sit up here and I'm just swinging my arm back and forth, I feel like I walk in the park, how would I get my arm to go faster without being tense, how would I do it?
Well, I would start having to shift my weight a little bit, right?
I'd start having to turn my body.
I'm not trying to make my arm get tense to make this movement happen, but it's going faster because I'm using movement, right?
That's how you need to think about it.
Your arms and your hands can produce speed for sure, okay?
But in order for you to be able to swing this freaking thing at 100 miles an hour, You got to have 32 pounds of muscle.
Now, I know I look like a svelte young man and I sit at the gym and do curls for the girls all day, but I don't.
I don't have 32 pounds of muscle available to me and my shoulders and my arms.
I don't.
But I do have it available to me and my biggest surface area muscles, my lats, my chunkiest muscles, my glutes, my abs, my obliques.
Abs, obliques.
And so those muscles were working on getting engaged in the swing to help transfer speed and energy.
right?
That's why in the setup position, and you don't hear a lot of people talk about this, is that the scapulas need to be in a down and depressed position.
You can't have your shoulders rounded and transfer energy from your trunk and your core.
Why?
Well, because there was a big study done from a biomechanist named Jeff Broker, Who did this study?
That was able to uncover that the position of the scapula in any hitting or throwing sport was critical for transferring energy from down here.
So think about a boxer.
This is always a good example.
A boxer doesn't hold his shoulder up here and throw punches, right?
A boxer holds his shoulder down.
So he's using his legs and he's driving and his power is coming out through his arm.
So the same thing in the golf swing is that you don't need to overuse your small muscles.
That's where typically people start really not enjoying the game is because they're trying to do too much here.
If you think about keeping your arms just chilled out and you move your body, then golf becomes a whole different world.
All right.
Are you going to deal with this issue of swing thoughts in these sessions?
In other words, are we supposed to swing thought our way through the movements in that first action?
Swing thought.
So, I mean, I'm teaching you movements, right?
So there's going to be some point where these movements, you're having to think about them at first, but then those thoughts, after they become part of your subconscious.
So I'm teaching you movement that you're going to ingrain and drill.
And so you're going to break these things down into.
a few different pieces.
So I like to use cue words, right?
So you're going to hear on Tuesday where I'm going to have you pressure shift.
I'm going to have you turn.
I'm going to have you aggressively move and keep that left arm moving through the hitting area.
So you're going to turn these into swing thoughts for now, but then we eventually want to move them off the list.
So I'm sorry if that, if I didn't answer your question, I'm sorry.
I'm maybe a little bit lost in that one.
So excellent work has always been with you guys through the evolution of rotation bootcamp.
Well, thank you very much, Steve.
That's awesome.
Thank you so much for the kind words.
As I practice, can I start to stack the wrist and the rotation to impact?
Yeah, absolutely.
Yep, absolutely.
I want you to stack, right?
I want you to move exactly through the program, just like I outlined.
All right, I want you to be able to put one piece in there, make sure it's good, add the next piece in, and then the next piece, okay?
Just like I walked you through today.
All right, I think.
We're winding down on questions.
If I've missed any questions, please type those up and send them my way.
Craig, thank you very much for being a rock star.
As always, you're the best of the best, man, for helping me out.
All right.
So it looks like we're winding down.
So let me end with this.
Hopefully you guys enjoyed.
the presentation today.
I know things feel really fast.
We're a two-week program.
We've got four sessions to get this stuff in.
Release stuff.
Don't overthink it.
Keep it simple.
Follow the plan.
Also, break up your time and give yourself a little bit more of a kick in the butt with these body movements.
Can't do that stuff enough.
Work on getting these two things as close to what you can with what we talked about today.
Also, do me a big favor.
Enjoy your weekend.
Enjoy the rest of your weekend.
Come back on Tuesday.
Please review the new homework assignment.
So the new homework assignment is to work on your left wrist going from here to here.
That's your homework assignment.
Now, once you can do this to here, all I want you to do is go to this position, okay?
I thought I said that.
If I didn't, then I'm sorry.
That's your homework.
You do this to this, okay?
Then you can add the club in and you can do the same thing.
That's what I want you to be good at, just from here to here.
If you can get your right hand back on there and you can still do the same movements, perfectly fine.
The other piece of the homework is exactly what I said to you, exactly what I said to you at the start of the session, is going back through those things in chunky pieces and working on creating movement, okay?
I'm sorry.
I hope I've made that clear.
If I haven't, Robert, then let's set up some time to talk, you and I, after the session where I can kind of get you into a Zoom format and we can talk a little bit about what I want you to do specifically.
Okay.
I see what you're saying.
So I know it sucks to have to watch me for a full hour, but go back through it.
Listen to it.
You might hear some information in there that actually kind of clicked with you.
Your job is to just be able to do this.
to here, to then to here, and add the club back in, and then be able to do more of this.
Okay, and then eventually be able to get those two things blended together, or those three things blended together, I should say.
So you do them in three pieces, blend them together with the secret sauce movement, do more of that, and then if you show up Tuesday, and you can do this, okay, if you can do that, and you can do this, you're ahead of the game, okay?
You can do those two movements with or without a golf club in your hands.
You're in the game.
You're in the business, okay?
Maybe that's what I should have started out with.
Do those two movements right there, and Tuesday becomes a piece of cake.
All right, I'm getting out of here.
I'm going to go decompress.
It's been a long morning.
Hope you guys have a wonderful rest of your weekend.
I will talk with you guys soon.


