Bootcamp 7, Sept 29 2020, Session 5
Session 5 of 6
Welcome everybody.
Happy Tuesday.
Hopefully everybody's having a wonderful start to their week so far.
As always, I'm Chris Tyler.
This is Craig Morrow.
We are here on session number five of Bootcamp number seven.
We have a very, Very simple night, but a very important night for you guys.
Because tonight.
We are going to make sure that every single person that's chiming in from wherever you are in this world is going to make sure that you can set yourself up properly.
You can load your body up.
And you can get yourself down to the delivery point with both hands on.
Because Saturday is a big day for us.
We want everybody in this group to be able to graduate with us and start being able to feel what it's like to be able to make this golf swing work from beginning to end.
And even if you leave on Saturday, where you're feeling a little bit slow and clunky.
It's really important that you have all of these pieces that you can be able to put together.
Because that's what you're going to be working on when we get you out of here.
So I'm excited to be able to bring you the information tonight.
I know Craig and I were doing a lot of talking about how we're going to present the information tonight.
Because We know how critical it is, over these next three or four days to be able to get this information into your brain, to be able to do this stuff at the pace that you're comfortable at, but also be ready to start getting yourself into the release, which is our favorite part.
Yeah.
Tell me now.
I really love the release session.
Yeah.
Because it's like the release is kind of like the holy grail.
Like if you understand how to do it, you can start doing it and apply with what we've done.
It makes golf fun.
Exactly.
Exactly.
So it's where we start putting the rubber to the road.
And so I know a lot of this stuff has felt a little bit on the mundane side, it's felt a little bit on the clunky side.
But this is all with good reason, because these important parts that we've been really pressing into your brain are the core functions of your golf swing.
And so tonight, what we're going to be doing is we're going to be putting your troublemaker back in the mix, we're going to be letting it follow along.
And we're going to give you a specific way that we want you to practice it, once we give you the specific way that we want you to practice it.
We're going to open up for questions at the end.
And then we're going to kick you guys out the door.
Because these next four days are going to wear be where we want you guys to remain hyper-focused.
We want you guys to spend as much time as you can asking questions, going and using the video process, making sure that you are using the forums, and making sure that you are ready to come on Saturday.
Because Saturday is, again, that's our graduation day.
That's where we start taking a culmination of all the stuff that we spoke to you about over the last two and a half weeks.
We start putting it together.
And it's a matter of being a make or break point for Craig and I.
And we want to see everybody succeed with it.
And we've had what I would consider a rock star group this time.
I know we've had some return people, but we have a lot of new faces this time as well.
And I've seen some magnificent changes.
I really have.
I've seen people being really diligent about working at the speed they're comfortable with.
And I've seen people asking great questions to be able to get this stuff done.
All right.
That's the important part.
Okay.
If you have any sort of misunderstanding in your brain, Don't leave here tonight because we want you to stay with us until you get this stuff intellectually all driven into your brain, but also have the ability to be able to perform these movements.
That being said, welcome everybody.
Welcome, Gary.
Welcome, Mick.
Helen checking in.
Greg checking in.
Craig, a bunch of Craig's in this session.
I love Daniel checking in.
Kevin checking in from Detroit.
Hello, Stephen from Sierra Madre.
Awesome.
Welcome, welcome.
So we've got Pat from Sutton's Bay, Michigan.
Brad checking in from New Jersey.
Mark checking in from Springfield.
Greetings and salutations from D.
C.
Hello from Atlanta.
Robert, hello.
Hello, hello, hello.
So anything good in your world?
That's just working.
Nothing new going on.
Nothing new?
Plotting along.
Plotting along?
Plotting along.
How was the ride up tonight?
The ride, well, I at least made it.
So let's take that as the win.
But it's a little stormy out there tonight.
So it's a lot of slamming on brakes and in and out of heavy downboards.
Right.
You know how it is.
And the thing is, is with.
normal I-4 traffic.
Left lane is the slowest, right lane is the fastest.
Which is mind-bought.
I haven't yet to figure that out.
I really feel like a lot of people in Florida should go back to Driver's Ed and understand that the left lane is for passing.
It's not a lane for you to just kind of chill out and listen to music.
It's the lane for passing.
The funny thing is when you pass them because they're going under the speed limit, they look at you like you're the problem.
You're going 65 in the 70 in the left lane.
Right.
Exactly.
Exactly.
So hopefully everybody's having a wonderful start to their week so far.
If anybody's got any questions, feel free to post those up now.
We're going to answer questions just for a couple minutes, And then we want to get into tonight's program pretty quickly because we want to spend a fair amount of time going through your practice program over the next three to four days, but we also want to leave a good, Good chunk of time at the end of the session to be able to answer any questions that you might have on a setup position, whether it's something grip -related, stance grip-related.
All of those questions, Now is the night to be able to put it together.
Because you're going to be spending the next four days getting this stuff ready to rock and roll for Saturday.
You better be ready to start putting a good, Fair amount of reps under your belt so that you can start letting the club release past your body when it comes Saturday.
Because this is where the fun starts to happen.
This is where Craig and I start hitting balls all over the place in the studio.
I turn into a range picker.
You'll see me shagging balls in here, which is kind of fun.
This is where you're going to be able to leave on Saturday.
Be able to make this golf swing happen for you on a day and day basis.
And then start putting it to the drive range and to the golf course.
And start seeing what it's like to actually hit the golf ball efficiently and start making that really nice, compressed sound, which is, quite honestly, it's kind of a day.
Yeah, it's a big thing and I think that's the big thing that, you know.
What we're going to be able to do is you're going to have the plan of what to do to go to the range.
It's something that we get often is the question all right I've done the drills.
Like, now how do I take this to the range?
Like, what do I do now?
Where do I start?
Well, You're going to have the stepping stone of where you need to start when you actually start trying to apply this in real world.
Excellent.
Excellent.
Exactly.
So we got Lee checking in with the question here.
So arm only from setup.
Hard for me to get over the shoulder looking down the line.
Lack of flexibility.
Bigger turn needed.
Getting the hand there seems to throw off other things.
So Lee, The way that we want you to think about this is that body turn always take precedence over anything else.
Okay.
So weight shift first.
Body turn second, if you see that your left arm is lagging a little bit on the lower side at the top of the swing.
Okay, this is going to become a whole lot easier for you tonight.
Because again, the right hand, or your trail hand, or your belt swing is going to start coming back in the mix.
And it's going to be more or less a support system to that.
So if you make sure that you are loading into your trail side and making sure that you do make a good full body turn, that's what's most important to Craig.
And Hard.
Okay, because the arm functions in the backswing are very, very simple, okay, and a lot of times that's we make it sound easier said than done.
Okay, the functions of your arms are literally the first one is just shoulder elevation, so this little bit of movement from the hands of the arms is happening right from the get-go.
It's happening right when you start moving into your right side now, it's a very, very small movement.
It's never anything that you're going to start doing before weight shift happens, or before body turn starts to happen.
Okay, the other function of the arms would just be trailer and flexion, okay, so your trail arm just does this, so your arms are literally elevating and your trail arm is flexing.
A little bit of wrist rotation and a little bit of wrist set should make it pretty easy to be able to get the hands, arms in the vertical plane.
If you feel like you're struggling, struggling, struggling to get it up there, then wait till after tonight, wait over the next couple days.
See that when the trail hand comes back on the golf club, that you're able to start making that sort of position happen with ease.
We'll show you a couple of the key points that we're going to be looking for tonight.
Because we'll talk a little bit about elevation being a variable and how much shoulder elevation.
We'd like to see you, but you're more than welcome to add more shoulder elevation in the mix.
If you have tons of flexibility to you, you got, you know, long arms or long limbs.
If you can get your yourself to move your hands and arms into the vertical plane, more power to you, right?
But you've got to be really, really patient.
Yeah, because this, you got to remember, this golf swing is is an equation, okay, and Craig, and I will tell you.
It's made up of width, leverage and rotation.
And so if you come and you start adding tons and tons of width to the mix, then you better make sure that you balance it out.
With a lot of rotation going back, number one.
But number two, on the way down, You better make sure that you're really patient with your body to allow the hands and arms to come back down in front of you, which a lot of you, I know at home, don't have a whole lot of patience.
I don't have a lot of patience.
I like to get things moving.
And when I see that little white thing on the ground, I like to get it going as fast as I can.
I don't know what your thoughts are on this situation.
I'm more of a width guy.
I get up there and just kind of take my back.
It's funny because we always when we talk about the three power sources.
In the golf swing, everybody, you know, kind of falls in line.
Whether they like a lot of width and high hands, or they like a little bit more of a shorter swing.
With a lot of lag, typically, the the less patient and very up-tempo people like that lag.
Because they want, they want to get that change of direction going, they want to get back down the golf ball.
And I'm on the other side of the thing, I'm like, well, I don't really like the whole lot of lag.
I don't like a lot of width, and I'm just kind of hanging out there.
I really wish I had an ounce of your patience.
You can just hear it in your whole tongue, where I'm just like, go, go, go.
Again, that's the way we are.
We actually did a video on this a long time ago that talked about the tour tempo.
The Tour Tempo was a device that was studied by a couple guys that went out there and watched the tempos on PGA Tour players across the board, and even did some amateur golfer studies as well.
And notice that there was four specific tempos that was, um, starting to come to fruition there.
And so, um, you know, if you have a fast tempo or you have a slow tempo, it doesn't mean you're doing anything right or wrong.
Just that's the kind of person that you have and so you.
You can start to refine your tempo based off of moving in the correct order.
Which is obviously something that we're working very hard on with you guys over these first few sessions.
And we're going to start doing our best tonight to be able to ramp up the speed a little bit.
And then we're also going to get you guys moving into a position where you can start letting this thing fly outside, which is where it actually starts to feel like a full golf swing.
So your job over these last couple weeks was to start recruiting muscle fiber and getting your muscles loaded up in this correct order.
And I know the site might seem a little bit unsexy, or a little bit uncool, or a little bit monotonous to some of you at home.
That has made the golf club move really fast from one side of the body to the other for many, many years.
But if you get these things nailed down, then it also becomes much, much easier, right?
all right, so a couple questions.
And then we're going to go ahead and get into the nitty-gritty tonight and get you guys ready to rock and roll for Saturday, which is our big day, we're going to hope that you guys come in and rock and roll on Saturday.
So, um, so, put in the work this week.
The payoff for everything that we've done is going to be Saturday.
So really hunker down and be very diligent.
That's one thing I wanted to add to what Chris said earlier.
I have been very proud of this group about diligence, like with the reviews in some other boot camps, we've been working on certain sections.
And then we might get somebody swinging their driver and they're like, Hey, and I'm working on boot camp session two, and I'm like, Wait, it was where the driver comes from.
But this group has been very diligent about staying on task.
I've been actually very friendly, right?
Exactly?
I've seen, like, for case of point here, I know Michael checking in from Atlanta, they're working with him in the swing review process, who's had developed a very nice looking golf swing.
And, you know, For him to kind of take a step back and go back through these movements and really start to refine these, you know, my hat's off to you.
I would consider you guys a rock star group at this point because I've seen people that have been around the site for many years.
I've seen people that are not here for their first time.
I've seen people that are here for the first time really take the time and strip this stuff down and do it at the pace that they're comfortable with.
I've only had maybe one or two people that were trying to do things a little bit too fast.
And that's, again, that's a small percentage.
Those people that go a little bit on the slower side at first are going to be the ones that get to the end results.
And make sure that you have these positions down there that are going to be ready to rock and roll on Saturday.
And And then Craig and I are going to have to go back and fix a whole lot of stuff as you guys get let out into the wild.
So we've got a fun night for you guys.
Those of you that are just getting seated, tonight is just going to be a very, Very simple night as far as adding new pieces to it, because we don't want to add a whole lot into your brain.
I'm sure that a lot of you guys are in system overload at this point already.
You guys want to spend as much time as you can over the next three or four days to get yourself ready to rock and roll on Saturday, which, again, is going to be an important day for both Craig and I to be able to give you a very, very clear plan on how to make this thing feel like a golf swing, right?
That's what you're here for in the first place, because a lot of you probably don't feel like you have developed any sort of golf swing yet, but you probably start feeling body parts that you never even have.
So big night for us.
So one more question here, and then we're going to go ahead and get into it.
Actually, we've got two more.
So I've always had a couple.
Wrist at the top I think I get my wrist back in a good position.
Impact Is this a problem?
So, to go from a cupped position at the top of the golf swing and then all of a sudden try to move it to a flat position on the way down is a very, very tricky process.
Also, what that does is it relies on a lot of timing, and timing is not necessarily your friend.
Okay, timing is one of those things that Craig and I want to start extracting from your golf swing as much as soon as possible.
But why?
Well, because A lot of you guys will come to us and say, what's the first thing you're looking for out of your golf lesson today?
We'll ask you this.
And every single person in this room would say, consistency.
We want to be more consistent.
We want to be able to hit it a little bit further.
Some people will kind of mutter under their breath.
So we know that that's time.
And so if you look at the golf swing, we have to be pretty precise.
And if you're relying on a timing aspect to be able to get things lined up at the bottom of the arc, then you're just going to have these fluctuations in your golf swing.
And that's one of the things that.
You know, you can get away with.
There are some very, Very great players in this world that have less than ideal positions through their takeaway and backswing, and even in their downswing.
But they manage to get things down to where it matters the most, and that's an impact, right?
Let's look at Sergio Garcia as an example, right?
Sergio is known for what?
Well, he's known for heaps and heaps and heaps of lag, right?
He's the Lagasaurus Rex on the PGA Tour, right?
His first move in the downswing, you just see all of this down talk happen.
Now, if any of you have ever stopped and looked at Sergio's golf swing on slow motion camera, you would notice that he has a very, very big compensation embedded into his golf swing.
For those of you at home that don't know what that compensation is, take a look at his left hand at a dress.
He's got the strongest left hand in golf.
Now, why is that?
Well, because over time, when he started coming down with all of this lag, he realized that he had a hard time getting the foot face back to square.
So he progressively started to strengthen it again.
This has done something at more of a subconscious level.
Okay, and again, every single player out there has got some sort of compensation builder built in there.
So the long story short to this is you can get away with it.
But we want to be kind of down the road, where you don't want to have to rely on the timing.
Because to go from that cut position to the top, you are.
You are forcing yourself to have some redirect, and you're making it harder for yourself to get into a position where an impact your left wrist is getting.
A flat or slightly boat.
Okay, and that's the main thing, like, when you're up at the top and you cut the wrist, what's it?
Do to the face?
Well, it opens the face up here at the top.
So if we're trying to get square down at the golf ball, then at some point in time coming down, we're going to have to start squaring up this face to get it back down there.
The thing that you're really trying to do in the swing is just strip away variables.
They're going to cause you to not be consistent when you get out there.
And that's one of those variables that it's somewhat a simple fix, depending on kind of how you're gripping the club.
That can really make it a lot easier for you not have to worry about getting that clip-based score right.
Exactly so, Mark, just to further answer your question here.
Because I saw you said, Okay, how do we get rid of the Cup?
Well, the best way in the world to do it is isolate, right?
Is to train this without the golf club in your hands.
Train it left arm only and start from a position where you feel like you're holding on the golf club.
I know that's one particular thing that Craig's actually going to talk about specifically tonight was what he saw within the fault fixes.
But the best thing for you to do is get into your setup position, have your left wrist and your left arm hanging freely down from your body.
Make sure you feel like you're holding a golf club here because you have to remember.
Your left wrist is going to start out in a little bit of a cuffed position.
There's a minor amount of cupping in it.
As we start moving through the golf swing, this cupping is going to start to deteriorate because the fact that the lead wrist is rotating.
Then as we start moving through the rep, and the golf club is moving around into the vertical plane, you're going to see that that left wrist is going to want to start flying off.
This is a great way to start training, is to train without the golf club.
For those of you that have done tons and tons and tons of reps with the golf club in your hands, and you're still seeing it cupped, you've got a lot of work because you've got to start.
I'm overriding that old movement pattern, I'm sorry, but it sucks to have to do that.
Okay, because the fact that the changing hand arm position on top of the golf swing, it's pretty tricky.
Okay, it's pretty tricky, but that's the best way to start.
Then, once you, once, you start getting the hang of it, then add the golf club back to the mix.
But do it exactly like we did it on Saturday, where you flip the golf club over and you have all of the momentum and inertia out of the golf club.
And you're just focusing on left wrist rotating, forward rotating and turning your body.
And then making sure that it's flat at the top of the swing.
That's it.
And then you just continue to repeat the process.
These are things that, you know, if you really want to get it done, you've got to just kind of bite the bullet and you've got to say, okay, I've got to just really make this whole uncomfortable, awkward situation just, I've got to do it.
It's like going to the gym.
You and I, especially right now, don't want to go to the gym.
And we know how hard it's going to be when we do get back into the gym.
You've got to have that starting point, and then you just progressively kind of chip away at it as you get more reps under your belt.
All right.
So, Stephen, final question here, and then we're going to go ahead and get into it.
So, Stephen says, likely I've had a hard time getting my left hand over the top of my shoulder down line.
So, I don't know if you guys got a chance to listen to the replay or really listen to a point that Craig and I made in a previous session, but when you're doing this stuff left arm only, we don't care if it's going to be a little bit on the low side.
Okay, because we're going to add the troublemaker back to the golf club tonight.
That's going to help you get a little bit more support to the mix.
And it's a very, very simple thing.
We really care more so about your load into your right hip and your right leg, and more so about your body turn.
If you notice that the left arm is a little bit on the lower side, perfectly fine.
Now when you get the trail hand back on there, okay, and you see that it's a little bit on the lower side, then we need to fix it, right?
We're going to give you a couple check points tonight that'll help you with that.
Okay, all right.
So my flat wrist is okay, but I found I'm not getting enough wrist cock to get the shaft above parallel on the post-up.
So my wrist cock to get the shaft above parallel on the post-up.
So you're meaning in front of the trail thigh, getting this to parallel to here?
That's what I'm assuming.
Yeah.
So Gary, you know, my flat wrist is okay.
So can you show me how much wrist cock is correct?
So we want the club shaft to be parallel to the ground when your hands are in front of the trail thigh.
Now, a lot of times what people do.
is at the top of a golf swing, they'll start getting their wrist fully topped.
Think about what Craig just did here.
He just maxed out his range of motion in his left wrist.
Now, just like any other muscle group in the body, the wrist and the forearm have muscles.
What he's doing is he's starting to stretch out all those muscle fibers in there.
Your muscles don't want to stay contracted for too long.
They want to start firing and start going back in the other direction.
This is part of the stretch shortening cycle.
The last thing that you want to do if you're battling with not seeing yourself.
Get into the position where your hands are down in front of your trough and you can't maintain the club shaft parallel to the ground.
Is start trying to get more set up here.
Think about it being like 75% or 80% of your max range of motion.
Your job is at that point is to maintain that angle.
If you have to feel like you're maintaining with some support from the wrist, a little bit of tension there, which I know is taboo for a lot of you, then do so.
You can support it there because when you start moving left, things are happening pretty quickly.
The club's going to want to work out away from you if you're not supporting it.
You're just going to want to feel like you're supporting it a little bit.
Then at the bottom, it's much easier for you at that point to be able to release all that tension and let things fly, what we're going to be talking about on Saturday.
Hopefully, that answers your question.
You might want to take out a little bit of the wrist set at the top of the golf swing.
Almost feel like it's a little bit more upright and then you can feel like as you're coming down, you're just trying to maintain that angle.
And you can look at it when you get down to the lead arm, parallel to the ground, I'm sorry, lead arm down in front of your trail.
Five with club shaft is a parallel.
Okay, if you notice that it's down like this, then fix it.
Take your wrist, set it okay, and then go back to the top from this position and then come right back down to it.
Okay.
These are simple little things that you can do in the process to be able to move into that correct position, so hopefully that helps you out.
So, all right, So Ready?
Let's do it.
All right.
So big, big, big night for you guys.
It's super simple because the fact that we want you guys to be able to spend as much time as you possibly can, either A, asking us questions at the tail end of tonight's session, or B, Getting your butts out there and getting to work over these next four days.
Because we want you guys to be able to take all of the information and all of the slides that we have up here.
And be able to start making sure that you can do what?
Well, set up.
Load yourself up and get your hands and your arms down in front of your trail thigh.
So that you're ready to deliver the pub and you're ready to start releasing it.
Great, let's show them what their main goal is.
Over the next couple days.
We're going to show you a couple reps based on, and then we're going to show you a couple reps down the line.
And this would be with both hands on the golf club.
This is what we want you to be able to do, we want you to be able to load, we want you to be able to transfer.
Okay, then we want you to be able to post up and end in this same position, okay, one more time.
So we're going to load, rotate, we're going to squat to square, we're going to post up, and hands are going to be down in the spot.
Some of you are going to be able to do that with some ease, where you're going to be able to move fluidly, and some of you are going to be working at the pace that you just saw Craig do.
Again, it doesn't matter.
We want you to be able to work at the pace that you're comfortable with.
That's our main goal tonight, Is to be able to give you the information to be able to perform that exact movement that you just saw Craig produce from beginning to end, and we'll show you exactly what it looks like down the line.
So on Saturday when we start, when we start the session.
Because we're going to be giving you a whole different look at the way you release the golf club.
That we are just hyper focused on the release because there's a lot of things that you need to have in your brain.
And then once we get through that release on Saturday, we're going to give you a very crystal clear game plan on how to get this stuff blended together.
And we're going to get a couple different options that will work for you at the home front, or whether you get to the range, anything you want to add before you start.
No, I mean, I think that's we really.
If you're confused tonight, please stay around and ask because we don't want to add too much to what we've already added to your brain.
Tonight should be a very simple night.
It's everything you've done.
It's just putting this little bear paw just on the side of the club.
That's the only thing that's changing.
Because you're going to need the reps to be able to do what.
I just did right there to make Saturday work like that.
Right, exactly.
And so you're going to see the same level of progression that we talked about on Saturday, where We talk about isolating.
And then slowly starting to add the troublemaker back in the book.
Now, let's talk about why we call it the troublemaker.
Your lead hand and your lead arm in your golf swing is more or less your conservative brother.
This is the person that we call the accountant that shows up to the party on time, always pays the taxes on time, never really creates any sort of problem.
She's kind of the middle of the road kind of person.
But your trail hand, or your right hand in this situation where the right-handed golfer is at home, is your crackhead brother that's got all kinds of issues.
He shows up to the party late.
Really, he's a fun time.
He's the life of the party.
Yeah, he's the life of the party, but he can screw some things up pretty quickly.
Now, the reason why that is is because he's sitting in a position that's behind the golfer, okay?
And when you start using this hand way too much in your golf swing, you start affecting swing playing.
You start affecting the face angle and we don't need it to do that stuff we're going to teach you on Saturday.
For those of you that really want to understand what your trail hand and arm are going to be doing in your golf swing.
Okay, you're going to understand what it should be doing at certain points, and I can assure you it's not going to be happening or doing anything.
From the point of your setup to the top of your backswing, to transition or to post up, it's going to be doing something at the bottom of the swing.
Okay, so, All right, so get that in your brain.
Make sure that you understand that your right hand and right arm are more or less a passive conduit.
That's going to be helping you transfer energy from your body as you get more reps under your body.
So your job is to start loading things up, turning your body, and then you're going to start working on transferring energy the proper way, and all is going to be great.
So the level of progression that we want you to follow is you're going to take your setup.
And you're going to go through the same motions left arm only with a golf club.
And you're going to go ahead and take the right hand.
And you're going to add it to the top of the golf club or add it to the top of the back swim.
Craig is going to demonstrate that for you now.
So we're going to set up.
Golf club is going to be on the heavy end.
Okay.
We're going to push that right ankle on the ground.
We're going to turn our body.
Now, what you're going to see Craig do is you're going to take the right hand and he's going to just touch the shaft.
Okay.
Now he's just touching it with his pointer or his pointer finger and his thumb.
See that?
He's not grabbing the whole golf boat.
The minute he starts grabbing the whole golf boat, The minute he's going to start trying to push that golf boat and start throwing it all away from him.
First thing we want you to do is exactly what we just did on Saturday, But then we want you to take the right hand, and we want you to now start reaching over to touch the golf boat.
For those of you that have had a hard time getting your hands and your arms more upright, this is going to make it much easier for you to be able to support the club.
Greg will vouch for this.
He deals with this stuff in the clinics.
It's amazing how much easier it is by adding the right hand onto the shaft, how much it takes the stress off the left arm.
Yeah, that's the one thing that I always love to show people in the clinics or in the boot camps, that when we start going through this process, if you just make a lead arm only swing with a club up here, you feel it.
The club, it's got some mass.
It's got some weight to it.
You feel a little, you know, kind of taxing in the arm.
But as soon as you take this trail hand, even if you just take your index finger and you just put it lightly underneath the shaft, it's like, oh, wow.
Like, I can hang up here for all all day now.
Like, how did it just become so light by just putting down?
Think about if just putting your index together all of a sudden makes the club light as a daisy.
Like, I can support this.
Think about what happens when you put your full hand on it, how much control and power has over it.
So, you know, as Chris was mentioning, if you struggle with elevation, this little bit.
Just putting the finger here is going to make a world of difference in being able to support this, right exactly, and so.
The checkpoints that you're going to look for at the top of your backswing, as far as your arms are concerned, are going to be quite simple here.
So when you have the right hand reach over and touch the golf club, you're going to have your right elbow, and we'll show you this down the line here in a second, right at the base of your chest.
You're going to see that your left hand and your left arm are extended out and they're pretty straight.
They're passively straight.
They're not ramrod straight, but they're passively straight.
You're going to see that your left wrist is flat and that your right elbow is in line with your torso.
So let's turn down the line real quick and show them those checkpoints.
Because I know a lot of you want to make your gallstrings look really pretty, right?
So this is where you talk about being on plane.
So the first one would be making sure that the right elbow is at the base of the chest.
This is the elevation point that I was just talking about at the very start of the session.
Now, some of you are going to want to be able to go a little bit higher.
Some of you want to go a little bit lower, we never advocate going a little bit on the lower side than this.
Just because what that does is it shuffles around your equation.
Where you have to rely on a whole lot more leverage, and typically, when you start relying a lot more on leverage, you start developing more time in this way.
So we like to kind of stay down the middle of the road, okay, so we like to see the right elbow at the base of the chest.
So if you draw a line straight down underneath his elbow, you're going to see it's right down underneath the base of his chest.
Okay, second checkpoint would be the lead arm is going to be passively straight.
Lead wrist is nice and flat.
You're also going to look for the right elbow to be in line with the torso.
Now, for those of you that have had a problem with getting your right elbow to look like this, there's a specific reason why this actually happens.
Typically, this is going to be a byproduct of having too much lead arm, lead shoulder push in your swing, Which is one of the common mistakes that I saw over the last couple days was people trying to take that left arm and push it across your center, which in turn shuts your body turn down very, very quickly.
When you start doing that, and you start forcing your trail arm to get further and further back from behind you, you have no idea what sort of repercussions you're putting yourself into to recover from that spot.
That puts you in a spot where you actively have to push your hands and arms back out in front.
That's the last thing you want, because that forces you to have all sorts of plane shift and forces you to start throwing the club out away from you, which is a loss of lag, all the fun stuff.
Your job is to try to keep your right up in line with your torso.
There, this is very much a variable as well, so we talk about elevation being a variable, and we talk about your right elbow position being a variable.
Now, your right arm.
Okay, we talked a little bit about this on Saturday.
Or your right shoulder is going to have some mobility, most of you will have a lot of mobility, some of you won't, okay, so for those of you who want to test this at home.
If you hold your right arm directly out in front of your body and you flex it to about 80 or 90 degrees, okay.
And then you just hold everything still and you just move your your hand away from your face here, like you're doing a backwards windshield wiper.
Is that the best way to explain it?
It's always like you're just going to give somebody a quick smack.
Some of you will be able to make some good move in here.
Some of you won't.
Some of you will be like, that's as far as I can do it.
Again, this is all based off of how much mobility you have up in your shoulder.
You don't need a ton of it.
Now, a great way to be able to get your right elbow into this position at the top of the golf swing, and this is a really big point that we want you to write down in your notes, is from the address position.
When you start working, From the bottom up to the top of the swing, which is the next piece.
We want you to keep your forearms and your elbows close together.
Okay, we don't want you to be tense to do this.
It's not a workout program, okay, but we want you to keep your elbows and your forearms close together.
Okay, this is going to force your humerus to externally rotate, and it's going to help hold your right elbow in line.
So now what we're going to show you is the next part of the progression.
Okay, this is again, this is back.
Some related stuff we're going to talk about transition and post-up here in just a moment.
Okay, so now, as Craig's done a bunch of rest breaks, Turn his body up to the top.
He's taking his right hand and putting it on the top of the club.
Now he's going to start doing it from the bottom.
Your job from the bottom is to just think about nothing else but weight shift and body turn.
Your hands and your arms are going to typically want to do a whole lot more here.
Just try to keep the arms relaxed and just start turning.
Keep turning as much as you can.
Try to keep that right hand and right arm passively straight and as relaxed as you can.
More or less going to become the governor of width.
When you get to the top of the swing, you're going to notice that your right arm flexes automatically.
But now remember.
The big pieces that we're looking for is loading into this right side and making sure that you've turned your body fully.
Now, The other parts that we just talked about, as far as checkpoints are concerned, are going to be there.
Based off of the right hand and right arm, just following along with movements.
Follow along with the movements and keep your forms and elbows close together.
And you will end up in that really sexy spot that everybody calls being on plank, right?
And I know every a lot of Because that old adage, you know, the rubber band around the arms.
Right.
Like people get set up and they get so locked into this position.
Right.
That nothing can happen now.
So we're saying have some awareness that they're together.
But we don't want you trying to squeeze your elbows and, you know, kiss them together right here.
Because that's going to limit how much you can rotate and get these arms elevated to the top.
Right.
Exactly.
And this is why the worker connects such a successful training game for us.
Because.
What that does is it helps you maintain that connection.
Now, I'm never a big advocate for training Aids because of the fact that it doesn't necessarily build as much kinesthetic awareness that you need, but it does give you a good reference point as you start moving through the drill.
It's a very, very good training aid.
That's why we have so few training aids for sale on the website, because of the fact that we've had everything thrown at us.
You should see one of the rooms in my house.
That people will just mail us everything and they want us to test stuff out here on a regular basis.
It's funny.
I've got some really funny stories about testing, training, Aids.
To see if they're going to even make the cut, to even pass along to Chuck to see if they get ready for sale.
Because, again, we want you guys to have the best of the best out there.
And there's a lot of stuff.
I love the messages where it's like, see if you can break my training aid.
Prove to me it doesn't work.
Usually it's like, all right, one swing and it doesn't work.
They're like, how did that happen?
Right.
So some of you want to ask a question about some training.
All right.
So the idea is, in order to build the arm positions into your backswing, is you're going to start out left arm only, and you're going to do the stuff that we talked about on Saturday.
And then you're going to take the right hand and right arm, and you're going to just go up and touch the side of the golf club.
You're just going to be up there to help support.
Then once you get this position into a good spot, Then we want you to start from the bottom and then move up to that same spot with the right hand just touching the side of the club.
Do not wrap your hand around it.
Now, the reason for that is, again, as soon as you start wrapping your hand around it, your brain is going to get a signal to the things that you've already done in the past.
And we're going to see your body turn shut down.
You're going to start creating a whole lot of momentum and inertia in the golf club that's going to be working against you.
And you're going to see that your positions are going to be very lackluster.
So what we want you to do is just now touch the side of the golf club and then follow along.
When you get to the point where your right hand and right arm are cooperating and you've met the criteria of what we're looking for with good body turn.
Make sure that your head's not getting too far with the ball.
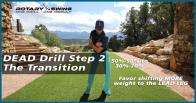
Make sure you've got load into your right hip and your right leg.
Now what we want you to do is start working through the other pieces.
Transition and post up.
What we're going to do from this spot is we're going to start squatting the square.
Now remember, the lead arm is going to start to come down from this position.
Well, so will the right hand.
It's reacting to these movements.
You're creating action through your legs and you're letting the upper half of the body react.
That's the whole big ticket item here.
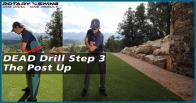
Then from there, you're going to go ahead and make sure that you post up.
And now your hands are going to come down in front of your trail thigh.
And that's it.
Now, the same positions apply here.
You want to look at it from your legs first.
Hips open 35 to 45.
You want to make sure that your shoulder line is nice and square.
Then, you want to make sure that your lead side of your body is pretty close to being fully stacked up.
You're going to notice with the right hand on the belt foot that typically you're going to have your right shoulder.
Want to peak down a little bit more.
You're going to see it kind of drop down a little bit more.
Remember, The secondary axis tilt that you're going to see when this is all said and done and we get to impact is just going to be where your spine is just outside your leading, kind of what Craig looks like right now, okay?
So the positions are going to be exactly the same as far as hands and arms are concerned, though, okay?
Now, one really big point here, and this is something that we've seen over the last two camps specifically, because Craig and I, we talked about this before we came on tonight, did we want to allow them to have their right hand wrapped fully around the club?
And I think we both agreed that let's just keep it light for now until we get to Saturday.
So for now, between now and Saturday, point of finger in your thumb.
Okay, that's all we want touching the golf club now.
One big mistake that we saw develop over those last couple camps is that when they start making, when you start making your move over to your lead side, is that.
Immediately the wrists and the forearms started to create separation.
Okay, so you see the right elbow gets separated back here because you're trying so hard to be so passive with the right arm.
Because you've heard us talk about all these horror stories in the golfing world, about what your right arm can do, right?
Well, Again, it's okay for it to stay exactly where it was in relationship to the left arm, through the bottom of the swing, up to the top, and even on the way down.
So, a focus point for you that you can write in your notes here is that we still want you to keep your forearms and your elbows close together.
As soon as you start making that move in transition, don't let your right elbow stay back behind you.
Your hands and your arms move back in behind your body.
This is the depth dimension of the golf swing.
We need things to move back in this direction.
If you leave your right elbow behind you, on the way down, guess what you're gonna have to do with it?
Well, at the release point of the golf swing, you're gonna have to push it back out in front of you, and that will cause the worst kind of chaos in your release.
That causes the flip, that causes the rate of rotation to be much higher, that causes playing shift, okay, and those sorts of things lead to ball striking nightmares, okay?
That's kind of what I dealt with when I played professionally, is my right arm stayed a little bit behind me, and I had to actively force it out in front of me, and that's what forced me to hit big, quick hooks.
And you can't literally survive on a big, quick hook that comes out of nowhere.
So you have to remember.
The movements that we're going to be creating here are going to help move the hands and arms gradually in front of your body, right?
So, in order for us to be able to do that, it's imperative that you write in your notes.
I will keep my forearms and my elbows close together when I make my move over to my lead side and when I make my post a move.
A lot of times it'll happen.
When you start working from transition to post up, you'll start leaving that right elbow back and behind him, so he transitions.
And then he posts up and then his right arm's gone.
Okay, this is a big time stuck position.
So you're going to allow it to just follow along with the left arm movements.
Now, What we've done here is we've given you the specific checkpoints that you're going to be looking for in the slides.
Okay, these are very much in line with what you saw on Saturday.
It's the exact same position now with both hands on the golf ball.
Okay, these are what we want your positions to look like as you come down.
Okay, again, it's not changing anything now that the right hand and right arm is on there.
It's going to be the exact same spot as it was with your lead on, that's it, right, piece of cake, right?
So what we did was is just try to keep it as simple as possible for these next four days.
Because you have so much to do to get this stuff ready to rock and roll for Saturday.
Okay, and we want to talk to you guys a little bit more about your plan, right?
We want to talk about how to get this stuff moving as quickly as you possibly can.
Now, I know on Saturday, I alluded to this a little bit, where I talked about.
We're going to be doing more reps than than what you're going to see on the slides here.
We'd like for you to get as many reps as you can.
If you have time to do 200 or 300 reps in a day, more power to you.
Obviously, 100 reps is kind of your baseline number that we want you to try to get after.
But if you get 200 or 300 reps of these things, go after it.
The more reps you get in, The more likely.
You're going to be able to move with some fluidity so that you can start moving from a set up position all the way to the top of the backswing.
Squat to square and you can come down in the hitting area and you can get ready to deliver.
Okay, so all of these movements is setting us up to be able to let the thing fly, which you're going to see on Saturday what happens when we do that.
you know, that's really it.
Okay, there's nothing that's changing from what we talked about on Saturday.
And I know a lot of you at home are like, that's what we just waited on.
That's it?
That's what we waited for this couple of days for?
That's it.
Okay, it's your right hand is just going to be more or less following along with moves.
We gave you some specific points that we want you to keep an eye on.
We want you from an address position to make sure that you keep your forearms and elbows close together.
to make sure that you get that right arm in the correct spot on the top.
We want you to make sure that you understand that.
It's going to help you elevate the hands and arms at the top of the swing as a support brace.
But then from there, it's following along.
It's not doing anything from the top of the swing down.
It's literally following the movements of the left arm.
Right.
And one thing that I want to throw out, if you start to see things fail, Chris and I get this question all the time.
When I'm doing my dead drill, how do I know when it's time for me to move on?
Or how do I know I have enough reps?
If you start adding this trail hand and you see one little fault, like one kind of new little fall pop up.
Get some reps in, fix it, work it out.
But if the whole thing gets thrown out the window, I can't stress enough.
Just delete that variable.
If you didn't have a problem going from here and shifting up and squatting the square and posting everything's good.
But all of a sudden you add this trail hand and now you've got seven things broken.
Then you need to step back and need to put more reps in the prior session because you're not ready to add that component yet.
Exactly.
And so now what I would like to do before we start opening up for questions is I'm going to walk you through a workout program that's going to be great for you.
And we're going to strip it down to where we don't have a golf club in there.
And I'm going to start doing a more condensed version of the reps.
But this is how we want you to start practicing this stuff at home and working your way up to where you have both hands on it.
And this is something that you can use on a day-to-day basis, even when we're done camp, or even over the next year or two years.
The more you start feeding your brain these correct movements at whatever speed you desire, the less likely your old habits are going to start to show up.
Again, your brain needs to be fed.
When we start letting the clock release and you're moving through this position, your brain's going to go, ding, now this feels like a golf swing.
That's when it's really time to start feeding it.
What I want you to do is, for those of you at home that want to stand up and go through these movements with us, more power to you.
I think most of you have been doing that because we've been seeing the swing review process.
If you want to stand up and go through this with us, perfectly fine.
We're going to do a bunch of reps based on, we're going to do a bunch of reps down the line, and then we're going to open up for questions.
Okay, so we're going to go ahead and take our setup positions.
We're going to do this without the arms in the golf club at first.
Again, we're going to follow a level of progression here.
Okay, we're going to make sure that we're two inches outside of neutral joint alignment.
Okay, we're going to make sure that we have ourselves hinged from our hips with a little bit of knee flex.
We've got to make sure that we have a little tiny bit of axis tilt.
Our weight distribution is what, Craig?
50-50.
50-50.
Okay, so we're not leaning one way or the other.
We've got 50-50.
Okay, now we're ready to start this whole process.
So the way I want you to start out, push that right ankle on the ground, pull that right shoulder back.
Piece of cake.
Body's really coiled up.
You should feel a little bit of load.
You know, 90% of your weight underneath that right ankle.
Make sure that you feel that midsection.
You're going to feel really coiled up.
Now from here, we're going to squat to square, and you're going to feel about 60% of that weight underneath that left ankle, left shoulder down, right shoulder up.
A position now that we're ready to start our post-up move.
So we're going to begin that post-up by driving that ankle on the ground.
We're going to feel like we're pulling that trail or that lead hip up and away.
We're pulling that back up and away from the golf ball.
You're going to make that lead leg work to a passively straight position.
You're going to feel rock solid stable.
Your hips are going to be open right around 35 or 45 degrees.
Your shoulder line is nice and square.
Now let's speed it up a little bit.
Arms still across the shoulders.
Right ankle on the ground.
Right shoulder back.
Squat to square.
Post up.
Let's do three more reps.
Right ankle.
Right shoulder.
Squat to square, post up.
Right ankle, right shoulder, squat to square, post up.
You can see how Craig's moving pretty quickly now.
Right ankle, right shoulder, squat to square, post up.
He's even beating me right now.
Right ankle, right shoulder, squat to square, post up.
Now we've warmed up.
Pretty simple warm up.
For those of you at home that want to do more reps, let's just say you want to break your rep sessions up into maybe 25 of those reps, do it.
That's perfectly fine.
Okay, now what we're going to do is we're going to add all l lead arm up.
Okay, how's that, my Espanol?
All right?
So now lead arm is now going to be hanging here freely.
Okay, we're going to make sure that we're using the same setup.
Remember, don't try to move from the arm, let your body move your arm.
Okay, really important point here.
Push the right ankle on the ground, turn the right shoulder, pull the right shoulder back behind your head.
Okay, squat to square.
Post up lead arm comes down in front of your body, right in the middle of your trail thigh.
Not out here.
Not in here.
It's right in the middle of your trail fight.
It's hanging there.
It's pretty relaxed.
It's like a Kenny G concert.
Way to have it.
Make sure you look at it from the ground up.
Hips are going to be open 35.
Make sure that your shoulders are right around square.
Right foot is down on the floor.
It's rolled in just a little bit.
Left arm hanging freely there.
Right ankle on the ground.
Big body turn.
Squat to square.
Post up.
Lead arm comes down.
Hanging there nice and freely.
It's not pushed out away from his body.
He's in a nice, relaxed position.
He's all ready to start letting the thing release and fly past his body.
Let's turn down the line and do a couple reps here.
Make sure that you remember to focus on a little bit of knee flex at a dress.
Just small amounts of knee flex.
You don't need a ton of knee flex here.
Just a little bit.
Just enough to soften the knees.
Butt back.
Chest over the golf ball.
Lead arm is just hanging there freely.
It's not out away from his body.
It's just hanging underneath his shoulder.
It's like.
A floppy noodle, okay?
Make sure a lot of you at home are focusing on feeling like you're holding the golf club.
Okay, because again, you need to feed your brain the correct way.
It's not sitting there with your arm way out of way from your body.
You never hold the golf ball like that, right?
It's not pulled back into your body.
Really tight up against your chest, let your arm hang down there, free.
Okay, now, from this position, we want to push that right ankle on the ground, you want to make big body turn.
Remember, you're going to feel that right shoulder up and that left shoulder move down.
Your job is to get your shoulder line perpendicular to your spine.
I'm going to squat to square.
Lead arm comes down to where it's parallel to the ground.
Notice how his lead hand is right towards the center of his chest.
He posts up.
Let his left arm come down in front of his body.
Okay, so let's now pick up the pace a little bit.
Right ankle, big body turn.
Squat to square.
Post up.
Good.
Right ankle, big body turn.
Squat to square.
Post up.
Okay, let's see you blend it.
Okay, Those positions right there are going to be easily achieved for you at home.
That really take your time to make sure that you hit these key points that we've talked about.
Now, key points that we've talked about, making sure that you get set up well, make sure that these pieces are all in a good spot, making sure that you load to your right side, make sure you get a good body turn, making sure that you shift properly over to your lead side, Which is a common mistake that I saw the last couple days, where people are still trying to hang their upper body back.
You load over to this right side beautifully.
You're loading that right hip up, you're turning your body, And all of a sudden, you just start shifting your pelvis, and your upper body wants to just kind of stay back where it is.
Remember, allow the upper body to more or less fall back into position.
A great way to measure it is just measure it through your head position, because if you load your trail side up, your head should move an inch to an inch and a half or so.
If it doesn't, then you didn't load anything up.
You just stayed really centered, and in turn, you're not going to want to move.
If you load your trail side up, you're now giving yourself something to move off of.
You can monitor this through the head position.
You're going to look at it from the legs first.
Make sure that your hips and knees stand back to virtually a square position.
Make sure that your lead shoulder is low.
And then look at your head.
Did it come back in his original spot?
Great.
Piece of cake.
And you know your weight transfer is in a good spot.
And then from there, you can go ahead and begin your post up.
Get that really, really rock solid lead leg.
Make sure that your hips are up at 35 and 45.
Shoulder line nice and square.
Okay?
So what fault did you do with a lot?
The arm out of the way.
That was the one that I saw for the most part people really hitting their positions.
But when they were starting to add the club and add an arm in the reviews, They, as simple as it may sound, they forgot to hinge into position.
So they would start very tall, so where they get their spine, angle at almost 75 degrees to the sky.
And they have their arm and hand out here, and they're like, Craig, I don't know why I can't get to the position.
Or they get to here where they're kind of blocking out their head right here, or they're getting way stretched over here.
It's very important that you do this from the proper position size.
Chris had me a second ago when I was hinging forward and just letting my arm hang nice and neutrally right here.
This is a position we want to start from and what we want to do every drill from.
Because, you know, as we're going through this, all we're trying to do is just create good habits.
You know, when you start to create good habits, good things happen.
Like, you know, you wake up in the morning and you, you know, you fix yourself a good meal or a good breakfast to start out each day.
When you get good habits, good things are going to happen.
Right.
So just like when you're doing your reps, if we just keep, you know, keep focusing on having good habits as we're practicing this.
That's what we have to do, and that's one of my pet peeves because when I'm repping, I want it to look like a golf swing.
I want it to feel like a golf swing, and this is just a simple thing that can wreck the entire drill.
100%.
Because when you start getting your hand and arm moved out away from your bottom, you have to remember that that's going to affect the swing plane pretty drastically.
Now, I understand that Craig and I and Chuck, we talked concessantly about swing plane is completely consequential.
It's completely in the periphery.
And everything that we do with our body is going to affect swing plane.
But again, if you move your arm out of your body, it's going to start to make your swing plane look really flat, look really rounded off.
And then when you start getting flat and deep, then Craig and I are trying to figure out ways to be able to get things back out in front of you.
So everything that we do here at Rugby Swing is requirements based.
Everything that you've heard us say over the last five sessions is all based off of a set of requirements.
So think about stance width here for a second.
Let's talk about stance width first and really understand what the requirements are of this.
Well, when you boil this down, what are we trying to do with this golf swing?
Well, the first thing that we're going to do is we want to stay balanced, right?
We want to stay as balanced and stable to the ground as we possibly can.
Now, let's think about that objectively for a second.
If I told Craig I want him to get really balanced and really stable, so I'm getting ready to come knock him over, okay, what's he going to do?
Well, he's going to get really, really wide and he's going to get really low, okay?
That's giving you a really good, solid base to be able to kind of fight off all the inertia that I'm going to be throwing in his direction.
Now, what's the problem with that in a golf swing?
Well, the other requirement is that we have got to be able to use weight shift.
So weight shift, if you start trying to move and load into your trail side here, it's going to force your head to have to move six miles.
And nobody wants to move that much of the muscle.
Believe me, I've seen it all week, right?
You guys are afraid to make this little lateral movement.
That would be an abundance of it.
So you've got to remember that everything that we're doing here is all requirements based.
And that's why we love to sit here and answer questions, because the fact that everybody wants to know why they've heard.
I had somebody break that book out during a golf lesson with me, and I was like, you put that book away.
There's some good stuff in that book, but that book was written to fight off a hook, just so you guys understand that.
I'm never going to bash the great Ben Hogan, but the only thing I really agreed with that in the book was something that Chuck said.
Hogan talks about sitting down to rip off a square by Fair Lady.
It's like, you got to take your time and go through the learn the notes.
And then you progressively start stacking in pieces, and then eventually it becomes a song.
Well, that's, you know, one of the Hogan things that's so funny about that as well, is when he first saw his swing on camera.
He's like, that's not me, because it didn't look like what it felt like to him.
And a lot of Hogan's book is based off what he felt all of it, because that's what he was trying to delay.
But the problem is, we know that feel isn't real, Right.
Everything that we've talked about over these few sessions, again, It's going to coil back to the idea that we're trying to get you to hit the golf ball as far as we possibly can and as straight as we possibly can, but also remembering that we're trying to protect and preserve your body.
Think about that.
There's a lot of golf instruction that's out there that claims to be body -friendly.
I can't tell you.
I might even talk about this in one of our previous sessions.
I was actually sitting on YouTube.
I fell into the trap where I was watching a YouTube video where somebody advertised himself as a body-friendly golf swing.
I watched it, and he's teaching his students, and he's got a very captive audience.
I was surprised because I was reading through the comments.
He's teaching his students reverse pivot.
Now, your spine hates two things.
It hates sheer force.
It hates compression, bottom line.
If you start working into a position where you're not loading your trailside properly, your hips become unstable, and you're getting your body to look like this, like Craig does, you're going to eventually hurt your back.
Okay, and it hurts my back, even having to look at it, okay.
So again, these things that there's a lot of information that's out there.
And that's why we'd like to stick around and answer all the questions that you guys might have.
And I know tonight might seem really, really simple, but that's what we said, it was going to be simple.
We don't want anything to change that we've done at this point.
We want your setup to be great, we want your weight shift and your body turn to be great.
We want your transition to be fantastic.
We want your post-up to be just as great.
You get that done and you add arm movements that we talked about here from Saturday and today, then Saturday, this upcoming Saturday, becomes way more enjoyable.
Right?
Did I miss anything there?
No, I think it's good.
I mean, I think that's it.
The main point is, and you already know, all we're doing is the exact same thing.
And, you know, Chris brings up the fact of, you know, looking at the swing from the ground up.
think about this guy last.
Don't focus on this guy.
If you get up to, so let's say you do a rep with this club and you're like, all right, I'm ready to add the trail hand.
I'm going to add these fingers and you get up here and you're like, oh, my club face is shut.
That's not what we want you to focus on first.
What is broken down right here?
Well, you can see that my shoulders aren't on plane, that I haven't gotten that part right.
I've already swung my lead arm across my chest.
Look at this guy last because everybody, when they start looking at this club, With that right hand on, if they're going to start, oh, well, I don't want to be shut at the top or open or it's laid off or it's across the line.
Make sure that you go through the protocol out to that point.
We want this to be the last thing that you look at.
Right.
And so here's a good example of that.
So if you were to look at me from a downline perspective, okay, and you see that my hand and arm position looks pretty decent right here, right?
I look like I'm very modelsman.
But now if I turn face on, what you're going to see here is a whole lot of luck.
A whole lot of nothing, right?
You're going to see the body didn't do anything.
And so that's why as instructors, what we always ask you to do is we ask you to send it from both angles, right?
Because of the fact that you can make it look really good from a downline perspective.
But we have to be able to watch the loading sequence and the loading order as you're doing things.
If you looked at my golf swing at downline, you'd be like, wow, that looks pretty.
I mean, I can move in that spot all day long, right?
Look at that piece of cake, right?
I just made it look awesome.
But you have to remember, there's multiple, there's two planes in the golf swing, right?
There's a horizontal plane and there's a vertical plane.
And there's other things that your body need to be doing to be able to balance this stuff out.
And so that's why we spend so much time without your arms and your golf club in the mix.
Because it's honestly where you guys screw the pooch.
You forget about your thumbs.
You forget about your body.
You think about the golf swing in the reverse order.
You always look at it from the golf field first, and then you look at your hands and your arms.
Why?
Well, because that's the sexy part of golf, right?
Hands and arms working into a good spot at the top of the swing.
Got all kinds of lag.
I got a lag as far as wrecks.
I got impact pretty close.
Okay, great.
But you've got to remember, there's all these moving parts that are helping aid the efficiency aspect of the swing, but also helping you protect your body.
Craig and I come out there and swing the golf club really fast with our hands and arms, but we're not going to be efficient.
I promise you right now, and it's going to be a very, very timed up move.
I do this as an example for students that come in that want to do private instruction.
As I'll sit there with my feet together, I'll hit golf balls at full speed.
They're like, wow, look at that ball.
I'm like, big deal.
And I watch.
I'll get my stance with here, and I'll start loading the body up and start moving.
And they start seeing like, wow, that's even better.
I'm like, yeah, I'm working way less to do this sort of thing.
Again, you can make the golf ball move really easy with your hands and your arms.
But it's the worst way to actually move the golf ball when it's all said and done.
So that's it, guys.
So your practice program over the next four days is to work at the speed that you're comfortable with.
We want everybody in this room to show up on Saturday, ready to get into the position that Craig's going to show you again.
Ready to come down and get ready to release this thing because you are going to hear some information.
For those of you that have even been through the boot camps.
Or you've sat and listened to all of our, um, all of our release drills on the website.
You're going to hear things different because we have different ways to explain this information to you every single time.
Because this, again, is where we start letting things fly.
And then there's some things that you have to be able to focus on.
And we're going to also give you a practice program on Saturday.
That's going to help you make this whole golf swing come together.
That you're going to try to get out to the range and get out to the golf course and start.
See any effects of it.
So that's it.
So for those of you that want to stick around and ask questions, more power to you.
I see Arthur is checking out and headed to his member guest this weekend.
Good luck.
I hope you take home the crystal.
Keep us posted.
We always like to hear good stuff like that.
Even the bad stuff, you just love stuff.
Good or bad, love stuff because we want you to be successful.
And if things do go well, put it on our wall on the side.
I don't know if anybody's really checked that out.
We have a wall on the side of our success story wall under the testimonial part.
You're going to see a lot of really good stories of great improvement under there.
I had a student the other day just post something where, I mean, he was shot like 12 below his handicap.
There's a lot of good stuff there.
Go check it out.
There's a lot of good stuff on the wall under the testimonial section.
We had a woman on Saturday after the session that emailed me that I'm working with her.
Seventh hole in one.
Seven, I was like, I've only got four.
I mean, I gotta get back out of there and play golf again.
So, um, so now is a great time to ask questions again.
Super simple night.
We just wanted to kind of recap everything we've thrown at you.
Get you guys ready to rock and roll for Saturday?
If anything, we've covered over the first four sessions into tonight, so tonight would be number five.
Does it make any sense in your brain?
Or maybe you're not having an easy time with yourself, or maybe you're having a hard time with stance, with a grip.
There's not such thing as a stupid question.
Okay, ask the questions, because if you don't have that information answered your brain, Then you're going to practice the wrong things, and then we're going to see it, and we're going to be like, what the hell are you doing?
We're going to fix We're here to answer those things.
We've got a question coming in.
What are the biggest mistakes with right arm?
My arm won't rotate at all when you did that demo.
How much pressure against the chest?
The biggest mistakes when we add the right arm, The first one that you're going to see right away is the right arm is going to fold up really quickly.
The right arm is going to start folding up very quickly because of the fact that, again, We just moved this golf club six or almost seven feet, with just a movement from our hands and our arms.
This is actually a very common drill.
It's called the start the lawnmower drill, which has really kind of screwed the developing world to the umpteenth degree.
But when you start folding your right arm up really quickly, you've now collapsed your width.
But also what you've done is you've stopped your body from turning.
You've started loading up your reach over girl.
So that's one of the big things we'll see.
The other things that we'll see.
Is at the top of the golf swing.
I think the biggest mistake that we'll see over the next few days is.
The right arm is going to want to stay back where it is okay, it's going to want to start working back in the opposite direction, rather than following along with left.
Think about your left arm being a pilot, okay, and everything that you're doing, you want your co-pilot to follow along with.
Now, both of these arms are very capable of flying this airplane.
Okay, but you still, when it's all said and done, when you're in heavy turbulence, you want your pilot to handle, right?
You don't want this guy that's got, you know, a couple days out of school.
Or he's starting to try to take over things, so you want him to follow along.
And so taking the idea of just keeping the forearms and the elbows really close together and doing the same sorts of things that you did.
Left arm only will move it down into the position.
What you see Craig in right now, so those are the two biggest faults that we'll probably see now.
As far as pressure against the chest at the top of the swing, this is one thing that Craig and Craig always like.
Talks about a video that I redid in the past, the three functions of the right arm, which is in the backswing section.
And I did an example in that video, where on the the non-remastered version, the original version where we had the towel across our chest.
Okay, that's, I'm sure.
It's a video that you guys have all seen, where you've been taught to keep the arms across your chest and turn your body.
Okay, now, the problem with that drill is that it just sacrifices all your width, okay, and width is a really important part to the skull swing.
So, as far as the connection between your chest is concerned, think about the very tippy top of your bicep and the very tippy top of your chest as being the only connection point.
It's a very, very small amount.
You could even stick maybe a T up there.
That would be the connection point.
You don't want to have your arm jammed into your side.
If you do, you're now sacrificing weight, and you're going to make it harder for you to be able to move back into transition anyways.
It's okay for the arm to be up.
It's okay for it to be in the position that we're talking about.
Again, just maintain that connection right up at the very top of the bicep and the top of the chest.
You see it's separated in this direction, and your right elbow is going to look like it's flared back and behind you.
You're going to have that flying elbow kind of look.
That's an exaggerated version.
I always exaggerate because it gets the point across because they remember.
So that was an exaggerated version, obviously.
But even that version right there is less exaggerated.
And you can see that there's no connection up here.
So you want to just maintain a little bit of connection up there.
So great question.
So you guys have been awesome.
Between the screen reviews and your questions, it's been really, really great.
So we always see some really ridiculous questions that people ask.
What I'm like, we didn't even talk about that, but we like to talk about it because it gives us some of the right.
All right, So, um, Mark says, You guys are awesome.
Thank you Mark.
Thank you Mark.
That was my celebration dance.
All right anyways, all right.
So should we wait until Saturday, no matter what, to hit practice balls at home, even if the swing is looking good?
Daniel This is the.
This is a very hard question to answer at this point.
Those of you at home probably want to hear a Muppet.
Daniel, you can listen.
You can hit balls anytime you want.
We told you at the very start of this, we don't ever want to shy anybody from playing and practicing.
You can do that.
We just want you to make sure that these movements that you have are ironclad impacts.
There's ways that you can start measuring these sorts of things.
We'll talk a little bit about swing playing and what you're going to be looking for and how to measure your impact positions on Saturday.
If you get a chance to hit balls, then hit balls.
You better make sure that these are in a pretty decent body.
We don't want you to erase all the hard work you've done at this spot.
So if you want to wait, you want to do more reps on the core movements that we've done here, by all means, do so.
Like I said to you guys at the start of the session, I've seen some people that have pretty decent baseline golf swings, being diligent and disciplined enough to strip this stuff down and do these big movements.
And I was actually kind of taken aback by that.
That shows you, it shows us that you guys trust in us and you understand that these processes are in place.
A lot of people don't understand neuromuscular re -education.
Let's just boil this stuff down and tell you what it's all about.
If you don't understand neuromuscular re -education, then you need to take your ticket and sit out for a little bit, right?
Because it takes a long time for the brain to be able to process this stuff.
It takes 3,000, 5,000 repetitions.
You can sit here all night and try to do that.
You're not going to make it, right?
So your brain needs time to be able to get this.
It's a biological process, right?
Think about biological processes.
P?
P is about to get a cut, right?
So you can't necessarily speed that stuff up.
It just has to happen.
So you can hit ball, okay?
Yeah.
All right.
Got a big question.
All right.
Duck says, are you wearing a duck?
No, no, no.
Okay.
Just want to confirm head position during parts of swim.
Back swing head shifts away from target approximately 0.
5 to an inch.
We'll say an inch to an inch and a half, okay?
So you'll see about an inch or an inch and a half of movement.
So squat to square head shifts back to target approximately to set up position, possibly slightly lower than set up.
Yep.
So post-up head height roughly same as squat to square.
Yep.
During post-up, Does the head move horizontally any closer to the target or stay in the same position as squat to square?
Stay exactly in the same spot.
Once you've got yourself into position, hold still.
Okay.
Stay right where you are.
Because I did see some people.
Actually allow their upper body to kind of chase over to this position, and that's again a lot of times.
People will rely on momentum and inertia that they're creating through either excessive amounts of rotation to be the driving force of their lateral movement.
Let's talk about that for a second, because I'm sure a lot of you're at home.
Like, what the hell would Christian say?
So I'll I'll give you an example.
So if I've moved off the ball in the summit and I start to shift, okay, notice where my head is all right now, I'm going to start really posting off, and then you see my head move in this direction Again, That was all being facilitated by late movement, being driven by either excess amounts of turn or lots of right side shove.
So yes, in that first part of the transition, allow your head to come back into its position, maybe even giving you the appearance of a slight in front.
You are going to see it drop down a little bit if you're being diligent about sitting down onto that left leg.
Again, that's a variable, So we don't want to give you kind of a number where we say an inch.
Or just maintain a little bit of composure with this, because it is a move that's often overdone.
But your example of what you just wrote down here.
Everybody should copy and paste that and put it in their notes.
Because it's a very clear understanding as to what we're looking for.
But you can increase it more than a half inch, going back, you can move up to an inch.
Okay, because if you're not moving enough, then you do run the risk of reverse pivoting, okay?
And weight shift is extremely important to any hitting or throwing sport.
You start taking out weight shift, then you're going to rely on a whole lot more body turn, a whole lot more arm strength.
Okay, all right, so Maybe you guys are hyper-focused again.
Questions are really quiet.
Talk a little bit more about chest being over the ball.
Okay, I missed that one.
Sorry, Robert.
Could you say a bit more about what you mean about your chest should be over the ball at set?
This is going to be dependent on how much you hinge from your hips and where your true balance points are.
Remember, True balance is best defined if you were to stand up at home.
And you were to just go ahead and lean over your toes and then rock over your heels and go back and forth.
Close your eyes.
Okay, and you want to just make sure you feel you come to rest for your most balance Okay, you're gonna feel it You're gonna feel your whole foot spread out to the ground, But you're gonna feel a bulk of your weight underneath your ankle joint.
Now I want you to take notice of where that weight is, and now when you start to hinge from your hips, Okay, but you're gonna notice is your butt's gonna go back your chest is gonna go over the golf ball Okay, And you're keeping your legs locked up straight, almost like you're doing a hamstring stretch.
And what you'll notice about Craig's feet here is as he's hinging, his butt's going back and his chest is coming over the ball.
Here is.
His toes have become very light.
Now, that weight has now moved to his severe side of his heel.
Now, when he takes his knees and he just softens them, watch for his feet here.
Now, He's moved back into that true balance point that you just took notice of when you were doing that little balance drill that you were just focusing To get yourself over the golf ball, You're going to hinge from your hips to make sure that your butt goes back and your chest goes over the ball.
How far do you hinge?
Well, you want to hinge to the point where you can see the golf ball.
Without your chin going down into your chest, okay, and at that point you should feel your kind of your weight going back towards your hips.
So great question there, all right.
So if we have questions after Saturday, can we email you guys?
So, Arthur?
Unfortunately, we can't do that because we would never get excited, but what you can do after Saturday is.
You can post them up in the forums or you can continue to use the swim reviews on the website.
That's a great way to be able to communicate with us, right?
That's, you know, when you have the swing reviews, you can ask the questions in there.
If you have unlimited reviews.
You can even submit a video that's an old video and just say, Hey, here's a question for you.
It's a great way for us to be able to articulate and communicate.
Um, so we get, unfortunately, we get bombarded every single day of our lives with people that aren't part of our camps or part of the website.
Because we have other videos that are in circulation and people can find us and they ask us to do some sort of work for them, as far as you know, looking at their swings, or whatever it might be.
And there's a lot of people in this dolphin world, okay, a lot of people.
And I'm not saying that we don't want to help as many people as we can, but we have these certain avenues that we'd like to be used so that we can maintain a level of.
Right.
And we've had in the past people abuse it a little bit, where they start sending YouTube links or training devices and stuff like that.
The best thing to do, as Chris said, they're an unlimited review group.
You can just submit as much as you want, pose the question.
But use the forums.
If you notice, under every single video, you'll see myself or Chris.
Answering every single question, if it's, you know what we're doing with adding this real arm here?
Go to the five and say, Hey, I'm struggling with this.
And we'll be right there and answer it in a very short amount of time, right?
Exactly.
So, all right.
So, Lee says.
I have a hard time keeping my upper body relaxed.
Once I pull my right shoulder back, I feel tense my shoulders all the way through.
Post -up, I try to focus on my hips.
My left arm is getting into position, but I think it'd be better off my shoulders and arms could show out advice.
So, upper body relax once I pull my right shoulder back.
I feel tension in my shoulders all the way through post up.
So you're going to feel a little bit in your left shoulder as you start moving the hands and arms in vertical plane.
So you're going to feel some up here.
If you're feeling some tension in the trail shoulder though, Then you're going to want to make sure that at the top of the ball swing, you don't have any sort of shrugging to it.
Okay, this is a very common mistake that we see with people.
So what you can do is once you complete your backswing, just take your right shoulder and shrug it really tight to your right ear and then depress it.
And you can feel the tension come out through the shoulders and the arms.
And then hold it static for a second, and then move down to the bottom, and then come right back up to that same spot, trying to feel like your right shoulder stays in that more of a depressed position.
But you will feel a little bit in the leg shoulder.
If you're feeling that trail shoulder getting loaded up, then we've got to make sure that you don't have any of that big shrugging up there.
Right.
And an easy way to kind of see that, I mean, I tell people all the time, when they get up here towards the top, they kind of see their trail shoulder.
Scratching their ear for them, more than likely, they're adding all this shrugging.
It's kind of like when you're sitting at a desk and you start to shrug over, go up to the top, try to shrug as high as you can.
And then depress it.
And you'll really realize how much tension you're adding that you don't need, right?
All right, so great.
Yeah, a great question here.
So what is the acceptable range of motion for the right elbow at the top and back?
So you don't seem to have enough flexibility to keep it long?
So you have very restricted, you have a very restricted mobility in your right shoulder, so add a dress.
Okay, the amount of space that you have between your forearms and your elbows, okay, that's typically the space that we want to see you maintain up to the top of the swing.
This should be a pretty relaxed spot, okay?
And when you start flexing your right arm, it should be pretty easy for you to be able to keep that stuff in place.
If you notice that, it flares back just a little bit, not a huge deal, but just remember this can start changing the pitch of the shaft at the top of the swing.
Okay, turn down the line for real quick.
So for those of you that see, the club gets a little bit more upright at the top of the swing.
Okay, and you see your right elbow flared back, now, watch what happens to the shaft plane as soon as we start taking right elbow.
Okay, so you see how it flattens it a little bit.
So all this is again, that's what we call it a variable, okay, variables being that it's not 100 iron flat.
Because the fact that you can have little, tiny bits of adjustment here, okay, that just helps set it a little bit more on plane at the top of the swing, so don't pan, right?
So if you just focus on your your, your trail arm, just kind of following along and trying to keep this close to the left arm as you can.
And you don't feel any sort of unwanted stress in the right shoulder, then perfectly fine, okay, but if you start feeling a bunch of stress in there, um, then you can allow it to get a little bit of separation there if you needed to.
But just be careful, you, you might want to send it in for us to be able to back check it.
Because I have plenty of people that square up and down, they have no mobility.
And their right elbow gets squared back from here and they're like, I got to just play with a flying elbow.
Like, Okay, well, you're going to come down either in a stuck position, you're going to floor first thing, back from the top.
And that's one thing a lot of people, you know.
It is a sense of feeling real.
That's like, Well, I don't have the flexibility to do that when we did the first lead arm only with the club up towards the top.
When you get to this position and add this trail arm, your trail arm should be relaxed as a daisy.
Right now.
And a lot of people realize they're like, Oh well, Craig.
When I add my trail arm like this, my elbow is always down.
But when I do it, my golf swing, it goes back this way.
Like, oh, it's not a lack of ability.
It's the fact that you're adding the success intention.
You're not keeping that arm in position.
So a good way to kind of test your range is just go ahead and get up here and see where it is.
Because where it's nice and relaxed, that's exactly about where you're physically capable of getting.
And if you start to see it vary a lot from that position, then you're just adding a variable that you don't need to add.
Right, exactly.
Exactly.
So very, very good explanation there.
So all right, it looks like we're winding down.
You guys are hyper-focused.
Maybe you guys have got all the information you need.
Maybe they already just had it all.
I love it.
I love it.
I saw some really great swing reviews.
I mean, I think they're ready to go.
So, Seven times the charm I've ordered was in currently because you guys were rock stars over the last few days.
So, David, thank you very much.
We appreciate you guys joining us today.
I know, again, tonight was a little bit on the shorter side as far as presentation is concerned.
We just wanted to beat into your brain the importance of just keeping it as simple as possible when you start from the trail hand to the next.
If you just allow to follow along with all of this freaking hard work that you guys have just spent your time doing with us over the last two and a half weeks.
Then your golf swing is going to be on plane.
It's going to be coming down in the slot, as you guys would say, and it's going to be into a great delivery point.
Ready for us to be able to, ready to rock and roll on Saturday.
Okay, I hate all those terms swing, plane and slot and delivery point, but you'll hear us use them on a regular basis because that's how you guys relate to the information.
But you will have that golf swing ready to rock and roll.
So That was the whole point.
It's just keep things simple, get you guys as many reps on your belt as you possibly can.
Come ready to go on Saturday.
Saturday is going to be a little bit longer of a session.
We always anticipate it's going to be a longer session because we're going to be putting all of this stuff together.
We're going to give you multiple practice plans that some of you are going to be able to like, different ways to blend it.
Some of you are going to work from the ground up on this stuff.
You're going to be working on a little bit more of a smaller swing format.
And so we're going to give you ways to be able to reverse engineer it.
So that each and every single person on Saturday is going to be able to walk out of here.
And know how to move the skull foot from one side of the body to the other the correct way.
Okay.
It's the efficient way and the safe way.
So we appreciate you guys taking time.
So I see you can't wait for the release information on how to put everything together.
Look forward to it.
So quick question.
Any plans for boot camp focusing on shirking?
So we actually need to talk to Chuck about this.
We've talked about maybe doing some boot camps where.
We focus on shorting, chipping and putting.
That's something that could be in the future.
We've got to make sure that we write the programs properly so that the information is as good as it can be.
We want the best of the best.
We don't want to just deliver junior varsity stuff.
We're thinking about branching off to the different areas with it, but it's like this boot camp.
This just didn't pop up in an hour session.
A lot of time developed.
So if there's a lot of interest for short game.
Or, you know Chris has talked about, you know, maybe doing like a driver camp, you know, talking about all the different, you know, variabilities when it comes to driving the ball.
You know, the more, you know, kind of demand that we get for it, we're going to put it out there for you guys.
Yeah, yeah.
If you guys want to see more cranking on camera and doing different camps, then send it in.
We like, we like to do this stuff guys, so this is what we love.
We love to be able to help you guys play this game.
So, um, got one other, a couple big all right questions in here, all right, so uh, based on work demands.
So I was only able to do one swing review so far and I have some major things to fix.
Early Park Swing should I continue to fix early swinging and put off the next steps?
Even if it's after campers wrapping up, before I start to have the full swing?
I don't want to rush because I want to learn properly.
Kevin.
So the the long or the short answer to this is you can add other pieces in.
Because I think if you were to send in another swing review and you were maybe still having some backstory related issues.
Or we'd still like to see the baseline stuff that you're doing over the other side, even though they could have a big negative cause and effect relationship to it.
Because then we can start getting you a little bit more caught up with things.
We can say, Okay, hey, listen, you're maybe a little bit too far off the ball going back.
Okay, we're going to want you to clean this up now.
Let's see what your squat square looks like.
We can give you this piece that you can try to try to put together, but we want you to work at the pace that you feel comfortable with that.
Am I missing anything there?
No, I mean, and that's, and remember, that's why we're going to have a replay.
So, you know, right now we want to push you a little bit to try to, you know, stay with the group.
But if and I remember doing your review the other day, I mean, if you're to the point where you're still struggling with these big points, send in another review.
Let us make sure that you you've got that down, because once you get past kind of session one, two and three, when you really start getting the body, the rest of stuff just speeds up.
Like this, right?
So I know that I personally, um, I get really anxious.
And I like to see you guys working on all of the three components, even if all three of them have a little bit of fault in it.
That way, you guys have something like, Okay, if I get this done, then I know I can work on this piece.
Because I know there's some lag time between the time that you get to work on things in swing reviews, right?
That's the one, you know, kind of thing that we have to deal with in the world of technology.
You gotta wait for us, right?
So definitely, um, work at the pace that you're comfortable with and make sure that you utilize, you know, the Swing review system more as you go through the process.
Again, if you feel like you're still stuck on one piece, don't worry, we're not gonna, we're never gonna make fun of you, right?
There's very few and far between that I make people.
I'll give you a little every once in a while.
Excuse my mouth.
That's just the nature of the beast and every everybody usually has their one or two things.
It's like, all right, look, everything's going well.
But you know, I kind of move my head a little bit too much, don't, you know?
Don't lose the force in the tree, so to speak, right?
And so David said, a little bit from left field.
How does Rotors can feel about speed training?
So speed training?
You want this one?
Yeah, so pick up everything, get all the training aids that are out there and start.
I'll let me let me answer this one for you.
So I had some training aids sent to me.
Especially David.
I had some parachutes that were sent to me that wanted to test out.
I had a buddy of mine that's like a 13 or 14 handicap, and every month we would reconvene on my back patio.
We would sit there for a couple hours, and his job was to take the training aids that I got, put them together, and start using them.
It was so funny.
It took two hours for him to put these parachutes together.
These are speed trainers.
I'm not going to mention the name.
It took him two hours to kind of figure out how to put them together and get them rolling.
He's a pretty smart guy too.
He takes his first swing and things break.
It was really kind of funny because we were just loud from our rear end up.
Speed training, the way that we're going to have you moving off, if you're going to maximize the efficiency through the golf swing, there are certain things that you can do in the world of ramping up the speed in the golf swing.
I mean, obviously, Bryson DeChambeau is kind of rewriting the whole book, as far as adding more big muscles to the golf swing, But you're going to still understand that there's a fine line where you can do things that would not hurt yourself, okay?
And so we're going to push your body to those extremes anyways.
We're going to make sure that we maximize through leverage.
We're maximizing the efficiency aspect through leverage, where you have proper amounts of lag release to using the proper amounts of ground force, which are also maximizing through width and rotation.
So we're never against speed training as long as it's not putting your body in harm's way.
I think that's the easiest way for me to answer that.
If it's doing something that's putting your spine in a precarious position, or putting any sort of unwanted stress or pain on your joints, then I don't want any harder because you have to remember at the end of the day, 81% of these guys on the PGA Tour sustained a golf-related injury.
It keeps them on a golf for eight weeks or more.
81% is a huge number, huge number, right?
If you're going to train your body, make sure it's done 100% right.
Your spine hates two things.
It hates shear force and it hates compression, like I said before.
So just be careful.
All right.
So hopefully that answered your question.
You don't need to be working on speed training, David.
All right.
So when we do start transitioning not using a camera.
When do we start transitioning not using a camera?
So you want to always use a camera.
I was about to say never.
Okay.
I think the transition goes more from a mirror to a camera.
You want to use a camera, more so when you're moving through positions.
Because it's the only way that you're going to get that feedback of what you did.
But anytime you're practicing, use a camera because you need to be able to back check this stuff.
Obviously, on the golf course, It's not necessarily conducive for you to be carrying around a tripod or carrying around a personal assistant to be videotaping all your swings.
But anytime you're getting a chance to work on things, like for instance, I was in the backyard the other day and I had my tripod set up and I videotaped every swing.
Phones are pretty awesome these days where you can just videotape and videotape and videotape.
You just go through it and then you can head these things down and you can pick one to set in.
So, I mean, Chris, myself, Chuck, we still videotape for swings because it's the only way we can get feedback from it.
Now, we're not sitting there saying you have to videotape every swing the rest of your life.
That's not the whole plan.
But if you're struggling or if you don't know set positions you're hitting, you must be videoing.
It's still the feedback tool you have.
All right.
So, let's see.
There's more to that question.
I have two angles almost always when I do the reps, and it's hard to tell how well my form is if I'm not seeing it on camera.
Use the camera.
Continue to use it.
One thing I can say is I don't rush.
I've done like seven reviews because I started a few weeks ago before Food Camp, and it's just now started to come together.
Good.
So great.
That's what, you know, a lot of times people have understood that they were going to be coming to a camp.
Like, we have another camp coming in for November that people will start sending in reviews just to go ahead and get a head start on these things.
And then sitting through the actual camp itself kind of helps reinforce the information.
And you're never going to hear the same exact information from Craig and I twice.
Yeah, So see the structure of the camps be done the same way, But you're going to hear something different from one camp to the next.
Because again, We're learning from each one of these sessions how you guys are processing the information, And what's the best way to be able to articulate the information.
So that you guys get the best looking screenshots that you can have, All right, So last question looks like coming in here.
So what's the most fair views you have gotten from one person in a month?
Is this one of your students?
No, I was sure someone has killed it.
I wish I could do a problem, I wish I could do that problem, but I need more time.
Great job guys.
So wait, I I got some guys that I got, some guys that blow your mind.
I've already got a member of my head, so I'm not going to tell you the I can't.
I'm not going to give names.
Um, Let me give a number here, though.
I'll give names.
So I would say the most reviews I've gotten in one month from one student in particular is going to be, and this is just a rough guessment, is probably in the ballpark between 120 and 130.
Okay?
So that's a lot of videos.
That's overkill.
That's it.
It's over.
I mean, you know, we can see our boards and our forums and, you know, what everybody's doing.
You know, Chris.
Said a few students.
I know I've had a few students that it's literally it's been like an obsession.
Where they might submit at 8 this is what you need to do rest of the day.
This would be clean up and I'll get it back at 9 o'clock I'm like wait a minute.
I just finished it out, the other one come in, I've had, I've had a couple.
Students average four to five a day, right?
That's so, that's kind of what that's.
It's a little over.
I've had, so the most I've seen, though, from a student.
This is actually a new record set for me I think there was like 10 or 11 submissions.
Yeah, it was 10.
And I was like, I opened up my queue and I was like, there's 10 from one person.
So a lot of times, you know, What we're looking for in a swing review, if you're going to send in 10 reviews, is we're looking for consistency.
If you're sending in 10 reviews, You better know damn well that we're going to go through each and every one of those swings that are on there.
And if we see inconsistencies, Then we're going to blow holes in the way that you practice and you're going to get barked out from us.
But if you're sending in 10 swing reviews because you want us to look at a sample of 10 swings from your session, Then, fine, you're gonna get us back saying, Yep, looks great and and review, right?
That's something that's common for us.
So, Lee, I got all kinds of stories I could tell you.
Like, we have, we've seen a lot, a lot over the years.
Okay, and so we'll end on that because I think that we could probably be here all night with telling you some stuff that we've seen.
We just appreciate that most of the people are starting to wear clothes now when they're screen reviews, so we'll just leave it at that.
All right, so all right, guys, so you know the plan, get this stuff ready to rock and roll for Saturday?
Okay, be ready to rock and roll at 12 you go back through the material, make sure that you're working your butts off.
Spend time going through the start of the processes like we just did tonight, stripping it down.
There's no substitute for, regardless of how far along you are, to getting the arms and the golf club out of there and doing these core body movements.
And when you do that stuff, you're going to see that the end result is going to become much, much easier too.
I really appreciate you guys taking time out of your day on Tuesday evening to come join us.
I know that there's lots of stuff going on in the world right now.
um and i know that you guys all have families so we appreciate you joining us um and we look forward to saturday where it's graduation day craig had some good ideas about how we're going to set up the new room we're going to sit here with some some smokers jackets on a glass of champagne and we're gonna that's how we're gonna open the session we'll see if that comes to fruition so we appreciate you guys hope you guys have a great rest of your week and we will see you on saturday thank you everybody


