C4 Bootcamp 1, Dec 3 2022, Session 2
Session 2 of 4
Good morning.
Good morning.
How are we doing this?
Lovely Saturday morning.
Can everybody hear me?
Maybe somewhat.
Who knows?
No notes yet?
Nobody's typing anything.
All right.
Good morning, Bill, Kevin.
All right.
Starting to pop up on my end.
How are we doing today?
We have video.
Do we have audio?
Do we have Craig?
Oh, good.
Can see and hear.
All right.
So we're starting off correctly today.
Nice.
Thank you, Gary.
I appreciate it.
How are we doing today?
Good morning and good on.
I agree.
Don't let that game talk thing cool you.
How are we doing today?
Make sure.
All right.
Nice.
Well, welcome, everybody.
Welcome to session two of C4 Bootcamp.
I will be your humble swing guide today.
Where is the instructor Craig Moore?
And what we're going to do is we're going to follow the usual protocol.
We're going to let everybody start to settle in.
And when people get set in, we're going to do a baby recap.
And then we're going to get right to work.
And today is going to probably be a little bit more interactive than the first session.
Because if you can, if you have the space, Whether you can only do the body drills, or whether you can only use, or whether you can use the golf club.
Like I am here, I want you to get up and do it.
And if you start to have some red flags, you start to peel some things you're unsure about, then we can answer them right here in real time.
Because I want to get you fixed.
And I've seen some really good stuff so far in the swing reviews, so I'm not really concerned.
As many boot camps as I've done so far, you know, there's certain boot camps where we kind of get the message right and people really click with the message.
And sometimes it's like, yeah, we need a little bit more understanding.
So far, so good though.
The phase one videos I've seen, homework is being completed very well.
Let's see.
And as you know, the usual protocol, you'll see me kind of float from here to there to watch the computer to see the screen.
Good morning, Steve.
Good morning, John.
All right.
Hello, June.
How are we doing today?
Robert, didn't find previous presentation.
Give me about three minutes.
I'm going to go over the whole thing so that everybody knows what's going on.
For right now, it's very simple.
Go to the website, go to the menu tree, remember tools, my purchases.
I'll go over that in a second.
Early question, how can the smash bag be used for practice?
Howard, they're going to be used a lot for practice.
If you remember what we did with phase one working on impact, because I'm only going to keep it on what we're talking about right now.
I'll bring the Smash Bag out when we get a little further into it, especially on Tuesday's session.
But the Smash Bag can be used for so many different purposes.
In fact, as you know, we're not a big fan of training aids.
I know we had a launch yesterday, but we only tell a training aid if we think it actually has a purpose and you can't break it, so to speak.
The Impact Bag for Phase 1 is great because you can get to your takeaway right here.
And it's an easy way to check your checkpoints, okay, it's a very easy way to be.
Like, Oh, do I have four shaft plates?
my wrist flat?
Am I hitting the position?
So the impact bag is really good for phase one because it kind of forces you.
I don't know if you recall, but in the first one, I said, you must stop and check.
Impact back kind of forces you to do that.
Because you can't go anywhere after you hit it.
Hello, Marcelo.
Ted, I find it really hard to stop the club just beyond impact with deceleration in time.
It's going to be just beyond, okay?
But typically, that's because players are trying to swing too hard, all right?
I mean, when you think about hitting a 10 -yard chip, all right?
When you think about hitting a 10-yard chip, like I don't need to be like this.
A 10-yard chip, if I were to sit here and, you know, do a little chip.
That's about how much power that I need.
Do you have a really hard time stopping?
Well, yeah, I can get the fact that you're using your legs more in phase one.
Okay.
But a little bit of what we're going to talk about today, more players often than not don't realize how much effort they're putting into the stroke and how much they're wasting.
All right.
And we'll talk more about that today, what kind of effort was power.
But players, when I get out on the lesson tee, I would say that I see players always at a 10.
And they're always asking me, Craig, it looks like you're at a 2.
Because I want to be at a 2.
I don't want to be maxed out on every single drill, every single swing I make.
In fact, I probably only max out maybe one or two times a round.
That's if I'm trying to hit it over a mountain.
Like the air hammer guy.
All right, Murray, go USA.
All right.
Because I may get distracted, see number one, need a link for after.
I'll tell you in a second.
Can you explain square shoulders at impact?
It looks like the right is square to target, but the left lead is opening.
Well, Mike, so you've got a couple things when it comes down to that.
If I'm square to my target line right here.
And work up into here and square my target line.
You can think about chest shoulders, I mean, there is some kind of separation, so to speak, but square shoulders at impact is this moment in time.
So when I get down into here, I'm going to see my right forearm just slightly below my left, my shoulder should be square.
And then right after impact, you're going to start to see that this shoulder has to get out of the way, especially if your right hand is on the club.
So I don't want you to get too nuanced while, you know, I see that my chest is over here, but my shoulders are back over here.
Think about it just in more kind of broader terms.
If my shoulders and chest are all facing this way, I should see a little bit of right forearm underneath, everything kind of square, okay?
This may appear to be a little bit open because you're going to have a little bit of separation between your starting on the chest and shoulders.
Don't get, you know, too caught up in that.
Will we get a replay of the video?
Absolutely.
And good morning, Anthony.
Everybody, my esteemed colleague, new to Rotary.
As you saw in phase one, Anthony Hopkins is in the chat today for any questions, concerns you may have.
For those of you that don't know, I have fashion sense, so to speak.
So, you know, some people are like, Craig, you're wearing a white watch with these colors?
Like, you can't do that.
The reason I wear the watch is because I get messages on.
And my colleague, in case I'm up here and I'm ripping through, and then the video cuts out, the audio cuts out, and I have no idea, he can be like, Mayday, Mayday.
All I have to do is look at my hand.
All right.
Hey, Craig, quick question on effortless swing.
I understand the release creates a lot of club at speed, but is there anything to the fitness side of trading for speed?
Yeah, there is.
I mean, if you think about it, David, I mean, the more muscle fiber you have to use, the more power you're going to have.
It takes 32 pounds of muscle to create 100 mile an hour club at speed.
So more muscle fiber does help.
So when you think about getting strength, flexibility, stretching and recruiting muscle fiber, there is a fitness aspect to it.
But most players at the end of the day aren't trying to be Bryson or, you know, Berkshire.
And when we look at our power sources, what's the greatest power source you're going to have in the swing?
The greatest power source you're going to have in the swing is leverage.
So most of your speed is going to come from leverage.
So you don't have to be something fancy.
I mean, look at me.
In my playing days, you know, I was a little bit more like 165.
You know, I'm 5 '9 1⁄2", calling my way to 5'10".
Now I'm, you know, a little bit heavier, but I blame Thanksgiving.
I put on my 25-pound.
But even in my heyday, you know, 116, 117, 118 for me, I'm just a little guy.
And I just maximized the amount of width that I could have in leverage, and it's not like I was swinging out of my shoes.
It's about efficiency.
You don't really have to be this big brute of a fellow.
I always tell people, like when I was growing up, Charles Howell was in the junior ranks as well.
And, I mean, he might be as thin as this alignment rod on the ground.
I mean, if he turns sideways, you missed him, Augusta went, he's going away.
And he had an.
It's an absolute lie.
Joseph, have difficulty keeping my right heel down.
We'll talk more about that today.
Anthony, good answer.
On the downswing of the club is parallel to the ground.
Could you show the wrist and arm action going into impact?
We're going to go through that whole thing today, Phil.
Don't worry about it.
I'm going to give about two more.
Maybe two or three more minutes and then we're going to get started.
And just as you know, we will do a Q A at the end, just as we did last time.
So if you have any questions, you know that I don't talk about.
Save them if you throw them up there.
Anthony might be able to answer.
If it's a quick question, uh, he might be able to answer.
But I don't want you to miss the presentation because you're, you're, you're, you're stuck on this one question.
I want you to really make sure that you stay with Guru.
Maintaining flat lead wrist sometimes causes me to block left wrist and hit heel of the club.
Assume this is a feeling that needs to be worked out.
Flat lead wrist, Ted, is going to control more of loft, okay?
So the wrist being flat or not, that's only controlling the loft of the face.
That shouldn't be controlling the rotation of the face.
So if you're hitting the heel with flat lead wrist, okay, and you're hitting it out to the right, A, you may not be allowing.
The forearm to help you square it up right here.
Okay, you may just be holding it like this.
Secondly, you could be pushing from this side, and when you start to push from this side, you start to open it up.
You can see my wrist is going out that way.
So remember when you're working from here to here, which we're going to do very first thing.
You have to allow.
You can see my watch logo right here.
You have to allow for this to square.
Mike wears four foot nothing.
Any thoughts on maintaining axis tilt?
Seems to get lost in it.
Axis tilt the backswing or downswing?
Thanks, Steph.
I'm giving a lesson.
I always kid my students when I do an in -person lesson or a Zoom lesson.
When they're like, hey, that actually makes sense.
Like, you know, I understand that.
I'm like, that's great.
I was like, this is the first lesson I've ever given.
So I'm just shooting from the hip.
Axis tilt and the downswing.
All right, Lee.
So the axis tilt and the downswing, which is going to be called secondary axis tilt.
Okay.
You set up with axis tilt.
You maintain that to the top.
And then on the downswing, you have what we call secondary axis tilt.
So I'll explain it to her.
So maintaining.
That tilt and the downswing, what's going to tend to cause you to lose that?
Well, A, moving your head.
Okay, that's going to cause a loss of tilt.
B, spinning your shoulders, which is the brother of moving your head.
C, not using your legs.
If I'm up here, and just watch what happens.
If I solely just move my lower half, what happens with my upper half?
Tilt and crease.
If you're not using your legs and you're taking off with your head and or shoulders at the top, Axis Tilt goes by Seem to struggle at times with keeping the left shoulder down, right shoulder back, thin shots.
We'll talk about that today, Gary.
I think with adding the release, it's going to help.
And I'm going to give about 30 more seconds, and we are going to get rocking.
Any other quick question?
Before we get started.
It's got to be a quick one.
People, we got football games today, Saturday, all sorts of stuff.
All sorts of stuff.
Maybe some golf involved.
I retired a long time ago.
It doesn't look like we have anything coming in.
So are those pictures of you on the wall?
That's a quick question.
they are not.
I don't really need pictures of me.
I know what I look like.
That would be Hogan, Palmer, Tiger, Nicholas, Daly.
And then over here, I've got, you can't see on camera, 97, this breakdown of Tiger swing that I got.
Up in Long Island, uh, in the early 2000s, when I was working with Michael Beverly.
Uh, that's Bear Briot, that's my grandpa.
Actually, there is a picture of me right here, so that's my father and myself.
That was, uh, 98 club Championship victory, I think that's it, though.
That was another club championship right there, but you can't see that.
Okay.
All right.
Hey, Juergen, how are we doing today?
So let's get started.
We've got to do a couple housekeeping items first because some of you may not know, but my wife actually does customer service for Rotary, and she's been getting blown up on emails and questions.
So I'm going to try to alleviate some of our work today.
Now, the handouts are in the link above.
If you go to handouts, you're going to see two handouts.
Number one, you're going to see the C4 PDF, which is what we're going through today and through this whole camp.
Second thing, you're going to see something called video lists.
I had a lot of players that said they weren't able to tell what the videos were on the little icon, so I typed out the entire video list for the camp.
So if you need to access one of those videos, you literally can just highlight And put it in the search box.
Use the magnifying glass on the website, put it in the search box, and it'll pop right up.
Okay?
If it doesn't pop right up, take one or two of those words in that title, type it in the search box, and it'll populate the entire list.
Okay?
You should be able to find them.
Replays.
Don't wait for a link to get a replay.
You should get one in an email.
But don't wait.
Replays are on the website.
All you have to do is log in first.
A lot of people are like, can't find a replay.
It's because they haven't logged in yet.
Go to the menu tree at the top.
Three little lines.
Remember tools.
My purchases.
That's going to be the replays right there.
And not only are the replays going to be there, you can also join the session there.
So you're also able to join the session from that same page.
Okay.
So the handouts are on the board.
Replays, menu tree, member tools, my purchases.
I think that should take care of all the housekeeping items.
One thing I want to mention, you'll see how I'm kind of like rocking back and forth.
As some of you know from my injuries in the past.
I have to kind of stay mobile a little bit.
If I stand still a little bit, I lock on.
So I'm not trying to force you to take any Dramamine or anything.
So with that being said, welcome.
Let's get started into session two.
I don't think I have any more messages on the board.
All right.
So what are we going to do today?
Well, today we're going to take our journey.
into adding the release.
And that's the only thing that we're stacking from phase one.
Okay, because the golf swing, the only thing that matters, as we know, is impact.
And if you don't release the club, basically everything else that you do in the swing is point plus.
And what I mean by that is it doesn't matter how crazy of a backswing or downswing.
Yes, I understand there are certain margins with that.
But you can do everything perfectly.
You can get to your takeaway, perfect spot up here, nice and wide arms and hands in front, shift your weight, shallow out the club, have all the lag in the world.
But if you don't release the club, it's kind of all for nothing, okay?
You can have a great release.
and kind of mess up some other points, and you can still play some decent golf.
But you can't have a perfect swing, okay, and not release the club because it just ain't going to work.
I tell the story to my students sometimes.
I had a father-son once.
The father was like, I don't understand why my son hits it a mile past me.
My swing's darn near perfect.
His looks like an unfolded lawn chair.
And I was like, yes.
Just say J is the name.
And I was like, it's because you don't know how to release the club.
But his release is perfect.
Yeah, he has a little cast in there.
He kind of pushes it off his right side too much.
But his release is darn near flawless.
Your swing's perfect, but you don't know how to release the club.
So you're not getting the benefit out of Okay, so this is very important.
And I'm going to spend a lot of time, you know, Really trying to dial down the tension, because that's the number.
One thing that I see with the release is that players don't accept the fact that they have to give up control.
And that's the whole point with the release.
As you know, the definition of the release is to let it go.
But it's the giving up of the control factor.
We are all in our daily lives wanting to be in control of something, you know, this chaos that we're in.
But the release is one of these things you can't be in control of.
And the more that you actually let go and give in to the golf gods and give in to Newton, the better results you're going to have.
You cannot control this weighted mass better than Sir Isaac Newton can.
The first thing that I want to talk about is your body.
When I see players start to work on the release, the very first thing that goes out the window is their body.
Because they get this club in their hand, and they're so excited.
They're like, all right, I'm past this impact position.
I get to actually swing the club now.
And the very first thing they start doing is they start flailing around here with their arms, and they completely forget everything that we did up until that point.
And we can't do that.
Because what generates all these things?
The body motion.
The body is the engine of the golf store, okay?
It's where everything's kind of generated from.
That club will take care of itself if you just get out of its way and let it do its own thing.
So I want you to start out your sessions in phase two, okay?
Because this isn't in the video.
This is something that I do a little bit more in person.
We're going to start out and do some mini dead drills, because I need you to, first of all, stay focused on what we're doing with our body to create the swing, okay?
So if you're at home, and you want to stand up and do this with me, fantastic.
If you don't, if you're like, hey, Craig, my coffee hasn't kicked in yet, and you're already way too hyped up for me, no worries.
You can do it after the session.
But what I want you to do.
is we're going to start to create nine to threes.
And you can take the normal dead drill and turn it into a nine to three.
And that's kind of where we need to stay in this phase two territory.
So what I'd like for you to do first is just focus on the body positions, especially you, Lee, who was talking about maintaining tilt.
This is the very first place to start.
I'm not trying to call you out or anything.
So I want you to take your setup with your hip bump until your hinge.
Let's start out.
okay 50 50 or roughly 50 50.
We don't need to preset our weight on this.
This is just going to be a miniature version of swing, you'll see in the first page of the handout.
So let's start out and let's kind of do five reps, kind of thinking our way through this and feeling our way through this.
Set up with some axis tilt.
Get your stance with all the fun stuff right here.
And all I want you to do is focus on kind of pushing your trail foot into the ground a little bit and creating 45 degrees of shoulder rotation.
So you'll see when I get here, I've got 45 degrees of shoulder rotation.
My hips have moved a little bit, not a ton.
They're just kind of reacting to my core rotating and my shoulders rotating.
But I'm basically just creating a little body takeaway right here, okay?
I can feel some pressure here.
I've got some rotation.
I did push from my lead shoulder to move my head off the golf ball a ton.
So a nice, balanced body position.
I want you to feel this.
And now I want you to make a down swim.
So I want you to start to push your lead foot into the ground and start to post up.
And that's it.
Now you'll notice that I'm reaching the same phase one positions that we talked about.
Dips open, weight on the lead side, everything's stacked with neutral.
But I want you to start repping, feeling, what it's like to make this motion.
Okay?
I need you to stay focused on your body.
If I'm going to get you to not overwork your arms, it's always got to work.
It's got to be your body, okay?
Now, you'll notice the kind of pacing I'm going through these and the size of it.
This is a half golf swing, okay?
Little right foot, right shoulder, shift pose.
Now, if you get yourself in a mirror, whether you look either right here or right here, And you see all these things changing.
Like you see, okay, I'm doing this, and my head's going this way.
Or when I start to shift and come down, I can't keep my shoulders from opening.
Don't move on and worry about anything else in phase two until you can do it with your body.
Think about it.
Adding the arm, adding the club is just going to compound the problem.
If you can't sit here like this and do it body only, Don't move on from this stuff, get your reps into there until you can kind of walk and chew gum at the same time.
Now there is another note that I want to add to this.
When you're working on this and you're slowly chipping out through these reps, okay, don't get too methodical about it.
Like, once you can kind of do it, don't get here and be like, all right, right foot, right shoulder, left foot, post.
If you can do the motion, start to learn how to do it with just a tiny bit of rhythm and pace.
Because, like what we saw with the Dead Drill, most players, they stay in the school zone too much.
Okay, they rep and rep.
and rep.
At 25 miles an hour, well, the golf swing is still fast at the end of the day.
So once you can start to kind of put the move together, I want you to expand.
I want you to actually put a little pace in it, because if you can do this with a little bit of pace, it's only going to help you.
I'm going to do this a little bit from down the line.
So all we're looking for is take your setup.
Remember to get our balance here.
We got our proper hitch, flat spine, all that fun stuff.
I'm going to make a little back swing so I feel some pressure in my right leg.
You're starting to see the rotary logo on my chest, you can see that I've rotated my shoulders and I'm just going to focus on shifting and posting.
I'm going to get over here.
You can see my trail foot's rolled in, My head's still down.
My chest, shoulders are good.
I'm starting to see that left butt, okay?
Here, here.
Just some small.
And I really want you to feel what you're doing on your feet.
I really want you to feel, you know, what it feels like to start getting these muscle fibers involved, to move your body without your arms or let your body move your arms, okay?
So I want you to warm up this way.
And if you struggle, was doing this at home, you can still work on what we're doing the rest of the day, but when you first start out your session with reps, stick with this at first until you can get here.
Bam, bam, bam, bam, okay?
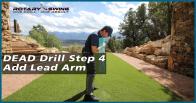
So if you've got your body motion and you understand the feelings with that, I want to start to add the lead arm into the mix, okay?
Now, I'm going to go ahead and get this.
I know players are going to be like, Craig, why are we focusing so much on lead?
Because.
You know, I'm a trail side releaser.
No worries on that.
Okay?
We're going to focus on trail side.
And I don't care which side you want to release the club with.
But both arms and hands have a job to do.
And we're going to say, focus on lead right now.
Because that's going to have a little bit more control over what you're doing with your trajectory and the rotation of the face.
Okay?
I want to check the board.
I'll wait to answer that one.
But any other fields for the weight shift other than pushing pressure, the blade foot there, there's tons of different things.
You know, the axiom will help you if you're creating your little, uh, clockwise motion with your trail foot as you start moving inside, that's going to help you shift the weight.
But the in this stage of the game, the simplest way to kind of think about it is.
If I'm right here, my pressure's in my right side.
Just.
Just literally just fall into your left leg.
I'm on my right leg.
I'm on my left leg.
So I'm here.
Just literally just fall into your leg.
And if you do that with the hip opening, that's going to get you to shift enough weight.
So now what I want to do is I'm going to add the arm.
Okay.
So let's take the same setup.
Take your trail arm.
Put it behind your back.
And I want you to stick your arm down towards the ground.
Now you can kind of do this in a shaking hands position.
You can do it like your kind of makeshift grip down here.
Doesn't matter to me.
The big pet peeve that I have, okay, is that when players start doing this, they either A, they hold their arm out here, okay, I'll show that from down the line.
They hold their arm out here, and they're like, hey, Craig, I'm doing my arm drill.
Nobody holds a golf ball out there.
Or B, when they start this, they start with their arm way over here, and they generate all this swing momentum with their arm before their body even moves.
Remember, the weight and the rotation is going to be what starts to generate the momentum.
I don't want your arm generating the momentum in the swing because if your arm generates the momentum, you're not going to be able to stop that train once it leaves the station.
Let's take our setup.
We get our tilt, arm and hand in normal position.
You can do a grip.
You can do a shake in hands.
I want to just do the same thing.
A little pressure, 45 degrees, shake hands.
Okay, you can see my shoulders are 45 degrees, my head's still down, nothing moved, shake hands position.
Now what I'm going to do is I'm going to fall, push, axiom, shift into my lead side, and I want you to stop at this impact position first.
Okay, stop here.
Now when you get here, all these same checkpoints from phase one should be there.
Flat lead wrist, ETC, okay?
And your arms should be pretty darn relaxed.
Now the only thing I want you to do from here, Is let your arm and hand release.
Okay, now notice?
I didn't move my shoulders anymore, I didn't move my head, I didn't move anything else.
All I did was go from this impact position, stop and let it release.
Okay, still, in this three let it release.
The release works independently of the body, and that's what you have to start to grasp right now.
You do not want to tie the release to your body.
So let's go from here, 9 o'clock, impact, release.
Okay.
Now let's see if we can do it in one fluid motion.
9 o'clock, shift post, let it release.
Nine o'clock, shift post, let it release.
Now what you'll notice as I go through here, my glove logo is facing the camera.
I allow my wrist, my arm to square up.
Now I'm shaking hands with my alignment rod, but shaking hands to the target so that's good.
So Ted, this will really help you out to start getting this wrist to square.
But I don't want you to get here and just be like this.
Remember.
I want you to feel weight, rotation, shift, pose, let it release.
Okay?
Think about what's moving you.
The body's moving the arm.
The arm's moving the hand.
Yada, yada, yada.
We swing from the inside out.
Okay?
I'll do a couple from down the line so you can see from over here.
I'll let our arm and hand hang.
Relax, relax.
Get set up.
Our axis tilt.
I'm going to look.
Now, if you want to watch yourself like I am, but I'm mainly just seeing the camera, ideally, once you get this down, you don't have to watch every breath.
But we get here, shake hands position, 45 degrees of the shoulders, got a little weight.
You can see my hips turn a little bit.
My pressure's moved towards my heel.
Now I work from here.
I shift, I pose, I let it release.
So my left hip's open, my trail foot's.
off the ground.
I'm shaking hands.
And look at where my chest is.
I'm not like this.
I've got to start to train this independent motion.
Okay?
Sorry.
I just heard Alexa just pop up in the background.
They're always watching.
I get to 9 o'clock.
Shift post.
Let it release.
Okay?
And then what I want you to monitor is this tension in this arm and hand.
And we try to get just a little bit of rhythm and pace to it.
Nothing crazy.
Just a little bit of rhythm and pace.
All right.
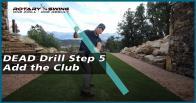
Now once you can graduate from there and you don't have any problems, you can do this with the club flipped over.
Same exact thing.
Take the same step.
Get set up here.
All we're going to do is load rotate to 9 o'clock.
Club's at 9 o'clock.
See the shoulders, head, weight post.
And you're going to let it release.
Notice my chest is still square.
My belt buckle's in front.
Trail foot's rolled in.
All I'm doing is phase one, but adding release to it.
Keeping that tension out.
Letting the swing work for me.
It starts sounding like Bob Ross here anytime soon.
It's your one.
Take the setup.
Load and rotate.
Shift post.
Let it release.
Alright.
At this point in the game, I'm not worried about too many mechanics.
We're going to clean that up in a second.
Add the club back.
Don't worry if it's perfect or not right now.
Okay, don't worry if it's perfect or not right now.
I just want you to take the club, I want you to kind of relax a little bit, let's just kind of go through the same thing.
Go weight, rotation, shift, post, let it release.
Notice my chest still square, my head down, my hips open.
I'm just feeling a little pressure.
A little rotation, a little shift, a little post, letting it release, weight rotation, shift, post, letting it release.
Okay, I'm Don't care too much about the mechanics.
I just want you to feel.
Just let them go rotate.
Just give up a little control.
Give up a little control.
Act like you've had that second beer in your round.
That second cocktail.
Where you just kind of give up a little bit.
I'm going to go over here so I don't shatter that beer.
Here.
Just give up a little control.
Give up a little control.
I'm actually, I just saw on camera, I'm doing one of my pet peeves.
Be careful.
Don't throw the arm and hand out like this.
We load and rotate to create a perfect tape.
I saw I had a little bit of push in it right there.
And know that the body and the engine is creating this motion.
But see how everything's just got some little fluidity, some rhythm to it.
Okay?
This is a great way.
To start your sessions.
You know, just to even get warmed up.
Because it's taking care of what's happening down here in the 93 territory.
Okay?
But it's getting you accustomed to moving your body, feeling the lead arm, feeling the release of the club.
But also, while starting to get the release to work independently of the body.
Which that's where we're going to see, or start to see, kind of big gains in consistency and speed.
Okay, so now, once you're kind of warmed up and you can do this.
We need to start adding the release to what we did the other day.
And I'm trying to.
I'm looking for my let's see, okay?
So on the second page of the boot camp, after you look at all the skills of me, kind of going through the drills.
What should we be looking for in phase two?
Okay.
We're looking for 40 to 50 yards, five yard dispersion left or right.
Kind of low to mid trajectory.
And if anything, it should have a little, maybe a tiny little draw.
But for those of you that experienced those little bit of pushes in phase one, those should start to diminish now because in phase one, we were holding impact.
The tendency is going to be that the face stays open just the tiniest bit and you get a little bit of a push.
But now that push should start going out the window.
Okay.
Now, the reason that I say, or these are our target numbers.
Let's talk about it.
Why should the trajectory be low to mid?
Well, we've been focusing on having a flat lead risk impact.
As I talked earlier in the session, this is controlling the loft and the face.
But what's going on in a properly released club?
In a properly released club, this club is squaring, but what else is happening?
It's also de-lofting.
Think about it.
The club is starting to turn over.
It's starting to close, square.
So it's actually de-lofting as well.
So as you're working on this, I get a question from my students all the time.
Craig, I don't think I'm hitting this drill high enough.
I'm hitting it 40, 50 yards.
But, you know, it's still kind of this low to mid ball flight.
That's okay because we're focusing on allowing the club to square.
And when you allow it for the release of the face, it's going to de -loft the face.
You have a flat lead wrist rotating de-lofted face.
We're going to be okay.
Yardage-wise, 40 to 50 yards.
40 to 50 yards.
Added to your phase one with release should literally be no more power than you were adding in phase one.
That's kind of how effortless this should Well, Craig, how am I going to get 40 to 50 yards, and I was going 10 to 15, and all I'm doing is adding release?
Well, we're doing two things with this.
One, we're allowing the face to rotate.
Now, don't let anybody ever tell you that the face doesn't rotate.
Always rotate, okay, this toe is rotating around the heel.
now, in a properly released golf job, this toe rotates around the heel about 12 miles an hour faster.
The center of the face rotates about six to eight miles an hour faster than the heel.
So if all you do is you let the face rotate, you're automatically gaining speed for literally doing nothing.
I'm telling you to do less, just literally get up here and let the club rotate.
And you're gaining free speed versus this.
Never impede what the club wants to do during the releasing phase.
Let it go.
Even if you kind of messed up the swing, go ahead and still let it do what it wants to do.
Now, when I'm saying let it go, I'm literally just letting the club rotate.
I'm not saying get down here and be like, oh, Craig told me to let it go, but you're putting your will on it.
But that's not letting it go.
Physics will somewhat correct you on this.
But to get 40, 50 yards, have that low mid trajectory, it doesn't take any more effort than you had in your phase one.
This isn't some big jump.
I've been going 2% power.
Now I've got to go 10% power.
If you can learn to stay down here and hit it 40, 50 yards, With this little motion, which with proper compression, proper release, proper motion with your legs, you'll be able to do that.
Age, ability, I don't care.
We can do this.
I'm giving a few lessons in my day, right?
The less that you do, the better.
Just be efficient about it in the club.
Do the work for you.
Let it rotate, okay?
So once you can kind of do the mini dead drill, once you can kind of add your arm, and start letting this release, the only two checkpoints that we're going to kind of stack on right now to what you did first is just checking the release.
Everything else still stays the same.
Now, when your trail hand stays on the club, yes, your shoulders will have to be open, all right?
The trail hand, I physically can't keep my shoulders square with my trail hand on the club, but that square shoulders is at impact, okay?
It's at that moment in time.
But the first stroke, VJ release stroke.
So shoulders, I want to stay square, okay?
So the first thing that I want you to do, once you can kind of get through the mini direct throw, once you can add your arm and hand, I want you to start doing left hand only or lead hand only.
And most players are like, Greg, this takes me forever or this feels so funky.
Good.
You need to train the hand that you're uncomfortable with.
That's okay.
So the first drill is going to be doing the same thing that we just did, and what we're going to be looking for is weight, rotation, shift, post, release.
And when I get here, my checkpoints with my body stay the absolute same, okay?
But there's two that we've got to add.
Number one, club, at least toed up or even a little bit toed down, okay?
I don't want the face like this.
Toed up or even a little bit toed down.
That club has not released if you see your face like this.
Number two, the wrist positions.
Now, if we were flat at impact, okay, flat at impact, what should my wrist be over here?
Well, it shouldn't all of a sudden be super duper cut.
It should still be flat or maybe even a little bit bowed.
Now you may look over here, and you see like, oh, I got a little bit of cupping right there, but that's perfectly okay.
There's going to be a little bit of varying degrees and strength of grip.
You set up like Sergio Garcia, like this, and it's going to be a little bit of cupping.
But there's a difference between here having a little bit of cupping and releasing versus this.
And a good way to see that is look at your face on.
Notice how if I get here and I cup flip it, notice how I don't have any extension or width.
Notice when I flat release it, so that still has a little bit of cupping in it, notice the width that I have in my body right now.
Okay?
If you see a flip, that's going to be what it looks like.
Versus here, that should be what it looks like.
Okay?
So in this first early going, you want to start out with.
Lead hand only.
Same positions.
So we're going to set up here.
A little weight, rotation, shift post, let it release.
Okay?
All the checkpoints stay the same.
We're going to get here.
Let it release.
Now, usually what I see when people do that, the very first thing I see, this and this.
Notice how my foot was still down and my head was still down.
If you want the club to release properly at this stage, keep that head down.
I know Chuck's head rotates through the shot, or appears to rotate through the shot a little bit.
If your neck is fused in C1, C2, and C3, I have no problems with it.
If your neck is not fused, and you don't have any other type of ailments, that head needs to be down.
So we're going to wait, rotation, shift post, let it release.
Wait, rotation, shift post, let it release.
Everything stays the same as we did with phase one.
You go through your checkpoints first.
If I'm hitting my checkpoints, now I can start kind of checking to see what the ball is going to do.
If this one doesn't go 40 or 50 yards, I'm not going to be mad at you.
It's only when we get both hands on.
Because this lead side motion isn't the power side.
You're not trying to create power by pulling and swinging your arm as hard as you can.
This is kind of weak.
Even if I was going to go throw a ball, I wanted to do it with my left arm in hand.
So we're not trying to create power.
We're trying to allow the generation with momentum, weight, leverage, release to get the speed for us right now.
It's not through brute force.
Not that big a guy.
So once you can kind of work through this, and I'll actually flip this down the line for you down the liners.
This is going to be interesting.
I think this is the first time I've done this.
So we're going to set up here.
We're going to make sure we have the proper hinge, our weight balance, nothing too crazy back, not standing up like this, not holding it out like this.
We're going to take our setup, 50-50 balance, load, rotate, show the post, and release.
Notice where my arm and hand are finishing right now.
Notice how I'm down here.
I'm not up here like I'm winning the Masters.
If I was up there like I was winning the Masters, I'm putting way too much effort in.
If I shift post, let it release, all my energy is done.
I don't have any energy left.
If I'm providing effort, yeah, now I can get way up there.
That's not the case.
Too far down the rabbit hole, hinge forward, get the weight balance.
We're going to make the takeaway.
Okay, you should see the logo.
45 degrees shift post.
We're going to keep that same nice, low level tension in here.
Let it go through, okay.
Release all the positions once you can get a feel for that and you can start feeling and allowing the club to release.
First.
The divot should be very thin, it should be very shallow, because what is rotation?
It inherently shallows your plane impact.
Okay, we should be, as Chuck says, digging some strawberries, taking some beaver belts.
It should be nice and shallow.
Once you kind of get past, you know, the left hand, only then we're going to start doing this with both hands.
Okay, now you can go to the version where you're here and let it go, and that may be good for some people, right?
I don't mind that drill, but I will say that I do see.
A lot of players struggle with it because they're they get overly concerned of when to let go of the game.
And even on my, you know, phase two session two of that, even I talked about that.
Where after I graduate from Lead, our moment and I start adding trail hands start working into more.
Kind of like a little BJ drill, where I'm loading, rotating and letting it go and hitting the same square.
Checkpoints the release flatly the wrist, toe up all this, you can get overly concerned about letting it go at the perfect time.
Well, I let it go too late or let it go too soon, I even let one go in the back swing.
Some players that works really great for, okay, have at it if you want.
I got zero issue with it for me.
I started thinking, like, in a right brain, left brain, I'm like, all right, so I'm here, I'm doing this.
I start focusing on the thing that doesn't matter.
I need to be focused on how moving my body, keeping the tension out and my lead wrist position.
I do that, I start thinking about what's my trail hand doing here?
Oh, I forgot to shift my weight, I will now.
I didn't shift my weight, so I gotta throw my right hand at something.
's gotta catch up, okay, cool.
So the next progression would be lead arm only with club and then going to kind of BJ ish and letting it go, which is perfectly fine, but if you struggle with it, it's okay.
All right, even I struggle with it because I just get too much thinking about this.
So now after we graduate from there, it's going to be doing nine to three.
We should be able to hit our target numbers, dispersion, all the fun stuff, we're going to start 50 50.
To do the full drill.
But I want to add in one thing if you do the lead hand only release well and you're doing everything good one-handed.
And by the time you get to two hands, you start just struggling a little bit with the release.
Cheat it over just just for a second, just for a second, start with that weight, just a little bit preset on this least, let's say you put a hundred percent, Let's start like maybe a little bit 70-30, almost in kind of like an impact position.
And then just focus first on just making a few releases just to get used to both hands on the club.
Just to get used to both hands on the club.
And then plug it back into, okay, now that I'm used to releasing with both hands on the club, and you don't really have to worry about the body because you kind of preset that way.
Now let's work them into this version, where when we get to here, taking our setup, where we should have load and rotation to the takeaway, when we get over here, nothing changes from any drill that we've done today.
45 degrees of shoulders, see my logo, pressure's on this side, club's parallel to the ground right here.
Goes a little bit more in this.
Shifting the weight, posting, feeling the same flat lead wrist and impact, but then letting the club release.
Going from here, I need to add a ton of speed.
I'm getting a lot of speed, not by me doing it.
Because I have the rotation, I've got momentum, I've got hip now.
My power level's still at a two.
When you get over here, go through your checkpoints.
You can see, my club is toe up, my forearms are crossed over, my lead legs post up, my trail foot's rolling.
Yes, my shoulders and chest are slightly open because I have my trail hand on the club.
Not the end of the world, but where they square it in.
Don't worry about the golf ball until you can hit.
Response So we take the same thing.
We get set up here, get our weight balance, we're going to focus on.
I'll kind of slowly do this, we get a little weight.
Take away to here.
When we get over here, trail arms should be nice and straight.
We've got good rotation, a little bit of weight.
We're going to shift.
We're going to post.
We're going to let the club release.
We're thinking about our body first, our arms secondary, our wrists.
Thirdly, the club last.
Let him do what he wants to do.
It's nice.
I haven't looked for that ball.
I think I just lost that golf ball.
I'm looking at my checkpoints.
I can see this mirror right here.
Oh, I'm toe up.
My wrist is flat.
My foot's rolling.
Okay.
Get your checkpoints first.
Once you start doing that, then you can kind of start looking at my golf balls.
Okay.
Let me get a couple of pellets.
I think I'm running out.
Feel like Tiger with Thursday at the U.
S.
Open.
Got one ball at 18 here now.
Most common faults with this is that players are going to quit the body.
They're going to start getting army, they're going to start to try to manufacture the rules.
Okay, and that's going to be where you start to see, you know.
What we commonly look at the faults and the fixes is that they set up here as they start to work down into the strike and they work into here.
They're like, Craig, Well, I'm hitting these big pull hooks all right.
well, how would I hit a big pull hook right here?
Well, look at my club face.
I'm facing the ground right now and my chest is open like way open, so I ripped open my shoulders.
And I manually release the club.
That's not an effortless release.
Remember, the release is going to be passive.
It's not active in this.
You're allowing for the release to happen.
So if you start hitting a lot left, check your shoulders and check that you're not manually taking over with the arms and hands.
Now with the push side of things or the slice side of things, it can still be in the shoulders.
But if you get over here and you see your face like this, what likely you're going to hit a block.
You're going to hit a cut.
So if you work down from here and you flip your shoulders like that, look at my face.
It's wide open.
My chest is wide open.
Now I'm going to hit this little push, slice to the right.
Your whole goal is not to impede the release.
It's not to get in the way of what the club wants to do.
That's it.
Do not impede what the club wants to do.
Chest spinning is the number one way to impede what that club wants to do.
Think about it.
If I'm right here, the more I rip my chest, look at my club face.
Look at my club right now.
I'm not moving anything except moving my chest.
Look at my club face.
It's wide open and pointed this way.
Because the spinning of the shoulders is going to delay the club.
The club's going to stay wide open.
Until I finally stop or I enact some force on it.
Because this club, if I think about a top, if I get here and I start working on the strike and I just kind of spin like this, this club has no reason to rotate over until I stop.
Now it's got a reason to rotate over.
But if I just keep pulling and spinning like this, this club's not going to do anything.
And once I stop, now.
The club wants to square up and rotate on its own.
Start going from that kind of centripetal to centrifugal force type thing.
You have to decelerate to let the club head accelerate.
If you're still accelerating and ripping your shoulders through, the club's never going to square up.
It's never going to accelerate.
So if you look at your handout, you're going to see I've got lots of different stills and clips of Chuck going 9 o'clock over to here.
Same thing with myself doing the mini dead drill.
Between now, And Tuesday's session.
Unless you're highly advanced, I don't expect you to have this perfect yet, but we should be able to start to get a semblance of what we're doing.
That's all I'm kind of looking for.
What I want you to do is I want you to do reps.
As you'll see in your rep tracker sheet.
So you'll see in your rep tracker sheet, I've got two sections on there.
I've got body arm and then release.
For body arm, same thing we did right here.
You may need to, today or tomorrow, you may be doing 80 of these.
You may need that because it's breaking down.
And then you do 20 of adding the club in the arm.
You may need to do that.
You've got to be your own kind of judge on that.
And if you're not sure, you can send it in to me.
Send it in to Anthony.
Send it in to the community.
It's a net anywhere.
But you may need to start with a lot of those.
For those of you that are very good at it, still just warm up with it.
Say, all right, my first 10, I'm just going to get my body going.
I'm just going to get my arm and hand going.
And then you can add the club, and then you can start through doing golf shots, lead arm only during the checkpoints, and start lightly adding the trail hand.
If you want to do the VJ release and let go, no problem with it.
Just know that if all of a sudden you start struggling, and you don't understand it, it's probably because you're thinking about this too much.
And that's going to be your homework.
I want you to really focus on this area of the swing.
At this stage in the game, your brain should be wired that this is the first component, moving your body, then your arm, then the club arm and hand.
If you focus on moving the body, the core will release itself.
You may start to feel some tension, some soreness in your lean forearm, lean wrist.
Soreness is going to be okay because you may be using it for the first time or allowing for it to rotate for the first time.
But a word of advice.
If you get tired doing this drill, you get exhausted doing this drill.
Isn't that kind of the opposite of effortless?
I could literally give this entire camp standing right here like this.
I could literally do this all day long.
And then I'll have students that practice the release.
And I do this five times.
I'm like, oh.
I'm exhausted, like I'm breaking a sweat and my arm and hand are killing me.
This is how hard I'm working right now.
I could just stay up here the whole time.
There's a reason that the guys on tour make it look effortless.
Shouldn't have to give the answer, because it is.
They are being effortless with it.
This shouldn't take a whole lot of work with this.
Now there's a difference between being dead.
And taking out some tension, all right?
And I'm not saying get here and you're going to kind of ace Ventura this thing where your arm and hand is just floppy.
I've already done that to my body too many times.
But just enough to have the feel of the club, to feel a little bit of the flat lever rest.
Just let it go back and forth.
I can do this for an hour and not get tired.
If you start getting tired after doing this for two minutes, you're working way too hard.
Now, you may get sore because you're using muscles for the first time.
Think about this.
We're using the combination of weight, rotation, shift, pose.
My trail hang.
Okay?
You want to do this for 15 minutes, I can do this for 15 minutes.
That's how much effort you should be applying because you're getting your speed.
You're getting all these things from all these other components.
Diagnose everything from inside out.
Okay?
I hope you enjoyed.
Any questions?
Post them up now.
I'm going to stay around, answer some Q&A.
You've got your homework.
You've got your marching orders.
Looking forward to seeing you on Tuesday.
Hope you're enjoying the session so far.
Without further ado, I will open it up.
Any question that pertains to today, the day before, I'm going to be happy to answer.
You start asking me about the top of the backswing and float loading.
Downcock pump drills and how to swing 125 miles an hour.
We're not talking about that today.
Okay.
Let's see.
I've got to scroll up a little bit.
All right.
These don't have a time stamp.
Okay, there we go.
Let's see.
All right, June.
I'm going to start with your question because it's right at 11 typically it's because it starts to move too much into the palm, too much into the lifeline.
For those of you that get this wear spot at the base of the glove, that's where it comes from.
The grip gets too much in the palm, but the club runs.
So you want to go to the bottom of the pinky knuckle right here, across to the first knuckle.
On the middle finger and in the fingers right, you should be able to hold it like this, no problem.
A little bit of meat of the club on top.
If you take your grip and the club slides out like this, more likely you're too much in the palm.
All right, thank you Anthony for answering Al and Ted.
If you're practicing indoors with a small bat for the ball, I do this in the garage.
Make sure that your feet are the same level.
Notice Craig's mat at the same height as the grass met.
Good call, Doug.
Good call.
Howard, thank you.
It's all good.
Long morning to practice.
Thank you, Howard.
Once we log into Rotary, where will we find the boot camp videos for our sessions?
Kevin, go to the menu tree at the top.
Click Member Tools.
Go to My Purchases.
Menu tree, Member Tools, My Purchases.
You can join and have the replays there.
The replay will be about 30 minutes.
Should your glutes feel equally tight at post-up or does it indicate too much right side?
Good question, John.
So at setup, you've got to be ready to move.
So you don't want everything fully engaged and maxed out.
So right now, muscles have to be able to start to work to start to load.
So when I'm here, I'm ready to go.
My muscles are ready to work.
Now when I get here, And I shift, I feel my glutes start to load more.
And then when I post, that's when they contract.
And that's when I really feel them.
Kind of the squeeze, the cheeks, okay, that's when I really feel them.
Fire is when I post.
So you're gonna if you start out with your cheeks all and your glutes just really squeezed.
Right now, they're they're going to stabilize us too much and you're not going to be able to move.
Think about, you're here and now I'm loading them and firing them.
Okay.
I'm putting, I'm loading, then I'm firing.
All right.
Gerald.
All right.
How do you manage to keep the right heel down when releasing the club?
My tendency is a lot of right heel to come up as it releases, especially the right hand still in the club.
Well, it depends on why the right heel is coming up, Gerald.
So if you're working through here, And your right heel is coming up, so to speak.
When I work over here, it's going to typically be this coming in.
It's going to typically be this coming I'm pushing off this trail left.
as I'm working through here, I don't use my lead side properly.
And what does that really mean?
Players will start to push and do too much here.
Because this side is kind of being too lazy.
You're not posting.
If I'm not using this post, I'm going to do something with this trail foot to try to make that post.
Your body is very good at finding compensations for things.
So what I would do is I would do it like we did it right here.
I would slowly do these swings to keep it down.
Even if you have to dial down the distance right now.
But I would focus on making sure your lead side is doing the posting to turn the trail leg more off at this point.
Kevin, thank you.
Henry, good session.
Thank you, thank you.
I'm not seeing it under my purchases.
Hey, Raymond, are you talking about session one or today's?
Peter, talk a little about the connection between the bicep and the pec.
So it's a little bit more of a full back swing question.
But when you set up right here, the upper part of your bicep and the upper part of your pec should have a connection right here.
So I'll kind of come in close on camera.
So if I'm right here taking my set up, I'm going to have a little bit of awareness of my upper bicep and pectoral right here.
I don't want this.
You start getting kind of gorilla set up this way.
You should have a little bit of connection right here, okay?
You don't need, and this is what I see more often than not because of this guy, you don't need to be like this setup where your arms are so externally rotated, your elbows are just squeezed out, you know, facing out in front of you to the death, and you're, you know, kind of on top and squeezing.
That's not what we want here.
Your arms and shoulders need to be, number one, relaxed and down and in the box.
They need to be retracted and in position.
And when you hinge forward, let's say we just hinge forward and clap hands.
I'm going to have this little connection between upper bicep and pec, and you're going to maintain that in the swing.
Hopefully that helps.
Session one.
All right.
Hey, Raymond, send me an email when you're done.
Okay.
Craig.
rotary swing.
com I'll make sure it gets under there, Gary.
In your experience, what's the best feel to initiate the post -up move during transition?
It's a loaded question, What is the best feel?
Yeah, I don't like teaching feel, just because your feel, my feel may be completely different.
It's like when I tell people, you know, the grip pressure.
Okay, grip it at a two.
Well, two to them may be an eight.
So when I get here and I shift my weight to my lead side and initiate the post, for me, my feel is firing that lead glute by straightening my lead level, okay?
Pushing from the ground.
That's how I do it because I'm going to exaggerate.
You do not need to do this in your swing.
I repeat.
I don't want to see anybody doing this.
If I get here and I just really load my left leg like this, all right?
Now, I'm not way out towards the ball of my foot.
I know I'm out there because my knee is going this way.
If I'm not way out there, I can still feel.
If I'm like this, what do I want to do?
This is very uncomfortable.
I don't like this.
I'm going to start to push.
And post up with my lead leg because I'm very uncomfortable with that.
Now.
That's on the exaggerated side of the equation.
But for my fields, when I get here, I just start to straighten my lead leg.
I start to fire that glute because I feel the load.
I nobody wants to stand around like this, that's uncomfortable.
Oh, okay, that's better.
I can stand here all day long.
This I'm getting a little bit tired, so my field initiate that.
It's just straightening the lead leg instead.
Pushing against the ground, so to speak.
Ground fighting me back.
Thank you, Troy.
I appreciate it.
The mini dead drill, you would think, like, right, I'm just sitting there doing the dead drill.
It really gets players.
To kind of rein it in, so players earlier were talking about hitting it too far.
And when you realize, Oh, I'm 45 degrees, that's it, yeah, that's it.
I'm not looking for you to be like this.
Ted.
I'm posting, I always seem to hang back why I'm posting.
You always seem to hang back on posting.
Now, Ted, that's a pretty loaded question.
I'm going to ask you for two things before I answer that.
If your weight's already back here and you haven't shifted weight, so don't even worry about posting until you get weight.
But if your weight's over there and you post and your weight's falling back to the trail, that's a different question.
So try to clarify that for me.
Thank you, Gary.
Thank you, David.
That's what I'm here for.
I want y'all to succeed.
Ask me questions.
I'm an encyclopedia of golf.
I've done it all.
Brian, you're welcome.
All right.
Kevin Craig on the.
Similarly, last week struggled with the face closed at impact, causing hook, even with the small drills.
Now, how can I help?
Well, Kevin, so what's going to cause the closed club face in your phase one drill?
What's going to cause that to be closed?
If I'm working here into phase one, what's going to cause it to be closed?
Well, you are manually rotating the face.
The second thing is.
because you're holding impact, it can also be your shoulders.
So what I would do, and this isn't the best way to do it, but if you really, really struggle with it, you can see like with this mat right here, if you get like a little mat, something you can kind of squirt it up against, you can go like this kind of into your mat and see like, okay, flat made the rest of the clubface square.
Remember, the clubface is 85% of your initial ball flight is going to be clubface.
So the only thing that's going to be closing it in that phase one drill, Because you, you're doing it with your hands, you're not maintaining that.
Flat lead wrist and square out of hip could also have overly strong grip, so check not overly strong grip.
And you've got to get the manual out of it.
Okay, uh, Rick, I tend not to turn my shoulders enough in the backswing.
Do you pull with your right shoulder back?
Yeah, is it?
Rick?
Just take your right shoulder behind your head.
You're setting up right here, putting a little pressure in, literally just take your right shoulder behind your head.
That's like, I'm just literally just pushing my right shoulder behind my head.
Um, that's all I'm doing, taking that right shoulder behind my head and feeling my abs, I feel in my obliques.
Hey, thank you Raymond.
No problem, I appreciate it.
TeD I think I'm spinning the chest open instead of releasing.
more than likely you are.
If you think that you're doing it, you probably are doing it, so Ted.
Um, if you're spinning open the chest instead of releasing.
Not only is the face going to be open, but going back to your weight issue.
If you spin open the chest too much, you can get like this.
And where your waist starts to fall back to your trail leg.
Because you're too active with the upper half, you're kind of counterbalancing.
So that hanging back problem may be due to the fact that you're overworking your chest.
Welcome, Kevin.
Great session, Craig.
Really clarified the release.
Awesome, Randy.
Now, when I try to make posting up the primary action that moves the club from my trail side to my lead side, posting up isn't going to be the primary thing to move from the trail side to the lead side.
It feels too thrusty.
It's too much lunge or sudden push.
Remember, you've got weight.
So when you're here, I'm in my trail takeaway right now.
Weight is going to start to bring the club down and gravity.
So I'm already here.
Posting is just triggering the release.
So posting is triggering the down and out of the club.
In this small of a swing, you shouldn't really have so much trying to do it.
Robert, how do we get.
The squat motion to help movement in the post-up.
How do you get the squat motion?
Well, Robert, in a 40, 50-yard shot, you don't need a ton of squat.
I mean, you just don't need that ton of leverage.
But what that's going to be is as you start to shift, what happens is your hips start to square.
When you start to square, you allow for the little increase in knee bend.
You start to squat.
Okay, but it's during that weight shift.
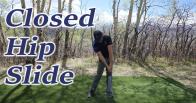
And what I typically see is most people don't allow their hips to square so they can't feel the squat.
They stay a little bit closed hip sliders.
They stay like this, and they're like, I don't feel the squat.
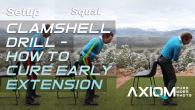
Yeah, watch what happens when I square up my hips now.
Now I can get both of them kind of squatting into position.
Hence, squat's a square.
Ted, that's it.
Great.
Garrett, wonderful session.
Much work on.
Thank you, Garrett.
John, is the shoulder plane dependent?
On how much you bend over at a dress, well, let's think about that.
So if I'm standing like this, I'm set up.
This is the point my shoulder is on, so I hinge for right here now, this is the shoulder point I'm on.
So that's my spine angle and how much I'm hinged.
That's the shoulder point that I'm on.
I don't want to change this during the swing.
I start on this plane, I'm on this plane, I'm on this plane, going through.
So that depending on how much you're hinged.
All right, thank you Garrett.
Anthony got that, Mitchell got that.
All right.
Looks like we're slowing down.
We still got a lot of people in the group.
No other questions, just people hitchhiking lessons.
I do human lessons if I'll come down from like four stalls down.
That was great information.
I appreciate the lesson today.
I'm like, you weren't my student today.
He's like, yeah, but I was listening to everything that you were saying.
Some of the advice I tell other people, though, that doesn't mean that you should be doing it.
You know, funny story.
That's like when I do clinics, you know, I'll have a room of students, and I'll be telling somebody to do one thing, and the person in front will hear it.
They'll be like, oh, I need to try that.
And I go over there, and I'm a big fan of negative reinforcement, so I whack them a little bit.
I'm like, hey, that advice is for this student, not you.
You've got a completely different problem.
Ted, how do you prevent the left shoulder dip on the initiation of the back swing?
That's just push, Ted.
If you're making your back swing.
And all of a sudden, your left shoulder just starts going down like this, you can see what you're just pushing with your lead shoulder.
If my trail shoulder is creating the motion, what happens with my lead shoulder, arm and hand?
I'm using my trail side, my right side to go to the right, I don't use my left side to go to the right.
That'd be like getting in a stop sign, putting on right hand turn signal.
But then you make a left, which I know is common in Atlanta, but Shouldn't be coming in your golf zone.
Hogan said he wished he had two right hands.
He wanted three right hands, John.
Sounds like he used a lot of effort to impact.
He did.
And you know what?
I will talk about that on Tuesday's session.
I've got a lot of beef with that guy right there.
I just like the picture.
But we'll talk about that when we start talking about speed on Tuesday.
Is the back swing started with the push of the left shoulder or pulling back of the right shoulder?
Mike, if you push with the left shoulder, I'm booting you out of this camp.
You can use a little weight to generate some momentum.
You can use a little bit of your core or your obliques.
Trail shoulder blade glide.
Anything with your right-handed, use your right side to go right.
Let's see.
Raymond, what time Tuesday?
Same time Tuesday, 6 p.
m.
EST.
All right?
So Tuesday session, 6 p.
m.
Eastern Standard Time.
Thank you.
I appreciate that.
Douglas, see you Tuesday.
Enjoy your weekend.
Thank you, Doug.
I hope that you found the meaning of life answer to your liking.
Thank you, Ted.
Al, when I try to maintain lag, it creates stress on my arms and hands and decreases the chance of proper release.
How do I balance it to?
in a full swing or in a nine to three?
I'll answer this one and one more.
I got some weekend projects I could get to.
Either.
Well, I'll leave full swing for when we get the full swing in 9 to 3.
If I'm right here at 9 o'clock and I start to come down, do you see how much my wrist really increased to have the lag?
My wrist increased about that much.
So if you're stressed, or if you have stress in your forearms and wrists, Due to lag, especially in what we're doing in phase two, because you're like this, like you're trying to create this massive kind of down cock pump with it, you're putting way too much emphasis on that.
And you're doing way too much with your hands.
The lag is going to be more of a byproduct of going back the other direction.
Okay?
The lag is only going to increase just slightly as I'm moving through here.
To me, what it sounds like is that you're getting here.
And you hear everybody and all of us talking about, oh, I'm going to have all this lag.
And you're trying to.
That's not how lag is generated.
You get a little bit more of the float loading.
You're just working way too hard for it.
It's my problem.
I lost audio.
Can you quickly repeat?
let's see, Mike.
Can you hear me now, Mike, before I do the answer again?
Just to make sure.
Okay, so first of all, and I think I'll see if I said.
If you use your left side left shoulder to start the backswing, I'm going to the right, use the right.
So you can use a little bit of weight shift to kind of get a little bit of momentum if you need.
You're using your core, your obliques, your right shoulder, trail side for me.
So you use your right to go to the right, You don't use your left to go to the right.
So I don't take my left hand and push my right arm out of the way.
I want to move my right arm over here.
I move my right arm over here.
So use the right side of the other right.
All right.
I think that about does it.
No other questions?
I will.
See you all on Tuesday.
You can find Anthony and I on the website if you need us.
Community, forum page, swing reviews, live lessons.
You can probably throw up a bat signal.
One of us will respond.
Thank you again.
I hope you enjoyed today's session.
Get ready for Tuesday.
Understanding how little work you really need to do in the swing.
to get a lot out.
Thank you, Gary.


