Video Transcription: 5 Minutes to the Perfect Takeaway
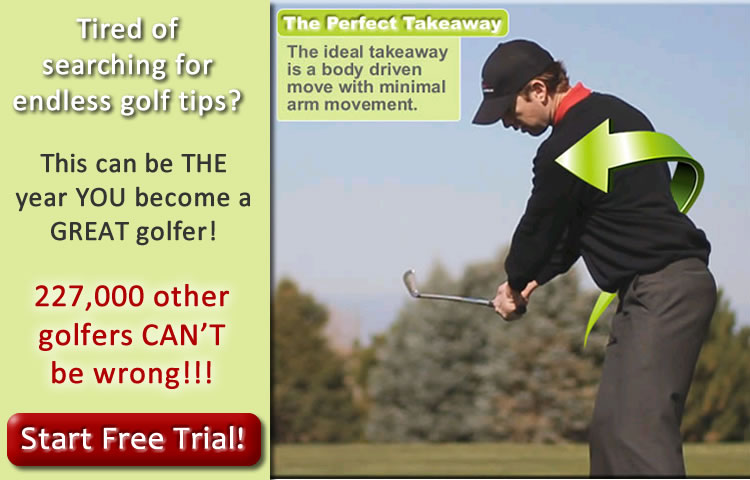
The takeaway is one of the easiest parts of the golf swing to get correct. You're starting from a static position, and there's very little movement. However, it's probably the thing that I see in the golf swing that's messed up the most by most golfers.
When you're learning the takeaway, it's imperative to take the time to learn to do it right, to understand the checkpoints, what you're looking for and why, and how all the things that you do wrong can mess up the rest of the things going on in your swing. It's super, super important that you take the time to do the takeaway right.
I'm going to go through all the checkpoints, and then give you basically a program at the end that you can follow along with, so that you can start to feel, and check yourself with mirrors and video, to make sure you're doing these things correctly.
The first thing I want to talk about are a couple of the most common tendencies that I see. Probably 80 to 90 percent of the golfers that I give lessons to, whether it's at a clinic or an in-person lesson, do one of these two typical faults that I'm going to talk about.
The first one I want to talk about is the wrist hinge. If I'm standing here at address, and all I do is hinge the right wrist...when we talk about wrist movement, if you've seen the Rotary Swing Tour Instructor Manual you'll understand moving in this plane is cocking and uncocking. This way is hinging and unhinging, to keep things simple.
What you want to feel during the takeaway is that there's maybe a small amount of cocking, which is OK, but there's no hinge. I'm going to explain why. First of all, when you put the right hand on the golf club it's really easy to move the club a long ways just with hinging. This is a dominant move. This wants to happen during the swing.
That's the direction you want to move the club, and the quickest, easiest way to move that club in that direction is to hinge your wrist, so that's what a lot of golfers do. To start the takeaway, the first thing they do is hinge that right wrist.
What that does, if you look from down the line, is it shuts the club face. Now we've immediately started our golf swing requiring some sort of compensation, whether you're going to have a shut club face at the top and you're going to hold on on the way down, or what have you. You have to do something to compensate for a closed club face, period. There's no way around it.
We obviously don't want to be building compensations in during the first six inches of the golf swing, so what you have to learn to do is keep that wrist in neutral. There's a couple of checkpoints for you to look at.
First, when you move from the right wrist and hinge it, your right hand will tend to end up on top of the club, and your left hand will be a little bit under. What I mean by that is, if you do this, you can kind of get the idea that my right hand is slightly on top of the left, versus this would be the left on top of the right. This would be neutral, and that's the right on top. Now my club face is shut, my hands are underneath.
If you look closely, you'll actually notice that my left wrist is bowed. This action of hinging the right wrist, the left wrist has to do the opposite. It has to bow, so that's where you end up with this really shut club face. For most golfers, they tend to do this, and get the club way inside.
My body, if you watch from face on, is barely moving at all. Simply by hinging my right wrist, look how far I can move the golf club, and never have to engage any powerful muscles. If you wonder why you don't have any power in your golf swing, and this is you, you're not using any big muscles. You're literally just using the muscles in your forearms. How big are these?
We need about 32 pounds of muscle to generate 100 miles an hour of club head speed. Unless you have really big forearms like Popeye, you don't have 32 pounds of muscle, so you're not going to be able to generate a lot of speed. Not to mention that it changes your path and plane and club face angle.
We don't want this, so what do we want?
If you'll notice, at address my wrist has got a slight amount of cupping in it - the left wrist. Because of how your arms naturally hang when you bring your hand across and take your grip, there's a slight amount of cupping in here.
You want to keep that. It's that simple. You don't want to flatten it out, which will happen if you hinge from the right wrist, or even try and roll your left wrist in. You want to keep that perfectly neutral.
Let's look at that. I'll do that from face on first. When I teach, a lot of times I actually put my thumb on the wrist joint to keep it hinged, then I'll make them take the club back and hold that angle. Now my wrist is still angled. I still have the same amount of cupping that I had at address. Now let's see what that does to the club face. It's square.
All I'm doing is taking it back, keeping the same amount of cupping that my left wrist had at address. My right wrist is flat. Guess what? When it's at address, it's flat. I'm not increasing this angle.
Again, if I hinge my wrist 20 degrees, I can move the club a couple of feet. This is really easy, so if you're kind of lazy in your swing and you don't rotate - which we're going to talk about shortly - you're just going to do this and you're going to have a really arms-y, wrist-y golf swing, and no power or control from your body.
The first thing you want to check is to see whether or not the first move that you have is something like this. Your hands should look like they don't move during the takeaway, other than if your body is moving.
Right now, my hands are staying exactly how they were at address. I'm purely rotating. Hopefully you can see that. My hands are maintaining the exact same relationship that I had at address, with my chest. I'm not moving my arms or my hands. I'm turning my torso. No movement from here; that's the first problem I see.
The second problem I see is maybe somebody who keeps their wrists intact, but shoves their left arm across their chest. That's the left-arm push.
What that looks like, again, is no rotation. I'm not turning my body at all, but look how far the club's moving. I can move the club all the way to the completion of the takeaway, simply by moving from this left shoulder socket and pushing the left arm across my body. When I do that, the club's all the way back but I literally have not made any rotation whatsoever.
Again, this leads to a flat inside golf swing. I'm not turning. This is detrimental for a number of different reasons. Obviously I'm going to tend to swing really flat, I'm going to tend to swing the club too far inside, also I'm going to tend to roll my arms and make it even more inside, and so on and so forth.
Long story short, you just don't want to do anything with that left side. You're going to learn, as we work on this, you're just going to rotate. I'm going to give you a couple of drills as we start to do this to feel how to learn that rotation.
We know what we don't want to do, and we know what most golfers do. What do we want to do?
I use an acronym for the backswing. It's REF - Rotation, Elevation, Flexion - that's all you really need. There's obviously little details in there, but that's your big mantra that you want to think about.
You're going to make a big rotation, a big body turn. You're going to elevate your arms slightly, and you're going to have flexion at the right arm. Those are the three keys to having a great backswing, and being really simple.
The first part we need to understand; hopefully you've been following the "Five Minutes" series, and you've added rotation to your golf swing. Most golfers I see do this really well when they're doing the drills. If they've followed along that video series they turn really well, but as soon as they put the golf club in there, this is what happens.
They get rid of that rotation, and now they think they need to swing the golf club. Obviously, we don't want to do that, so let's take the club out of the equation to start.
We're going to learn to rotate, elevate...flexion we're not going to really talk about, because flexion doesn't happen until the takeaway is done. There's actually going to be no flexion during this phase of the learning program.
What you're going to learn to do is rotate, and we're going to talk about the key checkpoints for that from face-on first.
Rotation. All I'm doing is taking my chest, turning like I'm going to talk to somebody to the right. Yes, I'm using the shoulder blade glide, but you don't need to make it some super complex thing.
All you're trying to do is take your rib cage, and turn. That's rotation. That's all it is, and you need to do this without facilitating it with a hip turn. This is what a lot of golfers do. I say, "OK, turn your back to the target, glide your shoulder blade," whatever I'm using to describe to them, and they do this with their hips.
Now, yes. I have rotated, however I have no coil and my hips have moved a long ways. Now they're going to have to move a really long ways in the downswing. We don't want to add any of that extra movement so all we're going to do is rotate.
Most golfers should be able to get at least 45 degrees of shoulder turn without moving their hips really at all. I can get a little bit more; I'm a little bit more flexible. That's all we're looking for. We need a tremendous amount of turn during the takeaway; far more than you think you need.
The reason for that is, I showed how little the arms have to move to move the club a long ways, but you need to feel the exact opposite. A lot of times I'll tell people to write this on the bill of their cap, or in the clinics I teach, "I want you to remember a mantra: Big body turn, little arm swing."
You can't overdo that, for most golfers. I've never seen anybody overdo it, especially when I put the club in their hand.
All you're thinking about, just leave your arms at address. Forget that you have arms. Just kind of leave them there, and turn as much as you can. Now, I didn't move my arms at all, but guess what? My arms moved.
If you look down the line, if I rotate, I'm not trying to move my arms. I'm trying to turn my chest so I can look at the camera. I'm rotating, not moving my arms, not moving my wrists, not moving the golf club. I'm not trying to move the golf club. I'm trying to rotate.
The first part of the REF - the Rotation, Elevation, Flexion - is Rotation. You need to turn as much as you can, so that's what we're going to be doing is working on big rotation. Now my arms have no problem staying in front of my body.
The takeaway, when you're doing it via the Rotary Swing Tour model, is the simplest way that you could possibly take the club back without adding any extra moving parts, and building a tremendous amount of power. There's no fewer moving parts that you can build into the golf swing, other than rotating using your obliques, using your shoulder blade glide to initiate it, and turning your torso. That's it.
Now, when we put the golf club in there, I'm going to do rotation. That's all I'm doing. I'm not moving my arms. You've heard the term, "One piece takeaway," I agree with that concept. I just disagree with how it's typically taught.
I'm trying to tell you what specific muscles to use to create a tremendous amount of rotation but a lot of coil, but not be swinging your arms and hands all over the place. That's the first piece that you need to understand; a huge amount of rotation.
The second piece, there is a small amount of elevation that happens during the takeaway. Elevation is simply this; stand straight up, get in good posture, put your arms straight out in front of you, and elevate them without shrugging your shoulders.
It's elevating it, like you're using your shoulder as a hinge socket. It's a hinge joint - just pretend that it is, for this - your arms do not move this way in the golf swing. That's in a horizontal plane. You want to think of them moving in a vertical plane.
What's going to happen is rotation is going to create the horizontal movement, or the depth, of the golf swing. That's what you're doing to create the club moving around in a circle. The arms don't need to help with that process. The body's perfectly capable of moving the arms deep back behind you, so there's no need for your arms to try and facilitate creating depth in the swing, because all you're going to do then is swing really deep and flat.
You need to get the concept that your arms are only moving vertically, so when we add vertical elevation...This is what we call shoulder elevation; technically it's shoulder flexion. What you're really doing is flexing from the shoulder, but we just call it shoulder elevation to get the concept that the arms are moving in a vertical plane, and I combine this with rotation. Now I'm creating a swing plane. That's how you create it.
When we look down the line, I'm teaching myself elevation, elevation, rotation, now combine the two. Well, if you want to keep your arms in front of your body, this is exactly how you do it. Rotate while adding a little bit of elevation.
When we get to finishing the whole thing, we're going to do elevation, flexion - just hinging from the right arm; we're not going to talk about this a whole lot right now, just to give you the full picture - elevation, flexion, rotation.
Now if I do this in my posture, elevation, flexion, rotation...I just made a golf swing. It's that simple. What we're doing is learning to combine those moves as we do it at speed. It's that simple, and that's what the purpose of this video is.
To get back to elevation, here's what we're doing. During the takeaway, there's going to be a small amount of elevation. My arms are hanging down naturally at address, and I'm just going to move them vertically in this vertical plane, while rotating.
All that does is keep the club a little bit more up in front of me. If I don't add any elevation from the shoulders, my hands are going to get really low and shallow, and they're going to tend to work too far around my body, so you've got to add some elevation to keep the club in front of the body and working up until we add flexion.
It's a small amount. Basically, your hands are starting out down around the mid-thigh. As you rotate on this inclined plane, they're going to move up to about belt-high, roughly belt-high or pocket-high during the takeaway.
You're not going to be way up here during the takeaway. It's a small amount of elevation. Right now you can see they're down close to my knees. As I'm done, they're up by my belt. It's that simple.
When we add the golf club, a little bit of elevation with rotation, perfect takeaway. That's all we're doing. I'm not moving my hands. You know that we're not hinging. I'm not bowing this wrist. I'm simply turning while adding a little elevation. That's all we're doing in the takeaway.
Now let's put this together in a little workout program so that we can have some more key checkpoints and learn how to do this very, very easily.
One other piece that we're going to add in this workout program is sitting into that right side, just a little bit. It's a small weight shift, but it does need to happen.
I'm going to do elevation, rotation, and I'm going to let my hips shift slightly to the right, so I push my right heel into the ground; no more than an inch. All we're trying to avoid is this tendency; we're trying to load up into that right glute slightly.
Notice my head's not really moving, but my hip is shifting slightly to the right as I add these two movements. It's a very small shift. If you can focus and feel that right glute and the right heel as you're pushing that ankle into the ground, that's all we're looking for. It's a small amount of weight shift.
Let's put this all together. We're going to do a little elevation, rotation, a slight amount of shift as I go back. Big turn.
Now, on camera that may or may not look like a big turn to you, but you need to feel a tremendous amount of turn, because most golfers don't turn nearly enough. They push their left arm across, they hinge from the wrist, they bow the left, they roll the arm.
All of this is moving the club a long ways, but I'm not using my body at all. We want big body turn - remember the mantra - big body turn, tiny little arm swing. Now when we look down the line, my hands will be perfectly in front of my chest. I'm not really moving them. I'm moving my body, shifting my weight slightly, and that's putting my hands exactly where I need them.
A few checkpoints here: The first thing that you're going to see, the most common tendency if you're watching yourself in the mirror, is for the golfer to disconnect and their hands to end up behind their body.
You'll notice, first of all, that my finger tips are no longer level because I've pushed my left arm across my body. My right arm has no choice. If it stays straight, which it must, if it stays straight my fingertips will no longer be level.
What most golfers will do is subconsciously bend their right arm. They're like, "Well, my fingertips are level." Well, yeah. You've hinged your right arm. The point is, your hands are still deep and buried. You're going to notice when you do this you're going to hinge from your elbow, and your wrist will tend to hinge.
Now you've added two extra angles into your takeaway that are completely unnecessary. Keep the right arm straight, rotate - don't move your arms or hands at all. My upper bicep and my upper pec are still touching. This is not touching, and I see this every single day.
People don't realize that they're doing this. Your hands - I'm going to turn and do a 45 degree angle here so you can see exactly where my hands would be. They're going to be right, directly at you because I can only turning about 45 degrees during the takeaway.
If I make a full turn, my hands should be right in front of the center of my chest, the buttons on my shirt. They shouldn't be back here. They shouldn't be way out here. If I just turn, they're going to be right in front of my chest. That's ideal.
There's no hinging in the right arm, there's no pushing the left arm across, there's no hinging in the wrist. Everything stays neutral, and I'm just rotating back.
If you feel this flying away, you need to monitor this, especially when you add a golf club into the mix, because you're going to want to do this. You're going to want to follow the momentum of that club. It's heavy.
It's easy to do this with just your hands. As soon as you add the golf club in the mix, guess what? This is creating momentum and you're going to want to follow it. You've got to learn to control that. You've got to learn to move the club with the body so that the club stays in front of the body.
Don't let it start to move you around. You swing the club by turning your body. This needs to happen pretty slowly for most of you. That's what we're going to do first.
To get our reps in, here's what I want you to follow along. Get into your setup. We're going to start out standing straight up. You can have a normal stance width. That's perfectly fine. All I want you to do is practice elevation, and do this 10 times. All you're doing is teaching your brain the movement or the plane that your arms are going to move in.
Now we're going to add 10 times rotation. Not pushing your head, not pushing from the left side. Just pulling your right shoulder behind your head and turning your rib cage away from the target; turning your chest away from the target with minimal hip movement. It's not this, and it's not this. It's just rotation.
Now let's combine these two moves, rotation and elevation, while standing straight up. Minimal hip turn, all adding rotation, with a little bit of elevation. This is all you're trying to do in the golf swing. I'm not moving my head, I'm not tilting back.
I'm going to add a little bit of weight shift in here with my elevation and I should be - if I do it from down the line - my hands should still be right in front of my chest.
Now let's do the same thing in our posture. Hinge, let your arms hang down naturally. Don't hold them way out here - that's cheating. That's not where you're going to hold the golf club, and you've already elevated too much - let your arms hang down naturally where they're going to be when you grip the club, hands one inch apart; rotation, elevation.
At first, you can start to segment this. Make sure you get the rotation right, and then add a little elevation to teach yourself where your hands need to end up during this first move. You don't have to try and blend them together just yet. Just do rotation first, keeping your hands one inch apart.
Remember we're not drifting away. Just rotation; and then start to add a little elevation. Look at yourself down the line in front of a mirror. Your hands should be about belt high.
A good drill when we add the golf club into this, which we're going to do now, is stick it in your belly button. Take the club, hinge over, stick the club in your belly button and choke down on it. Try to get where you'd be at address. Your arms might be outstretched a little bit; that's OK.
What you want to find is that, first of all, if you look from face on, that club forms a perfect perpendicular angle to my chest. In other words, if I move it pushing from the left, it's no longer perpendicular to my body. Can you see that?
If I'm doing this, this is no bueno. That's all pushing and just swinging your arms. There's no body movement in there at all, and my arms are going to swing deep behind me. I want to keep this at 90 degrees, while keeping my right arm straight, so not doing this. That's going to show that I'm pushing my left arm across my body.
My right arm stays straight. Now if I add a little elevation, it comes away from my belly button. That's the key. Rotation, elevation; now the club is still pointing at my chest, if we look from down the line.
I'm going to go rotation, a little elevation...the club is still in front of my body. It's still 90 degrees. However, if I elevate a little bit it moves away from my belly button. It's a great drill to learn how much you need to elevate, while still keeping your arms in front of your body.
You can do that drill, starting out just with the club, and then add weight shift to that. Let your weight feel slightly, and push that right heel in the ground. Stabilize those hips, a lot of rotation, a little bit of elevation, no horizontal arm swing.
Once we master that with the club in our belly button, we can take our normal address position. Now we're going to hinge, let my arms hang down naturally, and now I'm going to keep everything exactly how it is. I'm going to do rotation, big, big body turn, tiny little arm swing.
A lot of times I get questions asked, "When should I hinge my wrist?" By the time you're hands are about pocket high, the club should be parallel to the ground - somewhere between belt and pocket high. That will typically require a little bit of wrist hinge. The term I want to use here, though, is it should feel that it's wrist cocking, not wrist hinge.
Technically, your wrist is hinging, because of the angle that it's sitting on the golf club. However, you don't want to encourage this motion. This is death for every golfer because all it does, again, is shut the face and move the club deep behind you.
You want to feel that this is the only motion happening. Again, because your wrist is on the club in a turned position, there's a little bit of hinging there, almost kind of at a 45 degree angle between true hinging and cocking.
But I want you to focus on feeling that the wrist cocks up. Down the line, this will start to make a lot of sense. If I feel that I hinge my wrist, I barely felt I moved. I'll show you how much I moved my wrist. It's that much.
You can imagine, it doesn't take a lot of muscular effort to do that, especially when I've got this heavy club swinging around me in space creating a lot of inertia, a lot of momentum. This is really easy to do, and now I'm stuck and it's all compensations from here.
Learning to keep that wrist straight and feel like I cocked up, now the club is moving in a vertical plane, and the club doesn't get behind me. It's that simple. That's why so many amateurs end up here. It's from these simple little moves; rolling the left wrist, hinging the right.
To answer the question, when do we cock our wrist? When the swing is about...this is about halfway done, roughly. When you're here, or when it's a quarter of the way done, you should have the wrist cocked about half or a quarter of the way.
In other words, if this is 25 percent of the swing, you're going to have 25 percent of your wrist cocked. That's a simple way to think about it.
If I didn't cock my wrists at all and I made a great turn - notice I made a good turn - the club is just not quite parallel to the ground, add a little bit of wrist cock. That keeps the club moving vertically in front of you, rather than swinging around behind you.
Just add a little bit of wrist cock. Notice my left wrist is staying neutral. If I hinge, my wrist is now flat and bowed, and you can see what that does to the club. You don't have to be a rocket scientist to realize that's a bad position to be in.
If I feel that I cocked my wrist up while making a big turn, now the club stays in front. That's all we're trying to do.
If you want to add a little bit of wrist cock that's gradual throughout the whole swing, but as you're checking for your takeaway, all we're going to check is that it's parallel to the ground, the club's about pocket high, I've made a tremendous amount of rotation, my hands and arms have barely moved at all. They've stayed right in front of my chest.
You want to do that as many times as you can, so if you're going to work on your swing each day, if you can get 100 reps in, once you've mastered the other little pieces of doing it without a club, working on elevation separately, working on rotation separately, getting the checkpoints that I mentioned in the article, as well as in this video so far, that's going to help.
Now, the last thing I'm going to do is give you one more little drill. I call this the shark fin drill. I just call it that because you kind of look like a shark. You're going to put your hand right in the center of your chest - your right hand only, pull your left hand behind you - and start to rotate.
The reason I use this drill is because so many golfers dominate the backswing with the left arm, trying to create a swing plane, trying to move the club. That's a very dominant move that you have to learn to break.
When you take your left hand out of it and move from the right side and keep that right hand right in front of your chest like a little shark fin, now you're starting to feel how you rotate and pull your shoulder back. Minimal hip turn, and nothing from the left side.
Same thing we did in the rotation drills, when we put both hands on here and you started feeling whether or not you were pushing from that left side. Same thing when we added the golf club into it. We want to just feel big turn, tiny little arm swing, so we can take the left arm out, which is typically a culprit of pushing.
Now when we add the golf club, we can kind of do an extension of the shark fin drill, which is just doing the club, taking the club back, right arm only. Keep the left arm out of the picture. Now this is the golf swing. I'm rotating back. My arms are barely moving.
From down the line, I'm making a great takeaway and my right wrist has not changed. Nothing's changed. I'm just turning while adding a little bit of shift and a little bit of elevation. That's all we're trying to do in the takeaway. If you can master this simple little part, the rest of the golf swing is so much easier.
But if you screw this up, which you can easily do within the first 12 inches of the takeaway, the rest of it's all compensation. We want to work really hard on the takeaway to make sure we get this simple little move.
Watch all the checkpoints. You don't want to be hiking your shoulder up, swinging your arm across. You don't want your head moving way off the ball, all these things. If you can master this, take the time to do the reps, the rest of your golf swing will be a piece of cake.
Watch part 2 now to see how you're moving your body in the opposite direction of the pros!