


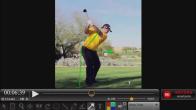
Patrick Reed - Right Foot Brake
Sorry, you need to be a member to access this video.
You Are Just Seconds Away - Become a member here!
Already a member? Log in now

Congrats to the young and always exciting Patrick Reed, for winning the 2015 Hyundai Tournament of Champions. In this new video, I will show you a great way to get over those hip spinning problems that have left you frustrated round after round. I will also show a couple of great checkpoints to help you maintain your spine angle through the entire golf swing and get you back to playing consistent golf. I'll show how to use the lower body properly in your downswing and then control it during the release by using your trail foot as a brake!
- Sit into the trail side glute when working into the top of the backswing to help maintain spine angle.
- Shift the hips to the lead side and post up.
- Use the trail foot as a brake for the hips so that cannot spin open in the hitting area.
- Release the club
Hey guys, this is Rotary Swing Instructor Chris Tyler.
Patrick Reed pulls out a beautiful victory at the Hyundai Tournament of Champions for 2015, kicking the year off in stylish fashion.
So congratulations to Patrick Reed.
This week, I'm going to talk to you about how.
Patrick Reed uses the right foot in his downswing to help slam on the brakes of the lower body.
And have a ton of clubhead speed.
Let's go ahead and get started.
Okay guys, This week, we're going to be taking a look at Patrick Reed's golf swing.
And I'm going to show you guys a couple of really key areas in his move that help him.
Number one, be able to pull power out of the ground and turn it into clubhead speed through the release.
But I'm also going to show you what's allowing him to be really consistent.
And so those of you players that have ever been labeled as hip spinners, You want to pay really close attention to this review.
Because he does one move in his golf swing, probably better than 95% of the players that I've seen out on the PGA Tour.
And this is a really key move that's going to help you control the speed of the hips through the hitting area.
At address, you're going to notice, I'm going to focus in on a few key areas here this week.
I'm going to show you how he keeps his hips back.
He's also been able to maintain his spine angle throughout most of his entire move here.
But at address, he's got his glove logo facing down his target line.
And then as we get through the takeaway position here, you're going to notice that he's got his glove logo now facing out in front of him.
Also notice how he's been able to maintain spine angle into the takeaway.
He's also been able to keep his hips back beautifully.
And then you're going to see as he starts to work up into the vertical plane here, you're going to see some gradual rotation of those wrists.
Notice how he's also kept his right hip back and maintain spine angle just as he had at address.
So for those of you players that have noticed that, your spine angle starts to change from where you had it at address up to the top part of your golf swing, double check to make sure that your trail hip has stayed back.
If you notice that your trail hip comes forward off of this line, then that in turn can make the spine go more vertical.
And that's going to add a very big timing variable to your golf swing.
That's going to make it very difficult for you to play consistent from one day to the next.
We really want the spine angle to stay the same throughout the entire golf swing.
We really want to make sure that that's maintained and we're rotating our shoulders perpendicular to that axis.
Alright, so double check to make sure you keep that trail side hip back.
A good way for you to try this out is if you stick your tush up against a wall and you just make some 9 to 3 swings, you know, just with some small weight shift over to the trail side swinging out to 9 o'clock, shift the weight, keep the arms where they are, Go ahead and shift over to the lead side, and then go ahead and swing on through.
And try to keep your right tush back all the way through, just lightly, as you're starting to swing all the way through 3 Now, this is just obviously a toned down version and just a different way to think about how to keep the hips back and how to maintain spine angle.
But definitely a good little simple drill for you guys to try around the house.
Now, those of you that have had a problem with hips spinning, or those of you that have had a hard time understanding how we're going to pull power to the ground, these next few moves are really critical for you to understand.
So you're going to see here as Patrick gets in transition, you're going to go ahead and see him sit left.
He gets the hips back to a square position here, still keeping the hips back.
Now, his hands are going to be working down into that same position that he had into the.
And, you'll notice that his Glove logo is now facing just a fraction more vertical than where it was.
Now really, Really important for those of you players, like I said that are hip spinners is paying attention to two areas.
This right foot and his hips.
Okay, so now watch right through these next few frames.
These hips are done right here.
This is the release point of the golf swing.
The hips are not moving at all and he's still got his right heel down on the ground.
Let me get through one more frame here.
So a few key areas to take a look at.
Take a look at where his glove logo is now facing.
It's now facing directly behind him.
So it was out in front of him through the take away.
Much like we talk about in the five minutes to a perfect release video, or the nine to three drill.
We want to always have the wrist kind of rotating through the take away, and then in the downward move, there's some gradual rotation.
So we use the Glove logo out in front of us as a reference point at the nine.
So, double check to make sure that you have that clearly understood how we're trying to get there.
Make sure you don't have a lot of tension in the wrist while you're trying to achieve this.
Because we need to have them relaxed and allow the club to do what it's designed to do, and that's rotate.
But more importantly, if you take a look at this right foot it is still down on the ground.
It is allowing him to control the speed of his hips through the hitting area and well after the hitting area.
So what I mean by this is that if you were to set up in a static address position, and you guys at home can try this out, And you were to shift all your weight over to your lead side.
And then go ahead and roll to the inside part of your trail foot, keeping your heel down, and then pull your hips open.
Try to pull them open and you'll notice that you have very limited range of motion, very limited mobility.
Then go ahead and lift the trail foot up just a little bit.
Notice how you can start to rotate the hips more and more.
So we think of the right foot as a braking mechanism for the hips.
So what we want to try and do is we want to make sure that we get fully seated over the left side, just as he does.
We want to post up and then we want to use the right foot to be able to stall the body out and release the golf club at the proper time and get lots of speed at impact.
That's really how you control the speed of the body.
So if you've been one of those people that likes to, you've noticed that you're spinning your entire body through the hitting area.
Then you definitely want to check out the role of the right foot in the downswing video.
That's a great video that Chuck really kind of goes through, how we're going to use the right foot properly in the downward move.
You also, For those of you players that have been running into problems with having some early extension to your spine, we want to look at the losing the tush line video.
And all these videos are going to be to the right of the video player for you guys as recommended videos.
And again, one of the most critical areas of the golf swing is always going to be the release.
So five minutes to a perfect release is a great way to, you know, start off your 2015, Making sure that you understand how to control the hitting area and then get into some good nine to three drills.
And then understand how you can use your lower body in the downward move.
Not only one to get things fully shifted, get things posted up, And then obviously, you can use your trail foot now to understand that it's a braking mechanism and you can release the golf club with max speed at impact.
So I want you guys to try those out.
Take a look at those videos and let's get out there and play some great golf this 2015.
I wish you all the best.
I look forward to working more with you all in the future and have a great day.


T David
Craig (Certified RST Instructor)
Brian
Craig (Certified RST Instructor)
Anthony
Chris (Certified RST Instructor)
Christian
Craig (Certified RST Instructor)
Peter
Craig (Certified RST Instructor)
Maciej
Chris (Certified RST Instructor)
Don
Craig (Certified RST Instructor)
Don
Craig (Certified RST Instructor)
Braden
Chris (Certified RST Instructor)
Braden
Chris (Certified RST Instructor)
Ian
Chris (Certified RST Instructor)
Pavel
Chris (Certified RST Instructor)
bradford
Craig (Certified RST Instructor)
alex
Craig (Certified RST Instructor)
Todd
Craig (Certified RST Instructor)
grant
Craig (Certified RST Instructor)
dan
Chris (Certified RST Instructor)