Video Menu
My Favorite Videos
My Favorite Videos
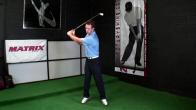
Bill Haas - Power from the ground up
Sorry, you need to be a member to access this video.
You Are Just Seconds Away - Become a member here!
Already a member? Log in now

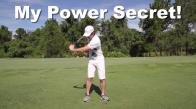
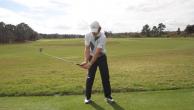
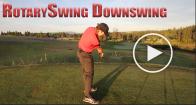
In this video, I'll show you what powering the golf swing from the ground up really means. I'll show you how Bill Haas uses his lower body perfectly to start his downswing sequence. The downswing sequence happens really fast and you must have a clear picture on how to get things started down properly, how to stabilize and how to stall the body properly for the proper timing of the release. If you have been searching for a solution to put more power in your game, then you must learn how to use your big and more powerful muscles first.
- Shift your weight first to start the downswing
- Stabilize the lower body by driving the lead heel into the ground
- Use the core muscles to unwind the torso
- Release when the lower body is stable and stalled
Hey everyone, This is rotary swing instructor Chris Tyler.
And if you have been searching for a solution on how to put more effortless power into your golf game, then I'm going to show you how.
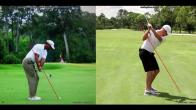
The 2015 Humana Challenge champion Bill Haas powers his golf swing from the ground up.
Now let's go ahead and get started.
Okay guys, So I want to spend some time this week talking about downswing sequencing and what it actually means to power the golf swing from the ground up.
I know a lot of us have probably heard that expression.
And if you really, kind of grab a hold the idea of what that means.
And hopefully this review will give you a clear indication of what it means, it'll certainly help you overcome a lot of those big faults that you have in your golf swing.
If you notice that you have a loss of lag or if you have poor balance, if you notice that you come way over the top, If you get a good prioritized list of things that are of what are supposed to fire.
When in the downward move, it'll be much easier to preserve lag, and it'll be much easier to take that stored power up and turn it into speed at impact.
So I think it's best if we look at where we're trying to get to first before I talk about how to get there.
If you look here at his impact position this is a driver swing, You can see that he's got a nice stacked up left side.
Got a little bit of secondary axis tilt here, so you can see this is a driver swing now, so we normally would see a pretty drastic increase in secondary axis tilt.
Because a lot of golf pros really try to launch the ball very high in the air, that's why we make some driver setup adjustments.
But very good stacked up left side appearance here.
Overall, a pretty textbook looking impact position.
So how do we get to this position from the top of the golf swing down?
That's our big question today.
So if we go ahead and I'm going to load Bill right up to the top of his swing.
Probably one of the better working transitions I see in modern golf today.
I'm going to go ahead and mark the club position, The club head, I'm also going to mark the outside part of his lead thigh here, so you have a good, clear understanding of what's going to start.
So when golfers load up to this position here, the tendency for amateur golfers is to start to use their shoulders and their arms way too early.
Now I like to think of the lower body as the dump truck in our golf swing, it's big, it's powerful, But it's really slow.
We need the dump truck to kind of pull things and get things moving in the golf swing.
In order to get things stabilized and make sure that we're going to be able to utilize all the power.
I think of the arms and the hands as kind of the Ferrari we don't want, If you get to the golf swing and you start to use your shoulders and your arms way too early, you're going to get in a race with those hands and arms and the lower body.
And guess what, Those arms are going to be really fast and they can actually make your lower body not work at all.
It can cause you to hang back, It It can cause you to throw the club very early, which in turn you're going to lose lag.
So the idea is that we want to keep the Ferraris in the garage for a little bit.
We want the dump truck, really, to kind of start our party out, so how do we do that?
So when we get up to the top part of the golf swing, what do we need to do to get the lower body really working?
You're going to see a very good sized shift of the hips here, so you can see a good shift of the weight over to that lead side.
So now you can see that his outside part of his thigh has moved a good 6, 7, 8 inches or so and notice how the club has moved virtually the same amount of space.
So the hands and the arms and the shoulders didn't do anything at this point.
All we did from the top part of the golf swing to start the downward move was shift our weight.
Now what do we do to get things further down into the hitting area?
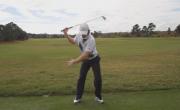
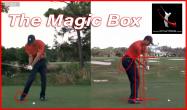
well the first and foremost thing that we want to look for in order to get that golf swing that's powered from the ground up is we want to stabilize so when you get your weight shifted over to that left side now we need to start to stabilize by pushing that left heel into the ground that pushing the left heel in the ground is going to get those glute muscles really contracted and it's also going to create some resistance from the ground it's going to act more like a piston so you push into the ground like that it's going to make the leg work more to a straight position so that's allowing you to leverage the ground once you shift then stabilize the left side it's very very critical for being able to move power up the kinetic chain but now to get the hands and the arms and the shoulders down in the hitting area we need to use the core muscles our abs or obliques we need to use those to start to unwind the torso and right here we're going to start to use those to unwind we're still not using the hands and the arms as much as you would think at this point the hands the arms and the shoulders are not really doing much of anything all we've done now is we're stabilizing the left side we're using those big muscles those those oblique muscles that's allowing us to pull the shoulders and the arms down into the hitting area a little bit of gravity is moving them down there as well but this is the point of the golf swing where we're really starting to post up and we're going to start to stall the body out as much as possible because when you start to stall the body now the hands and arms can act independently from the body and they can release on through so you notice here I'm going to go ahead and mark the outside or mark where the club head is now I'm also going to mark the buttons on his shirt and I'll mark the pocket just for good sake here alright so you can see now this is where he's going to start to really release the golf club okay so things are really starting to release hard notice that the buttons on the shirt are not moving at and the pocket is not moving at all and see how far this club has traveled from this position there might be a little movement of the buttons but not a ton and then right on through the hitting area okay so you can see that this golf club has traveled a good eight feet the left hip is not moved and the buttons on his shirt have not moved so this is a very very textbook way to stall the body and release the club with max speed down in the hitting area now you'll see the buttons move a little bit more as they move through some more frames here and that's just because the hands and the arms are hanging onto the club the club's got a lot of momentum and it's pulling us up into our finished position so the idea with a properly sequenced golf swing that can help you overcome a lot of those faults with being over the top loss of lag loss of balance the idea is is to get things motoring with the dump truck get your lower body moving first once it's shifted over to your lead side stabilize it make sure that it's going to be able to handle that load it's going to make you want to be able to handle all that momentum as you're releasing the club so stabilize it by driving the left heel into the ground and then use those core muscles those engaged core muscles those abs those obliques to start to pull all right you're going to create some torso rotation which is going to now pull the shoulders down in the hitting area which has now got the hands and arms more out in front of the body to where you can start to release it on through and you will have way more speed than you ever have all right so use this sequencing use the lower body first always in your downward move that'll help get things really rocking and rolling I got a couple of great videos I want you guys to check out we got an awesome video coming out later in the week that Chuck just put together it's actually kind of coincides with what I talked about today that's going to be coming out as a premium video later in the week I also have three sources to increase power that's going to be over on the right hand side of the video player that's a great video transition drill that's another good video for you guys to understand how the lower body is going to work and then the straight left legged impact video that's a video that I did that talked about the proper muscle engagement shows you a good way to find how to get some awareness of those glute muscles because you really need the dump truck kind of getting things started before you can turn those Ferraris on let them loose and have a good old time so all right guys so that's how to properly power a golf swing from the ground up I wish you all the best and let's get out there and play some great golf








































































































James
Craig (Certified RST Instructor)
James
Craig (Certified RST Instructor)
James
Craig (Certified RST Instructor)
James
Craig (Certified RST Instructor)
Anthony
Craig (Certified RST Instructor)
Anthony
Craig (Certified RST Instructor)
Jesse
Craig (Certified RST Instructor)
Jesse
Anthony
Patrick (Certified RST Instructor)
William
Craig (Certified RST Instructor)
Christian
Craig (Certified RST Instructor)
Andrew
R.J. (Certified RST Instructor)
andrew
R.J. (Certified RST Instructor)
Mike
Craig (Certified RST Instructor)
Charlie
Craig (Certified RST Instructor)
Mads
R.J. (Certified RST Instructor)
John
R.J. (Certified RST Instructor)