Video Menu
My Favorite Videos
My Favorite Videos
Phase 3 - Unleashing Speed
Sorry, you need to be a member to access this video.
You Are Just Seconds Away - Become a member here!
Already a member? Log in now
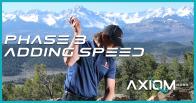
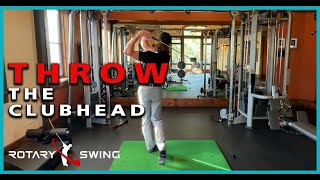
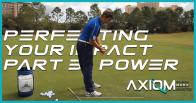
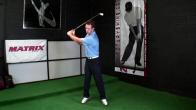
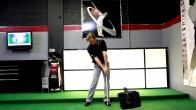
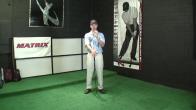
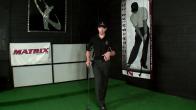
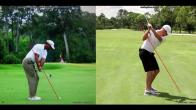
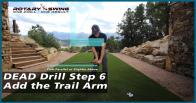
In Phase 3 we introduce the Throw the Ball Drill to teach you the simplest, fastest and most efficient way to dramatically and correctly increase your clubhead speed in a single session.
- You are building on the 7 checkpoints you have learned so far and those don't change.
- Preset your trail arm in a loaded position 90* degrees to your chest and with 90* of elbow flexion
- Rotate your rib cage and load the trail leg
- Step onto lead foot big toe
- Pivot
- Throw
- Trail elbow should be close to trail hip pocket/belt
All right, you can now hit the ball straight, you can start to shape it, you can release the club, now it's time to add power and speed in phase three, the fun stuff.
And the simplest way to do that is the good old throw the ball drill that I did 15 years ago on the site.
The throw the ball drill teaches you the exact kinematic sequence that is the most efficient way for the human body to propel an object.
It's that simple.
When you think about it, the same movements of throwing a ball are incredibly similar for creating speed for the golf swing as well.
And so we're going to talk about how you can learn how to add speed like you've never had before with this simple drill.
And we're going to start out with a golf ball.
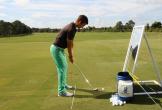
So you can actually pick up some balls, we're going to set a ball down on the ground to give you a target.
But there's a couple key checkpoints that you want to start to focus on when you're doing this throw the ball drill.
The first thing is we're not throwing the ball with just our arm.
There's no power in that.
Just like if you were throwing a ball from left field and baseball with just your arm, there's no power.
We have to use our body.
So how are we going to do that?
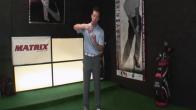
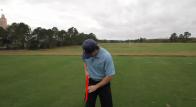
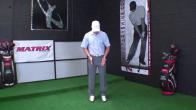
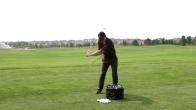
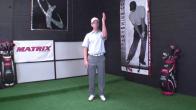
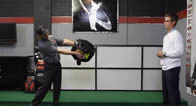
The first thing you're going to do is I want you to elevate your arm a little bit and set it.
So I'm just going to fold my right arm a little bit, let the wrist set back here a little bit.
I'm doing this and keeping my arm at a roughly 90 degree relationship to my chest.
I'm not letting it fly out here.
That's going to create a lot of struggles with inconsistency because everything you put into the swing, you got to take back out in the downswing.
So we're just going to keep our arm right nice in front of our body and no more than 90 degree bend.
From here, I can feel that my bicep muscle is kind of touching my upper pec.
I don't want to be disconnected like this.
So once I'm here, all I need to do is rotate.
You can see I'm going to take my right shoulder, pull it back behind my head.
That helps me naturally shift my pressure to my trail leg.
And now I'm loaded up.
I can throw this.
I have some power.
It's very important that you turn, that you don't just pick your arm up and throw like this.
That's weak.
We want some oomph behind this thing.
And so we want to use our whole body, our legs, our trunk, everything to help propel this ball.
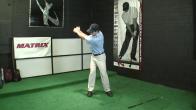
Once we're in this position to where our arm is loaded up, you can see my, now that I've made a backswing, my shoulder, my chest is pointing down the target line.
My bicep and my humerus, my arm should also be pointing down the target line, not way back behind me.
So now I'm in a good position here where I can throw.
The simplest way to get a feeling for what is the transition of the golf swing is to take a step.
And this is natural when you're throwing a ball, you naturally take a step.
In golf, we tend to get really static because we don't get that benefit of that step.
And so our lower body gets kind of lazy and doesn't do anything.
So I'm actually going to have you take a step and I'm going to teach you how to do it correctly.
What you're going to feel is the same sequence like you learned in the axiom where the pressure shift is moving in a figure eight pattern.
It's moving in a specific circle, a clockwise circle for right-handed golfers.
And what that's going to do first, I'm going to step onto my toe.
So for me as a right-handed golfer, I'm turned.
I'm going to take a step onto my toe.
And then as I plant my heel, I want to push it down and straighten that leg.
What happens to my hip?
It gets open.
Straightening your leg, opening your hip, pushing off of that toe to do it quickly as you pivot onto that toe and then snap that foot down is where speed comes from to move your hips quickly.
Most golfers don't move their hips much at all.
So for you to get this feeling of pushing down, you know, pivoting onto your toe, and then you can even rotate your foot to point it out, to get a feeling for your hips rotating quickly.
This will help you move everything faster so that you can throw harder.
Now, of course, in the golf swing, we're not going to add this big pivot movement because the more stuff you put in there, the more moving parts, the more difficult it is to become consistent.
But you can see this move in long drive, guys.
They get way up on this toe and then snap that foot down in order to get those hips moving quick.
So this is going to be a drill that you have to use with some judgment here because you can start adding a lot of speed to your swing, but you may struggle with control.
So a judicious use of power here is what I'm asking.
You don't need to be making this huge move where you're making this crazy step and spinning your hips as fast as you can.
It's fine to do that at first, to get a feel for waking up those hips and feeling how they create speed in the swing and give you power to help propel your arm.
But at first, let's keep it a little bit in check so that you're not going a little bit too crazy with it.
So as you're doing this, you're going to again, preset your arm, rotate back.
And so once you've made a nice turn where your chest is away from the target, your arm is pointing straight down the target line, back away from behind you, step onto your toe, pivot, and you'll see that as you do this, it's okay for your foot to rotate.
And that will help you learn to feel your hip rotation and the speed that that gives you to help propel that arm down and to move your arm faster using your legs.
So let's do this a few times and get a feel for it.
So we're going to preset the arm, rotate back.
You can see that my arm is pointing down the target line.
My chest is pointing straight back at the camera, back behind me.
I'm going to step, pivot, and throw.
So now as I do this, my hips are wide open and I helped propel that arm down through the, through the hitting area to get a good snap and release.
I want to do that several times.
You get a feel for how quickly this onto my toe, pivot, straighten the leg, rotate the hips.
And that gives me the speed to really fling the arm through the hitting area.
Once I have that, the basic feeling of throwing a ball and you, a couple things that you want to be mindful of.
You're not throwing the ball like this.
You're going to have secondary tilt.
Your axis is going to lean back a little bit.
Your right elbow, trail arm elbow is going to come down by your belt as you throw.
It's not this.
It's more of a sidearm throw to get that proper release to get the club down on plane.
Now, as you do it with the golf club, you're going to start to feel real speed in your swing for the first time.
So we're going to elevate my arm a little bit, preset, no more than 90 degree bend.
My upper bicep is touching my upper pec, turn, step, pivot, throw, preset, turn, step onto my toe, pivot and throw.
Same thing.
Now, as you, once you get this, you can, you don't have to preset it every time.
If you're getting into a reasonable spot, you can start to swing the club and you can start to tone down your step and pivot to make it more like your normal swing.
So I'm just taking a little tiny step, but what I'm really trying to feel here is that speed of throwing that throwing motion.
It's still the most efficient way to propel an object that man has figured out.
So this kinematic sequence is so important for you to learn.
And now when we add the lead arm back onto it, we can preset again, rotate back, step and throw.
I've got a lot of speed there.
Now I can start to swing it back.
That throwing motion gives me a ton of speed.
So now, how do we apply this to start hitting balls without spraying it all over the place and losing all of our great checkpoints that we've learned so far?
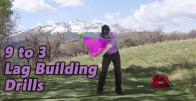
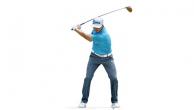
What you're going to do is modify the nine to three from being parallel to the ground with the club shaft to parallel to the ground with the arm.
So now we're going to turn a little bit more and our arm is going to end up parallel to the ground here.
And as we come through on the other side, it's going to do the same thing.
So parallel, parallel, that's your goal.
And that's where you're going to check your checkpoints, all the checkpoints that you've learned in phase one and two, exactly the same.
And we're going to walk you through that.
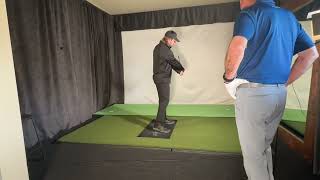
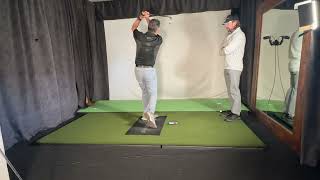
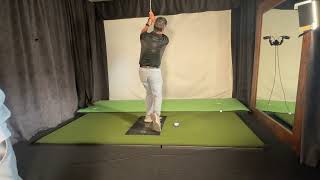
So I'm going to hit a ball here.
I'm not trying to swing hard.
I'm trying to throw, I'm trying to get speed, effortless speed, just like I felt when I was throwing that ball.
And I'm again, only going to swing back to lead arm parallel and try to stop at about lead arm or both arms parallel on the other side.
Let's take my setup here.
Perfect.
I was so proud of it.
I twirled the club instead of holding my check, instead of checking my checkpoints.
That's okay.
We'll do it again.
So one more.
So now I can check my checkpoints.
So is my head still back?
My hips are open.
My pressure's on my lead side.
You'll notice as I started to come around to more of a follow through, it's going to start to pull that trail leg up a little bit.
My head's still back behind the ball.
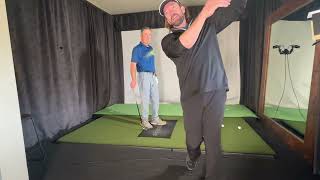
I've got secondary tilt.
My club is released.
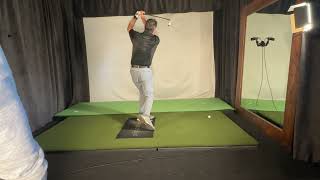
So if I do it from this way, so you can see up the line, you can see I'm still keeping down.
I can let my head swivel.
I'm not picking it up.
I'm staying in my posture.
As you look at the club, my wrist is slightly cupped.
The toe is released.
I'm not holding off the face.
I'm letting the club release.
Everything else is the same.
Lead my pressures here.
Of course, your shoulders are going to start to open a little bit more, but you're trying to keep this shoulder, right shoulder back so that the club can be thrown.
You don't throw a ball like this.
As you throw a ball, your shoulder has got to stay back so that arm can extend and release.
Same is true in the swing.
I'm throwing, and my right shoulder has to stay back.
You can see as I throw, my shoulder stays back.
If you're doing that, you're going to have a full release and a ton of speed all from this throw the ball drill.
That ball, both of those balls that I just hit, even though my arm was only about parallel and parallel, it's not a full swing.
It's a modified nine to three.
The ball still went about 150 yards.
That is your target goal here.
150 yards, which is probably farther than many of you are hitting your seven iron, but you can achieve that now with control when you use your fundamentals of the flat left wrist at impact, the other things that you've learned, the five checkpoints that you learned in phase one, the two that you added in the release in phase two, and now you start adding speed with learning how to pivot and learning how to, to propel your hips, to move them quickly so that your arm can throw.
Now you're going to start to have power.
So 150 yards, seven iron is the goal in phase three.
And the grouping pattern that we want to see is no more than 10 yards on either side.
If you're starting to spray the ball a little bit, your main fundamentals that you learned at impact are breaking down.
The wrist is no longer flat or under control, or you're flipping the release.
or not letting it release at all.
So make sure that you're hitting those same checkpoints.
You'll have to video your swing to make sure that you can check every single little detail if your wrists are breaking down.
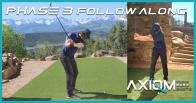
But if you are still hitting the ball nice and straight, start to ingrain this movement, go to the follow along section and start going through the movements in the practice session so that you can nail this movement down.
So then phase four, when we start to refine a full swing, we finish everything off, you're going to have prodigious power and keep that same consistency that you developed in phase one.




















































































Amar
Craig (Certified RST Instructor)
paul
Craig (Certified RST Instructor)
Mike
Craig (Certified RST Instructor)
Mike
Craig (Certified RST Instructor)
Mike
SYRIEAN
Craig (Certified RST Instructor)
SYRIEAN
Sean quinn
Craig (Certified RST Instructor)
Michael
Craig (Certified RST Instructor)
Richard
Craig (Certified RST Instructor)
Michael
Craig (Certified RST Instructor)
Eduardo
Craig (Certified RST Instructor)
Calvin
Craig (Certified RST Instructor)
Calvin
Craig (Certified RST Instructor)
Calvin
Craig (Certified RST Instructor)
Jan
Craig (Certified RST Instructor)
Atle
Craig (Certified RST Instructor)
Atle
Atle
Craig (Certified RST Instructor)
Todd
Craig (Certified RST Instructor)
Tausif
Craig (Certified RST Instructor)
Tausif
Craig (Certified RST Instructor)
Tausif
Andrew
Craig (Certified RST Instructor)
Dave
Craig (Certified RST Instructor)
Edward
Craig (Certified RST Instructor)
Edward
Craig (Certified RST Instructor)
Adam
Craig (Certified RST Instructor)
Beno
Craig (Certified RST Instructor)
Barry
Craig (Certified RST Instructor)
Amaury
Craig (Certified RST Instructor)
Amaury
Craig (Certified RST Instructor)
JIM
Craig (Certified RST Instructor)
JIM
Asle
Craig (Certified RST Instructor)
Roger
Craig (Certified RST Instructor)
Roger
Michael
Craig (Certified RST Instructor)
Tony
Craig (Certified RST Instructor)
Tony
Tony
Craig (Certified RST Instructor)
Tony
Craig (Certified RST Instructor)
Tony
Steven
Craig (Certified RST Instructor)
Asle
Craig (Certified RST Instructor)
Asle
Craig (Certified RST Instructor)
Erik Joakim
Craig (Certified RST Instructor)
Carver
Chuck
Tom
Craig (Certified RST Instructor)
Carver
Chuck
Craig (Certified RST Instructor)
Ross
Craig (Certified RST Instructor)
Tom
Craig (Certified RST Instructor)
Steven
Chuck
Dave
Craig (Certified RST Instructor)
Burton
Chuck
Tom
Craig (Certified RST Instructor)
Tom
Craig (Certified RST Instructor)
Tom
Chuck