Bootcamp 7, Sept 19 2020, Session 2
Session 2 of 6
All right.
Welcome back, everyone.
Welcome back.
Happy Saturday.
Hope everybody has had a wonderful week.
I don't know if anybody's got a chance to see what's going on with the US Open yesterday, but I'll tell you right now, USGA is going to make that golf course.
Those boys are going to have to get some this weekend.
You can see it coming, though.
Yesterday when they started chaining off, the golf course started to firm up a little bit, started to get a little bit faster.
Have you watched any of it?
I haven't seen any of it yet.
I would say.
If we see anybody at one under or better, they did a really good job.
They golfers would be really difficult.
So those of you that are already in the room checking in, say hi.
Hopefully you guys had a wonderful week.
Harry checking in.
Robbo checking in from New Jersey.
Nice to see you guys.
William checking in from Naples.
Lee checking in.
Craig from Madison.
You got somebody with your name.
Terry checking in.
That's a great name.
Jason checking in from SoCal.
What's going on, Jason?
How you doing?
Robert from Atlanta, my home.
That's Ryland.
Ryan checking in from Denver.
We've got Netherlands checking in.
Nice.
Arnie, welcome.
Bonnie checking in from SoCal.
Harry's from Aiken.
Arthur checking in from D.
C.
I used to play in a tournament.
What is it?
That's the oldest golf course there, Harry.
I used to play in the Southern Cross there in high school.
Mick checking in from Minneapolis.
I actually used to work with a guy named Mick Finn.
Paul Meadow, yeah.
Popular name, popular name.
Joseph checking in from Seattle.
Welcome.
Welcome, Kevin.
So for those of you that have had a chance to watch it in the U.
S.
Open, why don't you let us know what your predictions are for this weekend?
I know we've got Patrick Reed up there at four under.
We've got Bryce DeChambeau at three under.
And then you've got a whole slew of people chasing in behind him.
I haven't seen any, but I saw some quotes from Bryson yesterday.
He's complaining about the guarantee.
He's just like, these are the worst.
Yeah.
So his interview on Tuesday when they were talking to him about what his plan, what his objective was for the week, is that he was out there testing a lot of the holes where he was still trying to hit it as far as he could on these holes because he realized that.
even with getting it as far down there, if he was in the rough, that he could still hack it out of the rough and get it to the front end of the green.
And he felt like that was an advantage still to him.
And so he was going to stay with that.
He did say that he would eventually maybe put on the brakes on certain holes if it was, you know, wind was playing a factor.
But it's funny to just watch him go at it like Kamikaze.
He is literally swinging at it every part of his body.
It's kind of like what you would do on a video game, like power up, power up on every single swing.
Yeah, Xander for the win.
I like it.
Kevin says, up in the air, of course it's so damn hard, it'll be fun to watch.
I like when USGA can manipulate things like this, where they can firm up the golf course, they can make these guys go out there and look like brilliant beings, but people don't understand.
Even going out there and not making a lot of birdies, these guys are playing some incredible golf.
I mean, they're playing incredible golf.
So, it's gonna be interesting Sunday, for sure.
I'm interested to tune in today and watch a little bit.
David from Sugar Land.
Welcome, welcome.
So first few minutes, We're going to let everybody get settled in.
Because I'm sure there are some people that didn't follow instructions on Tuesday and forgot how to get into the room today.
So we'll let them get settled in.
Now is a good time.
If you guys had any questions at all from the stuff that we talked about on Tuesday, please feel free to post those up.
We'll answer some questions here for a few minutes.
If you guys just want to talk golf or you want to talk about Craig's.
Really nice, free flowing hair that he's got.
Right now.
We can talk about that stuff, but, um, in just about three to five minutes we'll go ahead and get underway.
What we're going to do today, too.
We like to do this is we like to give a little recap, and we like to actually talk about some of the common faults that we saw throughout the week.
With, uh, within the swingery process, we'd like to address that because, you know, it gives the whole group kind of an idea as to where people are at.
I will say this before we get into that.
This group is absolutely fantastic and out of the seven boot camps that we've got, or this is number seven.
This is the best I've seen, right?
Definitely concur with Chris on that one.
From what we did on Tuesday to what I've seen on the reviews this week.
I mean, the complaint department for me is very small, which is very rare because anybody out there knows I get very nitpicky.
I was very proud of this group so far.
Okay, so we've got a couple questions to come in, so let's go ahead and answer those questions.
Does the weight stay over the ankles for the backswing the entire time.
Yes, that's actually something we're going to be addressing today.
We're going to talk a little bit about your go zone and your no-go zone, but yes, you want your weight to remain in true balance during the entire bell swim.
You're going to feel some pressure to the forward parts of the foot and to the really, really severe trail side of the foot, but a bulk of the pressure needs to be centered right underneath those ankle joints.
You're going to notice that weight shift kind of works like a figure eight.
We'll talk a little bit about that further today when we start working on your transition.
Definitely some key points, so great question there.
Henry says ball placement.
What's the way during setup to get the correct ball placement?
So ball position under every single golf that we have in our bag, except for our driver, is going to be off of your left ear.
And in fact, you can actually play a driver off your left ear if you'd like to.
Typically, we'll say off your left ear or the logo on your chest.
Every single glove, no matter what you've heard or read on Golf Digest, your ball position is always going to be off your left ear.
Now, why is that?
Well, because the position of your beach shoulder is the determining factor as to where the golf is going to bottom out.
This is your primary pivot point in the golf swing.
This is the determining factor.
If you want a very good, consistent golf swing that's going to be in the same spot every single day, then your bottom of your arc is going to be in the same spot every single day.
Now, when you get to specialty shots, when you're starting to work on maybe fighting the golf ball a different way, or maybe you're working on knocking the golf ball down, or maybe you're working on hitting some track draws or track cuts, you can start manipulating ball position around just a little bit.
But think about that as being gradual, right?
You're getting your PhD list.
So ball position should always be off that left ear.
So good question.
Uh, could you go through once more how we get a video to you for reviews?
So, on the website, if you go to the top tab, once you're logged in, it says Swing Reviews.
Right on there.
On the top tab.
Click on that and then just follow that big green button in the middle of it that says, Get Swing Review.
It'll have you upload your videos, just like if you were an attachment email, and then you just go ahead and submit those to us.
You can even type some notes out to us about what it is you're doing, what you're working on.
You just say hi to us, or you can yell at us if you'd like to, whatever you prefer to do.
But it's a pretty seamless process.
If you get stuck on it, then go to the help section on the website because we've been doing this for a long time.
We've heard every question under the sun.
We've run into every single technical issue that could be presented to us, and we've figured out ways to be able to communicate how to get you through.
So definitely take a look at the help section there.
All right, so would you fellas address the not rounding of the shoulders?
For sure.
Okay, so the shoulders in the golf swing need to be in a neutral position how to dress.
Okay, now we're going to talk a little bit about the one exception to the rule first, and then we'll get this.
If you're really broad across your shoulders and your chest, when you hinge to get over the golf ball, it's going to be harder for you to keep your shoulders fully back into neutral.
and get your hands and arms on the golf ball.
You're going to feel like you have T-Rex arms.
So if you're a little bit wider across the chest or broader across the shoulders, you can allow for a little bit of roundness there.
Now, for the rest of you, which is 95% of you, we want your shoulders to remain neutral.
Like if you were standing here having a conversation with us, the best way to do this is just shrug your shoulders up to your ears and then depress them, and then just hold them in a nice neutral spot here.
Now, when you hinge forward from your hips, okay, what you're doing here, is you've got to remember that the shoulders are going to want to try to round forward because gravity is trying to pull them down in this way.
And so your job is just to hold them in a good neutral position as you're getting yourself over the ball.
Now, the reasons for this, there's multiple reasons.
Now, from an instructional standpoint, what Craig and I are going to see if you get really rounded, then we know that you're going to move more so from your hands and your arms to get your golf swing started.
We know.
We can see it right away.
That's a very, very common mistake that we see with golfers is that they start putting themselves in a position where they can.
It's very easy to move them.
From a biomechanics standpoint, you have to understand that the position of your scapula is critical for being able to transfer energy from your trunk and your core.
There's a big study done by some of the people that sit on our medical panel on this biomechanics, Jeff Broker out of Arizona, who did a study that said that the position of the scapula is critical for being able to transfer this energy.
Think about a boxer.
A boxer doesn't hold its shoulder up by its ear for a punch, right?
A boxer holds its shoulder down and in, and so you'll see them use their legs, and then they're driving.
That's how they're unleashing, and they're using all of the kinetic chain and sequence.
And so, again, so you have it from an instructional standpoint, and you have it from a biomechanics standpoint.
On top of that, when you're in a more neutral position, it's much easier for you to be able to turn your body.
If you get really rounded, it's very, very difficult for you to be able to complete a turn.
And so there's a good video on the website that I don't think is mentioned in here.
The golf backswing, actually it's in the previous slides where Chuck's sitting on top of a menace.
Golf backswing chair drill.
Yeah, the golf backswing chair drill.
It's a great video for you to be able to get your shoulders in a correct position.
And feel the proper rotation with your core.
Right, exactly.
So hopefully that long -winded answer did the trick for you.
Sometimes that can be long-winded.
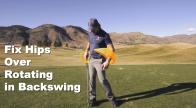
All right, so I struggle with how much backswing we learned is rotating torso and how much of it is hip going back.
What is the proper ratio?
Good question, Kevin.
We want 35 to 45 degrees of hip rotation going back, and we want at least 90 of the shoulders.
You're going to basically have to figure that ratio out based off of how much mobility you have in your upper half.
The more separation you can create between the two, the better off.
Stretch there helps get things moving back over to the inside sooner, but there is a little bit of a window as far as the hips are turning.
And I think that's one of the topics you want to touch base on today.
That kind of saw a little bit more than I did over the last few days when we're doing reviews, so we'll definitely touch base on that.
Get that 100 ironed out.
So how do we determine how far we should be from the ball at our setup?
Jim, you're going to be in a different amount of space depending on the length of the club.
But your setup is virtually never going to change.
The only thing that changes in your setup position is your spine angle.
very, very solidly from one cup to the next.
And it's almost immeasurable because if you have, what do you have in your hands?
A seven iron?
Eight iron?
So if he has an eight iron in his hands, he goes ahead and has his hands and arms hanging freely from his shoulder line that's neutral.
Go ahead and put both hands on it.
So his hands and arms are hanging freely from his shoulders.
If I put a three iron in his hands, you're going to see that his spine would have to move just a little bit vertically to still have a cup soldered behind the golf ball.
So that's the only change.
The the short answer to this whole situation is that we want you to have your hands and your arms hanging down from your shoulder line.
And that's the space that you'll establish, um, between you and the golf ball.
Make sense.
So I'm six, three.
Does that mean I'll bend more at the waist?
Sure, so it's also going to be dependent on how the how long your torso is.
But you want to make sure that.
When you get yourself over the golf ball, there's a couple things that you're looking for.
Number one, you gotta be able to see the golf ball right, and number two.
When you set up.
You've got to hinge enough to where, when your hands and arms are hanging freely, that you've got the club sold in behind the golf ball as well.
Okay, that's another good way to be able to think about it, right?
And and the thing is that you just want to shy away from, because you know what we mentioned in session number one.
When you are a little bit taller, I mean, depending on light, length, force, the length, you still want to try to shy away from getting too much knee bend.
Like this, because you're not going to be able to move efficiently.
So I'd always try to play around a little bit more with the hinge before you start adding a ton of flexion.
Because that's just going to require a lot more manipulations.
Some really good questions coming in.
So Arthur says, how does the necktie drill work for these back swing concepts?
So the necktie drill is a very, very good visual and a simple little drill that you can set up to help you maintain access to them.
So when you set up at a dress and you're turning your body over to your right side, so you're going to see Craig has a little bit of axis tilt, but if you notice here, as he gets up finishing his backswing, he's got a little bit of tilt here.
Now, if he had a necktie on, what you would notice is the necktie would be hanging off of him freely.
It wouldn't be drooped across his chest if he was in reverse pivot territory.
Okay, so that's what the necktie is good for.
It's a good reference for people that have a hard time understanding what your torso should feel like when you move off the ball better.
Typically speaking, if you set up with a little bit of tilt, And you move in the order that Craig and I outlined for you over on Tuesday.
Where you push it in the right ankle, make sure you maintain that right knee flex, and then you turn your body by pulling the right shoulder back.
If you keep your hips stable, you don't have a whole lot of over rotation to them.
Then you're going to see that you don't even need the next hydro unless you turn radically steep or something of that nature.
But those are very, very few and far between.
Okay, so good questions, all right?
So I think we've got everybody seated and I think we're going to go ahead and get started now.
So because I know that we have the U .
S.
open on today, I know that probably you guys want to Go Watch that stuff and have us rambling at you for two.
two and a half hours.
But we've got a big day for you.
Today is the hardest move in the golf swing course, and that's transition.
This is on a scale from 1 to 10.
It's like a 15 because the hips are going to be doing a lot here.
The hips are going to be shifting.
They're going to be unwinding.
They're going to be dropping.
And it's imperative that you guys have a very simple list of checkpoints to be able to make this movement happen.
On top of what we're going to be teaching you with the legs is that there's going to be some stuff that's happening with your upper body.
And this is one of the things that people struggle with from boot camp to boot camp because you're afraid to move.
And that's not your fault, okay?
Well, it kind of is, but it's mostly not your fault.
The reason for that is because we've always been taught to stay really, really centered.
We're afraid to move.
But in fact, lateral movement does take place in the golf swing.
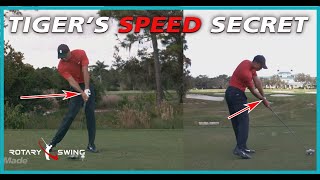
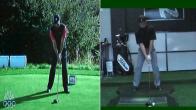
You'll see that if we had still images of Chuck or even when Tiger was in his heyday and he was moving, nobody would ever say Tiger.
was a slider in his belt swing by any means.
They always said he was very rotational.
But we have still images of Tiger working from the top of his back swing to an impact position.
And you can see that he shifts almost the entire width of his pelvis.
I think about that.
That's a very, very big bone structure right here that you're moving.
So it's a lot of movement.
And so that's why people tend to struggle with this because it might feel pretty foreign to you.
But when we get this, when we get all of a sudden done today, you're going to feel like you know how to unload your belt swing properly and get yourself set up for post -up, which is the fun part.
Right, and that's the thing that's really weird, because that movement that Chris is talking about.
You're gonna shift roughly six to eight inches right there, but it's all, I mean.
And when?
Until you start growing lines and stuff, it's almost kind of looks like you're not moving at all, but to you, it feels massive.
You may feel like you're moving all over the place and you look at it on camera, it's like, Oh, I'm only going from here to here.
It's crazy how your feel kind of burns you off with weight shift.
That when you barely move, you're like, oh, God, I've moved way too much.
You're still not even moving enough.
Yeah, it's all part of your vestibular process and part of proprioception as well.
So it's fascinating that the brain will process the way if your eyes move an inch to an inch and a half.
It feels like to me and Greg, and we've done this for a long time, that you're moving 35 or 40 inches off the golf ball.
It's a long, it feels like a lot of movement.
But you can't be afraid to move.
It's just like any other hitting or throwing sport.
We're trying to make your body move the most efficient way possible.
And we're trying to make it into the safest way possible as well.
We're trying to put you in the positions that are going to help you protect and preserve your critical joints like your hip, your knee, your back.
And so that's why we've got to get you to move now from this nice loaded up trail side that you have all the way back over onto your lead side.
Okay, so before we get into that, I'm going to answer these two questions, and then we're going to go ahead and talk about some of the faults that we saw throughout the week, and then we're going to get into the movements.
And actually, we'll do a little recap.
Maybe we'll do a little interactive workout with people.
I think that's a good idea.
Yeah, get them awake, get them alive, whatever.
Yeah, so the last two questions here.
So are arms hanging mutual, hands under the chin?
So the end of your right hand, if you were to drop a line straight down underneath your chin, the end of the right hand is typically going to be underneath that.
Okay, so that's a good kind of reference point or line that you can use.
I'm going to just hang this down here for you.
So if I draw the line down underneath his chin, you can see that the end of the right hand is pretty close.
That's what you're looking for, okay?
So very good question there.
Should the upper arms be compressed against the side of the chest?
So no, you don't want the upper arms pressed against the side of the chest.
You want your shoulders to be in neutral, and you want your arms to hang freely off of your shoulders.
If you feel like they're pressed against your chest, You're going to make it very hard for you to be able to function the hands and arms properly.
Some of you might feel a little bit of connection up here, at the very tippy top of your um, where your bicep and your chest knee just a little bit there.
But you don't want to have things pushed together down here because that's going to help you.
Well, that's not going to help you with width by any means, okay?
And that's one of the things you have to remember is that the golf swing is just not rotation and leverage, there's also width.
And width.
Is going to help us be able to move the golf program at really high rates of speed and almost out of free sense, right?
So that's that's a good thing for us, okay?
So, without further ado, if you guys can just kind of hang on to your questions till the end, unless something really pressing comes up through the session that you guys need to ask.
Because we do, I do talk a hundred dollars an hour, and sometimes people are like, What the heck did you just say I get it all right?
So again, gameplay is we're going to do a little bit of a fault fix, which people tend to like.
So we're going to talk a little about what we saw through the swimming process this week.
And then we are going to do an interactive workout.
So we're just going to do in five or ten breaths, we're doing our setup and our, uh, our body turns.
And then we're going to get right into the nuts and bolts today.
And when we get into this, we want to make sure everybody has a very clear head as to what we're doing before you guys get out of here.
So, as always, Craig and I will stick around at the end, answer some questions.
Um, and hopefully by the end of today's session, into next Tuesday, you guys will be able to start working through your backswing and transition with some pretty good EDS here.
All right, so excited to bring you the hardest movement of all swing.
Yeah, because this is, I mean, when people or players really struggle, this is where it happens.
Some people can master the backswing, some people can master getting over here.
It's how do you blend getting to the ball from the top of the backswing?
That's the glue for everything.
If you really get a good transition.
There's so many things that are on autopilot from there.
It just makes it really fun.
Right, exactly.
Okay, so the fault that I saw this week is not necessarily what I would consider a common one, but I did see it a couple times, so I do want to address it.
And this kind of goes back in hand with the idea of maintaining true balance in it also.
And I don't think we touched base with true balance very much in the first session, so we will now.
So for those of you that don't understand anatomic true balance, if you were to stand up wherever you're listening to us ramble at you.
And you were to go ahead and start leaning over your toes and then rocking over your heels so you can see Craig here leaning over his toes, walking over his heels.
Okay, and if you were to close your eyes and then you were to come to rest where you felt like you were most balanced?
You could sit there all day long and have a conversation with me.
What you're going to feel is a bulk of your weight is going to be right underneath your ankle joints.
Now, if I were to ask Craig a question here, where do you feel weight in your feet?
well, Craig, where do you feel weight in your feet?
But now, one of the things that he's probably not explaining to us, because it's at a subconscious level, is that he's still going to feel his foot sprint out to the ground.
You're going to feel a little bit of pressure up in the ball, your foot, a little bit pressure up in the toe.
You're going to feel the whole foot, but you're going to feel the bulk of your mass underneath that ankle joint.
And so it's really critical that you understand that if the weight starts to move to the forward part of the foot, let's just say up to the ball of the foot or up to the toe.
When you're trying to maintain knee flex with your weight in this position, okay, because you, you did hear us talk about trying to maintain knee flex there.
If you try to put your weight to the forward part of the foot and you do this, what you're now changing is your central balancing pivot joint down to your knee.
Again, we talked a little bit about that on Tuesday, the importance of understanding that the knee is not designed to rotate.
If you do that for long enough, you're going to blow your knee up, and you're going to be in one of those things called a hug around.
For those of you that don't know what a hug around is, that's one of those carts that you can go to the grocery store, and you can get a key, and you can ride it in that cart going up and down your aisles in your cankits.
We don't want you to be in a hug around.
So remember, don't let your weight go to the forward part of the foot as your starting load.
It's very easy to do this.
Now, one of the main mistakes that we'll see students do is that they sit with their weight too far back in their heels, right?
And when you sit with your weight too far back in your heels, you have to remember your brain is really good about a couple things in this life.
Number one, it doesn't want you to hurt yourself.
Number two, it doesn't want you to fall over.
And so Craig, if you set up with your weight all the way back to your heels, okay, when you're sitting up really, really strong to the trail side of the foot here, like you can see his toes up off the ground.
Now when he starts moving, he starts turning his body over his right side.
Okay, typically, what's going to happen is is the brain doesn't want you to fall over in this direction.
So it's going to start moving your weight to the forward part of the foot for you to keep you upright.
So don't set up because you're concerned about getting to the forward part of the foot.
Or now you have all your weight to your heels.
You want to make sure that you're anatomically in your true balance point right from the get-go.
Okay, this is where you're most stable.
This is where you're going to be able to maintain a good solid foundation, our good solid, like we call it, anchor to the ground base as you move through the galswing.
Okay, so that was.
The one part that I wanted to just comment on was that I did see some people move to the forward part of their feet as they were starting to load their galswing up.
And that's dangerous, okay, that makes it harder for you to be able to maintain flex.
I know Craig saw a pretty serious issue that he wants to address.
So, yeah, I saw.
The one thing that kind of stuck out to me is.
We have the laser beam drills on the side and we talk about maintaining flexion and things of that nature.
But our goal right here is to try to get a full shoulder rotation.
Now.
What I want to show you?
If I were to stand right here and not allow my hips to turn it off, this is about as far as I can make a shoulder rotation.
So how am I going to finish this motion?
To get a full back swing, I'm just going to allow my hip to rotate a little bit.
So I don't want everybody to kind of get so glued that they're like, all right.
I'm going to get this massive separation, I'm going to get this big X factor, because that's what Jim McClain told me to do.
I'm going to get a lot of power when I get up here, I can't finish my rotation without allowing for a little bit of hip.
If you lose a little bit of right knee flexion, no worries.
But you need to allow for the hip to move to finish your shoulder rotation.
Don't be kind of complacent and be like, okay, well, I got seven degrees of shoulder rotation.
I'll just call it a day there.
No, go ahead and get the full shoulder rotation.
by allowing your hip.
I saw some people just getting a little bit too glued, a little bit too tight, and hip rotation isn't a bad thing.
Yeah, huge point there, and that's where, when we were helping Chuck write the program, this is where we spent a lot of time talking about, because we saw a bulk of the issues with students, as they were saying in some interviews, where their hips were over-rotated, and then it almost became taboo around the website to have your hips rotate, but in fact, we still want them to rotate, and so that's why.
You got to kind of understand there's a balance point between this.
And so what Craig is telling you here is is you can allow your right hip to free up a little bit and get yourself to finish off your turn.
Don't be so restricted.
For those of you that want to put an alignment stick down and try to figure out you know how much your hips are rotating.
Then you can put an alignment stick down on your foot, on your foot line here, okay?
And then as you go ahead and you turn your body, you can put another alignment stick or belt.
Flip on here on your hip line.
And you can just look down at the line to see if you're close to being right around a 45 degree angle, If you're anything more than that, then you would want to restrict it a little bit.
If you're noticing that you're not at 45 degrees, you're a little bit tight there, and you haven't finished off a full turn, then allow it to rotate back a little bit further.
It'll feel nice.
It'll feel like you're starting to load into that right side.
It'll feel a little bit more freed up.
We don't want you to feel so restricted to the point where you can't move.
You need to have some freedom to move.
It's all going to be dependent on what you have to offer your muscle.
Those are the two things.
When we get to Tuesday, you're going to notice that.
This section of the event or this section of the of.
The webinar is probably going to be a little bit longer because we want to discuss a lot of the common faults we saw.
So my hat's off to you guys, I'm going to go ahead, I'll do it right now, I'll clap for you guys.
Because this was seven boot camp number seven.
And we typically see a, uh, a crap ton of faults, okay, we're seeing an array of.
I was trying to choose my words wisely because we are a camera, right?
So we see a very, very large amount of faults.
And we'll spend 20 minutes or so going through this stuff.
So, um, my hat's off to you guys, you guys did a remarkable job, so hopefully you guys were able to use the stuff that we gave you as far as information is concerned for those of you that if we didn't get to see.
And you were able to get this, this movement down and you were able to start doing what it was like to load your backswing up properly.
So good stuff, all right, so let's go interactive workout.
So those of you guys at home that want to stand up and get warmed up with us, by all means, please do so.
That's what boot camp's all about.
So, two inches outside of neutral joint alignment, don't be afraid to get two inches outside.
So a lot of people that were maybe an inch inch and a half or so get you get your little step out here.
Okay, you're going to be, um, into a ballpark where you're going to have the ability to be able to be balanced and shift your weight a little bit here.
Okay, so you're going to be two inches outside of neutral, you're going to go ahead and have your arms across your shoulders.
Okay, you're going to hinge forward from your hips, so your butt's going to go back and your chest is going to go over the mouth ball.
You're keeping your legs locked out straight first, okay, Once you get yourself over the ball, where you can see it, you feel your weight kind of shift all the way back to your extreme heel, then you just soften the knees.
And when you soften your knees, you're going to feel the weight go right back underneath that ankle joint, and you're going to feel very, very stable to the ground, okay?
Now, what you want to make sure you have here is a little bit of access to it, okay?
So rather than taking the arms off the chest, you can just bump your hip towards the target just a little, tiny bit.
It's a nudge, a teeny, tiny nudge, okay, where your spine is just inside your lead knee.
So now we're all set up.
We're ready to rock and roll.
First move I'm talking to as a right-handed golfer today, so I'm not going to keep fumbling around.
So we're going to take the right ankle, we're going to push it in the ground, okay, and then we're going to take the right shoulder and pull back behind the head.
Okay, now your job is to make sure that you feel that weight stay underneath the ankle joint.
You're trying your best to be able to maintain some flex in that right knee, you're pulling that right shoulder as far back behind your head as you possibly can.
If you're looking at it from a face-on perspective in the mirror, you're trying to see this shoulder on this side of your head.
Got it, so that's one rep.
All right, so let's go ahead.
You're going to start hearing my keywords like stance, width, hinge, if you get over it.
You're going to see that.
I'm going to skip some of these things now, and you're going to see that I'm talking to you a little bit faster, okay?
So stance width two inches outside of neutral, we're hinged, getting over the golf ball, got a little bit of axis tilt.
We're going to go ahead and push the right ankle on the ground, pull the right shoulder back.
Good, now, make sure you reset yourself, give yourself, you know, the chance to be able to get your setup 100 perfect.
A lot of times when people do the rep straining that Craig talked about on Tuesday, they started doing this.
And this is not feeding your brain anything, this is just making.
This is actually, um, decreasing your calorie count for the day.
So congratulations on that.
Okay, you need to feed your brain, right?
Your brain wants to know what it's doing and how it's doing it correctly.
So the people that will get the best success for this stuff will not be the ones that tell us that they're mentally fried at the end of the session, I'm sorry, will not be the ones that are physically proud, but the ones that are mentally fried again.
Sorry, I messed that one up you, you should be mentally fried when you're working on something new.
You're putting your brain into this deep state, learning stuff here, okay?
So push the right ankle on the ground, hold the right shoulder back.
Perfect.
Okay, do one more face on.
We'll switch down the line.
Perfect.
All right, so now let's switch down the line.
So I'm going to go through these key points with you.
So we're going to make sure that we're two inches outside of neutral.
We're going to keep our legs locked out straight.
We're going to hinge forward so the weight goes to the heels, and then you're going to soften the knees just a little bit.
You want the back of the knee to be directly over the center of the ankle.
Not too much knee flex where you're sitting way down on your knees.
You've got your butt tucked underneath you.
That's going to make it very hard for you to move dynamically.
Very common mistake that we see from the bulk of the people on the website is they just set up with too much knee flex.
It makes it hard for you to move.
Okay, so you want the back of the knee over the center of the ankle.
It's way down underneath your ankle joints.
All right, now what we're going to do is we're going to take that right ankle.
We're going to push it in the ground.
Pull that right shoulder back behind your head.
You can see that Craig's doing his best to be able to maintain as much flex as he can.
It might straighten just a little bit, perfectly fine.
That's allowing the hip to have a little bit of mobility in it.
It's freeing it up.
You can see that he's got good separation between his hip line and his shoulder line.
Now, one of the things I also want you to take note of is that his shoulder line is perpendicular to his spine as it was at a dress, okay?
So the right shoulder is going to move up, and the left shoulder moves down in relation to his spine.
Okay, so go ahead.
Push the right ankle on the ground.
Take that right shoulder, pull it up behind the head.
You can see here, shoulder line is perpendicular to his spine.
Okay, push that right ankle on the ground.
pull that right shoulder up, left shoulder down.
okay, good, right ankle on the ground, right shoulder up, left shoulder down.
Perfect.
Let's do one more perfect.
Okay, so piece of cake, right?
Yeah, are you sweating?
Yeah, a little bit, all right.
So Kobe got me a little bit out of fitness.
Oh man, I don't want to talk about it right now.
So we'll play that one for a rainy day, all right.
So now we've got you guys warmed up, we're going to start talking about the move back over to your lead side, so this is where you guys can have a seat.
You're going to listen to us talk for quite a few minutes here and then we are going to demonstrate.
As we go through these movements, we're going to talk about some of the faults that we're going to see, uh, throughout this week.
And then we're going to really get you guys back up out of your chairs and start trying to refine these movements with you.
Okay, now, if you don't have this, um, this PDF that we're pointing out up here, then make sure you let us know in the chat at the end of the session.
We'll make sure that you have this when you're done.
Okay, really important that you have this available to you because this has your reference videos.
This has some images you're going to be able to match yourself up with these images.
Or you can go back and re-watch the video that you're watching here today.
Um, because you'll have access to that, so, all right, so the first important checkpoint, okay, that we have listed up here, and this is the most important, is that your shoulders are going to remain closed, or as closed as you possibly can.
And they're going to get turned by the hips in the first move in transition, and actually, they're going to be turned by your legs the entire way through.
Your golf swing, okay, that's what we want you to understand is that your shoulders are going to be turned by your hips.
Okay, now we're going to demonstrate how to do all this stuff properly.
Now.
Your job at your golf swing is to feel like your upper body stays as wound as you possibly can.
You're going to hear us talk about keeping your back to the target, you're going to hear us talk about keeping your left shoulder low and your right shoulder up.
But this is one of the most important parts of your transition move.
It's not just necessarily what we're doing with our legs, but it's what you won't be doing with your body.
We don't want your upper body to unwind too quickly.
Because what you're going to be doing is is, you're going to start shifting your swing plane, you're going to start moving your hands and your arms too far out front of your body.
You're going to start throwing the club out away from you, and you're going to make it impossible for you to be able to maintain lag or preserve lag down in the hitting area, which is your most critical angle for speed.
And so it is imperative that when you do this, that you focus on keeping your upper body as loud as you possibly can.
That's why we listed as number one now, Checkpoint number two.
How are we going to get there?
Very, very common term that you're going to hear us use on the website is squat to square.
This squat move can be very much abused in the grand scheme of things.
We want to think about your squat move as being a subtle squat.
You're not trying to sit way down to where your ass is touching the ground.
You're just trying to increase your knee flex just a little bit.
When you make this sort of squat move, again, you're going to feel a little increase in knee flex, but you're also going to focus on your butt doing what?
Well, you're going to focus on feeling like it's going back a little bit, right?
You don't want to squat and have your butt tuck underneath you, you want to squat and feel like your butt goes back just a little tiny bit.
And what's that going to do for us?
Well, that's going to help you with that line you hear us talk about on the website so much, it's tush line.
Okay?
So when you make this squat move, what we're going to be looking for is perfectly dynamic move.
I don't know if that's saying, right, perfect dynamic movement.
From the hips, okay, remember what I talked about on Tuesdays that the hips are not doing one or the other.
They're not just shifting, they're not just unwinding.
So you're going to look for a balance between the two.
We're going to give you those specific checkpoints here in a second.
How much weight do we want to have underneath our lead ankle?
Well, we're going to get you upwards of almost 60% of your weight of your total body mass underneath that left ankle when you complete the move, right?
So you're going to have your hips and knees come back to almost a virtually square position.
You're going to have a bulk of your weight moving underneath that lead ankle, and you're going to make sure that your upper body is closed as much as you possibly can.
Number three.
Head remains back in behind the golf ball.
You're going to have the appearance when you make this first move over to the inside.
That your head is going to come slightly in front of where it was at your address position.
Now, let's talk about that for a second.
So if Craig were to go to his address position now, and he turns his body over his right leg, what do you notice about his head and his chest?
Well, you can see that it's moved off the ball.
When he makes his move in transition, this has to come along with it.
If it doesn't, you've now hung back.
and this is the death move that Craig and I sit at our computers all day long trying to fix people.
You need to allow your upper body to move.
This is going back to what I was telling you at the start of today's session.
Is going to be the most uncomfortable move that you have in your head.
Because a lot of times, people are afraid to do this because they're like, well, Chris, that feels like a slide.
That feels like a slide.
But this is getting you unloaded.
Remember, your legs bear a lot of mass and so does your upper body.
If you just take your hips and you shift them left and you leave your upper body back, you're leaving a lot of weight over on that right side of the body.
So you're going to see on camera or in the mirror that your head is going to come back into its original position.
Or maybe even slightly in front of where it goes.
Don't worry if you see it come slightly in front.
We'll be able to combat that off with the post-it move and being able to add some secondary access to hold the head back in position.
And I'll speak for myself, But I'd rather see you guys error on the side of getting too far over to your left side.
When you first start this, because it's far easier for us to tone back.
Than it is for us to be able to slowly add more and more in there, so keep that in mind.
So if you're going to be using the swing review process, don't be afraid to err on the side of getting over to there.
Okay, we're going to give you some key words and some key thoughts to be able to get you over there just a moment here, okay?
So now, when you make this, move over to your lead side.
A good way to kind of think about where your shoulders are supposed to be is you're going to be thinking about your shoulders.
If you're looking at it from a downline perspective, you can see that when he finishes off his move here, You can see that the logo on his chest is still pointing back to you at home.
Now, if he allowed his shoulders to unwind too quickly, you can see that you wouldn't be able to see any part of his logo.
So you're trying from a down the line perspective to keep this logo pointed back to the camera or to your mirror.
So that's a good quick little checkpoint.
You're going to see that up here in the actual visuals that we give you.
Okay, so now let's start demonstrating how we want you to move.
Is there anything you need to add there?
No, I think that's pretty much covered.
I mean, the main thing that I usually see is with the head.
I know we have the sway drill, I know we have tons of drills on the sway, we even talked about that in the first session.
For you to shift weight efficiently, your head's going to have to move a little bit.
And if you go and look at Tour pros, the best guys, you're never going to see their head just stay perfectly still, it's okay for it to have a little bit of room to move.
Okay, perfect.
So what we're going to do is.
We're going to teach you how to make the squat move look perfect from a face-on perspective.
And then we're going to teach you how to make the squat move look perfect from a downline perspective.
Okay, so we're going to first load over to our right ankle, so we're going to push right ankle on the ground, we're going to turn our body now when we squat to square.
The focus point here is to allow the hips to start to externally rotate, so this lead knee is going to begin to externally rotate.
And for those of you anatomic buffs at hallmark or anatomy buffs, and those of those of you that are doctors.
This actual movement is called internal femur rotation.
We call it external leg rotation to make it simpler for people to understand at home.
So you're going to see that this left hip and this left leg begin to externally rotate.
Now, under no circumstance does this knee go outside of neutral joint alignment.
This is a very, very critical piece for you to understand.
Now, when we start this external rotation, what you're also going to feel is a little tiny bit of an increase in your knee flex.
You're going to start feeling like you're sitting down over onto your left ankle.
The main goal here when this transition is complete, aside from what your shoulder line is doing, is to feel about 60%, and some of you will probably feel even a little bit more than that, 60% of your total body mass underneath your left ankle.
You just went upwards of 85 to 90 over underneath your right ankle, all the way to about 60 % of your weight underneath your lead ankle.
It's happening very, very quickly, so just keep that in mind.
What you're going to be doing to facilitate this move is you're taking your lead leg.
You're beginning to externally rotate and you're beginning to sit down a little bit, and you're going to feel like your left butt kind of sits back in a chair.
Okay, that's a good way for you to kind of think about the movement, so it's extra rotation and sit down onto that left ankle.
Okay, so think about it.
Pretty simple, right?
All you got to do is just take that left leg externally, rotate it and sit down, that's it.
That's your transition and everything that's happening in.
The upper body should be following the water, it should be a back seat passenger.
Now, for those of you that notice that your head really wants to kind of stay put.
You're going to have to allow your upper body to feel like it's falling or falling, as we would say, over onto this left side when you make this move.
You're going to have to feel like your upper body is helping assist this kind of sit move on to that left leg.
You're going to externally rotate the lead leg, and you're going to feel like your upper body is falling over onto this side.
Here's a really simple focus point that Craig and I both like to use is left shoulder down, right shoulder up.
Think about this.
If you were to keep your left shoulder as low as you possibly could, If you were to externally rotate this lead hip and you were to sit down on that left ankle simultaneously, what does that left shoulder down mentality give you?
Well, it gives you shoulder line that's still closed.
You're looking for your shoulder line to be about 45 degrees closed at this point.
That's really the three big keys that you have to think about in order to be able to produce.
This.
Movement is a little bit of external rotation of the lead leg, a little bit of sit move over to that lead side, and a little bit of falling from your upper half to help increase the pressure on that left ankle.
And that's a really good visual, and I just want to, kind of, you know, go through that one a lot because it's something that we use a ton.
If you see when I start to make my motion right here, you can see that this club's still pointing down, which is indicating.
My lead shoulder staying down, my trail shoulder staying higher.
Now watch what happens if I start to make this same move and I let this side of the club come up all right.
So now I've let my lead shoulder get higher, my trail shoulder get lower.
So look at where my head is now, my head's actually further back than where it was in the backswing.
And this is something, I mean, daily, that we see.
I mean, I don't think there's been a day in my existence over the last 10 years at Rotary Swing that I haven't seen somebody.
Make that sort of movement.
Okay, and again, it's not your fault, okay, it's probably just what you've been taught, or you're afraid to make that movement all right.
It feels like when Trey's moving his upper body, that inch, inch and a half or so, with his head coming back in that spot, it's going to feel like you're moving a long ways.
All right, this is what it feels like when, in the grand scheme of things, it feels like you're just kind of swinging over into that left leg.
So don't be afraid to allow the head and the chest to move a little bit, but you just don't want the shoulders to unwind.
We found that through the swing of your process and working with student after student after student.
That the best way for you to be able to encompass this movement is those three key pieces being done together.
So it's a little extra rotation of that lead knee and that lead leg.
It's increasing your knee flex, your pressure, and as you're simultaneously allowing your upper body to fall onto that left ankle, you've now completed the transition.
Now, What I'd like to do is I'd like to show you guys what it looks like from a down-the-line perspective, so that you guys can see the dynamic movement of the hips.
So when he's up into his backswing here, you've loaded underneath his right ankle.
When he begins to allow this left leg to externally rotate, what you're going to notice is that the lateral hip starts to rotate forward.
So you see the hips starting to unwind, and when he completes the move, His hips are virtually back to a square position as they were in a dress.
It's okay if you see them three, four, five degrees close.
It's okay.
We actually have that up here on the slides where you can see a little bit of chest lead lead.
Perfectly fine.
You just want to make sure that you're focusing on your left leg externally rotating, a little increase of knee flex, feeling like your butt kind of goes back.
You don't even have to think about that one.
If you just focus on your upper body kind of sitting back on that left ankle, you're cooking.
Okay, that's the move.
Piece of cake.
Right, so a lot of you will struggle with this move because you'll.
You've looked at a lot of videos, you've watched all of our transition videos.
You try to make up your own movements.
You've watched Chuck on camera and you see that, oh, it looks so simple, in fact, it really is simple when it's all said and done.
If you follow these three key pools.
And the reason why we use these three points is because we've seen it right.
We know this works, so make it simple on yourself, make yourself externally, rotate your lead leg, increase the knee flex just a little bit when you're doing it and just allow your upper body to fall back onto that left ankle.
And you're done and that's it.
And you just do that until you eat, sleep and breathe it for the next three days.
Okay, and then you start trying to tie the backs and stuff in together right now again.
There are some key points here that you can focus on with, like the left shoulder staying down.
You can focus on keeping your back to the target, whatever one you choose.
We're looking for a couple of things here.
Number one, your weight better be underneath your left ankle.
60.
Okay, We're looking for the hips and knees to be closely back to a square position, okay?
And we're looking for your shoulder line to be closed, 45 degrees closed, okay?
And so you can see here that the shoulders are still – sorry, the left pec is still facing back to you guys at home, okay?
So that's where you're trying to get to.
Now, the map in which we want you to use is those focus points that we just gave you.
Again, I'm going to keep pushing that into your brain because that's the best way to make this movement happen.
Anything else to be missing?
No, Because, I mean, that combines the best of both worlds.
What we're, what we're gonna see, and I know we're gonna see it, is that people get locked onto one part.
They either get here and they just move laterally.
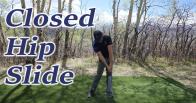
Now, what have I done right here?
I've done a closed hip-slide.
I forgot about the rotational part.
The other thing that we're gonna see is that people get here and then they just rotate.
When they forget, they forgot about the lateral motion.
Remember that you're moving two different ways here.
It's laterally and rotationally and that's gonna be what we see as I have faith in this group, but I know we're going to see somebody in between now and Tuesday that's going to come back and be like, all right, Craig, I got my weight to the left side.
I'm like, yeah, but what about your hips?
Your belt buckle's still pointed back this way.
Don't be afraid to move.
It's okay because they've got to do both.
They've got to shift and they've got to rotate.
Exactly.
And so let's talk a little bit further about the closed hips line.
Because that's going to be a common term that you're going to hear us use around the website.
And so when you see Craig load up his back swing here, you're going to see that his hips have closed off.
Now, when he starts to shift back over to his lead side, what you're going to notice is that his hips aren't going to want to rotate.
This is a very dangerous move.
Now, for those of you that have seen this move in your bell swing or you see it when you're drilling, Craig, where do you feel the weight in your left foot right now?
All of his weight is going to the forward part of his foot.
Now, go back and rewind what we just said and listen to what I've said to you for the last 15 to 20 minutes.
Think about where we just wanted your weight to move.
If you focus on your weight moving towards your ankle, Then your hips have to open back up, they have to go from a closed position and they have to start unwinding.
I promise you, okay, it's very, it's.
It's very unlikely that you can move your weight to your ankle without your hips.
Unwind.
Okay, so for those of you that have ever questioned if I have a closed hip slide or not, you won't have it anymore.
If you focus on where your weight goes, if it goes to the forward part of the foot, then you know damn well that you slid over onto that side.
And it can happen very, very quickly in your downswing because you can start sliding and then you can start trying to play catch up with your hips.
And that's not going to have a good balance of this dynamic movement that we're talking about here.
Think about what we're giving you as a balance, okay?
Because amateur golfers always tend to struggle with having way too much rotation or way too much lateral movement.
And so by taking and combining these three movements for external rotation of the lead leg, feel like you're kind of sitting or increasing that knee flex onto that left ankle, and just allowing your upper body to kind of fall onto that left side.
Or left shoulder down, whatever you prefer is the key to your success for this boot.
And so that that 15 that we talked about as far as being the difficulty level, has now become pretty simple.
PCK.
But if you don't have this down by Tuesday, then we can't get you to post up.
And post up is where the fun starts to happen.
This is where we got something different for you guys.
Boot camp number seven.
You guys are lucky people, we're going to give you guys a different way of instructing this now.
Because the fact that we've seen much more success out of this, this whole part of the process.
So This is what you're going to be working on, because you're going to be working on exactly these key points.
Again, when you want to look at this extra rotation stuff going over to your lead side and this amount of shift, let's make it a little bit easier on yourself.
Focus on when that left knee begins to externally rotate, that you're not allowing it to move outside of neutral, that it's going to be very close to getting into neutral joint line.
Up to the top of your swing, you're questioning about how far over the knee is going to be.
If I put this line straight up, you can see that his lead knee is almost fully into neutral.
So the center of the knee would be over the center of the ankle if that was full neutral joint alignment.
So go back over to your back swing.
So externally rotate the lead leg and sit.
That's about the position that you're going to be moving into right there.
And now from there, you're setting yourself up to complete the move when we make our post-hirt move happen, and that's going to move the left hip and the left knee fully into neutral.
So a lot of people are going to ask, well, how much external rotation should I have?
Well, it's enough to be able to square the hips up, and it's enough to be able to keep the knee just inside of neutral.
A lot of people are going to ask, how much weight should I shift or how much hip movement should I have?
Again, You're going to allow your head and your chest to move back into position, and you're going to feel about 60% of your weight underneath your left ankle.
If you get that, then you're going to have this move exactly the way we want.
And we'd rather you air around this side of getting too much right now.
It's always going to be easier for us or you at home to tighten the screws versus have to put in a whole new move.
Exactly.
So, piece of cake.
So now we're going to stand up.
We're going to have everybody at home.
We're going to do this move together.
Okay, we're going to be looking for a couple of Q words here that are going to help your brain hear us over and over again.
For the rest of today, Sunday and Monday, and then partially into Tuesday.
So that you can get these reps under your belt, so you're ready to start putting us all all this close-up stuff you have to.
Now.
There are going to be some of you that will be able to go into a backswing, into squat to square, all as one unit, pretty quickly.
Because some of you might have already done a lot of this stuff, or some of you already might have these movement patterns.
Pretty close, great, that would be.
Your ideal goal is being able to blend those two together, If you don't, and you're still working slow and choppy, perfectly fine.
We're not calling you stupid.
We're not saying that you're never going to get this.
We'd rather have you work slow and get it 100% accurate, rather than you trying to do the movements dynamically.
In all as one piece and screwing the pooch.
Hands down.
Because if you're screwing the pooch on this stuff, then why are you sitting here listening to us gabbing you anyways on Saturday?
You want to be perfect.
All right?
So take your time.
If we see you going slow and chunky, even when we add post-up, Perfectly fine.
We're going to be here.
We're not just kicking you out the door when week number three is over.
We're going to continue to support you in this process.
We're going to continue to help you get this stuff up at full speed.
I can't emphasize that enough to a lot of these people at home that take your time.
We're not expecting perfection.
Well, actually, we are expecting perfection.
We're expecting perfection.
We want you to work at your pace that you know is perfect.
That's the big one.
Go at the pace that you need to go at.
We're going to be meticulous about doing, but if you're meticulous, about how you do your reps.
I mean, if you are dieting and exercising or anybody that's, you know, successful somewhat in life, they follow a routine.
They don't go too far ahead.
You don't try to bench 300 pounds right off the bat.
You start out with a weight that you can handle so that you can get the form right.
Then once you can start to do more reps and you can do it correctly and support it, you start to add more.
If you are chunking this up right now because this is the pace you can get it, we would more than like or more than be happy to see that.
All right, because we know that you're going to get it.
If you do it.
If you're just like, I got this, I can do this, you know, a million times.
Yeah, who won the race?
The tortoise or the hare?
Yeah, I like that one, I like that one, good one, all right.
So let's get to work.
So those of you at home want to stand up and work out with this awesome.
So we're going to go ahead and get into our setup position, we're not going to spend a whole lot of time going through setup right now.
Because we should be in a pretty decent space after a warm-up.
But we are going to push our right ankle on the ground, we're going to take our right shoulder back now.
First move is you're going to start to feel this external rotation of this lead leg happen towards your lead side.
You're going to feel a little bit of an increase in knee flex, and you're going to feel the pressure increase onto that left ankle.
So you're going to feel your upper body kind of helping pressing down onto that left ankle.
Okay, so you're going to help squat to square.
That's the whole move, right?
So you're going to hear me start to consolidate a lot of these words and put it into a squat to square format.
Okay, so now go ahead and back up to your right side.
Now you're going to go ahead and externally rotate the lead leg, sit down on that left ankle.
Feel about 60% of your weight underneath your left ankle.
Chest, shoulders should be closed, so your left shoulder should be down, and your right shoulder should still be up in the air, okay?
So this is from a face-on perspective.
So left shoulder down, right shoulder up, 60% of the weight underneath that left ankle, hips and knees back to a square position or virtually square position, okay?
So right ankle on the ground, right shoulder back, externally rotate, sit down on that left ankle, okay?
Right shoulder up, left shoulder down, we're good in the hood.
Do it again.
Right shoulder, back.
Sit down on that left ankle.
Externally rotate that left leg.
Okay, you're going to see the left shoulder's down, right shoulder's up.
Perfect.
This is how we want you to make this movement.
So, 60% of that weight underneath that left ankle is your end goal.
With your hips and knees being back to a square position and your shoulder line nice and closed.
Let's turn down the line.
Let's show you how to do it here.
Okay, so we're going to push down that right ankle.
We're going to turn the body back.
Okay, we're going to externally rotate that lead knee.
We're going to feel like our butt kind of sits back onto that left ankle.
With some assistance from that, I feel like it kind of falls on that left leg.
That's a good way to get yourself unloaded.
Now, when you look at a shoulder line here, you're going to still see that Nike logo pointed back at you guys at home, okay?
If we can't see any part of it, your shoulders have unwound, okay?
So you want to try your best to keep your chest pointed back towards the camera, but allow it to move over to your lead side, okay?
So back over to your right side, load up.
Externally rotate, sit down on that left leg.
Shoulder line stays nice and closed.
Okay, let's do two more.
Okay, actually rotate, left leg sit down, good, shoulder line nice and closed.
Okay, so for those of you that don't necessarily like the idea of thinking about it from a down the line perspective, the best way to kind of think about it from a face-on perspective is left shoulder remaining low when you make that move over a transition.
So you're going to load into that right ankle, you're going to externally rotate and sit down, you're going to keep this left shoulder as low as you possibly can.
One thing that we've used in previous boot camps and we've gone before we go into like the fault fixes that we're going to do on Tuesday, And Craig likes this one as well.
Is, if you think about your lead shoulder being underneath the shelf when you're making your move over to the inside and staying down underneath the shelf.
Then you know you've, uh, have your shoulder line next to close.
If you're right.
If your leg shoulder comes up and you can see the right shoulder react to it, then you know your shoulder line will be unwinding.
And it hasn't transferred over to you.
So, again, you're seeing different ways for you to be able to encompass the movement.
I know I'm throwing about 500 different things at you right now.
But if you focus on the big three, external rotation, sitting down 60% of that weight in the left ankle and letting your upper body follow along with it, you're cooking.
Piece of cake.
With that being said, that's it.
That's all I got for you.
Your job over the next couple of days is to get exactly the amount of reps that we were doing in the previous session on Tuesday, Tuesday today.
We want you guys to try to get about 100 reps.
We've broken it up.
You can do 25 backspin reps or full backspin reps, and then you can sprinkle in 75 squat to squares.
You can design your practice sessions the way that you want to.
Okay, I'm one of those people that says, okay, if you're going to go out there and do 100 reps, Then you might as well try to do both these things together in two separate pieces and try to get those.
So you'd be more apt to be able to blend them together a little bit.
On the student side.
But if you want to just spend your time doing more backs and reps to kind of drive home what we said on Tuesday, perfectly fine.
We're here to work at your pace with you as well.
We can adjust some things here if you need to.
Right.
If you need a flip-flop list right now because that back's going to be still a challenge for you.
No issue.
You're going to have these replays.
You're going to have these tapes for a while.
Go up your pace.
Right, right.
So now our goal for Tuesday is to set you up to be able to make the post-op move happen.
Okay, so you've got some work to do.
Now, again, extremely important to both Craig and I because your success is what we are here for.
And we want you guys to succeed with this stuff.
We don't want you guys to go out and play bad golf.
We want you to take this stuff and feel what it's like to be able to hit the ball with some authority without having to feel like you're working all that hard.
Okay?
Make sure that you use the swing review process.
I saw a lot of you take advantage of that, submit swings for review.
We were able to kind of look at things and get them back over to you pretty quickly.
Those of you that might still find yourself having some questions after today's session, you can always revert back to the PDF.
You can go back and watch today's session on recap, or you could just post up some questions in our forums underneath the video player on the website.
Those are the resources that we want you to make sure that you can utilize.
Also, both Craig and I have opened up sessions for live sessions.
If anybody wants to do 30 minutes of time list because they're not really feeling like they're getting this movement transition, or they may want to clean it, by all means, do that stuff.
I'm not trying to sell you off like I'm standing here selling Tupperware or something like that.
I just want you guys to get this stuff down.
That's what you're here for.
So if you get this stuff in a good spot and you are ready to start adding post stuff, Tuesday's a fun day for us because now we're introducing something a little bit different to the boot camp, giving you some different looks at the way that we're making this movement happen.
And in fact, if you guys get that done, then the rest of this stuff becomes much, much easier.
And you'll see that as you get more reps over the next two weeks, that you're going to start actually feeling what it's like to be able to use your body more and less of your smaller muscles, your hands and your arms, Which is kind of fun because when you start hitting the golf ball and you feel like you've got a whole bunch of fuel left in the tank to burn up.
And feeling what effortless power is all about, it's addictive because you're like, that's it.
That's all I have to do.
I'm like, yeah, that's all you have to do.
It's okay, right?
Yeah.
Did I miss anything?
No, thank you.
I think we got it all.
So with that being said, for those of you that want to get the heck out of Dodge and don't want to listen to Craig and I ramble about anything golf-related, you guys are more than welcome to sign out of here.
For those of you that want to stick around and ask questions, by all means, ask the questions.
We will stick around for quite a few minutes here.
If we don't, get a chance to say goodbye to you, those of you that are leaving the room right now.
Have a wonderful rest of your weekend.
Enjoy the U.
S.
Open.
Hopefully everybody's staying safe out there.
And so hopefully you guys enjoyed what you saw today.
All right, so.
We got some questions coming in.
So when do I start the squat to square move in relationship to the backswing?
So this is a great question.
So when you make your full backswing turn, so when you feel all that coil movement starting to happen is when you're going to start initiating that move over to your lead side.
So you want to allow yourself to feel like you're getting to 90 degrees, and then you want to start making that transition happen pretty quickly.
Okay, so when you have the golf club in your hands, momentum and inertia is going to continue to kind of pull you in this direction.
You'll start creating a little bit more stretch there.
Um, but again, you want to make sure that you facilitate a good full turn.
Once you see that happen, it's time to start going over to your left side.
Okay, a lot of times what people do is they've used the video.
Started the basket for the vaccines complete, and they start making 70 degrees turn.
And they don't really facilitate a full back swing, so the full back swing is going to be marked when you're when your shoulder line gets to that 90 degree mark.
So good question, all right.
So does the left heel go down first before the body starts to shift, or does it all move together?
so it's all moving together?
My man, so good question.
So your left ankle?
okay, you're going to hear us say left ankle, left heel?
A lot.
I got to kind of move myself away from saying heel, because a lot of times people get way too far back in the heel.
And they got their their foot kind of like this, and it's not good for you, okay, so you want to have your weight move to the underneath that ankle joint.
You're going to feel most of the pressure more towards the trail side of the foot, though, so you'll feel an increase in pressure right away to that left side, okay?
So, as soon as you start externally rotating that lead leg and you're facilitating a sit move simultaneously.
As long as your upper body is falling onto that side with it, you're going to feel all of that weight moving under there.
I think I'm answering the question.
So it does move all together, you will feel the pressure starts to increase and it's very rapid, I mean, it's very rapid because it's.
It's a little bit more movement for those of you that have stayed rotational, and it's a lot less movement for those of you that have been sliders most of your life.
Because we're going to see a good balance of that, where people just continue to slide their hips because they use a lot of right side push.
So for those of you at home that do that, this movement is going to feel very minimal.
So you're going to be like, that's it?
Yeah, because you've got to remember, we still have some work to do with some lateral movement from the hip as we get to post-up.
So there's some movement that's going to be left there.
So we've got some questions coming in.
I like this.
So Doug says, take away head moves back a few inches during squat to square.
Does head move back to setup position or more forward in setup position?
So your head will move about an inch to an inch and a half off the golf ball.
It's going to come back into its original position or slightly in front of where it was addressed when you make this move.
We would rather have you err on the side of being slightly in front of where it wasn't addressed because, again, it's much easier for Craig and I to tone back.
I can't emphasize that enough.
Okay, so if you're watching yourself from a face -on perspective, put a piece of tape.
Your mirror and mark your head position and address and follow.
So you're gonna move off of it.
And then you're gonna see the back on the left side and see if the lead side of your head is just slightly in front of that line, you're perfectly fine.
And just make sure that you have the checkpoints in place where you feel upwards of% maybe a little bit more, you're gonna feel.
The hips are in, these, are back to the square position and the shoulders are still closed, right.
And same thing like I mentioned in the first session, you can see how this screen is on the side of my head right here.
So if I set up on the side of my head right here and I rotate towards the top, you can see my head moved off a little bit.
But now as I shift, my head's getting back and you can see it's just slightly out ahead of it.
So you can find something in a fixed space to really kind of focus on.
The only thing that bothers me about that comment, Doug, is a few inches.
It's only going to be about an inch to an inch and a half.
If you're going a few inches, you know, three or four more off of it, then you're getting a little bit of push in there and you're moving too much off so you're having to recover too much.
coming down in transition.
Yeah, great point there, great point.
So lots of good questions coming in here.
So why is it feeling like I'm pushing a bit off of my right foot?
Okay, so if you're pushing off your right foot and you're making this movement over to your lead side, then your chances are your weight's going to the forward part of the foot as you're making this movement happen, or you literally are pushing off your right foot.
So now, make no mistake about it, okay?
And I'm talking graduate-level stuff here, so don't get yourselves into this little frenzy or get yourself all.
Hopped up on, now I'm doing whatever here, okay?
The right leg in your mouth swing can help move things back over to your lead side.
It's perfectly fine.
But if it causes your left hip to get pushed out past neutral, if it causes your hips to spin open too much, if it causes your hips to come forward where you have any sort of early extension from your spine, then you don't want any part of it.
You're going to have to really, really focus on what you're doing with your lead side of your body mostly, okay?
There's a muscle group in the lead side of the body that you can start to be a little bit more aware of.
A lot of times you don't hear us talk about this.
I actually did a video on this a long time ago.
Fixing weight transfer you did fixing weight transfer and preventing hip pain.
I kind of thought about the inner adductors.
Yeah, yeah, yeah, so we just the inductors in the lead side of the body.
We can talk a little bit more about this on Tuesday.
We see some balls pop up.
But you can use these muscles to help facilitate a little bit of a pull move or the lead leg.
At higher rates of speed, it's harder for people to be able to feel that muscle group, but it is something that can help you, um, get away from a lot of your right side push.
In fact, that's just what I talked about right now.
Okay, so we don't have to, let's not be around the bush.
So when Craig is in this position, where he's set up.
If he takes his left foot and drags it on the ground over to where it is right, it kind of like tries to create a lot of friction on the ground.
Here.
And you do this at home, you're going to start feeling the muscle group right here, start acting, these are your inductors, and these are the muscles that, um, you can use to help pull yourself onto that, that lead side.
Okay, so this is again, this is like a graduate level kind of move.
So now when you go into your loaded position, what you're going to do is you're going to try to feel those same muscles.
Pulling, but not allowing your foot to slide across the ground.
And it's another good way for you to be able to make more of a pull sensation onto that left side.
That's going to help you alleviate some of the right side push.
So hopefully that gives you a different look at it.
But it's okay if you feel the right leg helping a little bit in this case, as long as it's not causing one of those major faults.
But if you focus on, you know the exact plan that Craig and I both laid out here for you.
You shouldn't.
You should feel minimal, yeah, it should be minimal.
But and that's the thing if you want to check that out.
Because even like me doing it right there, you really can feel that inside.
And if you're using that lead side properly, it's much safer because your lead side isn't going to pull you left.
Or if you're left-handed, right outside of position.
So that's fixing your weight transfer and preventing the pain.
We'll talk about that.
Okay, so for my reps, do I need to stop at backswing?
Finish?
Seems harder to trigger transition When I start.
You don't need to stop at the backswing finish, you can go back into transition if you feel confident enough.
Um, if you're, if you're 100 hitting the checkpoints and when it's all completed from backswing into squad to square, as Craig just did here, okay, then you can move.
We'd rather have you move through the positions, and also you gotta remember we never hit positions, we move through them.
And so if you get to a point on Tuesday where you're really advanced and you, you've noticed that you've made full turn going back.
You've restricted your hips, you've got good separation, you're back into a squat to square position, with your weight on your ankle and your shoulder lines closed, then do it then, by all means, if you need to move dynamically, and that's sometimes.
I encourage that to people.
I have people that they can do static reps all day long.
And they make it look perfect on camera, but when you put it off in their hands, it's like the world, they're in a completely different space.
And so I want the golf club to be able to get in their hands pretty quickly.
I want you to be able to move quickly.
So your brain goes, oh, okay, this feels like a golf sweater.
You need it to be relatable.
Okay, so good question there.
So Arthur, am I looking too far ahead to be thinking?
You already answered your own question by asking that.
So am I looking too far ahead to be thinking about the clamshell drill with a squat to square?
Does that happen from squat to square?
So what we just taught you was virtually the clamshell drill back onto your lead side.
Okay, the clamshell drill was a very, very good, clear overview as to what your hips and your legs are going to be doing for each and every aspect of the golf swing.
Okay, we're trying to give you these, not dumbed down, but you know the expression of kiss, keep it simple, stupid.
We're trying to give you these simple movements for your brain to be able to grab onto or latch onto and say, okay, I can make this movement happen.
When you boil this stuff down at the end of the day, and Craig can expound on this if he wants to.
is that everybody processes information differently, right?
So if you look at our weight shift videos back over to the lead side, we've got seven, eight, nine, ten, we've got tons of them, right?
And everybody's like, well, this video is different than this.
Yeah, of course.
But all of those videos have the same goal at the end of it.
It's to get you into this position that we just taught you to, okay?
Everybody processes it a little bit differently, so what we've noticed is the keywords that we're giving you are these simple little ways to be able to do this.
It's the best way for.
Bulk of the people to be able to facilitate movements now, that doesn't mean that a hundred percent of you are going to be able to do that, right?
We're going to see some people take the information, process it way differently, and we're going to see people still hanging back over the right side.
That's what we expect.
So you have to remember, we're speaking to groups of masses.
And we want to be able to find the best combination of things that are going to work best for you.
And so we.
That's through all of the research and all of the time that we spent.
I mean, we've done well, lots of reviews and lots of lessons, so we've seen a lot of this stuff and so.
Yeah, and it's okay for you to think that, Arthur.
I mean, if you look at it, you can see the little Bridgestone logo back there on the bag.
So if I get set up here and I start to load and rotate and I start to go back, you can see when I get my squat to square or clamshell, because that's the whole point is getting these butt cheeks back on that clamshell, you can see that I start to cover a little bit more of that Bridgestone logo right there.
So the clamshell.
Is a good thought, but just stay focused on what you're trying to achieve.
If you're using that kind of as a reference, like you want to put something back there, no problem.
Just make sure that you know what you're doing.
You're not like, okay, I'm just going to put my luck back here.
Stay focused on what we're trying to do.
Get the knee, get the weight, keep the shoulder down, all our checkpoints.
Yep.
Good, good, good.
All right.
So Jason says, external rotation.
Does the knee point forward of the ball at all?
So the knee itself at a dress is in front of the golf ball.
Okay, so the ball would be right here.
The knee is in front of it.
And so when you externally rotate, it's going to move back in front of it just a slight amount.
Okay, so if you're thinking about it from a reference point to that standpoint, you might want to move away from it because, again, that might get you a little bit jumbled up and you're trying to move into this fixed space.
Think about it from a weight shift perspective.
Think about how much weight you're actually trying to transfer.
60% weight left ankle.
If you just do a little bit of external rotation of the lead leg and not think about where it's supposed to be.
that you're going to see that this movement becomes a little bit more dynamic.
It's easier for you to achieve.
I know that you guys are the most analytical freaking people on the planet.
I mean, that's just the nature of the beast.
We have lots of very high IQ people that visit the website just because of the content that's put out there.
And so a lot of times we want you to not analyze it to the umpteenth degree because it can make you feel like you're a full enough launcher.
You can't move.
That's just me.
That's my opinion on it.
I would say you can use it if you want to, but I would say focus on what the left knee or left leg are doing, just a little bit of transition, a little extra rotation, a little sit move on to about 60%, and you're dancing.
All right, so when we do reps for this week, do we still do the full backswing moves first before the squat or start on top?
Nope.
So you would want to still do the move over to your backswing so you can continue to get more reps on that.
Um, and then you can start adding the spot to that position, you don't want to just start from a static position over here because you don't.
You got to remember, you got to move into that position and then you're going to move through.
So I would start from a Saturday dress, moving it back exactly.
And when you recruit and stretch those muscles and you get engaged by making this motion.
It helps you get back over here because you still, you've built up a lot of good tension to help you get back over to this lead side.
So if I were just to put my weight on my right leg and rotate up here towards the top, I really don't see anything.
So that there was nothing really dynamic about that, so could I practice that?
Yeah, but you're gonna Load and rotate in this stretch, in this rebound.
It's going to be helped by going through the full motion Exactly, exactly.
So very very good point there.
Great.
Thank you.
I appreciate that All right, so questions look good here.
I like, I like the questions from this group.
So you guys were not only like our number one group with the way that you guys move, but you guys ask all the questions are great.
So Gary says, Do I need to do anything special to get my swing review to you?
As opposed to going to the instructor that it went to before?
I joined this group?
So, Gary, you can request both Craig and myself.
Um, typically, the the rule for the website is the only way to be able to request.
One of us is to be able to be a part of the elements.
Interview groups.
Um, you can try, like if you're already with an instructor, he can maybe for the information over, just to try to get it done.
We'll let's do.
We're, yeah, we'll do our best so you can say, Hey, I'm a boot camper.
I'm a private student of Craig and Chris.
Can this be forward over?
And we'll do our best to be able to get it back over to you?
We're just trying to get all of these reviews back over you guys as quickly as we possibly can, especially during boot camp.
Um, so we do have some other instructors that are on there that are helping us out.
There's a pretty good chance that, um, that the information will be very comfortable.
We hope, okay, we hope so, but you can ask me, we'll, we'll do our best.
If it's not, let us know.
That was a really piss poor answer on my behalf.
I'm sorry.
Just you can put it in the notes and we'll, we'll.
We'll work our butts off to get it over.
Okay, all right.
So Henry says.
Shoulders are not intentionally opened at this point.
correct.
Your shoulders will be 45 degrees closed at least.
So here's the equation I want you to work off of.
Okay, so go ahead, load up.
So 45 degrees of hip rotation going back, 90 degrees of shoulder rotation.
When the hips come back to a square position, if you're literally trying your best to not unwind your shoulders, when you unwind your hips, the shoulders have to unwind.
So you're going to have at least 45 degrees of hip shoulder rotation left.
And the way that that would look from a down the line perspective, Is that your logo of your chest would be pointed back towards you at home?
Okay, and you're?
You would see that the right shoulder is up and the left shoulder is down.
And then, from a face-on perspective, what that would look like is the left shoulder is going to look really low in relationship to the right shoulder.
So you're going to see quite a bit of tilt here.
Okay, to the shoulder one, okay, and yes, not intentionally.
Shoulders are dead to you in the dance room.
There is no active motion of the shoulders in the dance room, Jason says.
Why is this game so damn hard?
Listen, I've played for 33 years.
It doesn't get any easier.
I've played through the game just like Craig has.
It's a fickle game, man.
There's so many moving parts to it, really.
Think about this sport.
We're taking this little white ball and we're putting it in a hole that's 300, 400, 500 yards away.
That's not very big and we have all these variables in place.
That we got rough, we got fairway, we got, you know, we've got different graphs, we got different lines.
It's a very, very daunting task, and so there's a lot of stuff out there.
Even with what they're doing.
With all this technology, you just have all of this stuff being fit in your brain.
I like to keep it simple.
Once you've done with the swing shape that you're going to have, uh, next week or the week after, you're going to see that.
We want you to just do this simple movement over and over and over again, and just let the golf plug in the way golf is about a swing, it's not about a hit.
And those of you that go out there and try to feel like you're chopping wood and trying to do the same.
Or trying to make the next big change.
Based off of what you saw in a YouTube video.
It's never going to happen.
The way the brain learns stuff is it just doesn't do that stuff.
Right.
And right now, I know it seems technical because we throw some terms at you.
We put you through some drills.
But there's kind of simplicity in its complexity.
That when you get done with this, And you start to gear your swing towards, oh, I just need the trigger of shifting weight.
You know, when I feel weight, you know, things kind of happen automatically.
When you start going through and you really start getting down what we're talking about, it really will simplify it.
So that you can kind of focus on the fun stuff and just play.
And I mean, I just want you to focus on swinging the stick and hitting the stupid ball, right.
And the way to do that is to really get the process in your brain of what you're trying to achieve.
I mean, think about, like, you know, when you're learning your multiplication tables and you're like, all right, two times two is four.
You're really having to think about that, but how much do you have to think about that?
Now?
If we can give you simple cues and simple, repeatable things over and over again, you can go out and enjoy play golf instead of play swing.
Yep.
So, Jason, we can answer that question all day long.
There's so many things I can tell you.
If you want to see how hard it really can be, Go watch what these guys are going to be doing, or what they're going to be dealt with at Wingfoot today and tomorrow.
Because I can see this golf course is going to give them all they can handle.
And you actually start to see the golf course start to bear its teeth a little bit yesterday.
But USGA can firm everything up very quickly, and they can make this golf course almost ungettable.
So watch what those guys have to deal with.
And those guys are ball-straining machines.
At that level, they make things look pretty easy, but this golf course is going to make them look a little bit on the difficult side.
More questions coming in.
So leg rotation, squat are synced together, or leg rotation starts first?
Squat and leg rotation are happening simultaneously.
All of these movements together, they're not just going to be doing one or the other during any part, okay, they're going to be doing all of those movements together.
Think about, um, a world of a world of peace where we all just hold hands and we just do everything together, right?
That would be the idea of what you're trying to do with your hips.
So the extra rotation, the sit move and letting everybody fall in position with it are all happening simultaneously, and it's happening very quickly.
Okay, very, very quick, but I think that actually says it, says it on your spot, Okay, so we got Arthur coming in.
So thank you so much, guys.
No one, I mean, no one teaches and else can focus on these fundamentals.
Well, thank you very much.
Thank you.
We appreciate that.
Thank you.
Glad to have you.
Mark says, this is awesome.
Great attention to you.
Well, thank you, Mark.
We appreciate that.
Thank you, Mark.
You guys are trying to get on our good graces for Tuesday.
Yeah, so I'm kind of worried right now.
Maybe y'all are trying to butter us up because y'all are struggling a little bit with this.
Awesome.
So thank you very much, David.
I appreciate it.
Looks like there was a loss of connection.
I think we're still up and running here.
It appears that we're still up and running.
All right.
So I think we're winding down on questions.
So with that being said, again, we know you guys have other options.
We know that you guys have other things going on in your lives.
We know that golf is being played on TV right now.
We know that we're dealing with.
Some crazy stuff in certain parts of the world.
And we really appreciate you guys taking time out of your day to come sit with us.
And hopefully you guys found the information to your liking and hopefully you're able to utilize it.
To be able to start, uh, the second part of your process, or the second part of your journey to being able to build the golf swing that you need to be able to use the rest of your life.
Because this is hands down the most efficient way and the safest way to be able to move your body.
And be able to move this belt from one side of the body to the other while straighten as far as possible.
So we really appreciate it.
And, uh, Craig and I can't thank you guys enough for being here.
And we will do everything we can over the next few days to be able to help you.
Uh, through the processes, to make sure that you guys are doing these moves the best you can.
So, uh, hope you guys have a great rest of your weekend, Greg, anything you want to add there?
I want to add something just that what I just saw.
Cecilia, you didn't receive an email for logging on.
You have to register for each session independently.
So the reason that you didn't get an email is because each session you have to register from, from that original email last week when we started boot camp.
So if you need help with that email customer service, then we'll get you on it.
But it's because you have to register independently for each one.
Yep.
So Steven says the transition is so important to get right.
I know.
I get back and then start with my arms, hope this will fix it.
So if you want to stop using parts of your body that you've been overwhelming in the past, then you need to start using another part of your body more.
And this is a great way to be able to start that process.
So you've got to remember that old movement pattern won't die off, but we will do everything we can to help kick it in its butt and put it on the back bench to where it will never haunt you again.
So this is a very, very.
Important move, for sure, because it starts the whole chain of events that need to happen to.
You know, YouTube posts up and throw in the club properly.
So, uh, looks like I'm not ready to get on playing just yet.
But do you have an idea when you start live lessons in Orlando?
I'm already.
We're already back underway here, so anytime you want to get on the plane and come down and see us, we will take you.
Planes aren't bad right now, they're very wide open.
I, I took a flight a couple months ago, they're wide open.
Um, so, Lee said.
Skip the range during boot camp or plane.
Did I talk about this in three sessions?
You talked about it a little bit.
Go ahead.
How about that?
We didn't do it very well.
No, no, because I'm not talking about men's league or women's league.
Like if you're going to want to play, so what should you think about while you're playing?
If you're going to take full advantage of this league, ideally you're going to shelve the course, but we're never going to tell you not to go play.
Look, life is short.
It's sunny.
It's nice outside.
But think about and assess what your goals really are.
What are you trying to do?
You're trying to completely change a new movement pattern right now.
So when you go out and play, you're going to tend to fall back into old habits.
If you do want to go play because it's nice outside, the U.
S.
Open's got you excited, at least try to take one thing that we're doing.
Try to be hyper-focused.
If it's just full shoulder rotation or just shifting weight, think, all right, today, come hell or high water, I'm just going to make sure I get my weight to keep trying to reinforce what we're doing here because we would never want to tell you not to go play.
I mean, that's.
I would never take the job.
So, but.
Also, think about what our end result is.
Our goal isn't to shoot 65 tomorrow, our goal is to shoot 65 for a lifetime.
So just make sure if you do go out, you stay focused on something that we're doing, so you don't kind of lose your work.
All right?
So Sean says, the shoulder tilt gets less when the hips go to squat to square, correct so the shoulder tilt so your shoulder plane.
Going back in your backswing, it's winding up perpendicular to your spine, it's going to be unwinding perpendicular to your spine.
As you make your squat to square, move over to your lead side.
Okay, so it's going to give you the appearance that from a downline perspective, that it's dropped down just a little bit.
Okay, just a fraction, but it's unwinding on the same exact length.
So when you look at it from face on perspective, you can look to see when your lead arm is parallel to the ground or where it would be parallel to the ground.
What your shoulders look like, and then after you complete your squat to square, your shoulders should look very comfortable to that.
That's something we'll talk about a little bit further, but yes, so it will.
You want to look like the left shoulder is low and the right shoulder is up behind that as much as you possibly can.
Yeah, just don't get caught up in the numbers and nuances, because that's it.
Someone's like, Well, I'm two degrees here, four degrees here.
That's never made or break anybody from shooting far.
Yep, okay, so that's it.
You guys have a wonderful rest of your weekend, get out there and play some good golf, and we'll see you guys on Tuesday at 7 p.
m eastern standard time have a wonderful day


