Bootcamp 7, Sept 26 2020, Session 4
Session 4 of 6
Okay.
Good afternoon, everyone.
Those of you that are on the East Coast, good morning to those of you that are over on the West Coast.
And maybe good evening to some of you that are over on the far eastern part of the world today.
So hopefully everybody's having a wonderful start to their weekend.
As you can see, it's just me here by my lonesome.
Craig Morrow is actually running a little bit behind.
He gets stuck in the beautiful traffic by Ford.
I guess there was a pretty serious accident.
So hopefully he'll be joining us here pretty soon.
So I see people are checking in.
We got Lee checking in, Craig checking in.
Welcome, everybody.
Willi checking in from Naples.
Hey, everybody checking in.
Welcome.
Craig checking in from Madison.
Hopefully everybody's had a wonderful start to their week.
We've got a big day for you guys.
We've got some really, really important fault fixes that we're going to go through today.
We're also going to do our interactive workout, and then we are going to be adding the lead arm and the golf ball back to the mix, which is exciting because this is going to start to feel like a golf swing finally.
So thank you for those of you taking time out of your Saturday to join us.
Hopefully you guys are all having a wonderful start to your weekend.
They're playing around with a little bit of the acoustics here in the office.
Because I know that we had a little bit more of a metallic-y sound than we wanted.
So we're definitely working on that.
Hopefully the sound is starting to get a little bit better, but we are always working to enhance and make the whole video process a lot better for you guys at home.
So we've got quite a few people checking in.
Nick checking in.
Ron checking in.
Brian checking in from Denver.
Welcome, guys.
Kim checking in from Denmark.
Welcome, Kim.
Mark checking in from Springfield.
Got a bunch of marks.
This is the big crowd of the marks.
So I got to do quite a few swing reviews over the last couple days.
Got to sneak in quite a few this morning as well.
And saw a lot of good stuff going on still.
We're going to talk a lot about getting you guys moving a little bit more.
I think a lot of you guys are afraid to move at this point, and that could be based off of some old instruction that you might have heard in the past.
It could be based off of the way that Craig and I are introducing the information to you guys.
But today we're going to make it a point to really get you guys feeling like you can move in this golf swing.
It's going to feel maybe a little bit more athletic to some of you at home.
It's going to feel maybe like tons and tons of lateral movement in your wrestling that you never knew that you were supposed to have in there.
But what we're also going to be doing is we're going to be adding the lead arm and the golf foot back to the mix.
We're going to give you some very specific checkpoints that are going to follow along with the PDF that we gave you guys at the start.
So hopefully you guys have enjoyed what you've seen through the first three sessions.
I know today is a big day because we do start putting the arms in the golf foot back to the mix, which is my favorite day because I never want to start.
doing a whole lot of reps where we are working in static positions or we don't have the arms of the golf club in the mix.
Why?
Well, because we want it to feel like a golf swing, right?
We know that when we get to the driving range or when we get to the golf course, that it's very easy for us to be able to get our hands and arms on the golf club and move the club from one side of the body to the other very, very quickly.
And so what we want to do is we want to introduce the arms and the golf club back to the mix as quickly as we can.
So that it starts feeding your brain the proper way.
So hopefully most of you have gotten a lot of good success with the stuff that we've talked about so far.
If any of you have questions here for these first five or six minutes or so, feel free to post those up.
I'll answer as many questions as you guys need me to.
And then once we get the questions answered, then we're going to jump right into the fault fix stuff.
We're going to talk a little bit about two of the common faults that I saw, and then we'll introduce Craig and some of the faults that he saw over the last few days.
And then at that point, what we're going to do is we're going to get really, really super focused on the positions of adding your lead arm and your golf club to the mix.
And then at the end of today's session, we'll go ahead and answer questions at the end, And then we're going to kick you guys out the door and get you guys back to work.
Because we want you to get a large number of reps between today and next Tuesday.
Because when we start putting the troublemaker back on the golf club, which is a.
k.
a.
your trail hand, we've got to make sure that you've got a lot of reps under your belt with loading, transition, and posting up, and allowing the hands and arms to follow along with those movements.
So we've got a question coming in from Tor.
My head moves four to six inches upon post up with weight shift and rotation.
And if is this to correct, how?
and if to correct?
So?
My head's moving four, six inches upon post up with weight shift and rotation to neutral joint alignment.
So that's just too much movement, so you're going to be running into either having way too much movement going off the golf ball or way too much movement in transition.
What you're looking for from a static address position if you watch My head in relationship to the TV in the background here.
So when I push my right ankle on the ground and I turn my body, my head's moved about an inch to an inch and a half or so.
When I make my transition over to my lead side, you're going to see that my head comes back into its position, maybe drops down just a little bit.
And then the head and the chest is going to hold very still when I make my post-it move happen.
Okay, so you're going to end up with your hips open 35 to 45, shoulder line nice and square.
If you're seeing four to six inches of movement, well, that's going to be dependent on how far you moved off the belt while going back.
It could also be dependent on if you set up with a lot of your weight preloaded over on your trail side.
Where your upper body is leaning over in this direction and then you turn your body.
Well, you're going to notice here that my head is where, well, my head is outside my trail foot.
And so for me to be able to get fully back over to my lead side.
I've got to have a whole lot of travel here to my head and my upper body for to be able to get back into position.
So if you're seeing that much movement as a whole, then number one.
I want you to check your setup position, I want you to know, make sure that you're balanced.
okay, I want you to make sure that you're 50, 50.
if you're five or ten percent one way or the other Not a huge deal, but you want to make sure that you're pretty well balanced.
Number two, I want you to check how much movement you're having over your head going off the golf ball.
Okay, you're going to be looking to make sure you only have about an inch to an inch and a half or so off the ball.
When you move back into position, the head can come slightly back in front of where it wasn't addressed, but at that point when you post up, you want to hold everything slightly as still as you possibly can.
Okay, so to correct it, If you're seeing too much movement going off the golf ball, then you want to check your rotation, make sure you're really centered.
You can do the wall drill where you stick your head up against a wall.
You can also do the reps where you really feel that right shoulder moving up or behind your head, get that left shoulder moving more underneath you.
That's going to help with centered rotation.
It looks like we have Craig that finally got off on high four.
How was that ride?
That was brutal.
How are you doing?
Doing great.
Hey, I appreciate you picking up the slack for a couple minutes.
No problem at all.
So we're just getting everybody comfortable.
I talked to them a little bit about what we're going to be doing today.
Add the lead arm and I'll go to the next big day for us.
Told them how excited I was to be able to add this component because, number one, it feels like a golf swing now, right?
Or it's going to start to feel like a golf swing.
I'll be working into a static position at the bottom.
But we're going to get you into a really good delivery spot so that when we start getting to the next two sessions, That on graduation day, you're going to be able to let the golf club fly.
So how's your weekend?
It's been okay so far?
Yeah, a little stressful, a little stressful, that.
Well, I, I always plan ahead, so I plan for one accident, I didn't plan for two accidents.
And then there was protests on the other side of the road, which is stopping one side.
It's, yay.
A drive that usually takes me about an hour 25, hour 30, almost took me two and a half hours.
So your blood pressure's up a little bit?
Yeah, a little bit, but that just means that these moves are going to be snapped.
All right, awesome, awesome.
So hopefully everybody's had a wonderful start to their week.
Ctor was talking about laterally.
If you're seeing your head move four or six inches, it can be a byproduct of your setup position being too preloaded on your right side.
And then when you start moving off the golf ball, you're going to see that your head's outside your foot.
And then from there, you're going to see that your head has to travel a whole lot of space in order to be able to get back over to your lead side.
Craig, let's go ahead and demonstrate that to them at home so we can talk about what the preloaded right side looks like.
All right.
So what you're going to see here is you can see that in order for Craig to get his axis tilt, a lot of his upper body is just leaning over his right side.
Now, here's what I want you to think about.
If you were to shift from this position and you were to then turn from this position based off of the way that we've been teaching you, then your head and your upper body are going to progressively get further and further off the golf ball, theoretically, right?
And so if you look to see where Craig's head is, for him to be able to get all the way back over to his lead side and get his head up against my hand, you can see that he's going to travel a long ways.
So that's probably what you're running into.
In order for us to be able to fix it, we want to probably see it though on camera.
If you're due for a swinger, you definitely get it in because we can help you out with that.
Typically, if you're moving too far off the ball, then it's going to force you to recover with too much movement to get back over to the inside.
So good question there, So all right, so we got another question coming in.
Review the movement of the right foot during post-up.
Okay, so right foot is going to go from a flat position and it's going to roll inward.
Okay.
And it's going to be to the point where it's very light to the ground, Almost like it feels like it's kind of floating there.
It's not going to have a whole lot of pressure on it, And you're going to feel like the whole outer portion of the right foot is just up off the ground, where all of the inside portion of the foot is touching the ground.
I'm going to show them from down the line what that looks like as well.
So you can see how he rolls to the inside part.
That's what your foot should look like at the completion of your post-up move.
If it's flat to the ground, ain't wrong.
to the point where it's up off the ground, that's even more wrong, you owe us a hundred bucks, right?
Or a hundred push-ups, right?
So this is actually going to kind of segue into one of the big faults that I want to talk about today, was when we make that move in transition, getting enough of the weight over to that lead side, because I saw a lot of people afraid to actually move back into position enough, and they actually started to try to do their closer move a little bit too soon.
And what that leads to is obviously the hips have a lot more mobility at that point.
They can really just start ripping open upwards of like 75, 80, almost 90 degrees.
So definitely going to be touching base with that.
So we got Mick checking in.
In the squat to square, how do you lean the upper body to the right and still keep the head still?
So how do you lean the upper body to the right and still keep the head still?
So the head's going to move.
When you squat to square, I think I've made a really big point to tell you that when your head moves off the ball, Then you squat to square.
You want your head to come back into position.
That's a good way to measure where you're at within the process is by looking at your head position.
If you look at it from the ground up, here's your checkpoints.
What you're going to look for out of your legs is that your hips and knees are back to the square position.
That's number one.
Number two, you're going to feel about 60 % of your weight underneath that left ankle.
Now, if you start looking up above the belt line at this point, what you're going to look for in the shoulder line is you're going to look to see that the lead shoulder is lower than the trail shoulder.
So you're going to see about 45 degrees of rotation from the upper half.
So 45 degrees.
Another checkpoint that Craig and I talked a little bit about in the previous session is when you make that move over to the inside, the outer portion of your back should be pretty well upright.
If you have a lot of tilt, you can see that the upper part of his back didn't make it over to this line.
So a good way to measure this sort of position to know if you're doing it accurately is look at your head position, right?
In order for your head, or I'm sorry, in order for your upper body to be in the position that we first demonstrated there where his outer portion of his back was pretty upright, his head had to come back into position.
So think about that.
So I just gave you a couple of quick little checkpoints.
We want your hips and knees to come back to the square position with 60% of your weight underneath your left ankle.
All right, we want your.
Shoulder line to be fairly close, so your left shoulder should be lower than your right.
And we want your head to be back into its original position, or slightly in front of where it started to address.
Right?
If you have that stuff in a good spot right there.
And chances are your transition made it, you made it all the way back over to your lead side, right?
And the main thing when it comes to the head, if you're trying to shift weight, you can't shift weight without a little bit of head motion.
And I know we talk about the suede drill and having excessive head in the golf swing, to where we don't get all the secondary tilt.
But you can't move weight without a little bit of motion.
So I don't want you to think of the head just has to be static and it just can't do anything.
It will waver a little bit as you're shifting weight.
Because you are literally moving from this side to this side.
And the only way to do that is for your head to move a little bit exactly.
And so that's that's.
One of the fault fixes that we're going to discuss this morning is that we're going to talk about allowing the body to move a little bit?
I saw a lot of people get really centered off because they were almost trying to get to their post-up move before they actually started to transition.
And so you have to allow for a little bit of louder movement to take place in the golf swing.
Think about it this way if Craig and I were baseball pitchers and he and I were going to go out and pitch a game against one another.
Where we said, Okay, Craig, today I'm.
We're not going to strive towards home plate.
Okay, now, if we don't strive towards home plate, what do we have?
What do we have available to us in order to be able to throw this baseball?
Well?
We have body rotation and we have arm strength.
Now, could he and I throw the ball pretty hard that way?
Of course we could.
We feel like we could throw it pretty hard.
We're athletic.
We feel like we've got a little bit of meat behind us right now, so we could get that ball trucking a little bit, but are we going to throw it nearly as hard as somebody taking advantage of the entire kinetic chain?
Probably not.
You have to understand, if you're not using weight shift, then your brain is really good about substituting the power sources in your bowel spin.
Very good.
If you start taking out weight shift, Then you're going to start automatically adding in tons and tons of body rotation and tons of arm strength through the hitting area, which is where the train can quickly come off the tracks.
Exactly.
And not only does it hurt the power, it hurts the accuracy.
Because think about if we were that baseball pitcher and I'm back on this right leg and I'm doing everything with my upper half.
Am I going to be more accurate, throwing the catcher's mitt that way?
Or getting set into position to release at the same point every single time?
Which is the same thing that we're trying to do is to get this position back.
So this bottom of our swing art, or our fulcrum point, is right, locked in position to be able to release it.
Exactly, great point there.
So we're going to answer these last two questions and then we're going to get into the fault fix stuff.
We're going to go through the fault fix stuff pretty quickly.
Today, we're going to do a pretty fast, interactive workout.
Because we really want to get the lead arm and the golf butt back in the mix here as quickly as we can.
We're going to do a good number of reps with that together, And then we're going to kick you guys out the door and get you guys to do a number of reps between now and Tuesday.
Because this is where you're going to really be able to see what you're made of.
Because you're going to see that by adding the lead arm and the golf club to the mix, you're going to think that it's a piece of kick when, in fact, you're going to see all kinds of balls start to pop up.
Why?
Well, because the arms and the golf club can create more momentum and inertia, and in turn, what this does is it starts making you less aware of your body.
And so for those of you that stay hyper-focused on the key points that Craig and I are going to be beating into your brain today, you'll see that, okay, this is exactly what I wanted my background to look like.
This is exactly what I wanted my weight transfer to look like.
And you'll see that you have these specific checkpoints that you're going to be working into kind of the delivery point, which is where we start letting the club release, which is the fun part, right?
Right.
And the thing that I want to just say on top of that is when we start doing this program and start adding the lead arm to the club today, remember, All the stuff that we're creating, your number one priority is still what we're doing here with the engine.
Don't set, don't try to just place positions, focus on what you've done to get to this point so far.
That will create what looks like a perfect golf swing.
Yep, exactly.
So a couple of questions coming in here, let's go ahead and answer those and then we will get to the nitty-gritty.
Today.
So big day for us.
So does the right foot have to come up on the outer edge, or is it good enough if it stays flat?
But you can tell the weight is mostly on the inner side.
So, we would like to see the outer portion of the foot rolled in, okay, because that's going to ensure that the lead hip made it all the way to neutral.
If you see that it is too, if it's still flat to the ground and it feels light there, there's a good chance that either your stance width is too narrow out of dress or you didn't get all the way to neutral with your lead hip.
And I think a lot of times people will underestimate how far inward their lead hip socket is.
For those of you that have wanted to kind of guesstimate where your hip socket is, if you find men's pants generally have a belt loop on the lead side here.
That's a good representation of where the lead hip socket is.
Or if you want to find it the old-fashioned way, you can find the pointy pelvic bone on the front of your body.
So right about two finger widths inside of that pointy pelvic bone, which is generally right where my belt loop is here, is where the center of your hip socket is.
Okay, so you want to make sure that you've got a little bit of space between the ground.
If it's flat-footed and it's light, it's probably not enough.
And at that point, what you're going to see is that I'll turn down the line so you can watch this.
So when my foot is flat to the ground and I start posting You can see that my right knee wants to come forward.
See how my right knee comes forward like this?
See how there's a lot of tilt to my pelvis?
This is a good indicator that your hip never made it to neutral.
If I roll into the inside part, this is as much as I can open my hips up.
You see how much more stable my hips are here?
See how much less tilt there is here to this actual position?
By coming back into a flatter position, look how much more I can turn.
Pretty big difference, right?
Okay, so again, we'd like to see you rolled a little bit more on the inside.
Double check stance width.
I've seen quite a few people with stance widths a little bit on the narrow side.
I've definitely seen more on the narrow side than wider.
Right.
Typically, we always see people go too wide.
Right now, everybody's going a little bit on the narrow side.
Widened up a little bit.
Okay, so.
Yeah, and just to follow up on that point, I mean, that goes back to when we talk about the hips, especially getting into this in-back position.
Remember, they're moving laterally and rotationally.
They're not just doing one or the other.
So when this trail foot stays flat, Typically, you're going to be shy, but also what is it also inhibiting you from doing?
I can spin off my back foot like this, but I also need that extra freedom to get this hip back once I gets the weight over there.
So you've got to think about it's doing two things.
So you need that extra little bit to make sure that you get the weight and you can get the hip open enough properly with the weight there.
Exactly, exactly, good point there, sorry.
So, David says.
During transition, should the right shoulder stay completely quiet, stay back and not rotate.
This might be an early question at impact, will the right arm get pulled through, or do you throw the ball with the right arm?
So that question is a little bit on the early side.
DAVID Um, the right hand, right arm does have some functions.
But we're going to be talking about that solely on session number six, when you guys get to the graduation day, because we're going to talk about its exact functions.
We want to think about that more or less as being graduate level stuff.
So like, when you're getting your P.
h.
D.
with us, then we'll start really teaching you how to fire that right side down the bottom.
But as far as your first question is concerned, during the transition, should the right shoulder stay completely quiet?
Stay back and not rotate?
For sure, so the shoulders are going to have to unwind.
You have to remember very, very specifically here that as soon as your hips start to move in the other direction, okay.
So as soon as the hips start to shift back over to the lead side.
You're squatting the square that unless you're a contortionist, okay, which a lot of you are not.
Your shoulders are going to unwind as a result of what your hips are doing.
Now, if you think about the equation being where you've got 45 degrees of hip rotation going back.
and you've got 90 degrees of rotation from your shoulder line at the top of your backswing.
When you hear the word squat to square, the hips are now going to be coming back to a square position.
So the shoulders at this point are going to have 45 degrees of woundness left of them still, okay, because you just unwound the hips 45.
Now, if the hips open up to 45 at this point, when we post up, then you're going to see that the shoulders come back to the square position.
So your job is to feel like you're trying to keep that right shoulder.
As far up and behind your head as possible.
You want to try to feel like you're maintaining contraction in your midsection, or you want to focus on the lean shoulder, staying down, whatever you prefer.
All of those methods are just ways that Craig and I are communicating with your brain to tell your upper body not to turn because your lower half is doing that job for you.
You might just not feel it because of the fact that, um, you're just not used to actually moving exactly.
So hopefully that answers your question there.
So, uh, Michael's got one other question here.
So I'm going to keep my right belt down.
I'm struggling to keep my heel down on my left foot, left-handed golf on my post-up.
I will admit I've always pushed off my back foot to carry the downswing.
So, Michael, this is where you're going to have to be hyper -focused on this particular movement, where you want to really focus on doing a bunch of reps and where you're literally just doing from one side of the body to the other.
You just kind of roll back and forth, and then you get into golf posture, and then you make sure that when you're posting up, and you do not allow that heel to come up.
Because if you're used to shoving off that side, then chances are.
You're going to continue to have a lot of this early extension that we battle off.
And this early extension is a very, very tricky thing for us to fix.
So start small.
Do lots of little back and forth little leg drills.
Use the roll of the right foot in the downstream video that we have on the website.
I think Craig and I have talked about this incessantly.
That there has never been a day that's gone by in golf instruction that we happen to use that video.
In fact, this morning I used it three times on three different students.
because you can just see how common of a problem it is.
So I always tell people to start really small.
Learn the footwork down through the hitting area during impact and then start adding more to it.
So you can add a little bit more rotation to it, add a little bit more squat to square to it, and then in turn you're going to be in a position where you have it on the floor.
So take your time with it though because an old fault that's got a lot of reps under its belt never dies off.
And the more that you spend time ingraining the new movement pattern, the more likely you're going to kick the old one to the back burner.
Right.
And I don't know if you remember in session number two when we were talking about Chris's drill.
Where you kind of drag the feet so you can kind of feel the inner thigh adductors.
That's a really good way to see how if you pull all your weight to the lead side, your heel doesn't come up because you're pulling your weight.
You're not having.
To take your trail leg and push off of it to try to get over here.
If you're pulling that weight with those inner thighs, because you can feel how this foot wants to drag.
And that's the same thing that we're trying to achieve right here.
And that's a really good way to start calming it down.
But trust that you're shifting with, right.
Exactly.
That's kind of one of the things that I wanted to talk about today.
As far as the main, uh, fault fix that I ran into is that I saw a lot of people trying to get to the post-up move.
So you were trying to complete move number three before you even completed the transition.
And what that does is it's going to force the upper body to give us the appearance that it's hung further back and it's going to.
You might have moved your hip over neutral, but you're never going to see the left side of your body fully stacked up.
Now.
Remember, at impact, what we're looking for in a good, solid impact position is a few things here.
We want the hips to be open 35 to 45 degrees, we want your shoulder line to be nice and square.
Okay, we want a little bit of secondary axis tilt.
So your spine's going to be maybe just a little bit outside your lead knee if you draw a line straight down.
But you also want to see that the left side of the body is fully stacked up.
So the left ankle, left knee, left hip, and left shoulder are all right in line.
When he starts his post up before he's even completed his transition, then you can see that the lead side of the body is not stacked up here.
Now remember, if you start getting into this sort of position, the position of your lead shoulder is going to determine where the club wants to bottom out.
Now, if the club wants to bottom out much further back than where you anticipated, what's that going to force you to do with your hands at the bottom?
Well, it forces you to start flipping.
Otherwise, you're going to stuff the club in the ground.
So for those of you that have ever hit drop kicks with your drivers where the club bounces off the ground first, or maybe you've hit the ground a lot before your golf ball, or maybe you've hit a combination of fat shots and then thin shots, always double check the position of your spine at impact.
If your spine is leaning way back, then chances are you tried to get to post up long before you got yourself over onto your lead side.
So think about breaking it up into three pieces here.
So you want to load to your right side.
You want to complete the transition by feeling your body move back into that spot.
And then you can start to make your post-up happen.
But if you're starting to go ahead and actually show them what it would look like if you start your post-up before you complete it.
That's the move right there.
Now, your hips are actually in the position that we just outlined, right?
They're 35 to 45 degrees open.
It's pretty close to being neutral.
But if you look at the upper body here, you can see that his spine is leaning way back here.
Okay, that's a lot of tilt.
And remember, that's going to start the golf club more on an ascending blow.
But if you watch Craig here as well, you're going to notice here that as he leans his spine back, you see how it shallows the swing plane?
Now, I know a lot of you have probably been like, well, I've always wanted to shallow my swing plane, right?
So all I've got to do is just lean my spine back?
Wrong.
That is the fake way of actually shallowing my swing plane.
If Craig and I were to see your golf swing, we noticed that you swung the golf club over the top.
Then a quick little band-aid fix for us would be okay.
We're just going to hold your spine back behind the belt ball and let you start ripping it away.
But that's again, that's throwing band-aids, and that band -aid eventually is going to get wet and it's going to fall off.
And you're going to just have more of a time velocity.
So the point of what I'm trying to pass along to you guys today is that I want you guys to start moving a little bit.
Use weight shift to your advantage.
Okay, don't be afraid to load and then unload, think about loading your right side up and then unloading and then begin your post up.
Because that unload is pulling the upper body into the correct position for the bottom out point to be in the right spot.
But it's also getting you into position now that your post up is going to be much more stable and much more ready.
For you to be able to let the club fly past your body with the most efficient speed possible, make sense, okay?
So that's a very, very key point that I saw specifically, and because the fact that it looked like people were trying to be too urgent right right now again.
I also saw people afraid to move a little bit off the ball.
I saw a little bit more downward movement from the head than I wanted to see when you were loading in your trail side.
So think about getting your weight over to the right side and think about the head position, allowing you to move a little bit.
If you allow it to move.
You're giving yourself more load and your chances are that you're going to be moving off that side are way increased, right?
So if you want to.
My dad always taught me one really important thing with in New Hampshire, like, you know, behind the woods, if you want to fire your gun, you got to load the thing up, I was like, okay, that's a valid point, Dad.
Thank you very much.
So simple little thought process for you.
But you've got to get that load in that side.
Don't just think by turning your body to load your trail side up is enough to be able to move in that direction.
Because a lot of times people will just stay very static and they'll just start turning as much as they can.
And that's when, in turn, their spine starts to look like it leans a little bit more away from the target here.
Their head kind of goes back in the other direction.
And then from here, when they try to transfer.
head starts moving back away from the target.
So I did see that quite a bit this week.
So it just tells me that you guys are afraid to move.
Don't be afraid to move louder than the swing.
Anything that you saw in particular?
That was the main thing that I saw was in transition and getting into post-up, the big lock of the head.
I mean, we've covered that topic today.
But that was, everybody did very well at still shifting and rotating and hitting the positions.
But it was just getting to this position and saying, uh-oh, I can't move my head now.
That was probably the main fault that I saw.
Okay.
So, Jess, don't be afraid to move back into position before you start your post -up.
Measure it on camera or in your mirror.
Say, okay, if my head is moved off the ball and I've come back into position, I can now start my post-up.
If I move off the ball and I start shifting my hips and my head never made it back to its spot, then you have no business trying to do this post-up move that we just talked about on Tuesday.
Okay, so fix the upper body.
Allow it to move back into this spot.
I can tell you how common this really is.
This is a mistake that we see very, very much over on the website, even when boot camp's not going on with other players.
Because, again, you guys have always been taught to stay really centered.
So I'm not going to keep beating a dead horse at this point.
I'd like to get us moving, I'd like to get us up and out of our chairs and do a quick interactive workout.
Maybe five or six reps or so, because we do have a lot of checkpoints.
We want you guys to be very clear on when we do have the lead arm in the golf club back to the next.
So for those of you at home, I did see Sean say, ouch, yes, that position will hurt your back too, whether we had Craig in here just a minute ago.
Yeah.
All right.
So for those of you at home that want to warm up with us, we want you to get two inches outside of neutral.
We might want you to err on the side of being a little bit wider than what you guys have seen or what you guys have been sending in for videos.
So make sure you're two inches outside of neutral.
Just a little tiny bit of knee flex here at address.
Okay.
The way you want to start this movement.
is by taking your right ankle, it's your right ankle, push it into the ground like you mean it, 70% of your weight underneath that right ankle, and then take that right shoulder and pull it back behind your head.
Try your best to be able to get this right shoulder to pull back to where it's popping out on this side of the head, and try your best to maintain as much knee flex as you possibly can.
Not a big deal if you lose a little bit of knee flex as your right hip rotates back.
We want your hips to rotate, okay?
So again, take your setup.
Push the right ankle to the ground, right shoulder back.
Okay, now we're going to squat to square.
Remember, think about this from the ground up.
We want to squat to square and allow our hips and knees to come back to a square position.
We want to make sure our head moves back into the right spot with our shoulder line being closed.
So left shoulder down, right shoulder up.
Okay, 65% of your weight underneath that left ankle is perfectly fine.
All right, so now let's go from a static address position to backswing and to squat to square.
Load the right ankle, pull the right shoulder back, squat to square.
Now from this position, what we're going to do to post up, Is we're going to be pushing that left ankle into the ground?
okay, so we're going to be pushing back into the ground.
Now that we've got some force under there, so we're going to be loading into that side, we're going to be pushing down an ankle.
We're going to work to open those hips up to 45 degrees, how we're going to do that, well, we're going to pull that hip back up and away from the golf ball.
So it's going to move vertically and it's going to be moving up and behind you here.
Okay, so that's exactly the way that we want you to facilitate this movement now.
When you finish this move, your hips should be open 35 to 45 degrees and your shoulder line must be square If it's open, you're doing it wrong.
You're going to make it very hard for you to release the club in time.
We want our max speed point to be down here at the golf ball.
Okay.
All right.
So now let's walk through this really slowly.
Okay.
So good setup position.
We're going to push the right ankle on the ground.
We're going to take the right shoulder, pull it back behind the head.
Now what we're going to do is we're going to squat to square, hips and knees back to the square position, shoulders closed.
Now we're going to post up by driving the lead ankle on the ground, pulling that lead hip back up and away.
Okay.
Now we're going to do it just a little tiny bit faster, okay?
Push the right ankle on the ground, right shoulder back behind the head, squat to square.
Post up.
Finish position Open 35 to 45.
shoulder line.
Nice and square.
Okay, get the left side of the body stacked up.
do it again.
right ankle, pull the right shoulder back, squat to square, post up.
Perfect.
Now let's turn down the line.
I'm going to give you guys a couple of key points here, Okay, so make sure you have the proper knee flex at address.
You want the back of the knee to be directly over the center of the ankle.
We don't want to see too much knee flex.
Okay, we don't want to see you sitting way back in your heels or way out over your toes.
You want your weight to be right underneath your ankle joints.
Okay, you want your butt back, your chest will be over the golf ball, shoulders in a good neutral position.
Now remember, your job is to push your right ankle on the ground and then take the right shoulder and pull it up behind your head.
Okay, so no downward movement from the head happening here.
You can see that his shoulders have rotated perpendicular to his spine.
You can see that he's maintained a little bit of flexion in the right leg.
His hips are rotated back about 35 to 45 degrees, shoulder line right around 90 degrees.
Okay, do it again.
Right ankle into the ground, right shoulder back.
Now from here, what we're going to do is we're going to squat to square.
So the hips and knees are going to come back to a virtually square position.
You see a little bit of the lean thigh popping out here, perfectly fine.
Don't panic.
You want your weight to be focused where?
Left ankle.
Okay, do not let it go to the forward part of the foot.
If it goes to the forward part of your foot, then you did a closed hip slide.
That's when your hips have not unwound enough.
You've not created enough of the dynamic movement that either Craig and I talked so much about during the sessions, okay?
So load the right ankle, squat to square.
Remember, the shoulder line must remain closed.
So for those of you at home that have a logo on your shirt, the logo should be pointed back at the camera, okay?
Now from here, what we're going to do is post up.
We're going to push that left ankle on the ground, and we're going to pull that left hip back up and away.
So we're trying to get that lead leg into a passively straight position.
The right foot is rolled in just slightly.
Hips are open 35 to 45 degrees.
Shoulder line is nice and square.
Now, I know that sounds like a ton of checkpoints, but it's really not that many.
I'm giving you a lot of different things to think about in each one of those positions because we've covered a lot.
Now, as we start getting more and more reps, you're going to hear that these words are starting to consolidate down.
Now, if you go back to session number one, We talked briefly about keywords, and keywords are just basically the ways that Craig and I are communicating with your brains.
So you're going to hear, as I start going through these reps now, that these keywords are going to become much smaller and faster.
And so for those of you at home that have done a really good job of putting all this stuff together.
You're going to be able to move with the pace that we're moving at, for those of you at home that aren't ready to move at this pace, perfectly fine.
Pick one or two sections that you want to work on within this warm -up and then do that with us.
Okay, so we're going to do maybe five reps on each side, Okay.
Start down the line.
Yep.
All right.
So we're getting ready to rock and roll here.
So we're going to push the right ankle on the ground, pull the right shoulder back, squat to square, post up.
Okay.
So you can hear it.
I'm just using the three big words.
Okay.
Right ankle on the ground, right shoulder back, squat to square, post up, stop.
Make sure your hips are open 35 to 45, shoulder line nice and square.
Okay.
Back to the start position, right ankle on the ground, right shoulder back, squat to square, post up.
Okay.
Now you can see that even in these warmups, As advanced as we are with these movements, we're not blending them together.
We're doing these in three chunky pieces.
If you feel like you're above us and you want to do these things in a whole dynamic movement, then by all means do so.
Just make sure that each and every one of these positions, you're hitting the exact spots that we just talked about when we were breaking them down.
Okay, so right ankle on the ground, hold the right shoulder back, squat to square, post up.
Okay, let's do a couple real fluid now.
Right ankle on the ground, right shoulder back, squat, post.
Good.
Turn face on.
Okay, so right ankle on the ground, right shoulder back, squat to square post.
Okay, this is how you're going to be trying to get yourself to move into and through these positions.
Now, we started out the process now for about 10 or 12 minutes or so, going through slow, chunky movements with a lot of key points in them to make sure that those positions are right, to make sure that we've loaded your trail leg, to make sure that you've turned 90 degrees, to make sure that your head is only moved an inch to an inch and a half off the ball, to make sure that you've completed your transition, to make sure that you post up correctly.
And those are all, there's all of these movements that happen within those big movements, right?
Or these all these key checkpoints.
And so if you don't have all of those key checkpoints in place, then take your time and get them right.
Because adding the lead arm and the valve flip to the mix, like we're about to do right now, will just further break those things down.
Anything you want out there, no, I mean, that's the main thing is get the engine down first, because adding the arm, adding the club.
You're just stacking more variables, and when you have more variables stacked on top of yourself.
Your brain reserves are going to start going here, there, there and there.
You're going to take the focus.
All Four really matters.
Right.
Okay.
So let's get into today's program.
So those of you that did stand up and work out with us at home, go ahead and have a seat, grab some popcorn.
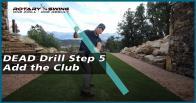
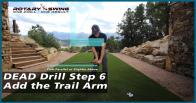
We're going to talk about how to get your lead arm and your golf club in the mix.
Now, the big thing that we cannot emphasize enough here, and this is the reason why it's in red bulb lettering on your PDF, is because it's extremely important you understand that nothing that we've learned at this point is going to change.
You're going to see very, very quickly how easy it is, and it's going to be really frustrating for a lot of you at home when you start looking at your body turn, and all of a sudden you're like, man, I'm only turning 75 degrees now.
Why am I only turning 75 degrees?
Or I notice that I'm almost running into reverse bit of territory.
I notice that my right hip continues to shift because, again, the left arm or your lead arm and your golf club can start to move this golf club pretty quickly.
When you start moving the golf club with any sort of momentum and inertia in it, your brain goes kaput.
It's very hard for you to maintain kinesthetic awareness within this.
And so what we want you to do is we're going to give you a very, very simple way for it to be able to go through this.
Double check that you're doing these movements 100% right.
And then we'll start working on adding the fluidity and the dynamic movement to it as we get further into the process.
So we always like to start out from a static address position with no golf hook.
We're going to do this with our arms across our shoulders.
And we're going to start out by turning our body and then extending our left arm up.
To the top of the swing here.
Now, why would we want to do something of this nature?
Well, let's think about this by just taking the left arm and extending it out of the top of the swing.
After you've completed your turn, now, you're ensured that you've loaded your right side up properly, right?
You can feel the load in that right glute, you can know that you've turned your body 90 degrees.
So you're going to start out by doing a good number of reps, what would you say?
10 to 15 reps, just like 10 to 15 reps?
Rotate to the top, add the arm just to make sure that you keep rotating.
And you know what the position feels like with the load, with the contraction and the cool, yep.
And so now, once you've done that, you're like, Okay, this is a piece of cake, okay?
What you want to do is you want to start from a static address position, with your lead arm hanging down freely underneath you.
Now, the checkpoint for your lead arm at the top of the golf swing is going to be you want to keep it passively straight.
Now let's talk about what that means.
Because we're going to get a lot of people that are going to have a hard time keeping this left arm straight.
Okay.
We do not want it ramrod straight.
Okay.
Where you're making it a workout program.
Possibly straight where it's nice and relaxed.
If you see a little tiny bit of bend in it.
Look at my left arm.
If you see a little bit of bend in it right here, it's perfectly fine.
Okay.
Because again, we don't have your trail hand and your trail arm on the golf club to help add support to this.
We think about the trail arm and the golf swing as being like our governor's width.
It's also a support system to what's happening.
If you see a little bit of break in there, perfectly fine.
If you see your arm like this at the top of the swing, abort mission.
That would be the other end of the spectrum.
Passively straight.
Think about your passively straight position here.
Again, if you have a little bit of flex in it, it's perfectly fine.
You're going to look for it to be passively straight, and you're going to look for your left hand to be above your right shoulder.
That's it.
That's the only checkpoint that you have for the backswing at the top.
That's it.
is I want you to start from a static address position, and you're going to do another 10 to 15 reps or so, just like Craig's doing right here.
So you're going to push your right ankle on the ground, and you're going to feel that right shoulder pull back and behind your head.
Now, a lot of you, even without the golf club in your hands, are going to feel some tension up here in the left shoulder.
You're going to feel some stress in here.
Now, why is that?
Well, because there's a movement happening in this golf swing that a lot of you are probably unaware of, and that's what we call shoulder elevation.
Now, shoulder elevation is basically just defined.
If you were to start from a static address position, and you were to lift your arms vertically, okay, to where your elbows are at the base of your chest, that's a movement that's being facilitated mostly by the shoulders.
And so it's okay for the arms to have a little bit of function.
We just don't want them to swing across your chest, and then you start shutting down your body turn, and then you start getting into positions where your arms have loaded up your body, and not your body loading up your arms.
Make sense?
Okay, so the checkpoints are, at the top of the backswing, is that your left arm is going to be passively straight.
and you're going to feel like you're trying to get your hand up above your right shoulder.
Again, if you look at it in the camera and it's a little bit low, no big deal.
If you look at it in the camera and you see a little bit of break in there, don't panic and send it in for swing view.
I can't get my left arm straight.
What am I doing wrong here?
Just understand that when we get the right hand in there on Tuesday, it's going to be much easier for it to be able to add support to this system.
Okay?
So now, pretty piece of cake, right?
So you do 10 to 15 reps starting from the bottom.
Okay?
Then you do 10 to 15 reps.
We add the lead arm and work up to the top of the swing.
Now we're going to start adding the transition in.
Now the transition is going to be a big, Big piece for you.
Because this is where you're going to start unwinding your shoulders too quickly, or you're going to start actively pulling your hands and arms down from the top of the swing.
And this is where we're going to give you some very, very specific checkpoints that you're going to look for.
So when you start making your move over to your lead side, when you complete your transition, you want to show them face on first?
So when we squat to square, Not only is the head and the chest come back into position, and that left shoulder remains low, but you can notice here that his hand and his arm have dropped down to where?
So roughly about parallel to the ground or so.
That's outlined up here on the squat.
So you're going to be looking for, after you complete your squat to square move, that your lead arm is right around parallel to the ground.
Now from here, when we start to make our post-up move happen, and our hips open up to 35 to 45 degrees, now you can see that the left arm is all the way down where?
Well, this is the fun spot right here, right?
This is the delivery zone.
You have now got your lead arm in the position of where you just let things fly down.
So what you're going to be looking for is that the left arm should be hanging pretty freely underneath the shoulder.
It should be a pretty relaxed position.
Craig, are you tense with your arms out away from your body at all?
I'm pretty chilled out.
Yeah, you always have.
I'm pretty chilled out.
I love that.
So when you finish this move, your left arm should feel just kind of hanging there.
Okay, you're going to feel a little bit of support in the shoulder to keep it in this position rather than being over here.
But you're going to notice that.
The center of his hand is in the center of his trail thigh.
Okay, that's a very, very specific checkpoint that we're going to look for is that we want the center of your hand and the center of your trail thigh.
And when we start adding the golf club to the mix, you're going to use the golf club as a couple of different reference points here as well.
Okay, so everything that we just did is all exactly the same now, with just your left arm hanging on to the shoulder block.
Now, when you do this, you want to stay relaxed through the left arm and shoulder, you don't want to be really tense.
The only tension that you'll probably feel if you're doing this correctly would be at the top of the golf swing.
When the left shoulder goes into a little bit of protraction to help support the arm into the vertical plane.
That's really it.
When you start making your move over to your lead side, you want to feel like your shoulder is relaxing.
You don't want to hold your shoulder into a tense position.
A good way for you at home to double check this is after you make that move to your lead side is shrug your shoulder up to your chin.
Why don't you go ahead and squat the square.
Shrug your shoulder up into your chin and then fully depress it.
And then feel what it's like to actually have your left arm and your shoulder in a very relaxed position here.
That is where you want to start to post it from.
If you feel like you're holding your shoulder in this really, really tight position, then stop what you're doing and then start the process over and then make sure that that shoulder comes down into a nice, relaxed body.
Anything you want to add to that?
No, no.
I mean, that's one of the big things that we see is it's going to feel new.
And when players tend not to rotate enough, they're going to swing their arms.
They're going to get a lot of this tension.
And they think they're going to be like, OK, well, I'll just recover by making a good squat to square.
Then they make a squat to square.
And when they get to this position, you've got all this tension right here.
And what you really have to focus on is I always tell players, remember, we're trying to build an effortless golf swing.
If you feel like you're providing a ton of effort.
Abort mission.
Right.
Because something's wrong.
Right.
So we had a question come in.
So Jason said, what do you mean by having the left hand over the left shoulder?
So if I said left shoulder, my apologies, we want the left hand to be above the right shoulder at the top of the swing.
Okay.
So do you mean it should be higher than the left shoulder or is it that the shoulder should be directly above the left shoulder?
So you want your lead hand to be above your trail shoulder at the top of the golf swing.
I'm sorry if I said that incorrectly.
Okay.
I'm glad that we had a chance to clarify that if I did.
But when you turn your body back, there's going to be a little bit of elevation that's happening from the shoulder itself, and your hand is now going to be above your trail shoulder.
Okay?
So now let's look at it from a down-the -line perspective here because there's going to be some key checkpoints.
Okay?
So from a down-the-line perspective, we're going to be looking for the lead arm, okay, when you make your first move over to your lead side.
And that lead arm is parallel to the ground.
You're going to be looking for a hand to be right around the center of your chest.
So let's show them what that looks like.
Okay, so you can see here looking back at Craig, and you see how his lead arm or his lead hand is right in the center of his sternum.
There now show them in incorrect positions, so you see how his arm now has worked out away from him.
That would be a byproduct of having your shoulders unwind too much, or just being way too tense in your shoulders and your arms.
To begin with, another position that will be really detrimental to us is if you start seeing your hand and your arm drop way down in behind you.
Okay, that's what we would consider a stuck position.
So when you complete your squat to square from a down the line perspective and your lead arm is parallel to the ground.
You want to make sure that your lead hand is right in the center of your shirt, or maybe just slightly in behind it.
Not way back in here and not way out here.
Okay, piece of cake.
Right now.
The next move is when you start moving from that position and you begin your post up.
I always tell people to feel like your left arm is falling straight down the ground when you do this.
Because if your left arm feels like it's falling straight down, what are your hips doing?
Well, your hips are unwinding.
That's what's moving the hand and arm further around the front for you.
So your end goal here is when you shift, your left arm is going to be hanging down freely underneath your shoulder, very relaxed.
It's not a tense position.
You're going to be really, really chilled out down here.
It's like a nice Kenny G concert for those of you at home.
Get a bath with some lavender and some chamomile in it.
Take a few deep breaths and relax, all right?
So left arm is going to come hanging down right in front of the trail thought.
Now, let's think about this.
You just now completed your backswing, you completed your transition, and you completed getting yourself into an impact position, all with your lead arm in the mix.
Now, what that should look like when we have a golf club in our hands is it should look like you're establishing this really nice swing plan, right?
Everybody loves to focus on that fancy term in the golf world, is swing plan.
Swing plan, swing plan.
Swing plan is a good term.
It's a term that we have to use on a day-to-day basis because the fact that as golf instructors, it's a way for us to be able to see where you're at within the swing shape.
But what we're focusing on is moving our body to be able to create this swing play.
And all we did was just add the lead arm to the mix, and now the golf club will follow along.
So for those of you at home that are going to be adding the golf club over the next couple days, which you should be, is we want you to start out with the golf club flipped upside down.
Okay, why would we want to flip the club upside down?
So you don't start swinging that club because this head.
Has a lot of mass to it.
You're going to start swinging that mass around, trying to find positions, and we don't want you to be searching for positions.
We want you to still focus on what you've been doing and not swinging a stupid club around, right, exactly.
So what you're going to be doing now is you're going to start with this, go upside down and you're going to do the exact same thing.
So you, you can see how there's a level of progression here.
For those of you that have ever heard the term stacking around rotary spin, well, this is how we stack things in, right?
So we start out, we isolate, We turn our body, we add the left arm up to the top, and then we start with a golf swing where the left arm is hanging down freely.
We move through those exact positions, and then we start adding the golf club.
Now, if you get to a point over the next couple of days where you're not seeing really, really good work when you just have the left arm there, then don't put the golf club in the mix.
You don't need to have it there.
We would rather have you get more focused movements because everything that you do with your body.
Is going to force this golf club to react right?
And so, if you want to have a perfect looking swing plan, and you want to have a perfect looking position.
That drops into the slot, which is one of my least favorite expressions in golf, then you will.
You will make sure that you have your left arm following along.
Just like we outlined it here, and those things will actually happen and we'll show you in just a moment.
Okay, so now we're going to add the club to the mix, we're focused on the exact same points.
We're going to push that right ankle on the ground, we're going to turn our body back by pulling our right shoulder.
Now, you can see here that Craig's left arm is passively straight Again, some of you might see a little bend in it here.
Okay, but remember, we're looking at it from the ground up.
We want to make sure that your hips are rotated 35 to 45.
We want to make sure that your shoulder line has rotated 90 degrees, which it has.
And now from here, we're going to squat to square, so the hips and knees come back to a square position.
The left shoulder remains low.
The head comes back into its original spot.
That head must come back into its original spot.
Lead arm is now parallel to the ground, and we're all ready for post-up.
Post-up brings the left arm down into position.
And you can see here now, this is now a new spot that you're going to be looking at.
You want to see that the club shaft is at least parallel to the ground when you finish off your movement.
Now, how I want you to look at the movement itself is exactly how I've been saying it to you here for the last 10 to 15 minutes is from the ground up.
We want you to look at your legs and your hips first.
So are your hips open 35 to 45 degrees?
Yes.
Okay.
Is your shoulder line nice and square?
Yes.
Is your left arm hanging down freely in front of your trail thigh?
Yes.
Is the golf club parallel to the ground?
Yes.
That would be a very, very good rep.
You know that you've moved into and through the positions that have got you into the impact position that we're looking for.
And that's how you want to look at the golf club.
Don't just start looking at it from the golf club first.
I know a lot of you at home are going to watch the golf club go into certain spots.
Those of you that watch the golf club go into certain spots or look at it down here first and you're not looking at your legs or your shoulders, are going to be the ones that we have to make a lot of corrections to.
Watch it from the ground up, okay?
That's the position you're going to be working into.
Now let's look at it from down the line when we add the golf hook to the mix.
So we're going to push the right ankle in the ground.
Now here's a spot that we're going to probably have to talk a little bit about on Tuesday.
It's at the top of the golf swing, we want the left wrist to move into an anatomically flat position.
So the left wrist, we like it to rotate a little bit.
And so when it gets up above that right shoulder, You're looking to make sure that you don't have any sort of cupping.
So that would be a cuffed wrist right here.
So you want to allow the wrist to be in an anatomically flat position.
So for those of you that have maybe the club a little bit across the line or maybe you've laid it off, then when you do your left arm only reps, you stop at the top of your swing, you're going to want to make sure that you're anatomically flat.
If you're not seeing that it's anatomically flat, then fix it.
You want to make sure that you get into the correct spot every time, add the golf club back in the mix.
Okay, now from here, we're going to squat to square and lead arm comes down to about parallel to the ground.
Okay.
Now from here, you can see that the club shaft itself is kind of sitting underneath the trail shoulder.
That's exactly what proper swing claim would look like at this point.
And then as he starts posting up, the lead arm comes down just in front of this trail thigh.
Club shaft parallel to the ground.
Now, we have a couple of other checkpoints that we're going to be showing you here in just a moment when we flip the club upside down.
Okay, we'll flip it right side up, right side up.
But the big point that Craig and I want to emphasize today is follow the exact body movements that you guys just worked your butt off for the last week and a half.
If you start trying to go and move the arm and move the golf club and you're not focusing on these big picture body movements, then things are going to look way out of sorts.
Right.
Right.
And I mean, and just even further that point, as I'm sitting here going through these reps, and obviously I've done a few before, but I'm literally not thinking about this at all.
Like I, this, this club right here, I'm not thinking a thing about, like, I'm literally just moving me and letting.
The club would go to the positions that it wants to go into as a byproduct of what I'm doing.
And that's, and that's easier said than done, really.
I mean, I'll be the first person to vouch for it, you know?
It's very hard, when we have this golf club in our hands, to shift our attention from where it goes.
Because it's super, super easy for us to be able to get this golf club.
To move very quickly from one side of the body to the other, with just our hands and our arms, okay, and it's very easy for us to get lazy and not use our body.
Okay, I'm a case in point of that.
When I played golf professionally, I battled with a ball going left.
Okay, and so you can't go out there and hit golf balls left.
When you're coming up 14, 15, you know, four or five, and apart hit a quick one out of play.
I expect when golf turns right, you couldn't shut, that can close the door.
And so the reason why that was happening is because my golf swing was always relying on tons and tons of leverage.
Where I got my arms kind of whipping across my body really quickly, and I had my arms get down in front of my body too quickly.
So what I was relying on was a whole lot of timing at the bottom of the arm.
Which is one of the things that we You just can't survive on.
And so in order for me to balance out my equation, what I had to do was learn how to turn my body more and learn how to load my right side.
And that was a very, very daunting project.
And to this day, and this is 20, almost 20 years later, actually 18 years later from when I played, it's still hard for me to turn my arm.
It's still, I mean, it's a very, very difficult piece.
And then now Craig, when he was playing professionally, he was battling with a lot of the same things.
He could get his arms a little bit quicker in the sequence.
You know, and then turning, coming out a little bit on the were you a little bit stuck at one point?
Oh, I was, I played the power of the lice.
Yeah, so I would get stuck.
And instead of trying to save it with my hands, I would just keep rotating, getting even more stuck and leaving it wide open, right?
And so a lot of times.
What you'll see is as golfers that are playing this stuff on a day-to-day basis is we start searching for different ways to be able to get the club out in front.
So we start trying to work from the hands and arms instead of actually solving the problem by the correct way, which could be done through your legs or something you've done with your torso, All right, So the big point here is that just make sure that you're moving from the correct order and making sure that you're moving from the correct body parts when you add this stuff to the mix.
Now, for those of you that get really advanced and ready to start putting the heavy end down in the golf club, we have a couple of specific checkpoints we want you to look at in the golf club.
And I'm about 110% certain that every single person in this room right now is going to send in swim reviews with their clubs on this side.
I am going to be in kamikaze.
I am too, and that's the one point that I really want to stress.
I know everybody's eager to get this club foot this way because it's like, Oh, okay, finally I got a club in my hand.
You can't discount doing it this way.
This is the best way to really get this motion down.
Because as soon as this guy gets into here like this, all bets are off, right, exactly.
And so there's a reason why you have a short amount of days between now and Tuesday when we get the right hand back on the club.
Because you're going to still get a large number of reps in your belt with your left arm only.
And then you're going to sprinkle in more of the right hand for the next four days after Tuesday to get you ready for graduation, okay, because that's where we need you to be in this good spot, or for the relief stuff to make sense.
And so we want to get you guys to do a number of reps on this left arm.
Only then when we start putting the right hand on there.
On Tuesday, which is Craig's least favorite day of it all, um, then you're going to see that.
Even throughout that week, we still want you to do a good number of left arm only swings.
Because the fact that.
It's giving your brain the signals to do the stuff that you need to do with your body to be able to get this stuff done.
Okay.
So for those of you that are going to, and I'm sure everybody's going to have this end down, same thing.
Okay.
But you're going to have some checkpoints here that you're going to look for at the bottom when you get into this release position.
Okay.
So up to the top, make sure that your left arm is extended out fairly straight here.
You're going to make sure that you've turned your body fully.
Okay.
These are the positions that you're going to look Squat to square.
So hips and knees have come back to a square position.
Lead shoulders low, trail shoulders up, head is back in its original spot.
Lead arm is parallel to the ground.
Now, post up.
Now, lead arm parallel, or sorry, lead arm is now hanging down underneath us.
The hand is in the center of the trail thigh.
It's not out here, and it's not in here, okay?
You stop with it in the center of your trail thigh.
Now, why do we want it in the center of our trail thigh, Craig?
Well, we want it in the center of the trail thigh because that's going to be where we start releasing it from, and that's the optimal point where we have our leg.
and ready to let this puppy go.
Right.
And so what we're going to talk about a lot on Tuesday is people are like, well, why did you have us post up first before we started letting things release?
Well, because again, everybody will forget about the legs at high rates of speed.
You'll start getting your arms down in front of you really quickly, and then your legs shut down.
We want you to finish off the movement from your legs because at that point, the golf club's going to be reacting to you at high rates of speed.
So simply put, we want you to get to this position and be able to stop because at this point, this is going to be forcing the release to happen anyways.
But you've got to double check that this golf club is in the perfect spot.
And the way that this golf club is going to be in the perfect spot is you're going to make sure that the club is parallel to the ground.
You're going to make sure the butt end of the club is pointed down your target line.
And you're going to make sure the toe of the club is perfectly up to the sky.
So what you're going to look for here is when you come down, squat to square.
You're going to make sure that the butt end of the club is pointed down the target line.
The club shaft should be parallel to the ground or maybe slightly more, and the toe of the club should be directly to the sky.
If it's towed down maybe a degree or two, perfectly fine.
We just don't want to see it shut, and we don't want to see it fanned wide open.
This is the spot that you're going to be getting into.
This is the delivery point.
This would be considered on plane.
This is how you move through the slot and get into the delivery areas that a lot of you would probably hear at home.
If you get into this spot right here, there's a very good or a very strong likelihood that your path is going to be pretty close to being zeroed out.
Think about that.
Tour pros on average are like a degree to a degree and a half max on either side.
That's it.
Either side of the playing level.
You come down and you're pretty close to being zeroed out, then all you have to do at that point is just let things go.
That's when golf becomes a way different world.
You start compressing the golf ball.
You start seeing the ball go out on a very penetrating ball flight.
Start seeing that it has a lot less movement to it, and it gets it gets a big all right, right, that's that dispersion starts coming in.
Because, as we talked about in session one, people want more distance.
And obviously we advocate hitting the ball as far as you can.
But at the end of the day, people want to be consistent, they want to hit fairways, they want to hit greens.
That's the easiest way to start playing fun golf is to not be searching for it all day.
And when you really start getting to this point, and you really start getting that pass zeroed out, you're going to start to see that.
Your dispersion, instead of being like this on the course, really starts to narrow up, right?
Exactly, that's one of the things that we work with the players at the highest level, so people that are getting played to play this game.
We're not necessarily making giant swing shape changes with them, we're working on things to the umpteenth degree, that are taking their dispersion and tightening up even more.
And and when you look at golf, okay, you understand how the ball is flying through the air, 80 of that stuff when you see it fly through the air.
80 of that golf shots DNA is dictated by face angle, the other 20 is dictated by the path.
And whether you guys know it or not.
Craig and I are always working on trying to establish a good, proper path for the club to be traveling on.
First, before we start working on face angle and a lot of you at home might be thinking, well, why would you want to fix the path first, when the face angle is the biggest bang for the buck?
Well, think about if the path is going to be working or working against you as far as the rate of rotation is concerned.
Okay, if you have the club coming in way too flat or way too far from the inside, then what you're going to have to see.
As far as the rate of rotation in the butt face is concerned, is you're going to see a very high rate of rotation.
And generally speaking, good ball strikers on PGA Tour, good ball strikers in general are going to be right.
Around 250 to 350 degrees per second.
Okay, that's how much the butt face is rotating through the hitting area.
Ball strikers that come in from the inside, way too far from the inside.
That's seven, eight, nine, ten degrees.
Their face rotation is going to be upwards of 800 to 1200 degrees per second.
Now.
Think about that.
When you go out there and see it on the golf course, you're going to see a lot more movement on the ball.
You play in windy conditions, you're done right, so you have to start.
You have to start changing the path first so that you can start slowing the rate of closure, or vice versa.
For most of us, that swing the club more over the top.
And what we're going to typically see is the club-based rotation is going to want to be a lot less than what we want it to be.
Because you have to hang on for your life now.
I have seen people swing the club over the top and have a very accelerated rate as well.
And those are the people that take these pulls for their hooks.
So what we're trying to do with all of these big picture body movements is in space.
We're trying to establish a good, solid swing plan that's going to get you in a good delivery point.
So that next Saturday, when we put this all together, that you let things fly and the ball flies nice and tight.
This expression, right?
And it's all about working less.
If you get these preset positions that we're talking about, where you get the weight, you get the post and you get to this trail.
Fine, you don't have the club wind or plane or steep out in front of you and you got the lag.
You're not going to have to work as hard to get that clubface to square up.
It's ready to do the job that it was designed to do.
And that's what we're trying to eliminate is the fact that you at home have to do something to square up the clubface.
We want it to be effortless.
We want it to be where, oh, I just get here and just let the club do what it wants.
Absolutely.
So this is kind of going down that road where you're getting these positions.
You're pre-setting yourself up to not have to worry about our favorite word, timing.
Right, exactly.
So that's one word that we actually hate, is we, I should say, dislike.
We dislike timing in the golf swing because we want the golf swing to do the same thing every single day.
We don't want to have to rely on a time agreement.
If you're relying on timing, then you'll go out there and hit the ball great for one day, and then all of a sudden, your timing gets off, and then you hit it terrible for the next three.
So you want to look at the golf swing and extract timing variables so the golf swing does the same thing every single day.
So I know that, again, we covered quite a bit of information here today, and I'm going to go through it real quick for you guys again at home.
I want you guys to start out with the arms across your shoulders, and I want you to do a bunch of reps where you push your right ankle into the ground and you turn your body and then extend the left arm up here.
And you can even do your squat to square in your post -up and go through the checkpoints that we talked about.
in this session, but the reason why we want to do this in particular, because the number one fault that we see in takeaway in backswings is you start moving from the arms, and that's giving your brain these false senses of load and these false senses of body turn, okay, and it'll happen.
There'll be a good portion of the class that you'll see they get to the top of their swing, and their shoulders haven't really turned at all.
Okay, that's because it's very easy for you to move the arm and the golf opener.
So once you start doing a number of reps where you see that you've got full body training, you've extended your arm out.
You know, you're in the spot that we just talked about, then you can start doing it from the bottom up, okay, if it takes you more than 10 to 15 reps during your warm-up to do this, perfectly fine, take your time, work at the pace that you're comfortable with.
Okay, we want you guys all to succeed.
I don't know if you guys understand that.
We want you to get this stuff down right, because we want you guys to see what it's like to get this ball.
Like, stuck, okay, and so take your time.
If you're saying that, okay, my body turned shut down, then you guys need to be disciplined enough to strip it down and put your arms back on your shoulders.
And that's where we want to give you the reins here and say, Okay, you guys are your own instructors to a certain degree.
And be diligent.
Look at it on camera.
We gave you guys very specific checkpoints to look for within your legs and your upper body here.
If they're not in that good spot and you've got your arm looking pretty up here, we're.
Honestly.
I don't give a shit.
Excuse my mouth, I don't care with all of those.
I'm sorry if I offended anybody with that poor word, but we got to put some emphasis here right Now, once you can do the back swing stuff with the lead arm extended, and you can make your transition over to your lead side, and you can make sure that you have the exact checkpoints that we have on your PDFs at home, then you can start putting the golf club back in there.
Now, when you start putting the golf club back in there, under no circumstance do we want you moving and kamikaze like you're flying airplanes into wherever mode.
You want to go ahead and do these things slow and chunky.
I don't care if you're a 2 handicap or a plus 4.
And you know, you've been through the the boot camp for this four times.
Do them slow and chunky.
I did this the other day before I went and played golf is I did slow, chunky movements to wake my legs up on purpose.
Okay, take the time, do that stuff.
Then, once you get those positions done, okay, and you add the club back in the mix.
You can either a start trying to move fluidly, or B, you can flip the club over to the heavy man.
And I know everybody at home right now.
We actually had a bet in, uh, boot camp number five, with how many people we're going to send in with a heavy head down.
And I think I ended up, well, you won it, but not by much.
So I bet there was going to be a very large number.
Craig's like, no, I think we've got a good group here that's not going to send in.
We had everybody send in with heavy head down.
So what we want you to do is make sure that when you go to this end of the golf club, you still start slow and chunky.
And by Tuesday, if you get to a point where you're loading, transitioning, and posting all as one piece, then the sky's the limit.
And the next week, you'll have a.
Kind of a cakewalk.
For those of you that are still working a little bit slow and chunky, don't worry about it because when we put the right hand on there on Tuesday, you're going to see that we're not changing anything at all, okay?
We're going to continue to do more of the same movements, and so you'll have that entire rest of next week to be able to get more reps under your belt.
That's what I'm trying to emphasize to you.
So don't feel like you have to race to catch up with us on Tuesday.
Tuesday to Saturday is where you're going to be spending a ball of your time.
Getting this stuff bundled up.
We're going to give you very, very large reps.
We're actually going to probably give you more reps.
That are on the videotape itself, or, I'm sorry, on the PDF itself.
Because of the fact that we know that, what we've seen throughout the last couple weeks with with the students here.
So we want to give you a number of reps here to get this stuff done.
And then Saturday, next Saturday, is when we start putting the rubber to the road and starting on this thing.
Fly.
Okay, so really important that you follow that exact process, you follow that, and then you're ready to rock and roll on Tuesday.
Then Craig's the least favorite day.
Hopefully, you know, he doesn't get stuck in I-4 traffic and come in here in a bad mood.
Then we'll be ready to start putting things back to the next year.
Anything else there?
No, I wish that we sold a package of a hacksaw with the boot camp to get prepared for Tuesday, because once you get to Tuesday and you start adding that trail arm, it's just.
Yeah, but you know what?
We've been through six other boot camps at this point.
We have already learned what a lot of the stakes are going to be with the right income on there.
And so when you come into a boot camp number seven, You're going to realize that we're changing the way that we're presenting the information to you.
Because we're going to give you some of these key points right out of the gate.
Because we want you to spend that next four days being able to be as 100% accurate as you can.
And so Tuesday is a fun day for us.
It's an easy day and to a certain degree for your brains because you're going to hear a lot of the same information over.
But it's a difficult day to be able to start getting yourself to really commit to this guy being back on the golf club.
And we've got some fun stuff we're going to do in that session.
Those of you that are needing to get out of here because it is Saturday, you guys probably have family obligations by all means.
You guys can check out here.
You can listen to the Q A's later when you have some more time.
For those of you that do have questions, I'm sure there's going to be a lot of questions coming in today.
Um, feel free to stick around with us, we'll we'll answer as many questions as we need to.
It's really important for anybody that Craig and I got a chance to work with over these last couple days.
You know, if we said something to you that didn't make any sense, or maybe you want us to rehash on something or demonstrate something.
Then we'll stick around here for a few minutes to be able to do that.
So, For those of you that are leaving, have a great rest of your weekend.
We'll see you on Tuesday at the normal time.
Remember, do these things in slow, chunky pieces.
Take your time.
Use the PDF.
Use the forums.
Make sure you use the swing reviews.
We're here to help you.
I've seen a number of people in this group starting to use the swing reviews.
The first session was a little bit quiet if you guys were afraid of us, but now people are starting to wake up and understand that you need to use it.
Use it.
We're here to help.
Very, very good tool.
Even when we get done boot camp next Saturday.
We're still going to be there to help you guys get this stuff to the driving range of the golf course because honestly, we want you to succeed.
So that's what it is.
So with that being said, those of you that have questions, feel free to post those up.
We will be here for you.
Okay.
So a question.
Handout talks about grip with back three fingers on the left hand holding the cleavage transition.
Anything more on that?
So back three fingers.
We're going to hear us talk a lot about that on session number six.
But when we're doing this, it's a good idea to have as light grip pressure as you possibly can.
So you'll see that the back three fingers, we want you just to hold the club lightly there.
Okay, we probably could have made a point that typically people are generally pretty light on the golf club at this point.
Um, you'll see that the grip pressure will start to increase once we start to put the right thing on there for some whatever reason that is.
But yes, you can use the back three fingers to hold the club very lightly at the top of the golf swing.
You'll notice that the thumb needs to be on the shaft just to help support the club.
If it comes off the shaft, then the club wants to kind of fall down and hit you in the head, Okay, so you can have it on there, just be very, very light.
And generally speaking, you know, when we get to higher rates of speed, you'll hear us even shuffle this around when we say the back two fingers, so your pinky finger and your ring finger.
The other finger, you know, if we wanted to have a little bit of pressure on there, but if you're squeezing it really hard, that's going to make it much harder to release.
Okay, so Mark, thank you very much.
Kevin, thank you very much.
At impact, does the trail leg foot rotate have flex?
So hold on, let me read this again.
At the impact, does the trail leg have flex in the knee or is it strained also?
I leave it flexed so as not to push off.
So we covered this in the last session.
The trail leg will more or less move towards the lead side.
It'll have a little bit of flexion in it, but it's not to the point where you're sitting way down in it and it's not ramrod straight.
So think about your right side being a reaction to what the lead side is doing.
If you see that it moves in just a little bit towards the lead side.
Okay, and then you see that there's a little bit of flex in there, that's perfectly fine.
Okay, just don't have a ram rod straight out there.
Because that's going to make it very hard for you to actually rotate your hips enough, and that's also going to make it harder for you to be able to maintain posture.
Okay, so, um, once we have full swing down, would you recommend using the arm band training aids that make sure your arms are right distance far during the swing?
We don't like bands at all, we do like the rotary connect.
Because the fact that it helps you maintain the proper spacing there without being locked in position.
When you start using the bands, it can actually restrict movement in the shoulders a little bit.
And a lot of you don't actually have extra and humorous rotation available to you.
And so extra and humorous rotation, we'll talk a little bit more about this on Tuesday.
You see how Craig's taking his arm and he's flexing and then he's moving his arm away.
That's a barrier.
So I have a fair amount.
Where some people, when you do this, when you hold your arm up in front of you.
You try to move it away, you can't move it at all, and that's a byproduct of you having, you know, very little flexibility, very little mobility in your shoulder.
I have a student the other day that has arthritis in his right shoulder and he's had surgery.
And so he has absolutely zero, uh, ability to.
Just can't move at all from this position, right?
And so by having the bands on there, it's going to literally force the humerus to externally rotate, and it can put you in a very uncomfortable position.
So that's why we use the word Connect, because it gives you a little bit more of a window, right?
You can still maintain space, but have it get a little bit further back there.
It takes a little bit of pressure off the humerus.
So good question there.
All right, so thoughts to consider.
For me, I have to avoid sticking my right hip out on the backstone.
I have to rotate internally in the right hip.
Second, I have to cut my butt slightly instead of having it.
The in any complexity in my spine reason is that by cupping, my upper body and hips stay together and thus 45 degrees relationship between body are maintained.
Okay, so let me read that one again.
That sounds like that you pat.
Are you adding Lordosis right here to try to lock it into the position right here?
That's kind of what it sounds like.
That's what it sounds like.
So reason is that the cut by cupping If you start adding Lordosis right here, so you start adding this cupping down here in the spine, not only are you putting yourself in a dangerous position, But you're not going to be able to facilitate your full rotation right here because you're actually taking each vertebrae right there and starting to crush each facet joint down there, and you're not going to be able to rotate as efficiently.
And also, it takes your pelvis right here, and it gets too much tilt in them.
So as you start trying to rotate and start trying to load, you're not going to be able to move your hips dynamically throughout the swing.
So you want to be careful that you don't add, I kind of call it dinosaur butt to my students.
You don't want to stick your butt out like a dinosaur like this.
Where your chest gets really forward and you get a lot of this rounding because you're putting a lot of compressive force on the spine.
And like even for me right here, I can't rotate from this position.
Okay, so Pat, I'm glad we had an understanding of that.
So hopefully Craig gave you the explanation that you needed in order to be able to resolve that.
So we see, will you be sending replay of session 12?
So yes.
So Ed, we always want to make sure that you have access to the replays because I know that I talk fast.
And I know that we cover a lot of information.
And the reason why I talk fast is because we've got to get all this stuff jam-packed in there.
But we also know that you have the ability to be able to go back there and re-listen to the information.
We also give you the resources like the PDF, to be able to use as checkpoints.
Because everything that Craig and I say in the session is up here, we're just saying it a different way.
Okay?
And so, if you find yourself getting lost on anything, then you go back and listen to the replay.
Now we have to put a time frame on the actual replays.
Because the fact that somebody was nice enough in our previous boot camps to take the information and start passing it along.
And it's proprietary information, right?
This is stuff that you guys paid for, you guys should only have access to it.
I don't know exactly what the time frame is.
I think it was 30 days, but they're giving a little bit more now.
We'll make sure that you have plenty of access, even when camp ends.
To be able to get the information that you need into your brain so that you know what you're working on.
I'd love for you guys to be able to keep it for a lifetime, but we just can't do that.
Are the swing reviews that I purchased only available during the boot camp?
No.
Swing reviews are good for as long as you want them to be good for.
They never expire.
We want you to be able to use this a lot of times after camp, because camp doesn't mean that we're sending you out into the world like a lost puppy dog.
It's your first day of school.
We're going to hold your hand for as many weeks as it takes.
Where you're going to be able to transfer this stuff to the golf course, because what we're doing here is we're building a golf swing, a drill swing.
It's going to be the one that you want to be able to show up.
We understand that you guys have millions and millions of reps under your belt on old swing habits.
And so we're going to be, Craig and I are going to sit on the other side of the fence coaching you through this stuff.
Sometimes when we get your move as good as we want it to be in a practice swing format, Craig and I take off our instructor's hat and we put on a coach's hat.
And that coach's hat is just basically walking you through how we want you to practice this stuff in order to be able to get into the golf course.
Because we know at that point you've already shown us that you know the moves.
It's your job to be able to follow these practice programs.
And that's one thing that we've really kind of turned the corner and specialized in a lot lately is that people need specific practice regimens when they go out to the range.
And that's something I, you know, I really work hard on a day-to-day basis with people, and it requires a lot of back and forth feedback from students.
That's where the elements interview group becomes paramount.
Because again, we say something to you, you need to be able to give the information back.
So that's something you might want to explore in the future.
So, um, all right, so I'm seeing a couple questions coming in here.
I'm having a very hard time keeping the left shoulder lower than the right in transition, especially with the left arm out of it.
Okay, so when you are working on this movement, You can think about it a couple different ways.
If you're focusing on the left shoulder remaining low and that's not working for you, then you can think about the right shoulder staying up behind your head.
You can also think about your back staying to the target as long as you possibly want.
The idea of this left shoulder low is to help your upper body stay wound.
So the way that we want to think about it is if the left shoulder remains low when you complete the transition, then we know that your shoulders are still wound up about 45 degrees.
The minute your shoulders look like this, after you've completed the transition, then we know that your shoulders have unwound to almost a fully square position.
And what that would look like from a down-the-line perspective is when you turn, you can see that there's no part of the logo facing back to you.
So there's multiple ways to be able to get this sort of movement done.
A lot of times people actually like the back-to -the-target sort of notion.
So when you start making your move in transition, if your back's facing the target, like mine is here, and I start shifting onto that left leg, I'm trying to keep my back there as much as I possibly can.
Now, under no circumstance are you going to keep it at 90 degrees or allow it to, you can't keep it at 90 degrees because if you do that, that's going to force you to close hip slide.
So you've got to allow your upper body to unwind based off of what your hips are doing.
You can keep that back to the target as long as you can, and then that's where you close up a complete move.
Yeah, and if you're struggling with it with just the lead arm, I would imagine you're struggling a little bit with it with the body because this barrel right here, Typically isn't just all of a sudden going to make somebody want to open up.
Take this golf club, exactly what you see me do up here and wind yourself up towards the top and do a couple transition reps.
Where you watch this grip end right here, as you squat the square and you're like, all right, this strip ends pointed down, the club's pointed back up, all right.
This is the move that I'm looking for.
You can even take your arm right here right now and do the same thing where you can see that this club's working down.
So I would imagine it's a little bit kind of earlier in the move, you know, even in your body drill, it's just adding the lead arms, making it change that much.
So I'd go back and put just a few more reps on, you know, putting the club across the chest and really making sure that it stays down.
Yeah, exactly, great point there.
So, um, Glenn just came in with a comment here.
After that said.
It helps me best to think about keeping my chest away from the target.
That's another good point.
The one thing that I've run into with giving that information over to a bulk of students is is that?
By keeping the chest away from the target, you can either slide okay, or what you can do is.
A lot of times, people want to keep your upper body back when they do this.
And so they start increasing secondary access zone right away, and that's, that's an exaggerated version, so I'll show you kind of.
Like, what I would normally see is when people keep your chest back here, they start shifting their pelvis and their chest stays in this direction.
So again, we're trying to get you all to the same position, it's just a matter of how you get there.
And so if you find that, keeping your chest back, or keeping your back to the target, or left shoulder down, or your right shoulder up, that's fine.
Just note that you want to have your shoulders wound 45 degrees and you want to have your hips back to a square position.
If you have those things in a good spot and you've got 60% of your weight on your lead side with your head, then you're doing just fine.
If you're having a hard time still at that point and none of those things are working for you, Jim, then send in a swing for review.
Let Craig and I get to work on it because we can figure out different ways.
And we can draw some lines on the screen for you and show you different ways to be able to get your body into the correct spot.
All right, so David, thank you very much.
Hopefully you have a good rest of your weekend.
All right, so today, Terry says, in today's session, the arms and hands are moved automatically in a down swing as a product of moving through squat and square and post up.
Yep.
I've heard golfers say swing the hands toward right field.
Question, with RST, do the hands automatically swing toward right field?
Or with RST, is the hand moving toward right field not even applicable?
So it's not even applicable.
So that sort of instruction is you focusing on the arms and the golf club first before focusing on the body.
You have to remember, the golf club is designed to be swung on an inclined plane, and it's designed to rotate.
So believe it or not, when your hands come down into the hitting area, your hands are actually going to be working on an arc.
If you're swinging out to right field, you're going to be working on fixing the thing that took me out of professional golf, and it's really frustrating to go out there and hit the blocks, and a big old quick hook, and Craig battled with it himself.
That's where you start getting things too far from the inside.
So if you start thinking about the direction that your hands and arms are going through the hitting area, you're doing it wrong.
Now, on the flip side of that, if you've had some sort of wackadoo movement with your hands and your arms and your swing, then in some very few one-off cases, we will get you to try to feel like you're moving in a completely opposite direction, okay?
Again, those are very, very one-off.
That's a very special kind of movement.
But in this case, you shouldn't have to be worried about it.
If your hands and arms come down into the spot that we just taught you how to do it, okay?
Right into this position, right here, all you gotta do is let things go.
And at that point, when the club is flying past your body, wherever your hands and your arms go, should be a byproduct of the club pulling your body around.
And we'll talk a lot about that on on next Saturday.
So good question, though, very good question.
We get that a lot.
We get questions about, you know, other ways of instruction that I might have heard in the past, and we have no problems answering that by no means.
Are we ever terry?
Are we trying to bash other methodology after we're not trying to pull this stuff apart and say that anything is bad.
We'll blow holes in it if we need to, but we want to make sure you understand that that sort of instruction is more or less like band-aid style instruction, where if you guys came into us, like you came here to Orlando, and you had some sort of shot that was bothering you, we could catch you in about three seconds.
I could.
I mean, we've done this a long time.
That's not me being arrogant or pompous.
That's just knowing, you know, how the ball swing works.
And I could probably get you to hit the ball pretty reasonable in that short period of time.
But that again.
Is not going to fix the root to the problem.
The the golf swing has thousands and thousands of cause and effect relationships built in it.
For instance, you know, if you load your right side, your spine starts going the opposite direction.
You have no idea what that does.
To hands and arms in the swing plane at the top of the swing, it forces a lot of redirect, it forces the club face angle to start shifting around.
There's all kinds of things that you can run into.
So, um, that's a good question, though.
Thank you very much for asking that one.
So Glenn says, it helps me best.
Oh yeah, we already answered that one, or we already commented on that one.
In full speed, when the ideal time to start the transition, have you finished fully rotating the vaccine?
Yes.
So we talked a lot about that actually in session number two.
So when you complete your body turn, so when you make your full 90 degrees turn, that's when you can start moving back to the other side.
If you look at it on camera and you're only at 80 degrees and you're starting to move back a bit because you're really anxious, then make sure that you finish off this turn.
Really, really important.
That's something that's very common for people to start moving back to the other side.
All right, so it looks like everybody's winding down, all right.
So, with that being said, we hope everybody has a great rest of your weekend.
Hopefully you guys got a chance to devour a lot of information over these last, uh, week and a half or so, and you guys are all ready to rock and roll on Tuesday.
This is actually, it's been two weeks now.
So on Tuesday, we're going to just simply start putting the trail hand back in the mix.
We're going to let follow along these movements.
Craig's going to get ready to punch all of you, And then we're going to give you guys a very, very large number of days to be able to get this stuff ironed out so that we can start putting the release stuff to it on the following Saturday, which is where the fun starts to happen.
That's our favorite day.
Because you guys get to start seeing what it's like and feel what it's like.
To actually move it off from one side of the body to the other.
So we hope you guys have a great rest of your weekend.
Hopefully everybody's staying safe out there.
Hopefully you guys enjoyed the information.
For those of you that might have missed anything during the presentation, you will have access to the replays.
If you have any other stuff that you want to talk with us about further down the road, then by all means, you know, use this interview system or use the forums to help.
But I hope you guys do have a great rest of your weekend.
Anything you want to add?
No.
Thank you very much, team.
Get to work.
I know this is going to be a little bit of a challenge, but remember, next week you'll have more time to kind of develop the sense of what you're doing with the body and the club.
So just go at your own pace this weekend.
We're going to keep really hitting these points on Tuesday, so you're going to have some time to get this done.
And yes, Daniel, your arms will still be moving as you start the transition as well.
So as your hands and arms are going back and you start moving in the other direction, the hands and arms, the momentum and inertia will still pull them back in the direction.
It's very minimal.
You're not going to see a ton of stretch back in that side.
But it will see that the hands and arms want to still continue to carry back there.
Also, if you keep your wrists supple enough, you might even see a little bit of down cock in the club.
But not to the point where you come Lagosaurus Rexes.
And then you come down in the hitting area where you have this angle that we have no chance of getting grabbed.
okay and giving you a golf lesson on how to try to get rid of lag when we have too much of it is our least favorite golf lesson to get because to teach somebody to do the exact antithesis of what they've always been trying to do where they're trying to keep the club from getting past their hands and to teach you how to throw it is a it's a daunting process excessive lag is a lot a lot harder to fix than not having enough exactly exactly so all right guys have a great rest of your weekend we will see you on tuesday


