





































































Fix Inside Takeaway - 4 Square Drill
Sorry, you need to be a member to access this video. You Are Just Seconds Away!

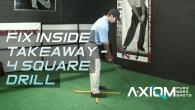
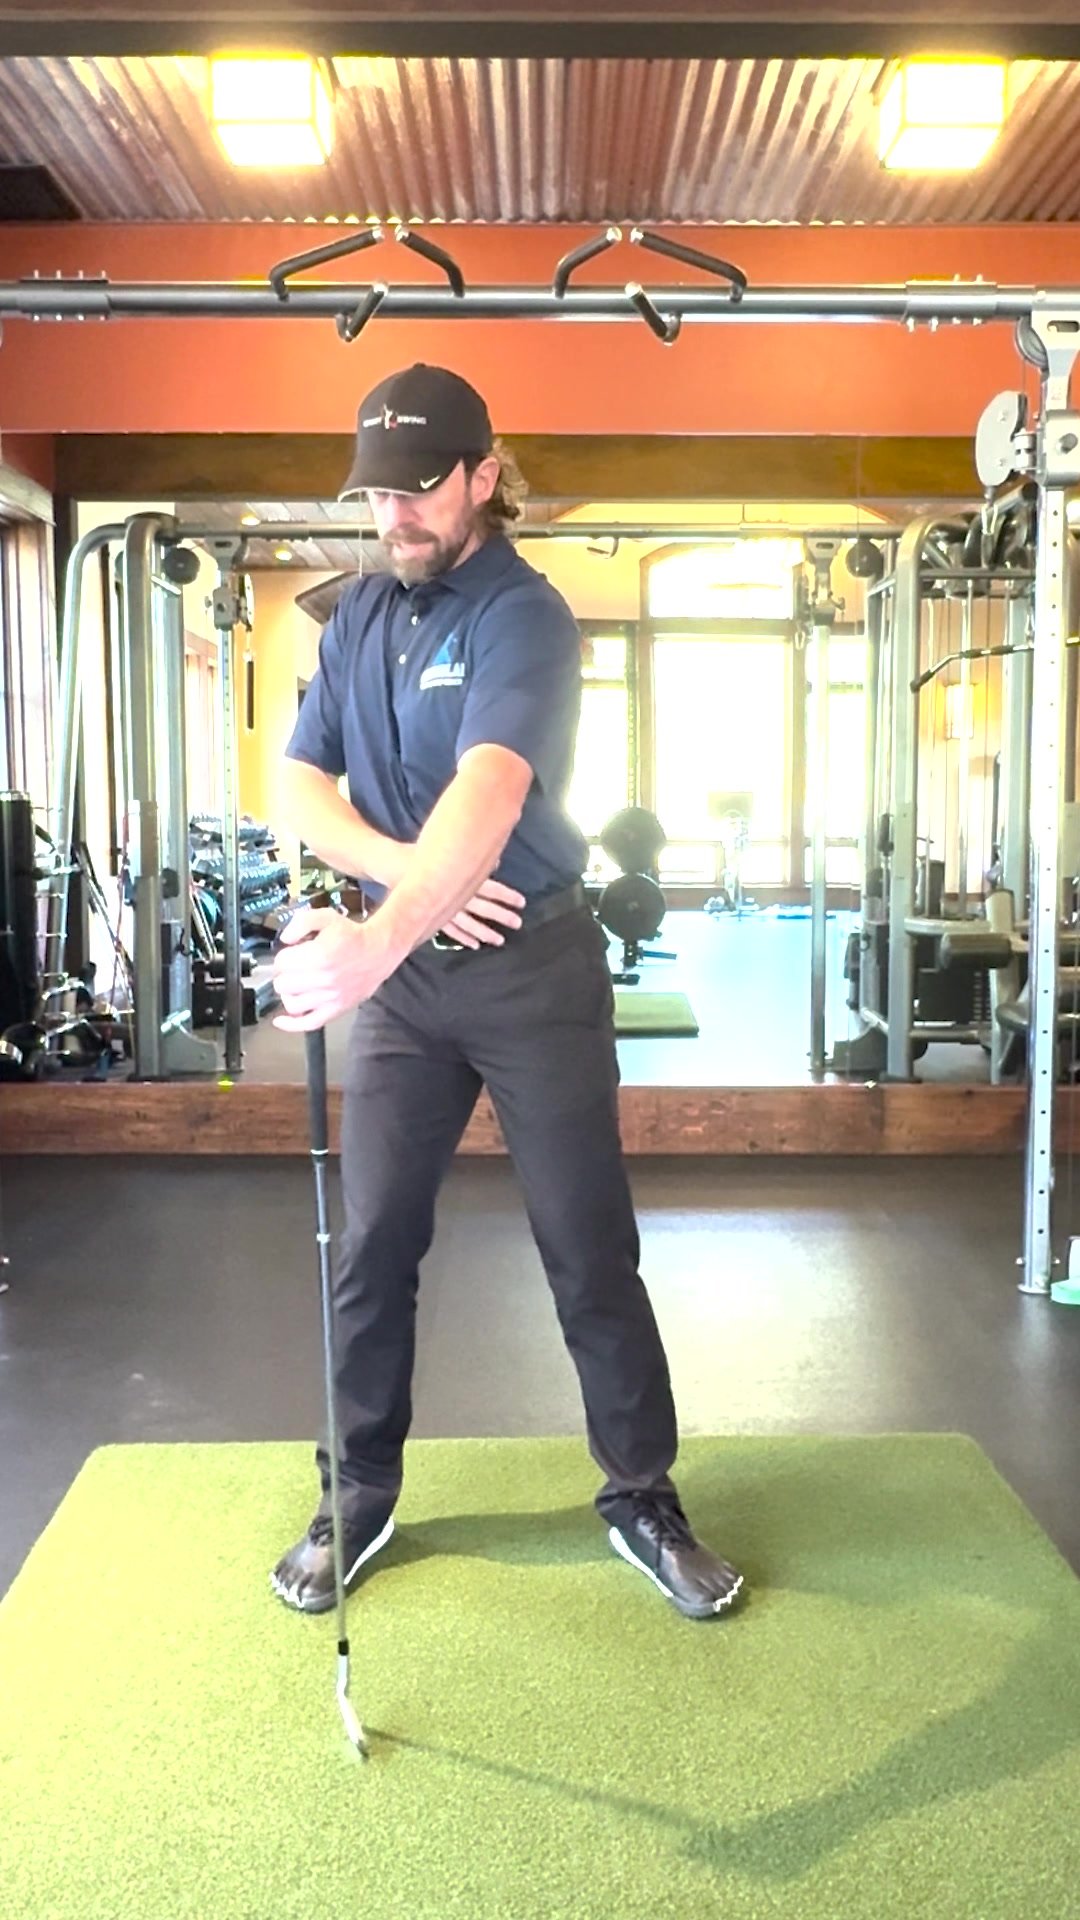
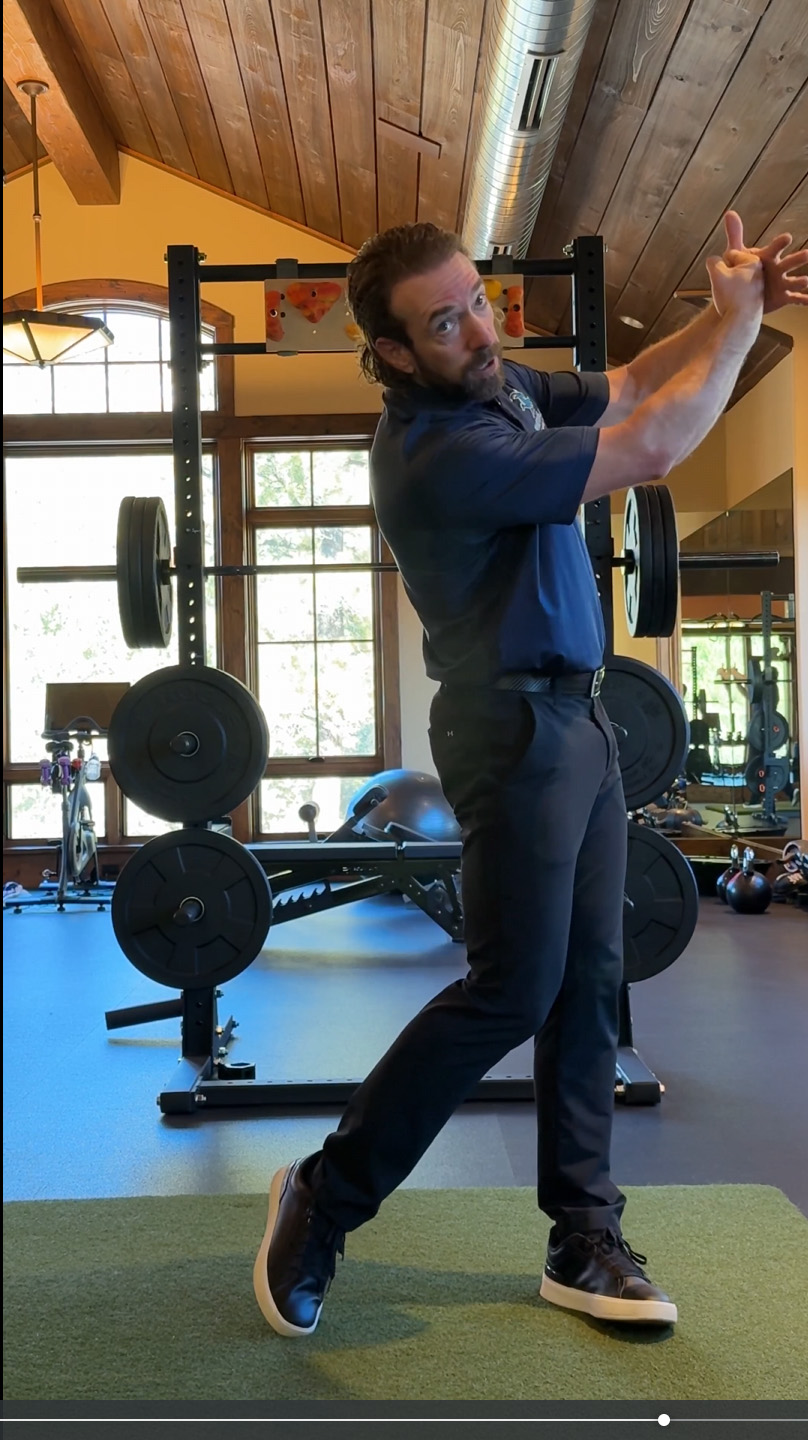
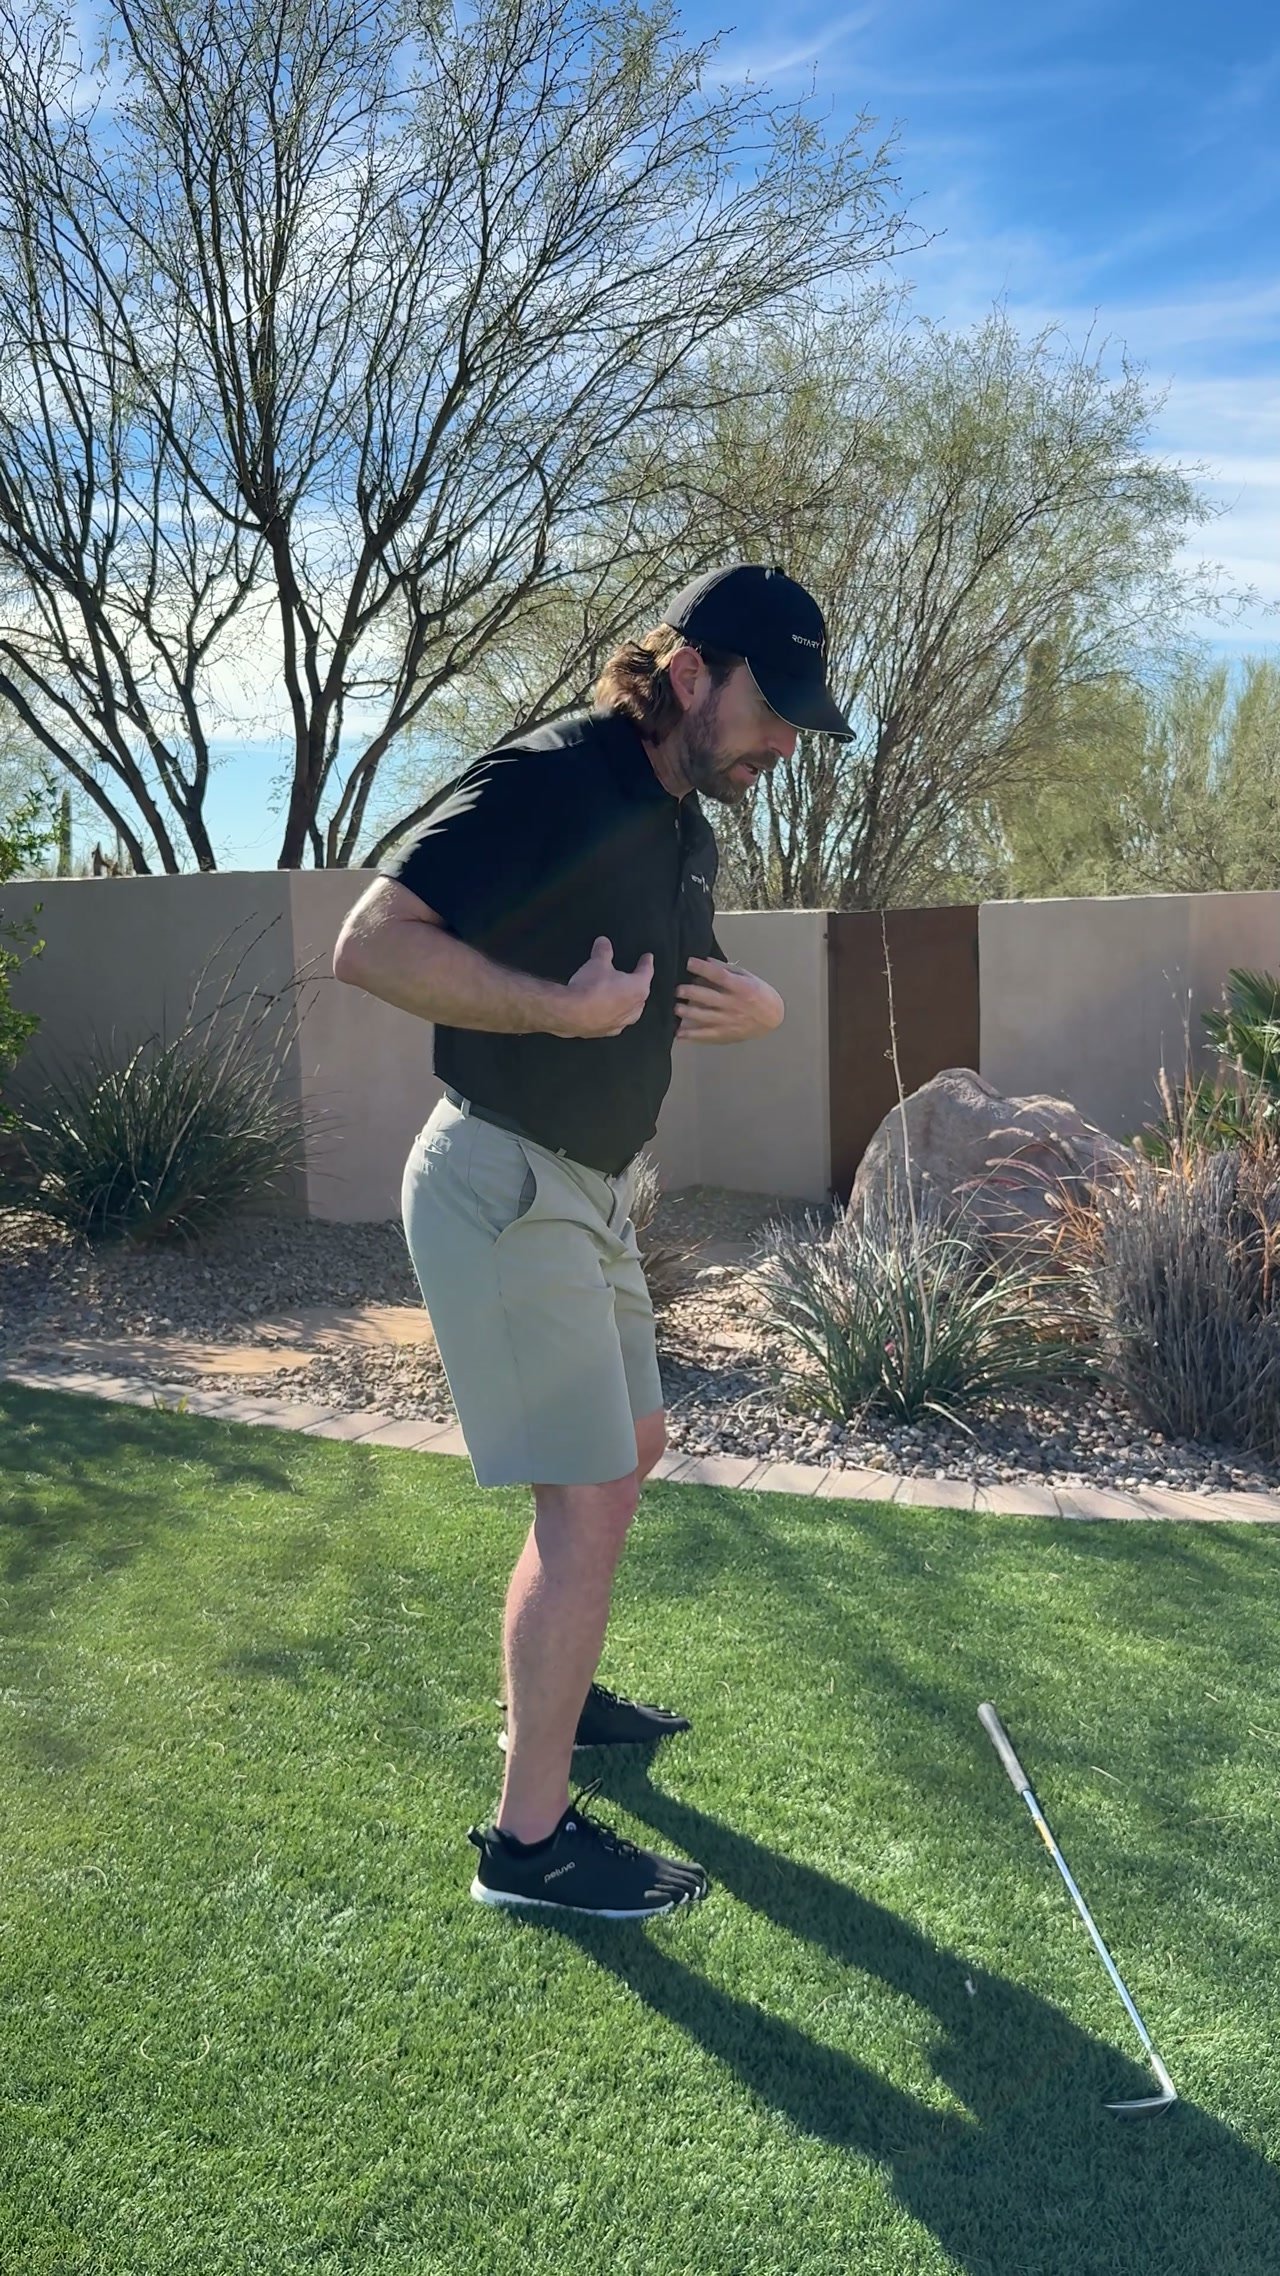
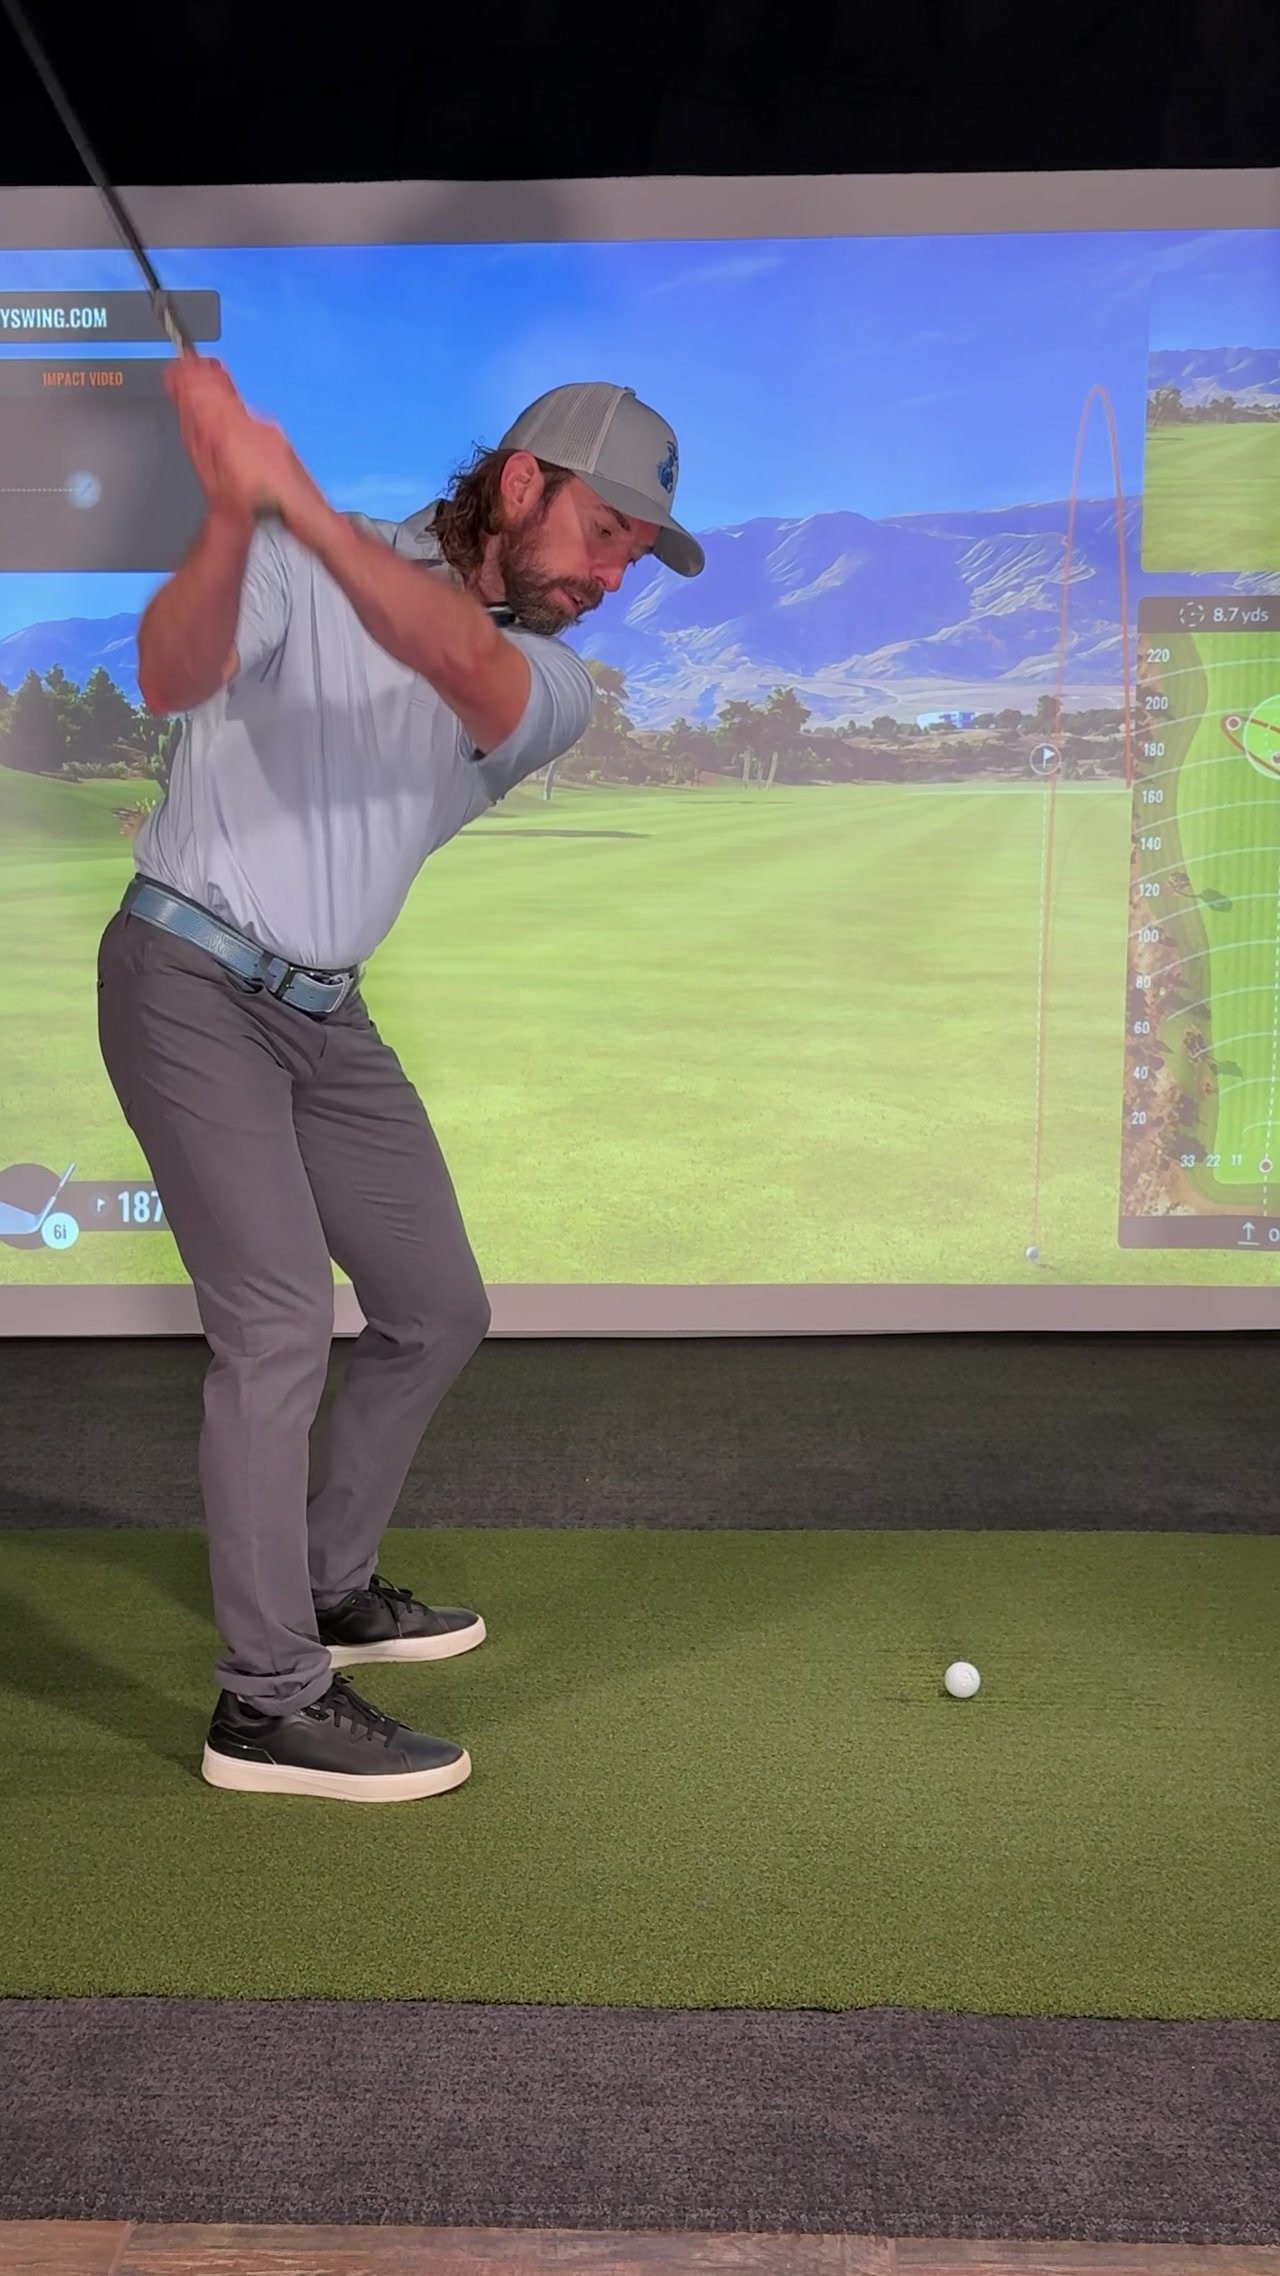
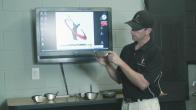
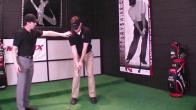
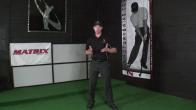
You probably overuse your hands during the first half of the backswing, like most golfers, and yank the club behind you almost immediately. This one move can be disastrous and lead to countless swing problems. Even if you avoid it during the takeaway, there's a good chance you get "too deep" by the time you're at the top of your swing. Either way, the simple drill in this new video has got you covered.
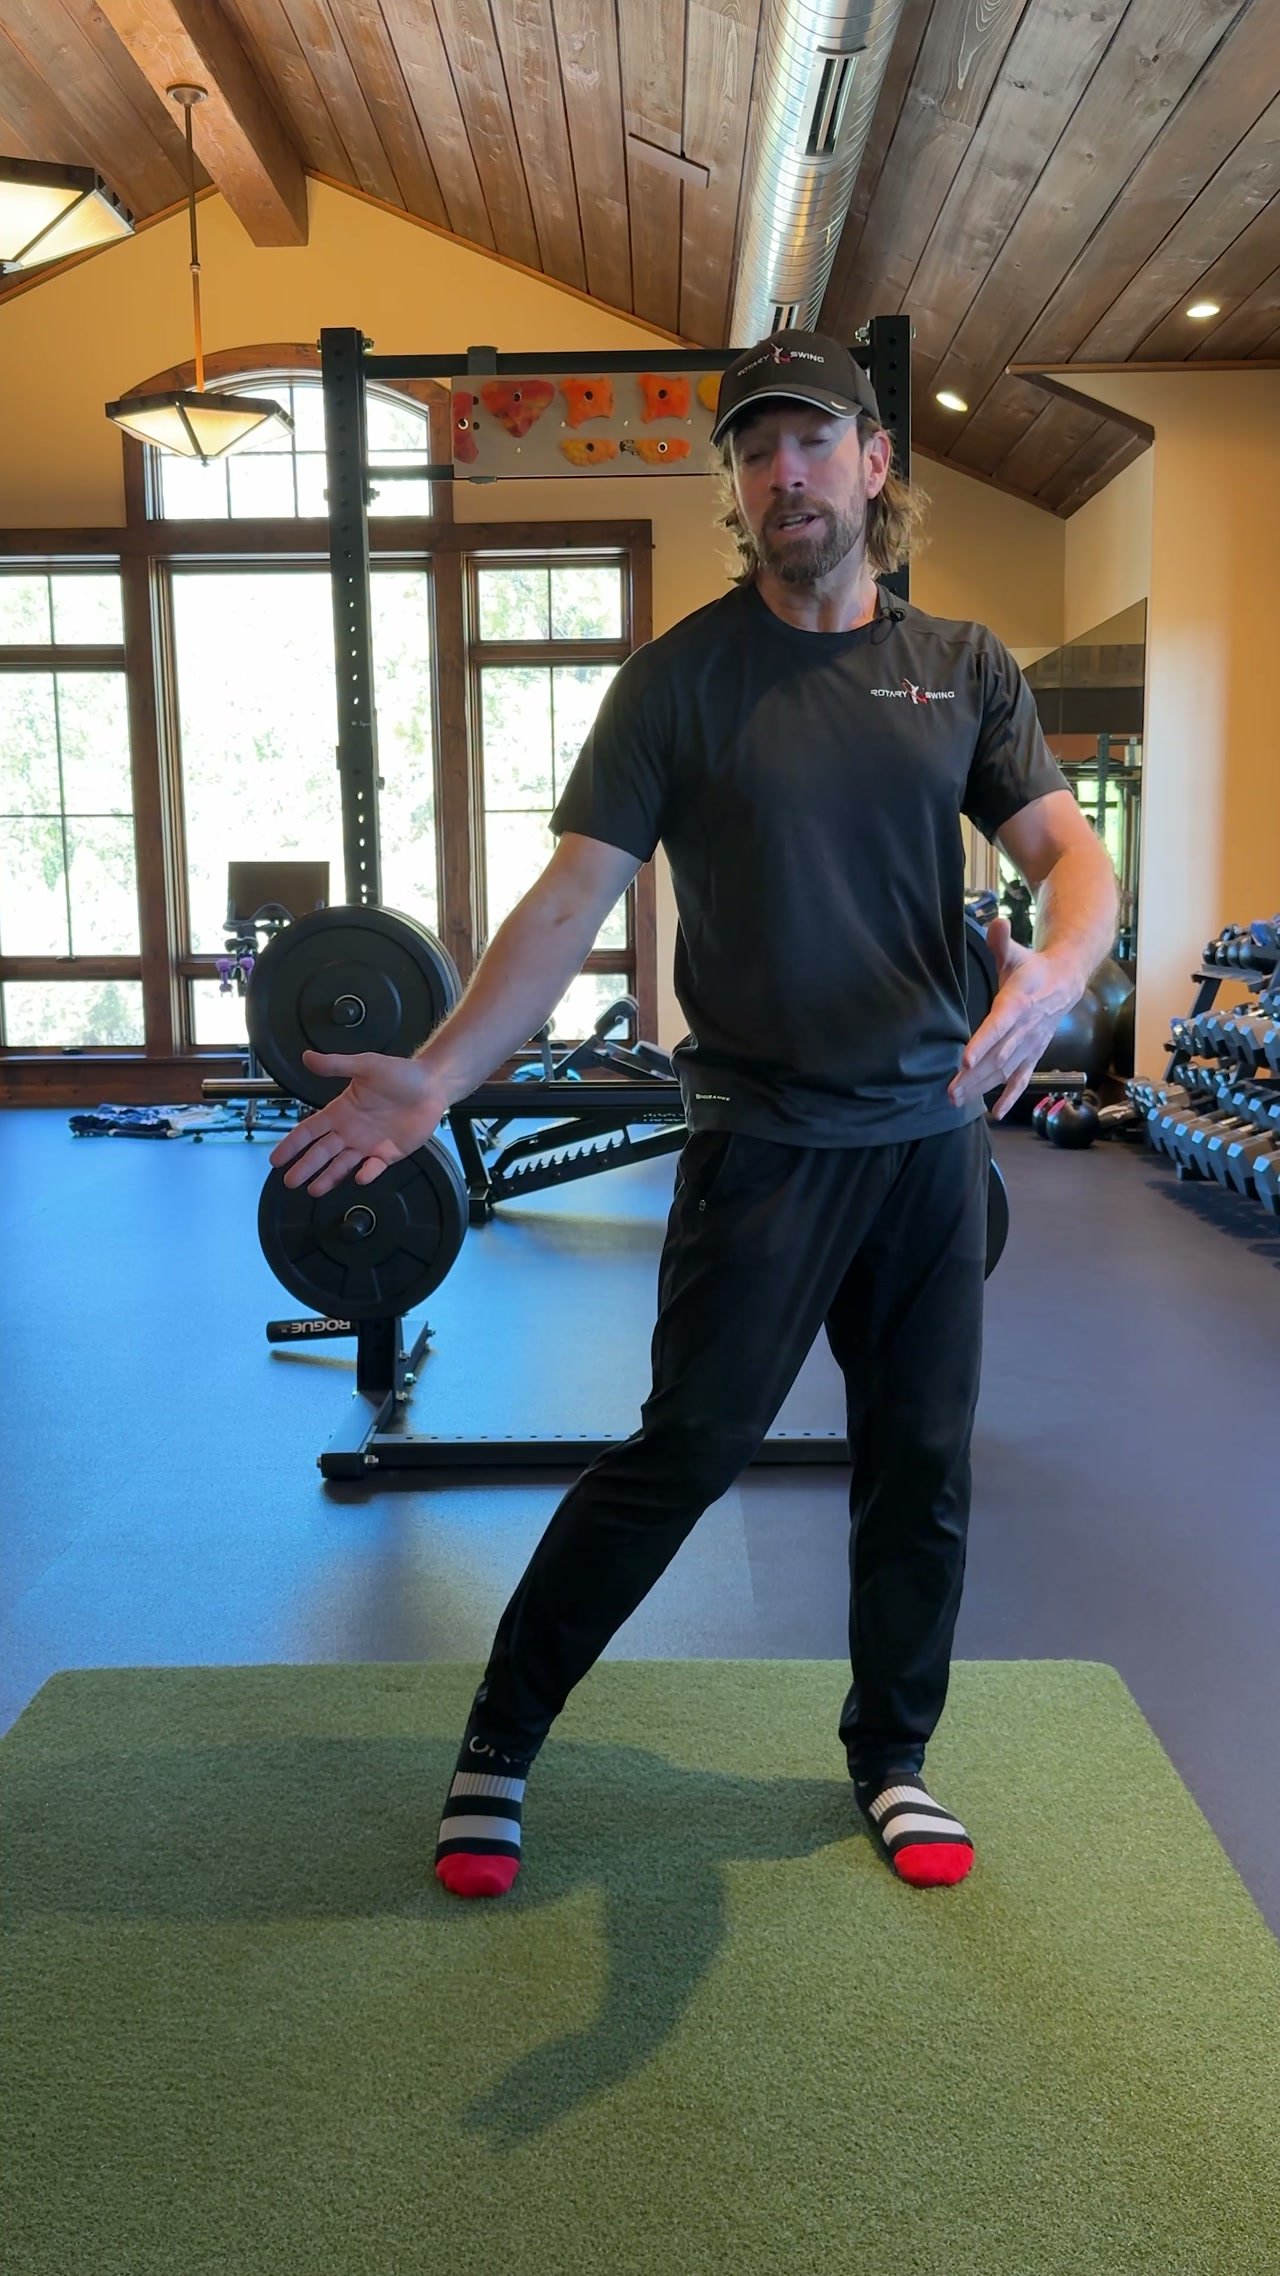
- Think of your swing in terms of two sides (left & right) and two halves (front & back)
- A training aid or shafts laid on the ground help you visualize the four quadrants
- The club should stay in the front right quadrant, Box 2, during takeaway
- At the end of takeaway, the club should be parallel to the shaft that divides front from back (Box 2 & Box 3)
While there are a lot of videos on the website that cover a lot of detail about the golf swing, There would literally be hundreds more if I covered every single thing that I used, typically in an in -person lesson throughout the week.
One of those drills that is really, Really important that I wanted to put on the site that I use almost every day is something I just call the four square visual.
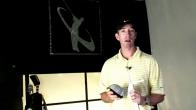
All it is, I've got a little alignment aid here, and it's going to help you visualize how this works in the swing.
What I always do is I divide the golf swing into two halves and two sides.
When you do that, you get quadrants obviously.
What I want to talk about today is just from down the line view, my front half and back half.
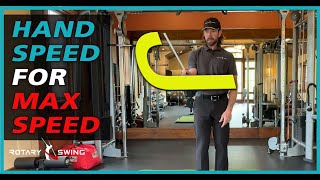
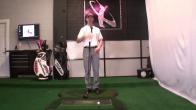
If you think about the golf swing in terms of those perspectives and then you think about face on, you've got a left and right side, that's where you see these two yellow lines.
So this line here down the middle would represent my left and right side, and then this line here represents my back half, everything over here, and my front half, everything over here.
What I'm specifically going to talk about today is the backswing and what you're going to visualize when you're working on stuff, especially if you struggle with a club getting deep.
So, what I do a lot with my students is I tell them to, I'll lay shafts out on the ground so they can see this.
And then I create this quadrant where I have one, this is box one, box two, box three, and box four.
And when you have those four boxes, you kind of know where the club and your body needs to be during different phases of the swing.
So, for instance, during the takeaway and backswing, one of the things that I emphasize a lot is that the club, as far as you're concerned, should never move into box three, which would be this quadrant over here.
Now obviously it does, and you want it to, but the problem is people move it there incorrectly, and that's how the club gets buried and stuck and rolled inside.
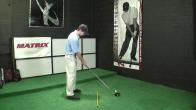
During the takeaway, what I want to feel is that the club always stays in box two.
So, it's always going to stay on this side of my front half here.
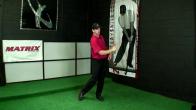
So as I take the club back, what I don't want to do is this.
Now you can see the club has moved into box three from your perspective, and so now the club's inside and now I'm in trouble.
Instead, what I want to do is turn that the club stays always out in box two.
So now, as I do that, the club's staying out in front of me.
To a lot of golfers, it feels like the club's doing this.
So when you're doing that, it's just the feeling, because you're used to moving your arms and getting the club way over here, the feeling is very different versus if I just turn my body and I use my arms to elevate, the club stays out in box two the whole time.
Now, that's a really important piece to get.
Because the only way that the club's going to do that stay in box two is if you move correctly during the backswing, and that is rotation of your upper body and elevation of your arms.
You put those two things together, the club travels back on plane.
The problem is people use their arms to swing the club across into the depth dimension of the swing.
So when I talk about that, everything on this side is depth.
That's me moving the club behind me.
And everything up and down is the vertical dimension.
I want to feel that my arms are only working in that vertical dimension during the backswing, and my rotation is what's going to move the club into box three.
But if you're just visualizing this and you feel the club stays out in box two the whole time, and then as I keep going to the top, you just keep turning, it will still feel that it stays out there the entire time if you're used to coming deep, going back.
So you don't need a fancy training aid like this.
We have them on the side I believe, but if you just throw down a shaft and put it on your toe line here.
So if I didn't have this fancy thing, and I just put it right over my toe, right about here, and I take the club back, I want to see that during the end of my takeaway, if I move correctly, my shaft is directly over this yellow line every single time.
And that's me keeping the club, elevating going back, and rotation to move the club into the depth dimension.
So I'm just turning back.
So use this visual when you practice, especially if you have a problem getting the club going outside, or excuse me, inside, and start working on the club feeling like it stays in box two during the entire backswing, and that will help you stop getting stuck going back.
So use this visual, throw a club down on the ground, and just start checking your position.
Like I said, just even during the takeaway, If you just check that the club is staying out in front of you and going over that line when you're done, you see my shafts are parallel to each other.
This one, my club shaft is directly over the yellow line here at the finish of the takeaway, and then I'm just going to keep going up from there, and it's going to feel like it stays out of box two.
So use this.
I use it all the time when I teach, and it's a very effective visual, and it will help you with your takeaway as well.
One of those drills that is really, Really important that I wanted to put on the site that I use almost every day is something I just call the four square visual.
All it is, I've got a little alignment aid here, and it's going to help you visualize how this works in the swing.
What I always do is I divide the golf swing into two halves and two sides.
When you do that, you get quadrants obviously.
What I want to talk about today is just from down the line view, my front half and back half.
If you think about the golf swing in terms of those perspectives and then you think about face on, you've got a left and right side, that's where you see these two yellow lines.
So this line here down the middle would represent my left and right side, and then this line here represents my back half, everything over here, and my front half, everything over here.
What I'm specifically going to talk about today is the backswing and what you're going to visualize when you're working on stuff, especially if you struggle with a club getting deep.
So, what I do a lot with my students is I tell them to, I'll lay shafts out on the ground so they can see this.
And then I create this quadrant where I have one, this is box one, box two, box three, and box four.
And when you have those four boxes, you kind of know where the club and your body needs to be during different phases of the swing.
So, for instance, during the takeaway and backswing, one of the things that I emphasize a lot is that the club, as far as you're concerned, should never move into box three, which would be this quadrant over here.
Now obviously it does, and you want it to, but the problem is people move it there incorrectly, and that's how the club gets buried and stuck and rolled inside.
During the takeaway, what I want to feel is that the club always stays in box two.
So, it's always going to stay on this side of my front half here.
So as I take the club back, what I don't want to do is this.
Now you can see the club has moved into box three from your perspective, and so now the club's inside and now I'm in trouble.
Instead, what I want to do is turn that the club stays always out in box two.
So now, as I do that, the club's staying out in front of me.
To a lot of golfers, it feels like the club's doing this.
So when you're doing that, it's just the feeling, because you're used to moving your arms and getting the club way over here, the feeling is very different versus if I just turn my body and I use my arms to elevate, the club stays out in box two the whole time.
Now, that's a really important piece to get.
Because the only way that the club's going to do that stay in box two is if you move correctly during the backswing, and that is rotation of your upper body and elevation of your arms.
You put those two things together, the club travels back on plane.
The problem is people use their arms to swing the club across into the depth dimension of the swing.
So when I talk about that, everything on this side is depth.
That's me moving the club behind me.
And everything up and down is the vertical dimension.
I want to feel that my arms are only working in that vertical dimension during the backswing, and my rotation is what's going to move the club into box three.
But if you're just visualizing this and you feel the club stays out in box two the whole time, and then as I keep going to the top, you just keep turning, it will still feel that it stays out there the entire time if you're used to coming deep, going back.
So you don't need a fancy training aid like this.
We have them on the side I believe, but if you just throw down a shaft and put it on your toe line here.
So if I didn't have this fancy thing, and I just put it right over my toe, right about here, and I take the club back, I want to see that during the end of my takeaway, if I move correctly, my shaft is directly over this yellow line every single time.
And that's me keeping the club, elevating going back, and rotation to move the club into the depth dimension.
So I'm just turning back.
So use this visual when you practice, especially if you have a problem getting the club going outside, or excuse me, inside, and start working on the club feeling like it stays in box two during the entire backswing, and that will help you stop getting stuck going back.
So use this visual, throw a club down on the ground, and just start checking your position.
Like I said, just even during the takeaway, If you just check that the club is staying out in front of you and going over that line when you're done, you see my shafts are parallel to each other.
This one, my club shaft is directly over the yellow line here at the finish of the takeaway, and then I'm just going to keep going up from there, and it's going to feel like it stays out of box two.
So use this.
I use it all the time when I teach, and it's a very effective visual, and it will help you with your takeaway as well.
Bien qu'il existe de nombreuses vidéos sur le site Web qui couvrent de nombreux détails sur le swing de golf, il y en aurait littéralement des centaines d'autres si je couvrais chaque chose que j'ai utilisée, généralement dans une leçon en personne tout au long de la semaine.
L’un de ces exercices qui est vraiment, vraiment important et que je voulais mettre sur le site que j’utilise presque tous les jours est ce que j’appelle simplement le visuel à quatre carrés.
Tout ce que c'est, j'ai une petite aide à l'alignement ici, et cela va vous aider à visualiser comment cela fonctionne dans le swing.
Ce que je fais toujours, c'est que je divise le swing de golf en deux moitiés et deux côtés.
Lorsque vous faites cela, vous obtenez évidemment des quadrants.
Ce dont je veux parler aujourd'hui, c'est juste une vue d'ensemble, ma moitié avant et ma moitié arrière.
Si vous pensez au swing de golf en termes de ces perspectives et que vous pensez ensuite à la face, vous avez un côté gauche et un côté droit, c'est là que vous voyez ces deux lignes jaunes.
Donc cette ligne ici au milieu représenterait mon côté gauche et droit, puis cette ligne ici représente ma moitié arrière, tout ici, et ma moitié avant, tout ici.
Ce dont je vais parler spécifiquement aujourd'hui, c'est du backswing et de ce que vous allez visualiser lorsque vous travaillez sur des choses, surtout si vous avez du mal à atteindre la profondeur d'un club.
Donc, ce que je fais souvent avec mes étudiants, c'est que je leur dis : je vais disposer des flèches sur le sol pour qu'ils puissent voir ça.
Et puis je crée ce quadrant où j'en ai un, c'est la case un, la case deux, la case trois et la case quatre.
Et lorsque vous avez ces quatre cases, vous savez en quelque sorte où le club et votre corps doivent être pendant les différentes phases du swing.
Ainsi, par exemple, pendant le takeaway et le backswing, l'une des choses sur lesquelles j'insiste beaucoup est que le club, en ce qui vous concerne, ne doit jamais se déplacer dans la case trois, qui serait ce quadrant ici.
Bien sûr, c'est le cas, et vous le souhaitez, mais le problème est que les gens le déplacent de manière incorrecte, et c'est ainsi que le club est enterré, coincé et roulé à l'intérieur.
Lors du takeaway, ce que je veux ressentir, c'est que le club reste toujours dans la case deux.
Donc, ça va toujours rester de ce côté de ma moitié avant ici.
Alors, quand je reprends le club, ce que je ne veux pas faire, c'est ça.
Maintenant, vous pouvez voir que le club s'est déplacé dans la boîte trois de votre point de vue, et donc maintenant le club est à l'intérieur et maintenant je suis en difficulté.
Au lieu de cela, ce que je veux faire, c'est faire en sorte que le club reste toujours dans la boîte deux.
Alors maintenant, pendant que je fais ça, le club reste devant moi.
Pour beaucoup de golfeurs, c'est comme si c'était le club qui faisait ça.
Donc, quand vous faites cela, c'est juste la sensation, parce que vous avez l'habitude de bouger vos bras et de placer le club bien ici, la sensation est très différente par rapport à si je tourne simplement mon corps et que j'utilise mes bras pour l'élever, le club reste dans la boîte deux tout le temps.
Maintenant, c'est une pièce vraiment importante à obtenir.
Parce que la seule façon pour que le club reste dans la boîte deux est que vous vous déplaciez correctement pendant le backswing, c'est-à-dire en faisant tourner le haut de votre corps et en élevant vos bras.
Vous mettez ces deux choses ensemble, le club revient en avion.
Le problème est que les gens utilisent leurs bras pour balancer le club dans la dimension de profondeur du swing.
Donc quand je parle de ça, tout ce qui est de ce côté est profondeur.
C'est moi qui déplace le club derrière moi.
Et tout ce qui est en haut et en bas est la dimension verticale.
Je veux sentir que mes bras ne travaillent que dans cette dimension verticale pendant le backswing, et c'est ma rotation qui va déplacer le club dans la boîte trois.
Mais si vous visualisez simplement cela et que vous sentez que le club reste dans la boîte deux tout le temps, et puis que je continue vers le haut, vous continuez à tourner, vous aurez toujours l'impression qu'il reste là tout le temps si vous avez l'habitude de venir en profondeur et de revenir en arrière.
Vous n’avez donc pas besoin d’une aide à l’entraînement sophistiquée comme celle-ci.
Nous les avons sur le côté, je crois, mais si vous jetez simplement un arbre et le placez sur votre ligne d'orteil ici.
Donc, si je n'avais pas ce truc sophistiqué, et que je le mettais juste au-dessus de mon orteil, juste ici, et que je reprenais le club, je voulais voir que pendant la fin de mon retrait, si je bouge correctement, mon manche était directement au-dessus de cette ligne jaune à chaque fois.
Et c'est moi qui garde le club, qui l'élève en arrière et qui fait une rotation pour déplacer le club dans la dimension de profondeur.
Alors je reviens en arrière.
Alors utilisez ce visuel lorsque vous vous entraînez, surtout si vous avez du mal à faire bouger le club à l'extérieur, ou pardon, à l'intérieur, et commencez à travailler sur le club en ayant l'impression qu'il reste dans la boîte deux pendant tout le backswing, et cela vous aidera à arrêter de rester coincé en arrière.
Alors utilisez ce visuel, jetez un club sur le sol et commencez simplement à vérifier votre position.
Comme je l'ai dit, même pendant le retrait, si vous vérifiez simplement que le club reste devant vous et dépasse cette ligne lorsque vous avez terminé, vous voyez que mes manches sont parallèles les uns aux autres.
Celui-ci, mon manche de club est directement au-dessus de la ligne jaune ici à la fin du takeaway, et ensuite je vais continuer à monter à partir de là, et j'aurai l'impression qu'il reste hors de la boîte deux.
Alors utilise ça.
Je l'utilise tout le temps lorsque j'enseigne, c'est un visuel très efficace et cela vous aidera également dans vos apprentissages.
L’un de ces exercices qui est vraiment, vraiment important et que je voulais mettre sur le site que j’utilise presque tous les jours est ce que j’appelle simplement le visuel à quatre carrés.
Tout ce que c'est, j'ai une petite aide à l'alignement ici, et cela va vous aider à visualiser comment cela fonctionne dans le swing.
Ce que je fais toujours, c'est que je divise le swing de golf en deux moitiés et deux côtés.
Lorsque vous faites cela, vous obtenez évidemment des quadrants.
Ce dont je veux parler aujourd'hui, c'est juste une vue d'ensemble, ma moitié avant et ma moitié arrière.
Si vous pensez au swing de golf en termes de ces perspectives et que vous pensez ensuite à la face, vous avez un côté gauche et un côté droit, c'est là que vous voyez ces deux lignes jaunes.
Donc cette ligne ici au milieu représenterait mon côté gauche et droit, puis cette ligne ici représente ma moitié arrière, tout ici, et ma moitié avant, tout ici.
Ce dont je vais parler spécifiquement aujourd'hui, c'est du backswing et de ce que vous allez visualiser lorsque vous travaillez sur des choses, surtout si vous avez du mal à atteindre la profondeur d'un club.
Donc, ce que je fais souvent avec mes étudiants, c'est que je leur dis : je vais disposer des flèches sur le sol pour qu'ils puissent voir ça.
Et puis je crée ce quadrant où j'en ai un, c'est la case un, la case deux, la case trois et la case quatre.
Et lorsque vous avez ces quatre cases, vous savez en quelque sorte où le club et votre corps doivent être pendant les différentes phases du swing.
Ainsi, par exemple, pendant le takeaway et le backswing, l'une des choses sur lesquelles j'insiste beaucoup est que le club, en ce qui vous concerne, ne doit jamais se déplacer dans la case trois, qui serait ce quadrant ici.
Bien sûr, c'est le cas, et vous le souhaitez, mais le problème est que les gens le déplacent de manière incorrecte, et c'est ainsi que le club est enterré, coincé et roulé à l'intérieur.
Lors du takeaway, ce que je veux ressentir, c'est que le club reste toujours dans la case deux.
Donc, ça va toujours rester de ce côté de ma moitié avant ici.
Alors, quand je reprends le club, ce que je ne veux pas faire, c'est ça.
Maintenant, vous pouvez voir que le club s'est déplacé dans la boîte trois de votre point de vue, et donc maintenant le club est à l'intérieur et maintenant je suis en difficulté.
Au lieu de cela, ce que je veux faire, c'est faire en sorte que le club reste toujours dans la boîte deux.
Alors maintenant, pendant que je fais ça, le club reste devant moi.
Pour beaucoup de golfeurs, c'est comme si c'était le club qui faisait ça.
Donc, quand vous faites cela, c'est juste la sensation, parce que vous avez l'habitude de bouger vos bras et de placer le club bien ici, la sensation est très différente par rapport à si je tourne simplement mon corps et que j'utilise mes bras pour l'élever, le club reste dans la boîte deux tout le temps.
Maintenant, c'est une pièce vraiment importante à obtenir.
Parce que la seule façon pour que le club reste dans la boîte deux est que vous vous déplaciez correctement pendant le backswing, c'est-à-dire en faisant tourner le haut de votre corps et en élevant vos bras.
Vous mettez ces deux choses ensemble, le club revient en avion.
Le problème est que les gens utilisent leurs bras pour balancer le club dans la dimension de profondeur du swing.
Donc quand je parle de ça, tout ce qui est de ce côté est profondeur.
C'est moi qui déplace le club derrière moi.
Et tout ce qui est en haut et en bas est la dimension verticale.
Je veux sentir que mes bras ne travaillent que dans cette dimension verticale pendant le backswing, et c'est ma rotation qui va déplacer le club dans la boîte trois.
Mais si vous visualisez simplement cela et que vous sentez que le club reste dans la boîte deux tout le temps, et puis que je continue vers le haut, vous continuez à tourner, vous aurez toujours l'impression qu'il reste là tout le temps si vous avez l'habitude de venir en profondeur et de revenir en arrière.
Vous n’avez donc pas besoin d’une aide à l’entraînement sophistiquée comme celle-ci.
Nous les avons sur le côté, je crois, mais si vous jetez simplement un arbre et le placez sur votre ligne d'orteil ici.
Donc, si je n'avais pas ce truc sophistiqué, et que je le mettais juste au-dessus de mon orteil, juste ici, et que je reprenais le club, je voulais voir que pendant la fin de mon retrait, si je bouge correctement, mon manche était directement au-dessus de cette ligne jaune à chaque fois.
Et c'est moi qui garde le club, qui l'élève en arrière et qui fait une rotation pour déplacer le club dans la dimension de profondeur.
Alors je reviens en arrière.
Alors utilisez ce visuel lorsque vous vous entraînez, surtout si vous avez du mal à faire bouger le club à l'extérieur, ou pardon, à l'intérieur, et commencez à travailler sur le club en ayant l'impression qu'il reste dans la boîte deux pendant tout le backswing, et cela vous aidera à arrêter de rester coincé en arrière.
Alors utilisez ce visuel, jetez un club sur le sol et commencez simplement à vérifier votre position.
Comme je l'ai dit, même pendant le retrait, si vous vérifiez simplement que le club reste devant vous et dépasse cette ligne lorsque vous avez terminé, vous voyez que mes manches sont parallèles les uns aux autres.
Celui-ci, mon manche de club est directement au-dessus de la ligne jaune ici à la fin du takeaway, et ensuite je vais continuer à monter à partir de là, et j'aurai l'impression qu'il reste hors de la boîte deux.
Alors utilise ça.
Je l'utilise tout le temps lorsque j'enseigne, c'est un visuel très efficace et cela vous aidera également dans vos apprentissages.
Si bien hay muchos videos en el sitio web que cubren muchos detalles sobre el swing de golf, literalmente habría cientos más si cubriera cada cosa que utilizo, generalmente en una lección en persona durante la semana.
Uno de esos ejercicios que es realmente muy importante y que quería poner en el sitio que uso casi todos los días es algo que llamo simplemente la representación visual de los cuatro cuadrados.
Lo único que tengo es una pequeña ayuda de alineación aquí que te ayudará a visualizar cómo funciona esto en el swing.
Lo que siempre hago es dividir el swing de golf en dos mitades y dos lados.
Cuando haces eso, obviamente obtienes cuadrantes.
De lo que quiero hablar hoy es sólo desde una perspectiva lineal, de mi mitad delantera y de mi mitad trasera.
Si piensas en el swing de golf en términos de esas perspectivas y luego piensas de frente, tienes un lado izquierdo y un lado derecho, ahí es donde ves estas dos líneas amarillas.
Entonces, esta línea aquí en el medio representaría mi lado izquierdo y derecho, y luego esta línea aquí representa mi mitad trasera, todo aquí, y mi mitad delantera, todo aquí.
De lo que voy a hablar específicamente hoy es del backswing y de lo que vas a visualizar cuando estés trabajando en algo, especialmente si tienes dificultades para que un palo llegue profundo.
Entonces, lo que hago mucho con mis estudiantes es decirles que coloquen ejes en el suelo para que puedan ver esto.
Y luego creo este cuadrante donde tengo uno, este es el cuadro uno, cuadro dos, cuadro tres y cuadro cuatro.
Y cuando tienes esas cuatro casillas, sabes dónde deben estar el palo y tu cuerpo durante las diferentes fases del swing.
Entonces, por ejemplo, durante el takeaway y el backswing, una de las cosas que enfatizo mucho es que el palo, en lo que a usted respecta, nunca debe moverse al casillero tres, que sería este cuadrante de aquí.
Ahora, obviamente lo hace, y así lo deseas, pero el problema es que la gente lo mueve allí incorrectamente, y así es como el palo queda enterrado, atascado y rueda hacia adentro.
Durante la comida para llevar, lo que quiero sentir es que el club siempre se queda en la caja dos.
Entonces, siempre permanecerá en este lado de mi mitad delantera aquí.
Así que mientras recupero el club, lo que no quiero hacer es esto.
Ahora puedes ver que el club se ha mudado a la caja tres desde tu perspectiva, y ahora el club está adentro y ahora estoy en problemas.
En cambio lo que quiero hacer es lograr que el club se quede siempre fuera en el cuadro dos.
Así que ahora, mientras hago eso, el club se queda frente a mí.
Para muchos golfistas, parece que es el club el que está haciendo esto.
Entonces, cuando haces eso, es solo la sensación, porque estás acostumbrado a mover los brazos y colocar el palo hasta aquí, la sensación es muy diferente a si simplemente giro mi cuerpo y uso mis brazos para elevar, el palo permanece afuera en la casilla dos todo el tiempo.
Ahora bien, esa es una pieza realmente importante de conseguir.
Porque la única forma de que el palo se quede en la casilla dos es si te mueves correctamente durante el backswing, y eso es rotación de la parte superior del cuerpo y elevación de los brazos.
Juntas esas dos cosas y el club regresa en avión.
El problema es que la gente usa los brazos para balancear el palo hacia la dimensión de profundidad del swing.
Entonces cuando hablo de eso, todo en este lado es profundidad.
Ese soy yo moviendo el palo detrás de mí.
Y todo lo que está arriba y abajo es la dimensión vertical.
Quiero sentir que mis brazos sólo están trabajando en esa dimensión vertical durante el backswing, y mi rotación es lo que va a mover el palo a la casilla tres.
Pero si simplemente visualizas esto y sientes que el palo permanece afuera en la casilla dos todo el tiempo, y luego, a medida que sigo hacia arriba, sigues girando, todavía sentirás que permanece afuera allí todo el tiempo si estás acostumbrado a llegar profundo, retrocediendo.
Así que no necesitas una ayuda de entrenamiento sofisticada como ésta.
Creo que los tenemos a un costado, pero si simplemente colocas un eje y lo colocas en la línea de los dedos aquí.
Entonces, si no tuviera esta cosa elegante y la pusiera justo sobre mi punta, aproximadamente aquí, y llevara el palo hacia atrás, quiero ver que durante el final de mi movimiento, si me muevo correctamente, mi varilla estuviera directamente sobre esta línea amarilla cada vez.
Y ese soy yo manteniendo el palo, elevando hacia atrás y rotando para mover el palo a la dimensión de profundidad.
Así que simplemente estoy regresando.
Así que usa esta imagen cuando practiques, especialmente si tienes problemas para conseguir que el palo salga, o perdón, entre, y comienza a trabajar en el palo sintiendo que se queda en la casilla dos durante todo el backswing, y eso te ayudará a dejar de quedarte atascado al retroceder.
Así que usa esta imagen, arroja un palo al suelo y comienza a comprobar tu posición.
Como dije, incluso durante el takeaway, si simplemente verificas que el palo se mantenga frente a ti y pase por esa línea cuando hayas terminado, verás que mis ejes están paralelos entre sí.
En este caso, el eje de mi palo está directamente sobre la línea amarilla aquí al final del recorrido, y luego voy a seguir subiendo desde allí, y voy a sentir como si se quedara fuera de la casilla dos.
Así que usa esto.
Lo uso todo el tiempo cuando enseño, es un recurso visual muy efectivo y también te ayudará con lo que aprendes.
Uno de esos ejercicios que es realmente muy importante y que quería poner en el sitio que uso casi todos los días es algo que llamo simplemente la representación visual de los cuatro cuadrados.
Lo único que tengo es una pequeña ayuda de alineación aquí que te ayudará a visualizar cómo funciona esto en el swing.
Lo que siempre hago es dividir el swing de golf en dos mitades y dos lados.
Cuando haces eso, obviamente obtienes cuadrantes.
De lo que quiero hablar hoy es sólo desde una perspectiva lineal, de mi mitad delantera y de mi mitad trasera.
Si piensas en el swing de golf en términos de esas perspectivas y luego piensas de frente, tienes un lado izquierdo y un lado derecho, ahí es donde ves estas dos líneas amarillas.
Entonces, esta línea aquí en el medio representaría mi lado izquierdo y derecho, y luego esta línea aquí representa mi mitad trasera, todo aquí, y mi mitad delantera, todo aquí.
De lo que voy a hablar específicamente hoy es del backswing y de lo que vas a visualizar cuando estés trabajando en algo, especialmente si tienes dificultades para que un palo llegue profundo.
Entonces, lo que hago mucho con mis estudiantes es decirles que coloquen ejes en el suelo para que puedan ver esto.
Y luego creo este cuadrante donde tengo uno, este es el cuadro uno, cuadro dos, cuadro tres y cuadro cuatro.
Y cuando tienes esas cuatro casillas, sabes dónde deben estar el palo y tu cuerpo durante las diferentes fases del swing.
Entonces, por ejemplo, durante el takeaway y el backswing, una de las cosas que enfatizo mucho es que el palo, en lo que a usted respecta, nunca debe moverse al casillero tres, que sería este cuadrante de aquí.
Ahora, obviamente lo hace, y así lo deseas, pero el problema es que la gente lo mueve allí incorrectamente, y así es como el palo queda enterrado, atascado y rueda hacia adentro.
Durante la comida para llevar, lo que quiero sentir es que el club siempre se queda en la caja dos.
Entonces, siempre permanecerá en este lado de mi mitad delantera aquí.
Así que mientras recupero el club, lo que no quiero hacer es esto.
Ahora puedes ver que el club se ha mudado a la caja tres desde tu perspectiva, y ahora el club está adentro y ahora estoy en problemas.
En cambio lo que quiero hacer es lograr que el club se quede siempre fuera en el cuadro dos.
Así que ahora, mientras hago eso, el club se queda frente a mí.
Para muchos golfistas, parece que es el club el que está haciendo esto.
Entonces, cuando haces eso, es solo la sensación, porque estás acostumbrado a mover los brazos y colocar el palo hasta aquí, la sensación es muy diferente a si simplemente giro mi cuerpo y uso mis brazos para elevar, el palo permanece afuera en la casilla dos todo el tiempo.
Ahora bien, esa es una pieza realmente importante de conseguir.
Porque la única forma de que el palo se quede en la casilla dos es si te mueves correctamente durante el backswing, y eso es rotación de la parte superior del cuerpo y elevación de los brazos.
Juntas esas dos cosas y el club regresa en avión.
El problema es que la gente usa los brazos para balancear el palo hacia la dimensión de profundidad del swing.
Entonces cuando hablo de eso, todo en este lado es profundidad.
Ese soy yo moviendo el palo detrás de mí.
Y todo lo que está arriba y abajo es la dimensión vertical.
Quiero sentir que mis brazos sólo están trabajando en esa dimensión vertical durante el backswing, y mi rotación es lo que va a mover el palo a la casilla tres.
Pero si simplemente visualizas esto y sientes que el palo permanece afuera en la casilla dos todo el tiempo, y luego, a medida que sigo hacia arriba, sigues girando, todavía sentirás que permanece afuera allí todo el tiempo si estás acostumbrado a llegar profundo, retrocediendo.
Así que no necesitas una ayuda de entrenamiento sofisticada como ésta.
Creo que los tenemos a un costado, pero si simplemente colocas un eje y lo colocas en la línea de los dedos aquí.
Entonces, si no tuviera esta cosa elegante y la pusiera justo sobre mi punta, aproximadamente aquí, y llevara el palo hacia atrás, quiero ver que durante el final de mi movimiento, si me muevo correctamente, mi varilla estuviera directamente sobre esta línea amarilla cada vez.
Y ese soy yo manteniendo el palo, elevando hacia atrás y rotando para mover el palo a la dimensión de profundidad.
Así que simplemente estoy regresando.
Así que usa esta imagen cuando practiques, especialmente si tienes problemas para conseguir que el palo salga, o perdón, entre, y comienza a trabajar en el palo sintiendo que se queda en la casilla dos durante todo el backswing, y eso te ayudará a dejar de quedarte atascado al retroceder.
Así que usa esta imagen, arroja un palo al suelo y comienza a comprobar tu posición.
Como dije, incluso durante el takeaway, si simplemente verificas que el palo se mantenga frente a ti y pase por esa línea cuando hayas terminado, verás que mis ejes están paralelos entre sí.
En este caso, el eje de mi palo está directamente sobre la línea amarilla aquí al final del recorrido, y luego voy a seguir subiendo desde allí, y voy a sentir como si se quedara fuera de la casilla dos.
Así que usa esto.
Lo uso todo el tiempo cuando enseño, es un recurso visual muy efectivo y también te ayudará con lo que aprendes.
Zwar gibt es auf der Website zahlreiche Videos, die den Golfschwung detailliert behandeln, doch es gäbe buchstäblich Hunderte mehr, wenn ich jede einzelne Sache, die ich verwende, behandeln würde, normalerweise in einer persönlichen Unterrichtsstunde im Laufe der Woche.
Eine dieser Übungen, die wirklich, wirklich wichtig ist und die ich auf die Site stellen wollte, die ich fast täglich benutze, ist etwas, das ich einfach die Vier-Quadrate-Visualisierung nenne.
Ich habe hier lediglich eine kleine Ausrichtungshilfe, die Ihnen dabei helfen wird, sich vorzustellen, wie das beim Schwung funktioniert.
Ich teile den Golfschwung immer in zwei Hälften und zwei Seiten auf.
Wenn Sie das tun, erhalten Sie offensichtlich Quadranten.
Worüber ich heute sprechen möchte, ist nur die Betrachtung meiner Vorder- und Hinterhälfte.
Wenn Sie aus diesen Perspektiven an den Golfschwung denken und dann von vorne, haben Sie eine linke und eine rechte Seite, dort sehen Sie diese beiden gelben Linien.
Diese Linie hier in der Mitte würde also meine linke und rechte Seite darstellen, und diese Linie hier repräsentiert meine hintere Hälfte, alles hier drüben, und meine vordere Hälfte, alles hier drüben.
Ich werde heute insbesondere über den Rückschwung sprechen und darüber, was Sie sich vorstellen, wenn Sie an etwas arbeiten, insbesondere wenn Sie Schwierigkeiten haben, mit einem Schläger tief zu schlagen.
Ich mache also oft mit meinen Schülern Folgendes: Ich sage ihnen, sie sollen Schäfte auf dem Boden auslegen, damit sie das sehen können.
Und dann erstelle ich diesen Quadranten, in dem ich eins habe, das ist Feld eins, Feld zwei, Feld drei und Feld vier.
Und wenn Sie diese vier Kästchen haben, wissen Sie ungefähr, wo sich der Schläger und Ihr Körper während der verschiedenen Phasen des Schwungs befinden müssen.
Ich lege beispielsweise beim Takeaway und Rückschwung großen Wert darauf, dass der Schläger Ihrer Meinung nach niemals in das dritte Feld, also diesen Quadranten hier, gelangen sollte.
Das ist natürlich der Fall und Sie möchten es auch, aber das Problem besteht darin, dass die Leute ihn falsch bewegen und der Schläger dadurch vergraben wird, stecken bleibt und hineinrollt.
Beim Takeaway möchte ich das Gefühl haben, dass der Schläger immer in Feld zwei bleibt.
Es wird also immer auf dieser Seite meiner Vorderhälfte hier bleiben.
Wenn ich den Club zurücknehme, möchte ich Folgendes nicht tun.
Jetzt können Sie sehen, dass der Schläger aus Ihrer Perspektive in Feld drei gewandert ist. Jetzt ist der Schläger drinnen und ich stecke in Schwierigkeiten.
Stattdessen möchte ich dafür sorgen, dass der Schläger immer in Feld zwei bleibt.
Während ich das tue, bleibt der Schläger vor mir.
Für viele Golfer fühlt es sich so an, als würde der Club dies tun.
Wenn Sie das also tun, geht es nur um das Gefühl, denn Sie sind daran gewöhnt, Ihre Arme zu bewegen und den Schläger hierher zu bekommen. Das Gefühl ist ganz anders, als wenn ich nur meinen Körper drehe und meine Arme zum Anheben verwende, der Schläger bleibt die ganze Zeit in Feld zwei.
Das ist ein wirklich wichtiges Stück, das man sich besorgen muss.
Denn der Schläger kann nur dann in Feld zwei bleiben, wenn Sie sich während des Rückschwungs richtig bewegen, d. h. Ihren Oberkörper drehen und Ihre Arme anheben.
Wenn man diese beiden Dinge zusammenbringt, reist der Club mit dem Flugzeug zurück.
Das Problem besteht darin, dass die Leute ihre Arme verwenden, um den Schläger in die Tiefendimension des Schwungs zu schwingen.
Wenn ich also darüber spreche, geht es auf dieser Seite bei allem um Tiefe.
Das bin ich, wie ich den Schläger hinter mir bewege.
Und alles oben und unten ist die vertikale Dimension.
Ich möchte das Gefühl haben, dass meine Arme während des Rückschwungs nur in dieser vertikalen Dimension arbeiten und dass meine Rotation den Schläger in Feld drei bewegt.
Aber wenn Sie sich das nur vorstellen und das Gefühl haben, dass der Schläger die ganze Zeit in Box zwei bleibt, und Sie sich dann weiter drehen, während ich weiter nach oben gehe, wird es sich immer noch so anfühlen, als ob er die ganze Zeit dort draußen bleibt, wenn Sie es gewohnt sind, tief zu kommen und zurückzugehen.
Sie benötigen also kein ausgefallenes Trainingshilfsmittel wie dieses.
Ich glaube, wir haben sie an der Seite, aber wenn Sie einfach einen Schaft herunterwerfen und ihn hier auf Ihre Zehenlinie legen.
Wenn ich dieses schicke Ding nicht hätte und es einfach genau hier über meine Zehe lege und den Schläger zurücknehme, möchte ich sehen, dass mein Schaft am Ende meines Takeaways, wenn ich mich richtig bewege, jedes Mal direkt über dieser gelben Linie ist.
Und das bin ich, wie ich den Schläger halte, ihn anhebe, zurückgehe und drehe, um den Schläger in die Tiefendimension zu bewegen.
Also drehe ich einfach um.
Verwenden Sie diese Visualisierung also beim Üben, insbesondere wenn Sie Probleme haben, den Schläger nach außen oder, entschuldigen Sie, nach innen zu bewegen, und beginnen Sie mit der Arbeit am Schläger, indem Sie das Gefühl haben, dass er während des gesamten Rückschwungs in Feld zwei bleibt. Dies wird Ihnen dabei helfen, beim Zurückschwung nicht mehr stecken zu bleiben.
Nutzen Sie also dieses Bild, werfen Sie einen Schläger auf den Boden und beginnen Sie, Ihre Position zu überprüfen.
Wie ich schon sagte, wenn Sie beim Takeaway einfach darauf achten, dass der Schläger vor Ihnen bleibt und über diese Linie hinausgeht, wenn Sie fertig sind, sehen Sie, dass meine Schäfte parallel zueinander sind.
Bei diesem hier ist mein Schlägerschaft direkt über der gelben Linie hier am Ende des Takeaways, und von dort aus gehe ich einfach weiter nach oben, und es wird sich anfühlen, als ob er außerhalb von Feld zwei bleibt.
Verwenden Sie dies also.
Ich verwende es ständig beim Unterrichten. Es ist eine sehr wirkungsvolle visuelle Darstellung und wird auch Ihnen beim Mitnehmen helfen.
Eine dieser Übungen, die wirklich, wirklich wichtig ist und die ich auf die Site stellen wollte, die ich fast täglich benutze, ist etwas, das ich einfach die Vier-Quadrate-Visualisierung nenne.
Ich habe hier lediglich eine kleine Ausrichtungshilfe, die Ihnen dabei helfen wird, sich vorzustellen, wie das beim Schwung funktioniert.
Ich teile den Golfschwung immer in zwei Hälften und zwei Seiten auf.
Wenn Sie das tun, erhalten Sie offensichtlich Quadranten.
Worüber ich heute sprechen möchte, ist nur die Betrachtung meiner Vorder- und Hinterhälfte.
Wenn Sie aus diesen Perspektiven an den Golfschwung denken und dann von vorne, haben Sie eine linke und eine rechte Seite, dort sehen Sie diese beiden gelben Linien.
Diese Linie hier in der Mitte würde also meine linke und rechte Seite darstellen, und diese Linie hier repräsentiert meine hintere Hälfte, alles hier drüben, und meine vordere Hälfte, alles hier drüben.
Ich werde heute insbesondere über den Rückschwung sprechen und darüber, was Sie sich vorstellen, wenn Sie an etwas arbeiten, insbesondere wenn Sie Schwierigkeiten haben, mit einem Schläger tief zu schlagen.
Ich mache also oft mit meinen Schülern Folgendes: Ich sage ihnen, sie sollen Schäfte auf dem Boden auslegen, damit sie das sehen können.
Und dann erstelle ich diesen Quadranten, in dem ich eins habe, das ist Feld eins, Feld zwei, Feld drei und Feld vier.
Und wenn Sie diese vier Kästchen haben, wissen Sie ungefähr, wo sich der Schläger und Ihr Körper während der verschiedenen Phasen des Schwungs befinden müssen.
Ich lege beispielsweise beim Takeaway und Rückschwung großen Wert darauf, dass der Schläger Ihrer Meinung nach niemals in das dritte Feld, also diesen Quadranten hier, gelangen sollte.
Das ist natürlich der Fall und Sie möchten es auch, aber das Problem besteht darin, dass die Leute ihn falsch bewegen und der Schläger dadurch vergraben wird, stecken bleibt und hineinrollt.
Beim Takeaway möchte ich das Gefühl haben, dass der Schläger immer in Feld zwei bleibt.
Es wird also immer auf dieser Seite meiner Vorderhälfte hier bleiben.
Wenn ich den Club zurücknehme, möchte ich Folgendes nicht tun.
Jetzt können Sie sehen, dass der Schläger aus Ihrer Perspektive in Feld drei gewandert ist. Jetzt ist der Schläger drinnen und ich stecke in Schwierigkeiten.
Stattdessen möchte ich dafür sorgen, dass der Schläger immer in Feld zwei bleibt.
Während ich das tue, bleibt der Schläger vor mir.
Für viele Golfer fühlt es sich so an, als würde der Club dies tun.
Wenn Sie das also tun, geht es nur um das Gefühl, denn Sie sind daran gewöhnt, Ihre Arme zu bewegen und den Schläger hierher zu bekommen. Das Gefühl ist ganz anders, als wenn ich nur meinen Körper drehe und meine Arme zum Anheben verwende, der Schläger bleibt die ganze Zeit in Feld zwei.
Das ist ein wirklich wichtiges Stück, das man sich besorgen muss.
Denn der Schläger kann nur dann in Feld zwei bleiben, wenn Sie sich während des Rückschwungs richtig bewegen, d. h. Ihren Oberkörper drehen und Ihre Arme anheben.
Wenn man diese beiden Dinge zusammenbringt, reist der Club mit dem Flugzeug zurück.
Das Problem besteht darin, dass die Leute ihre Arme verwenden, um den Schläger in die Tiefendimension des Schwungs zu schwingen.
Wenn ich also darüber spreche, geht es auf dieser Seite bei allem um Tiefe.
Das bin ich, wie ich den Schläger hinter mir bewege.
Und alles oben und unten ist die vertikale Dimension.
Ich möchte das Gefühl haben, dass meine Arme während des Rückschwungs nur in dieser vertikalen Dimension arbeiten und dass meine Rotation den Schläger in Feld drei bewegt.
Aber wenn Sie sich das nur vorstellen und das Gefühl haben, dass der Schläger die ganze Zeit in Box zwei bleibt, und Sie sich dann weiter drehen, während ich weiter nach oben gehe, wird es sich immer noch so anfühlen, als ob er die ganze Zeit dort draußen bleibt, wenn Sie es gewohnt sind, tief zu kommen und zurückzugehen.
Sie benötigen also kein ausgefallenes Trainingshilfsmittel wie dieses.
Ich glaube, wir haben sie an der Seite, aber wenn Sie einfach einen Schaft herunterwerfen und ihn hier auf Ihre Zehenlinie legen.
Wenn ich dieses schicke Ding nicht hätte und es einfach genau hier über meine Zehe lege und den Schläger zurücknehme, möchte ich sehen, dass mein Schaft am Ende meines Takeaways, wenn ich mich richtig bewege, jedes Mal direkt über dieser gelben Linie ist.
Und das bin ich, wie ich den Schläger halte, ihn anhebe, zurückgehe und drehe, um den Schläger in die Tiefendimension zu bewegen.
Also drehe ich einfach um.
Verwenden Sie diese Visualisierung also beim Üben, insbesondere wenn Sie Probleme haben, den Schläger nach außen oder, entschuldigen Sie, nach innen zu bewegen, und beginnen Sie mit der Arbeit am Schläger, indem Sie das Gefühl haben, dass er während des gesamten Rückschwungs in Feld zwei bleibt. Dies wird Ihnen dabei helfen, beim Zurückschwung nicht mehr stecken zu bleiben.
Nutzen Sie also dieses Bild, werfen Sie einen Schläger auf den Boden und beginnen Sie, Ihre Position zu überprüfen.
Wie ich schon sagte, wenn Sie beim Takeaway einfach darauf achten, dass der Schläger vor Ihnen bleibt und über diese Linie hinausgeht, wenn Sie fertig sind, sehen Sie, dass meine Schäfte parallel zueinander sind.
Bei diesem hier ist mein Schlägerschaft direkt über der gelben Linie hier am Ende des Takeaways, und von dort aus gehe ich einfach weiter nach oben, und es wird sich anfühlen, als ob er außerhalb von Feld zwei bleibt.
Verwenden Sie dies also.
Ich verwende es ständig beim Unterrichten. Es ist eine sehr wirkungsvolle visuelle Darstellung und wird auch Ihnen beim Mitnehmen helfen.



Stefan
Craig (Certified RST Instructor)
mary
Craig (Certified RST Instructor)
Blake
Chris (Certified RST Instructor)
Blake
Blake
Chris (Certified RST Instructor)
Kevin
Craig (Certified RST Instructor)
Kevin
Craig (Certified RST Instructor)
Kevin
Craig (Certified RST Instructor)
Kevin
Kevin
Craig (Certified RST Instructor)
Kevin
Craig (Certified RST Instructor)
Kevin
Craig (Certified RST Instructor)
Keith
Craig (Certified RST Instructor)
Keith
Craig (Certified RST Instructor)
frank
Craig (Certified RST Instructor)
Eric
Craig (Certified RST Instructor)
Eric
Stefan
Craig (Certified RST Instructor)
Stefan
Craig (Certified RST Instructor)
Eric
Craig (Certified RST Instructor)
Thaddieus
Craig (Certified RST Instructor)
Thaddieus
Craig (Certified RST Instructor)
Lippen
Craig (Certified RST Instructor)
Loran
Craig (Certified RST Instructor)
Chris
Craig (Certified RST Instructor)
Greg
Craig (Certified RST Instructor)
Jay
Craig (Certified RST Instructor)
Jeffrey
Craig (Certified RST Instructor)
Jeffrey
Craig (Certified RST Instructor)
Jason
Craig (Certified RST Instructor)
Rick
Aaron (Certified RST Instructor)
Michael
Craig (Certified RST Instructor)
Loran
Craig (Certified RST Instructor)
Christian
R.J. (Certified RST Instructor)
Jeffrey
R.J. (Certified RST Instructor)
John
Craig (Certified RST Instructor)
Freddy
Craig (Certified RST Instructor)
Freddy
donny
greg
Chris (Certified RST Instructor)
greg
greg
greg
Chris (Certified RST Instructor)