



















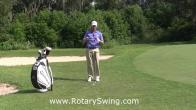
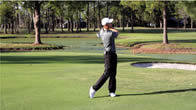



Proper Tee Height | Optimize Distance and Control
Sorry, you need to be a member to access this video. You Are Just Seconds Away!

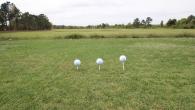
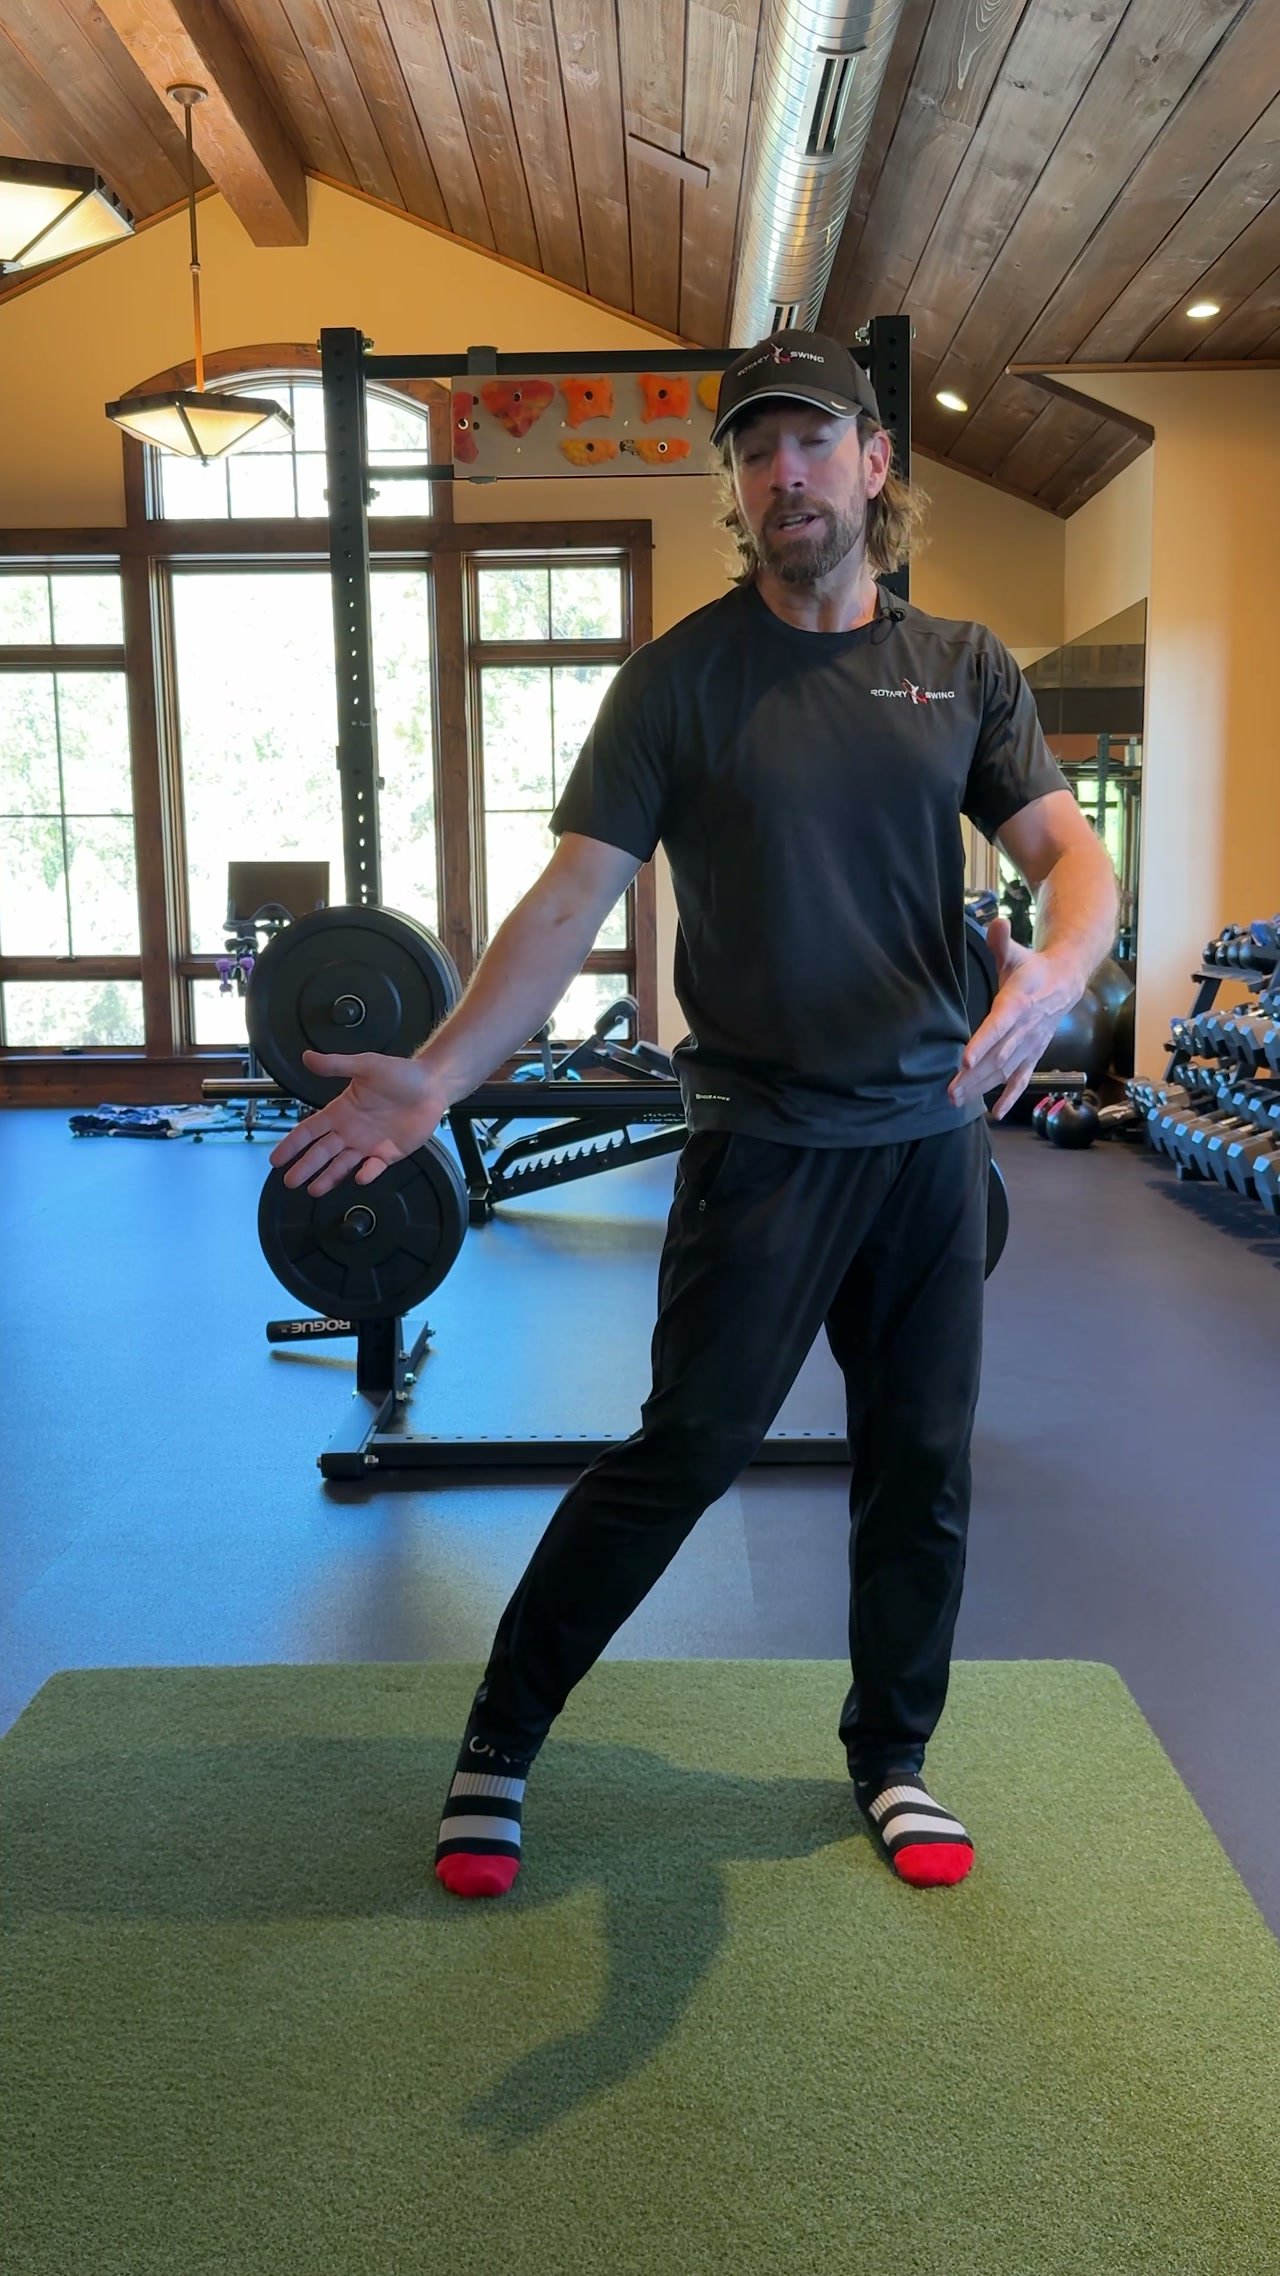
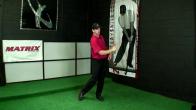
In this video, you'll see the importance of using different tee height positions with your driver. You'll also learn how axis tilt can help you start launching the ball higher for longer drives or hit low penetrating bullets that go right through the wind.
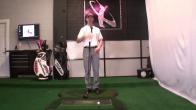
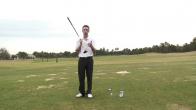
- Tee it high let it fly - Ball teed above the face. More secondary axis tilt needed.
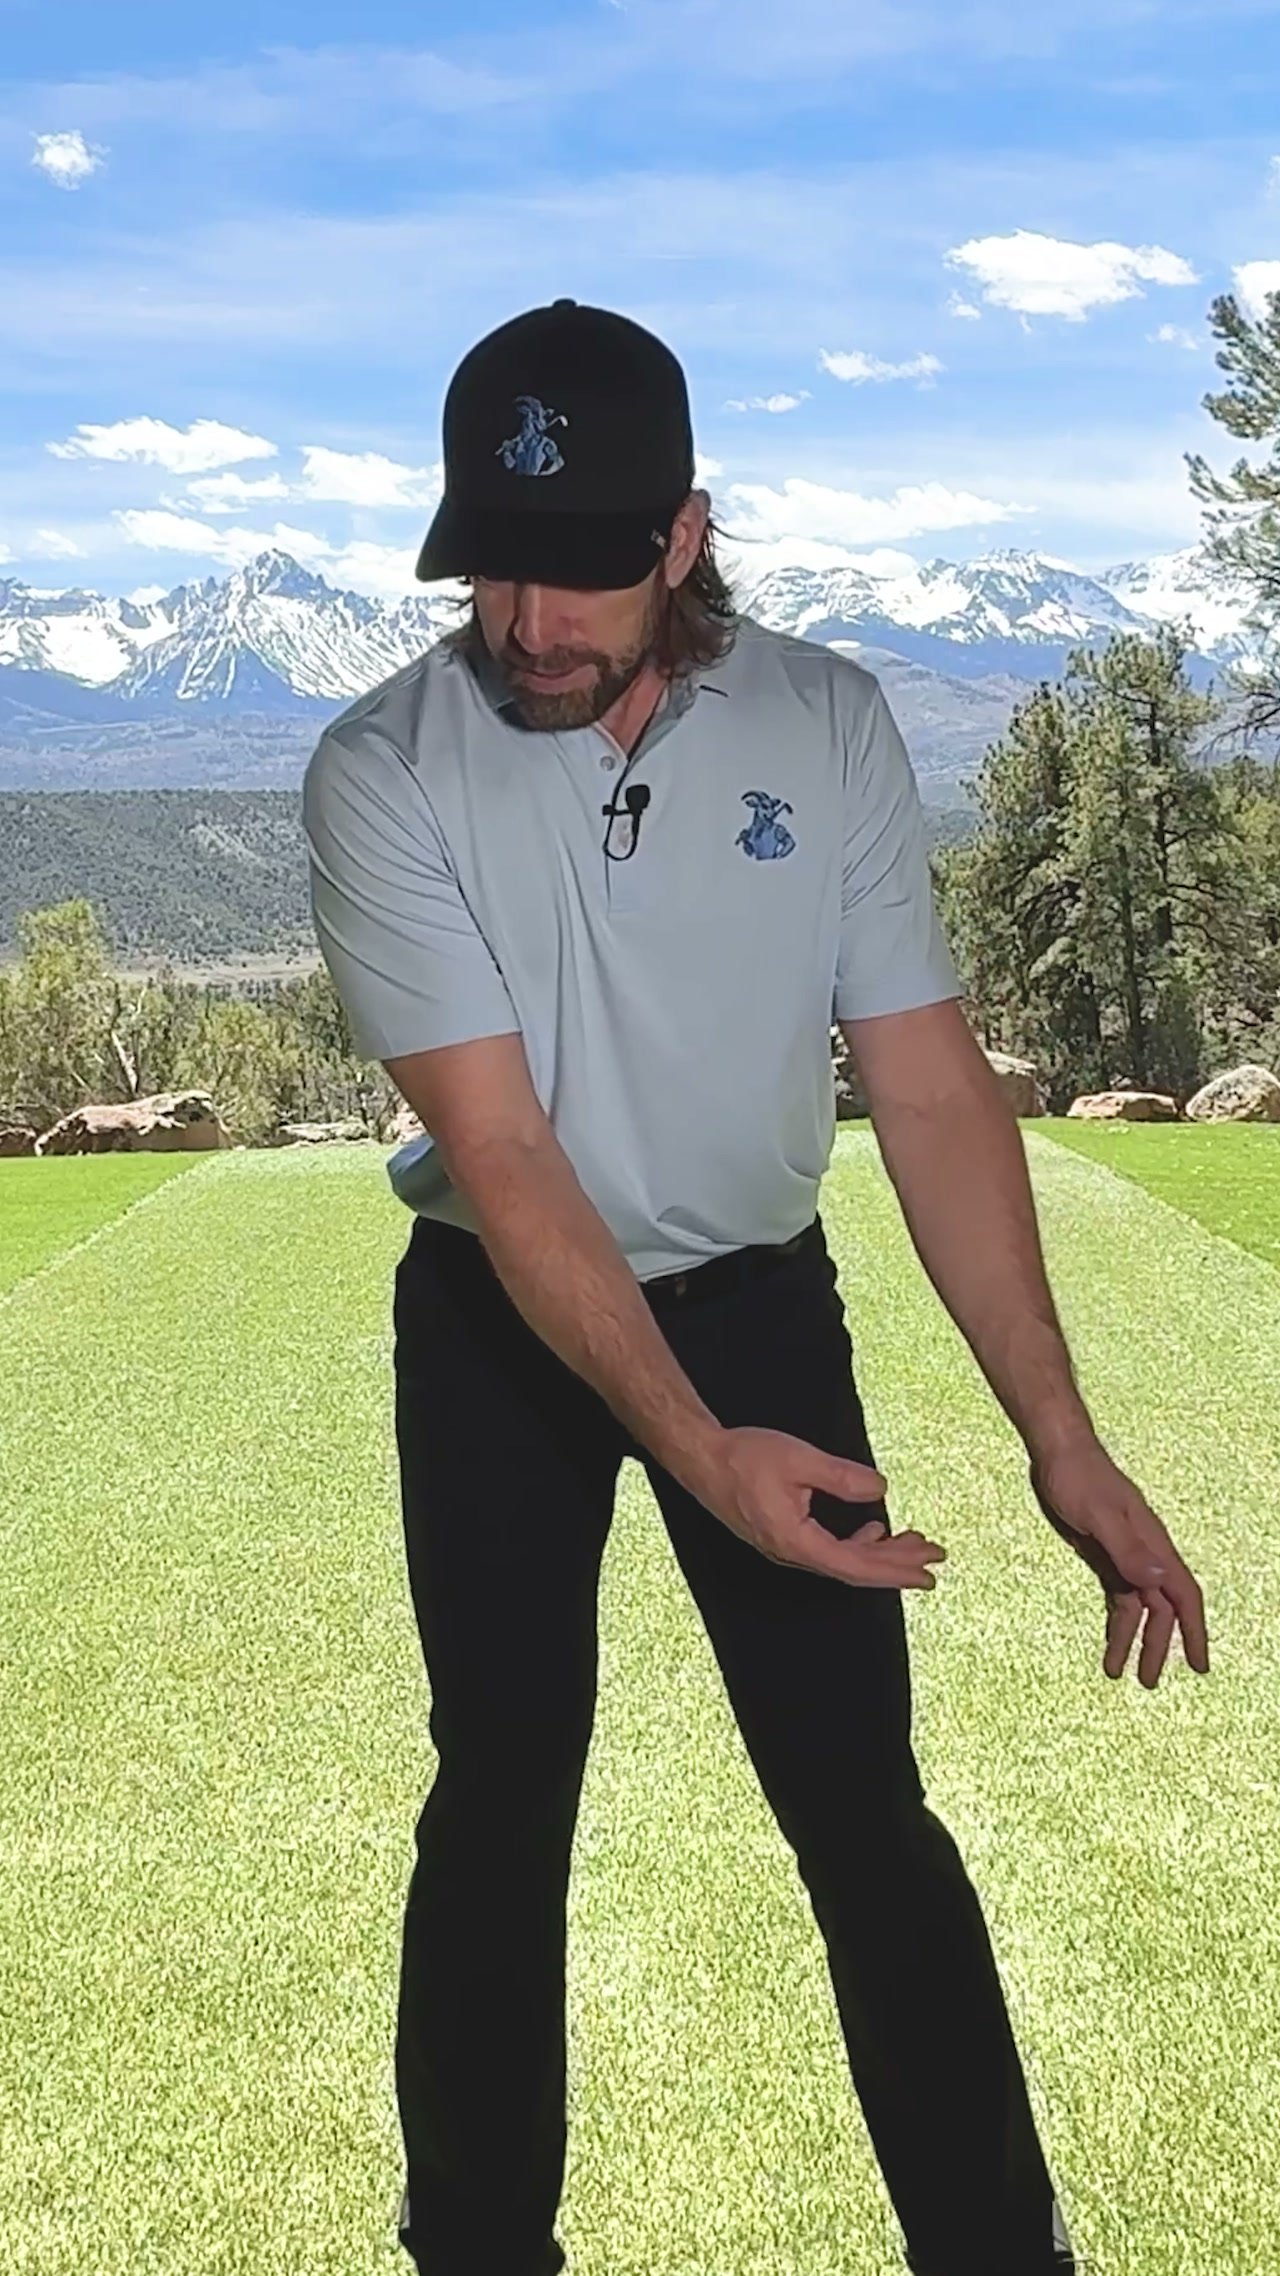
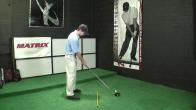
- Stock shot - Ball half on the face, half above it. Normal RST swing.
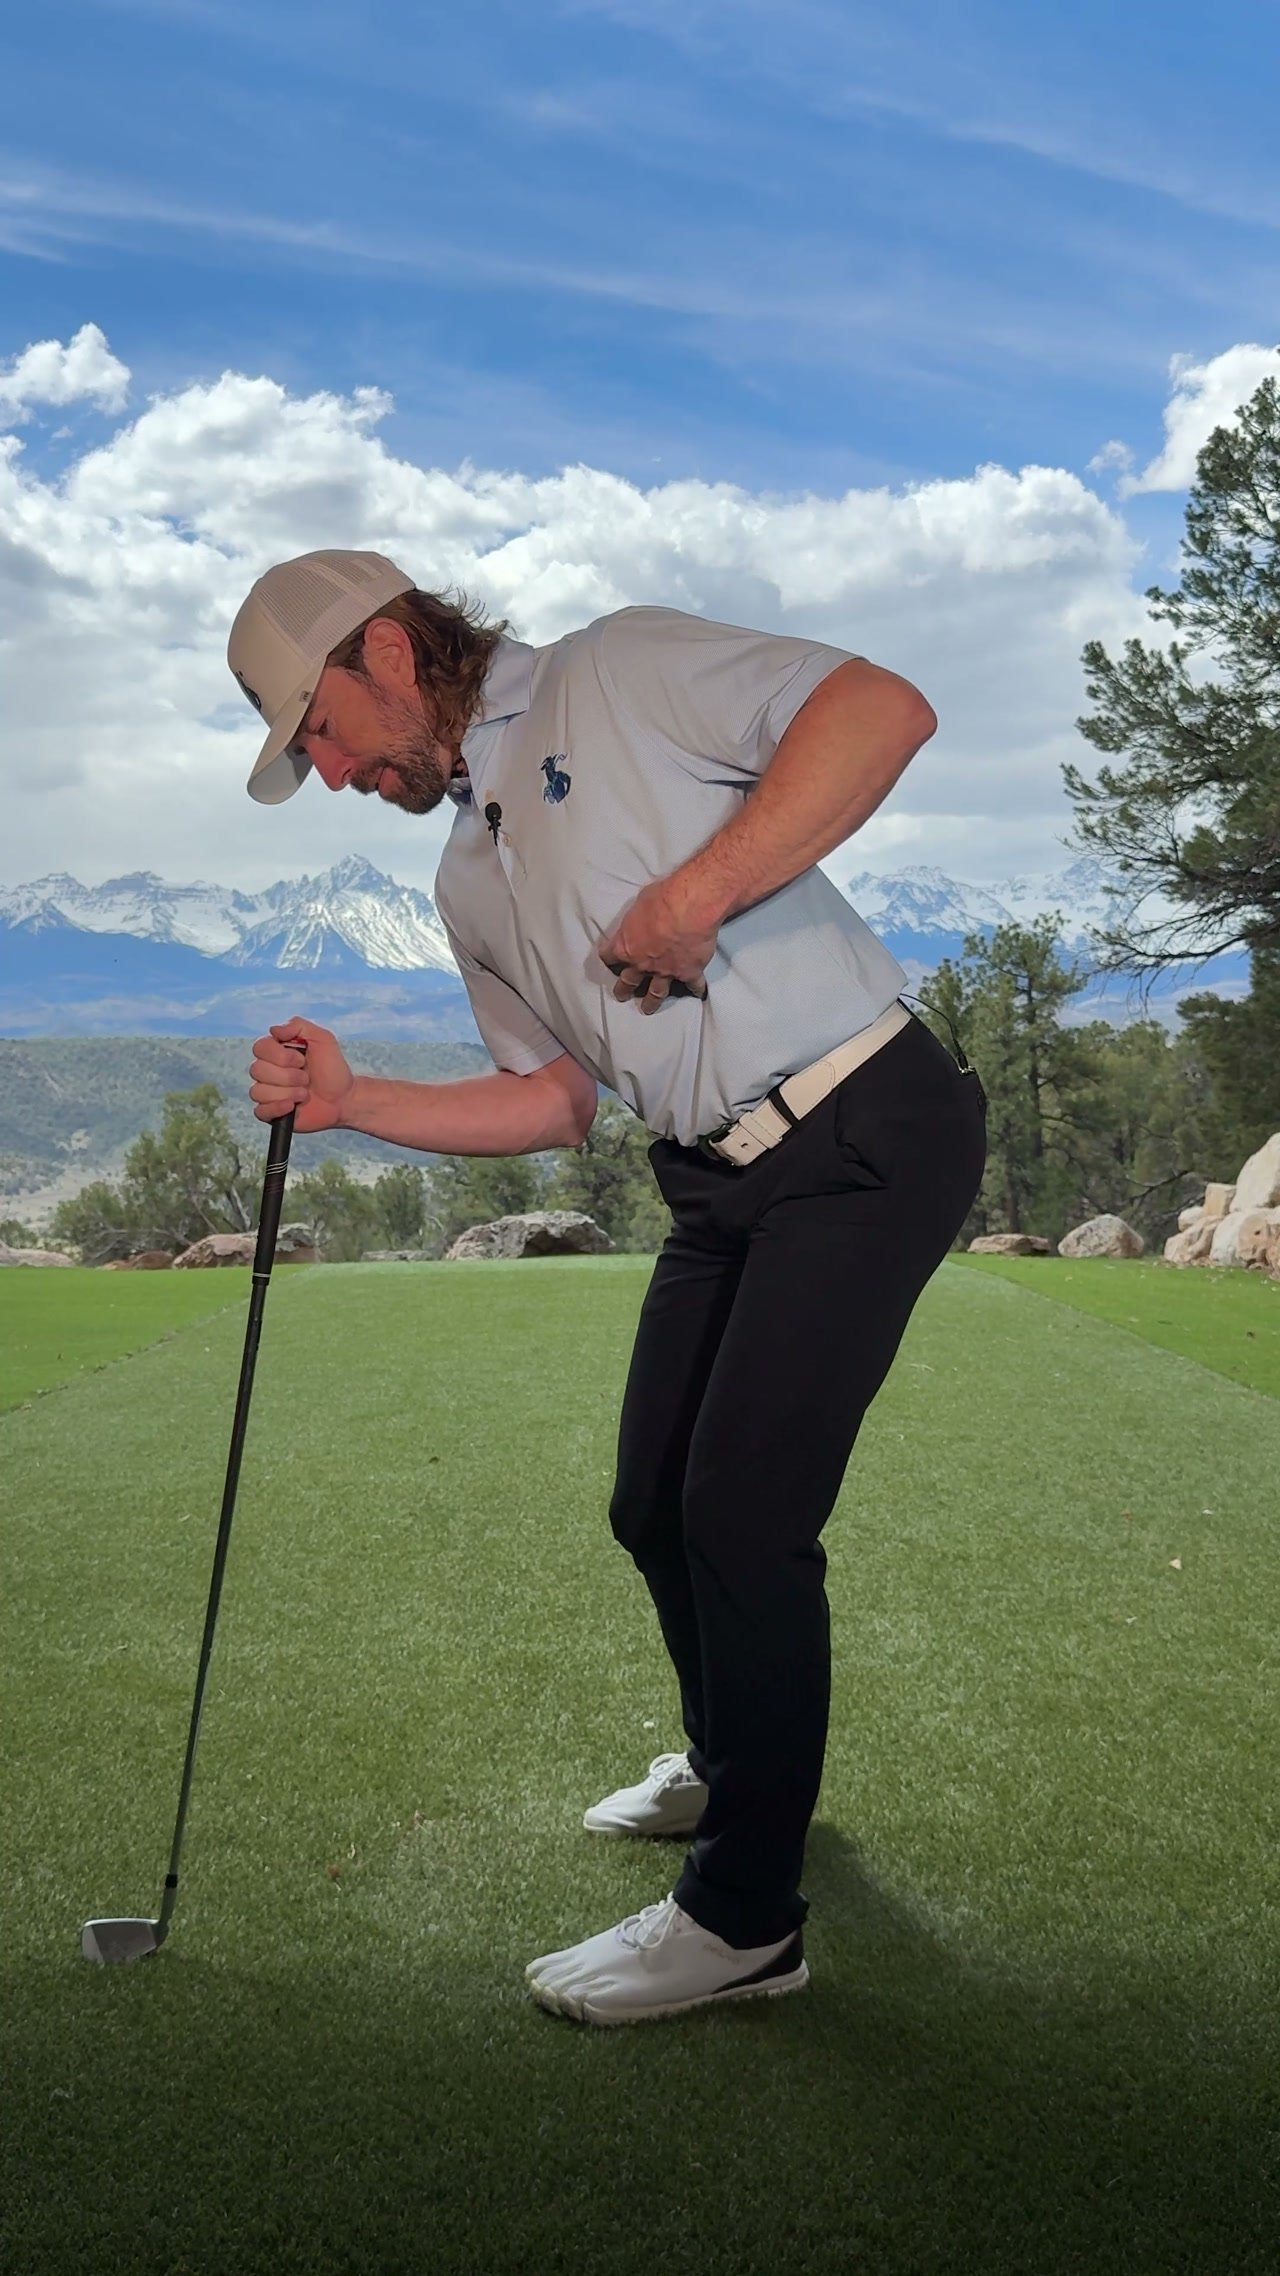
- Low bullet - Ball teed in the middle of the face. Lead shoulder stays low.
Hey, Rotary Swing Golfers.
Welcome back.
I'm your instructor, Chris Tyler, And today we're going to be talking about how.
Tee height and the position of your spine can help you optimize your distance and also get you more control in the golf course.
Okay, guys, So before we start getting into the mechanics and how, it's going to be important to control the position of your spine in the hitting area, I want to go ahead and discuss the three different tee heights that I like to use when on the golf course here.
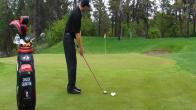
And this first tee height, you're going to notice that the ball is pretty much completely above the face.
Now, this is the ball that I call tee it high and let it fly.
And these are going to be ones that we're really trying to get the ball to be in a very high launch condition, with very low spin.
I like to play this shot on days that there's not tons of wind, or if it's a hole that's playing dead downwind.
We want to really kind of tee it high, let it fly, take advantage of the wind.
Also, another good time to use it is if you have some crosswind on the golf course.
And you can use the wind to your advantage to help get the ball back into play and further down the fairway.
This is another one that you can use this particular tee height on.
This next ball position, this is what I call the stock shot position.
Okay, this is where I have about half the ball on the face and half the ball above the face.
Now, what does a stock shot mean?
Well, a stock shot is typically, if you were to hit a pitching wedge, a total of 130 yards.
That was your maximum value to it, where you didn't have to swing too hard and you didn't have to take anything off it.
It went 130 yards.
That would be what we consider a stock shot.
Well, the same thing with a driver.
We want to be able to have a go-to shot in your round.
I'm not going to be making any adjustments to my setup with this particular tee height.
All I'm really doing is trying to make a good golf swing, get the golf ball in play.
So, this is what I call my stock shot ball.
This low ball right here, this is what I call my low ball bullet ball.
Now, this is a ball that's great for really windy conditions.
If you're playing a hole that's dead back into the wind, this is going to help you flight your golf ball down quite a bit.
This is also good for those players that are starting to try to work the golf ball left to right off the tee.
If you have a hole that's set up to where you're going to need to start curving the ball or hitting a cut shot, this is a great way to start to do that.
So, you'll notice that this ball position on the club face is pretty low.
It's pretty much what I have just right in the center of the face is really where I tee it up.
So, again, we have the tee it high, let it fly, we've got the stock shot, and then we've got the low bolt bullet here.
Okay, so let's go ahead and talk about the position of the spine now, how it's going to affect each one of these shots, so you can start optimizing the distance and start optimizing that control.
Okay, so now that we've looked at the various tee heights here, Let's talk about the various spine positions that you're going to be working with with each one of these balls.
So that you have a good understanding of what you're going to be looking for.
To help get these things launched properly.
So, with the ball that we had first here, that one we were going to call tee it high and let it fly, we're going to be trying to promote a lot of secondary axis tilt.
Now, what is axis tilt?
A lot of you may be asking right now.
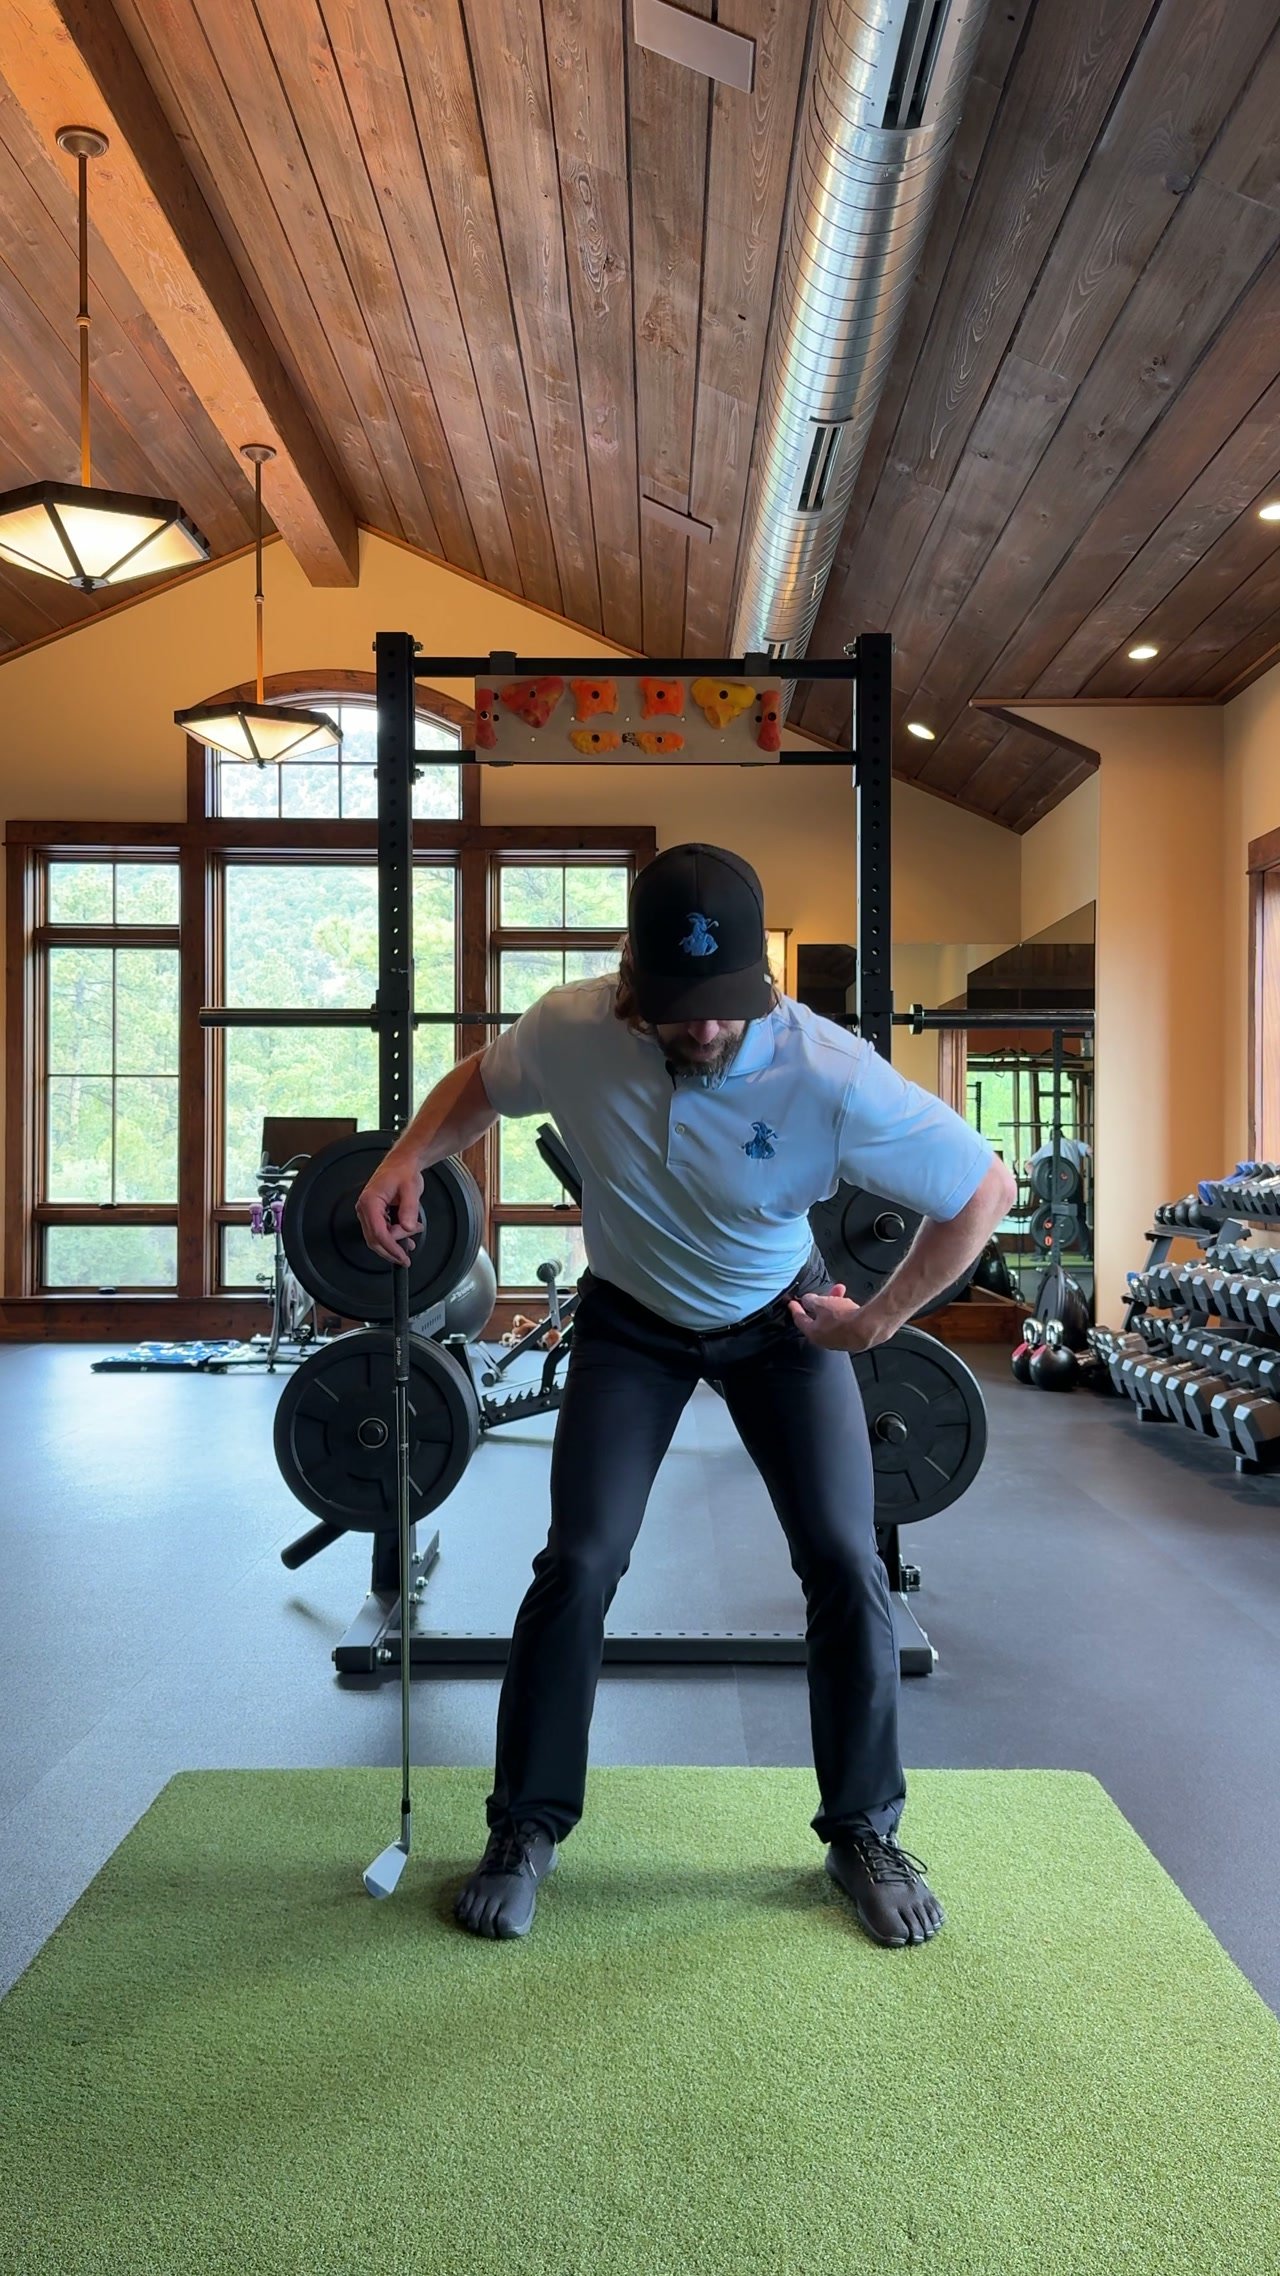
Well, axis tilt is just simply the position or the angle to my spine here from a face-on perspective.
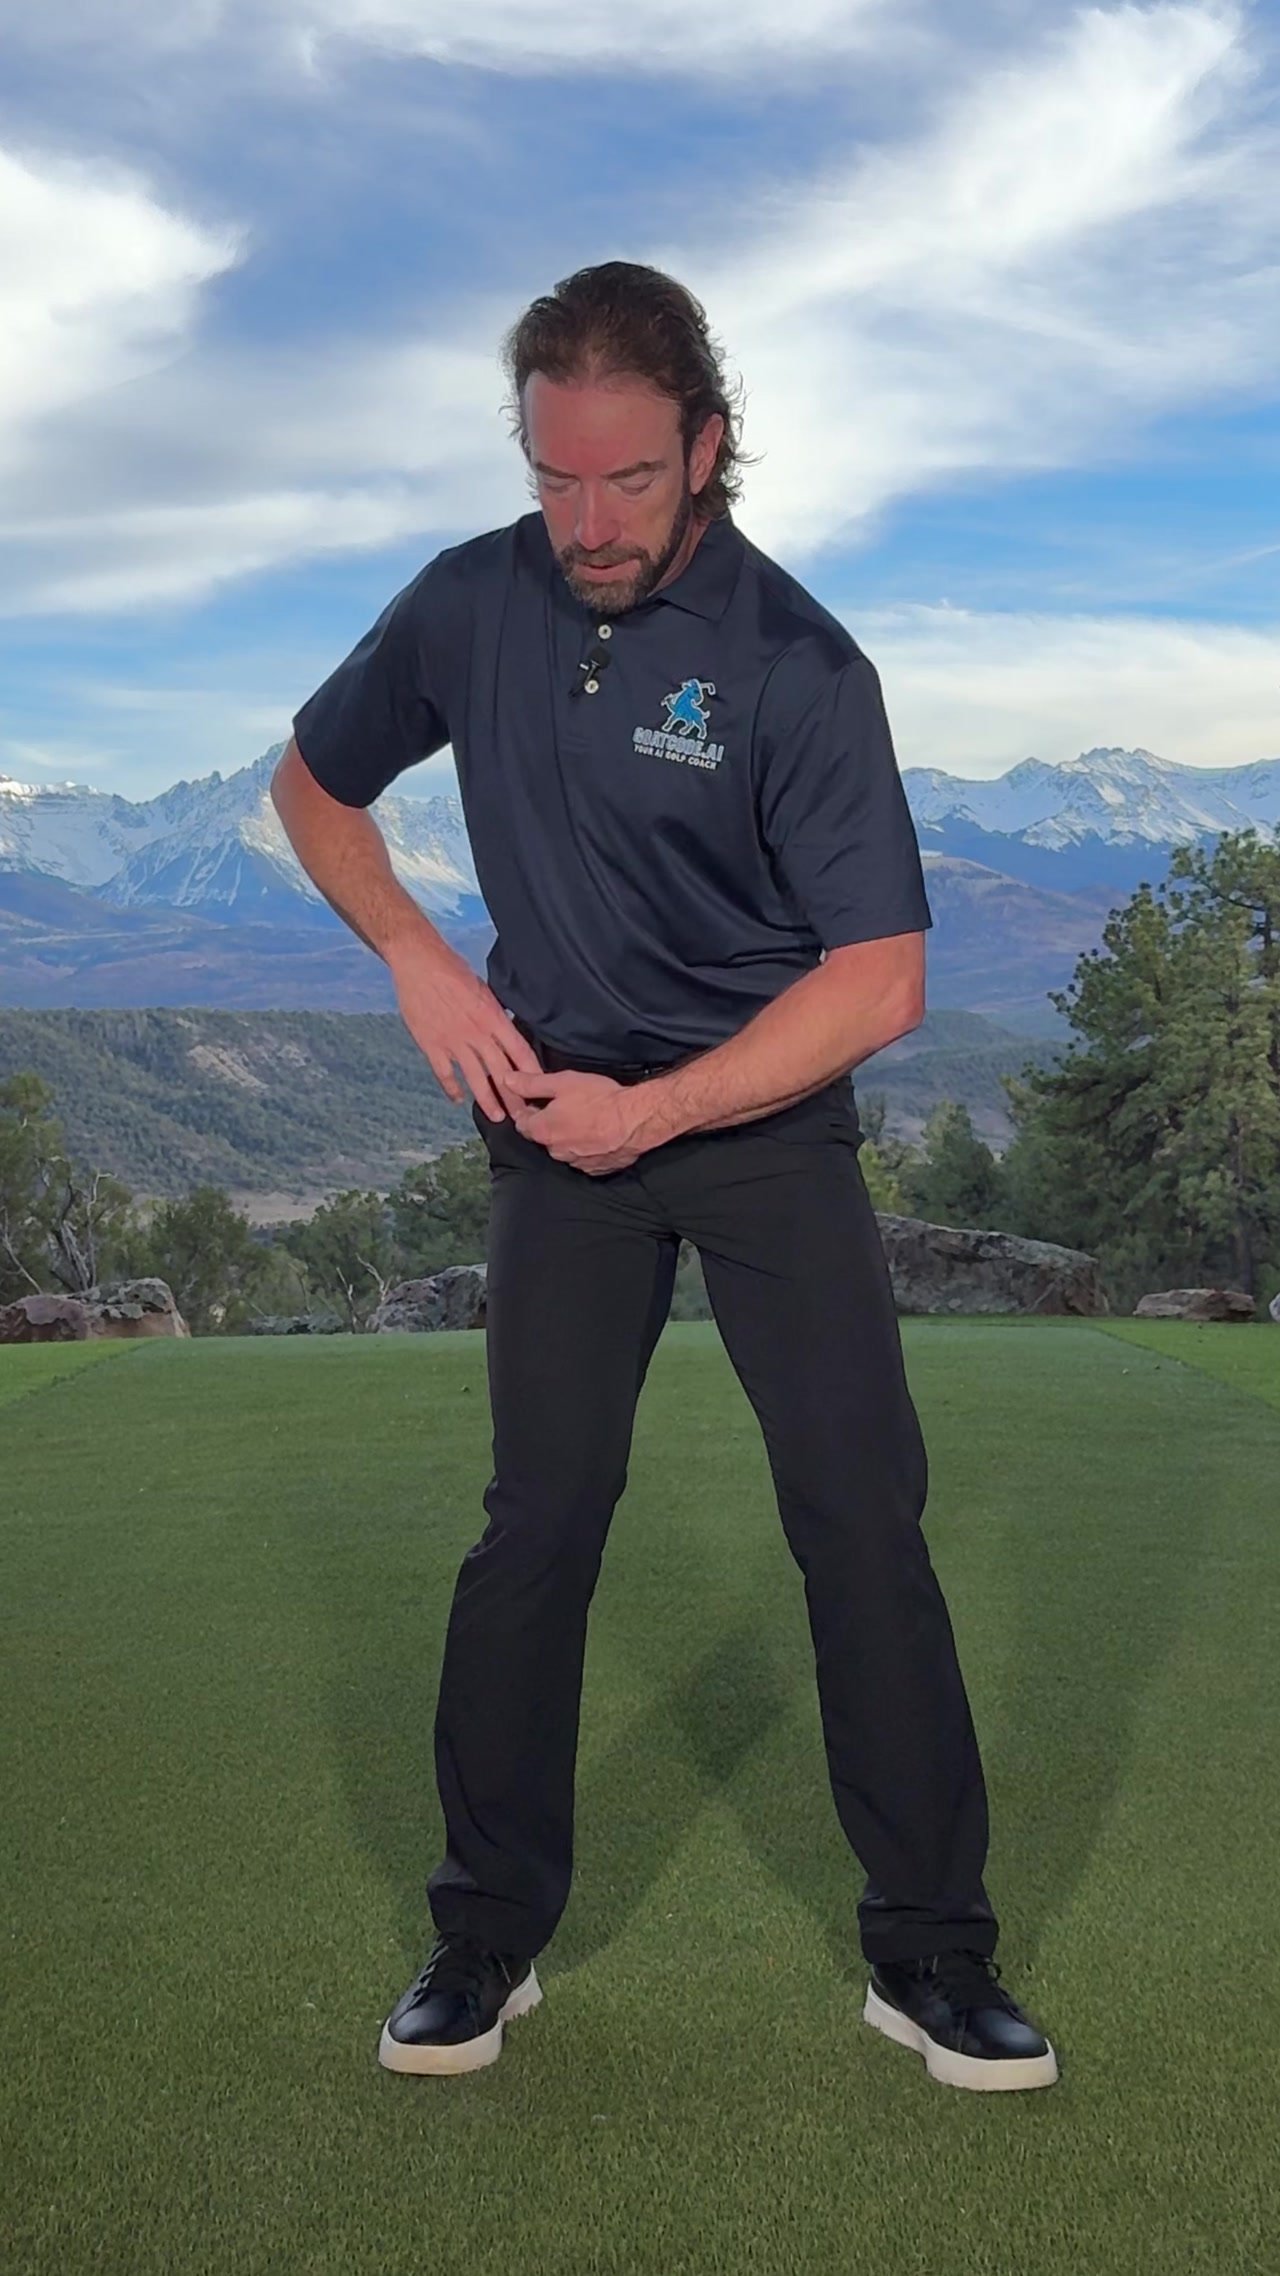
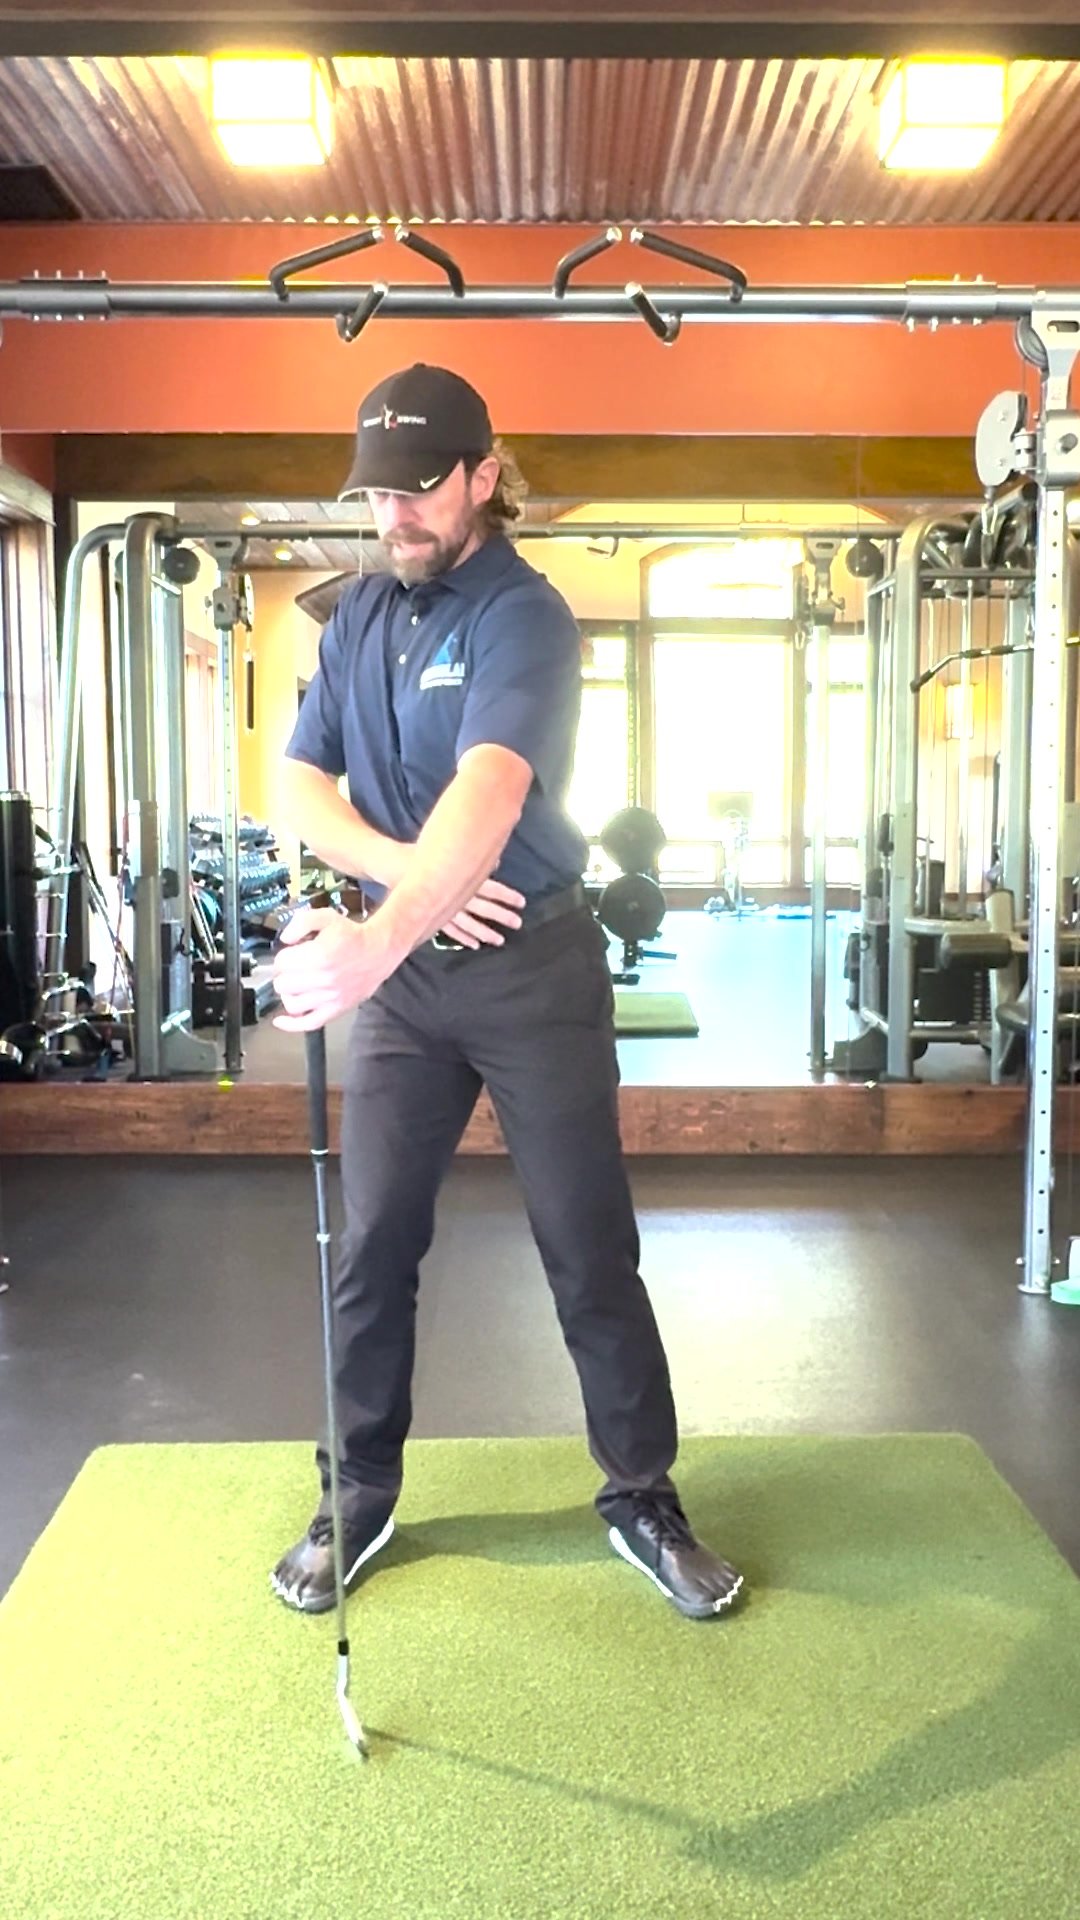
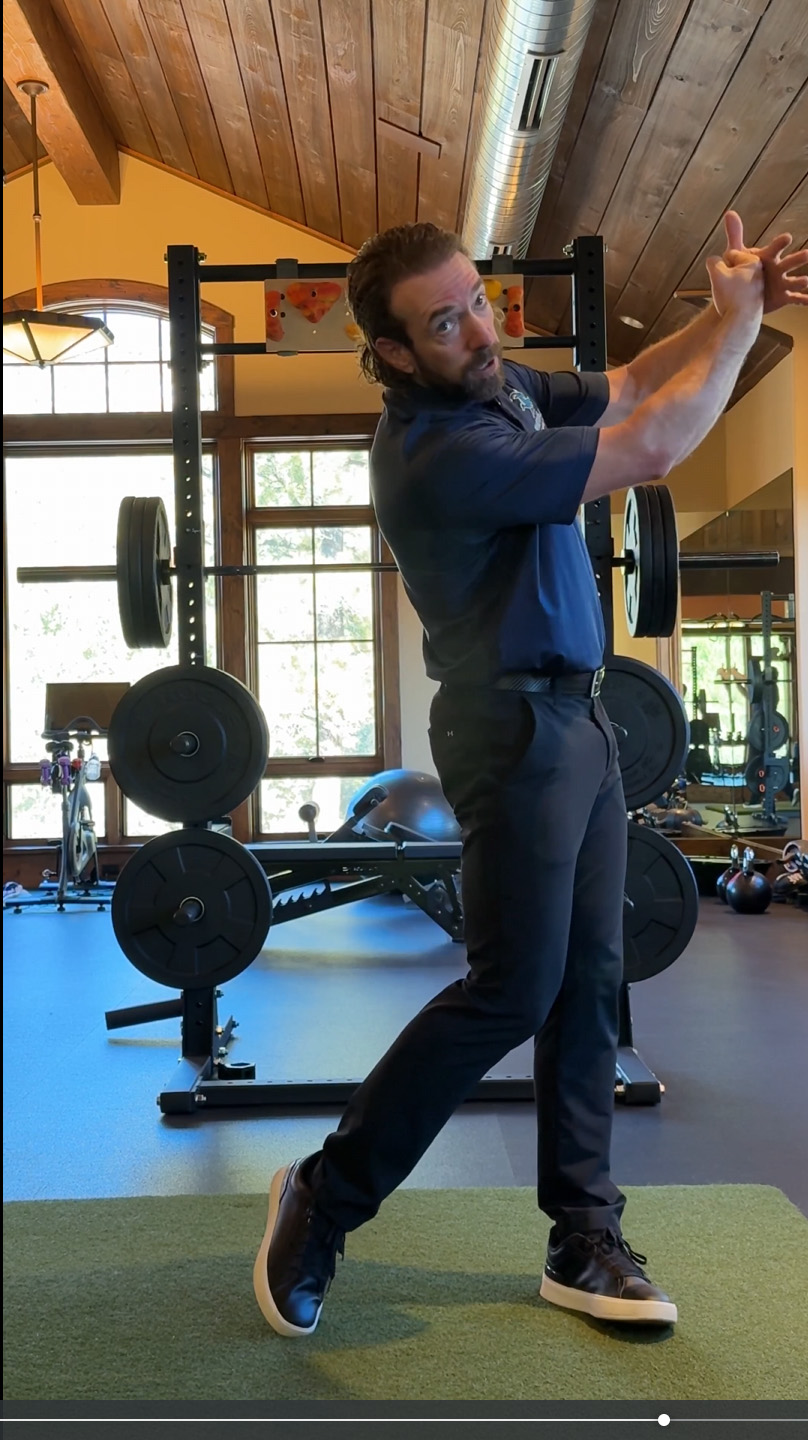
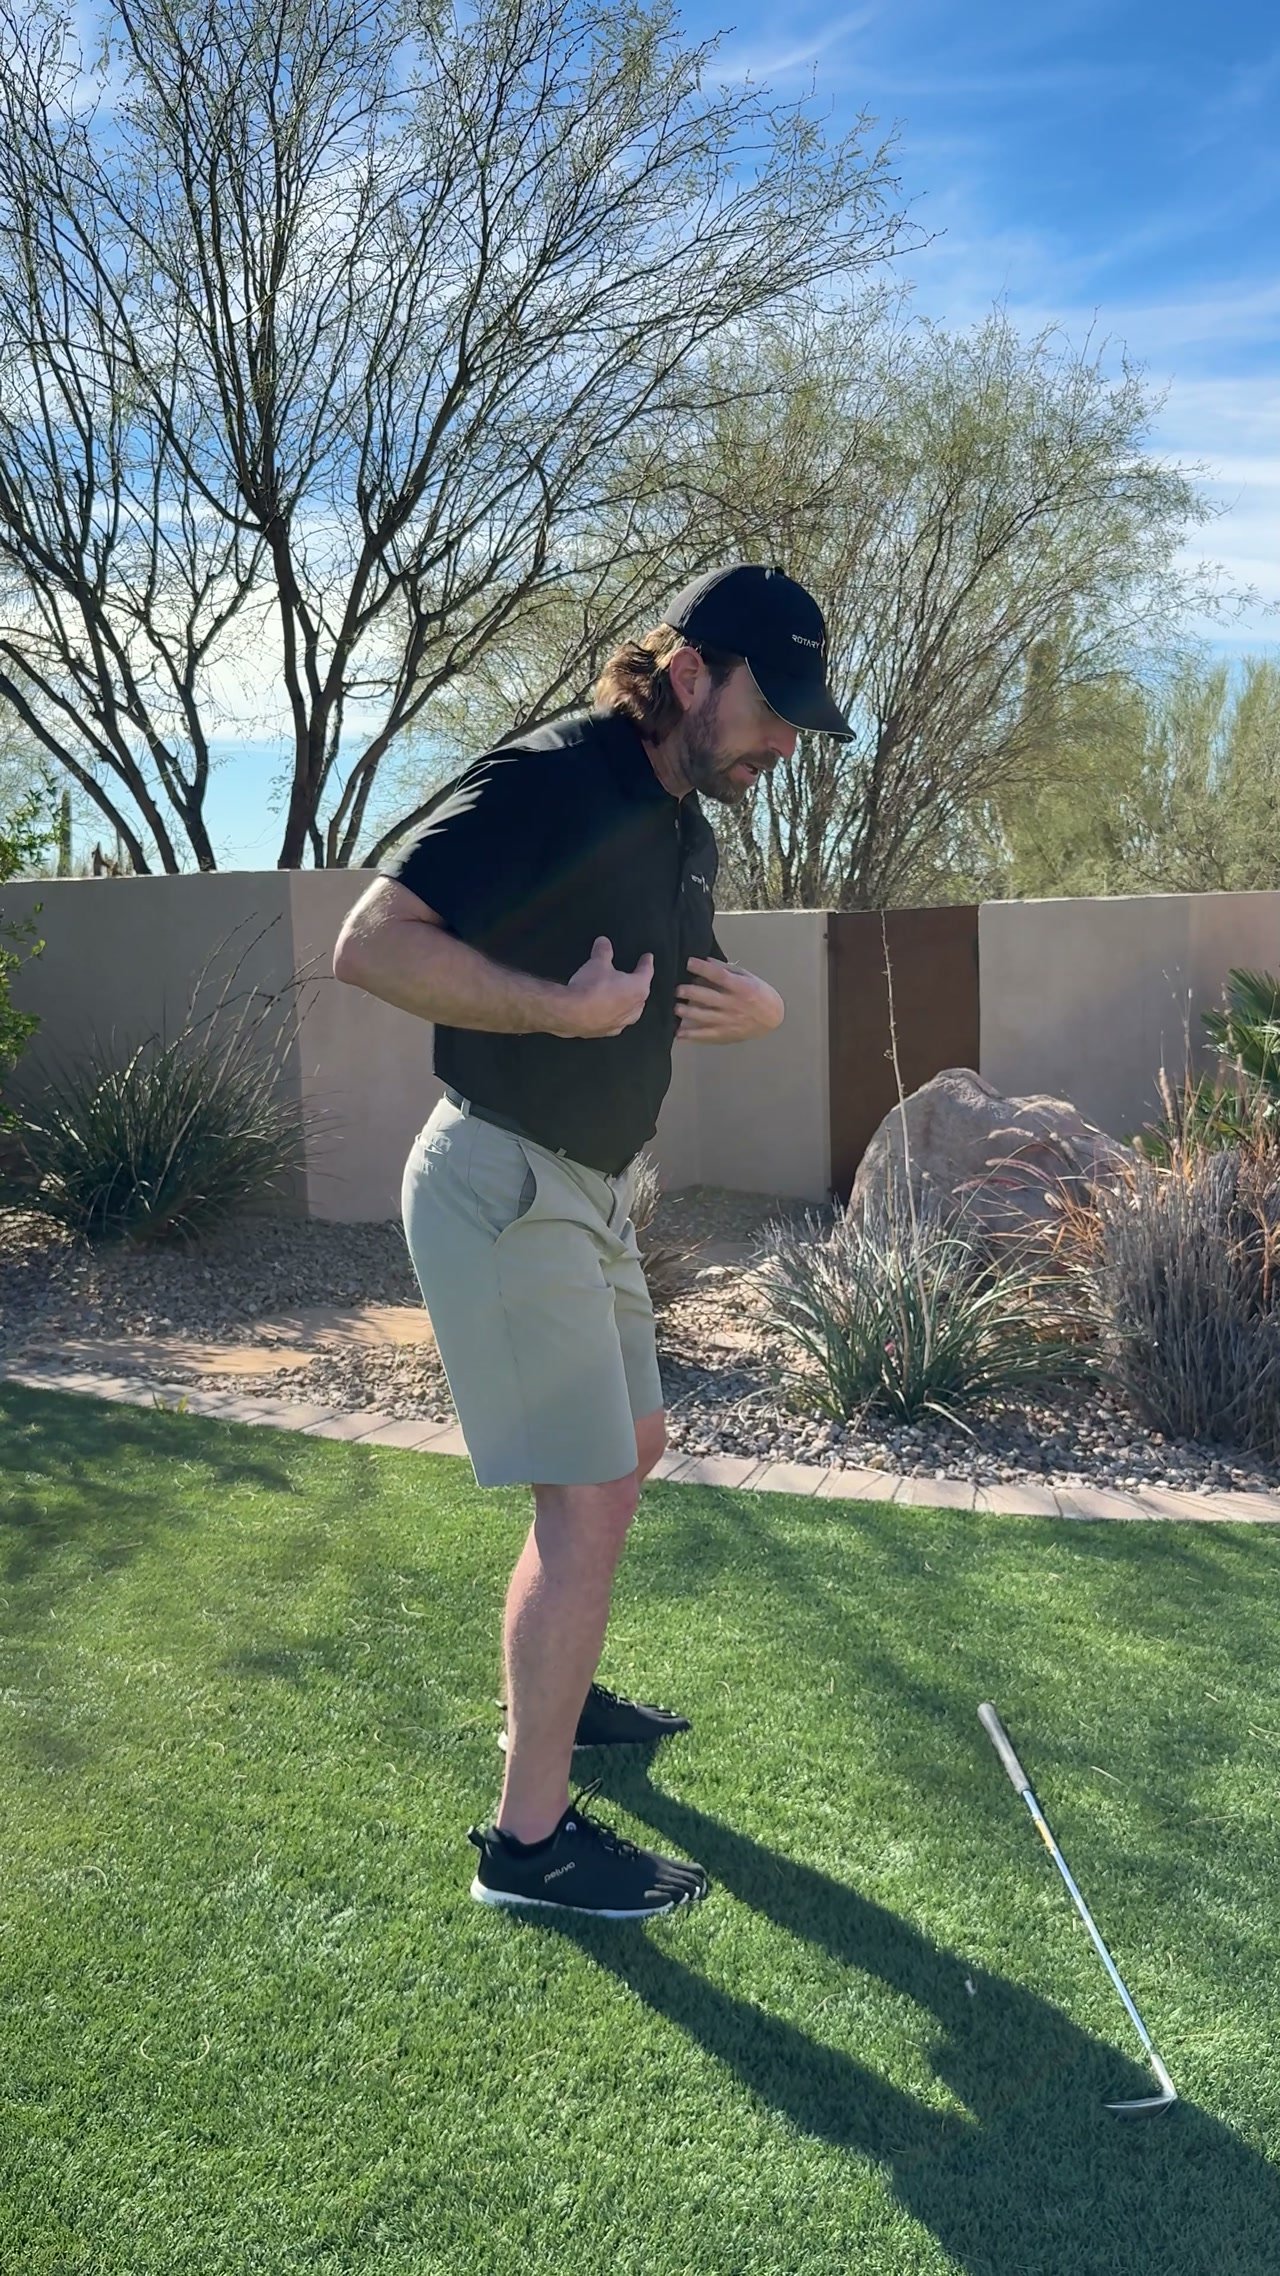
Okay, so at a dress, we like to have our spine just inside of our lead knee, and for a stock shot, you'll notice that our spine just shifts just outside of our lead knee.
Now, what does axis tilt do to your golf swing?
Well, what it does is it helps shallow your golf swing out quite a bit.
So, what I mean there is if you turn down the line here, okay, and I were to lean my spine away from the target, you're going to notice that the shaft plane lays flat here.
Now, why is that important to your golf swing?
Well, it's going to help get your golf ball, especially with a tee it high, let it fly condition, it's going to help you get the golf club on more of an ascending blow rather than a descending blow.
And a lot of these drivers these days are set up for very high launch conditions with very little ball spin.
So, what we're going to be trying to do with the tee it high, Let it fly.
Ball is.
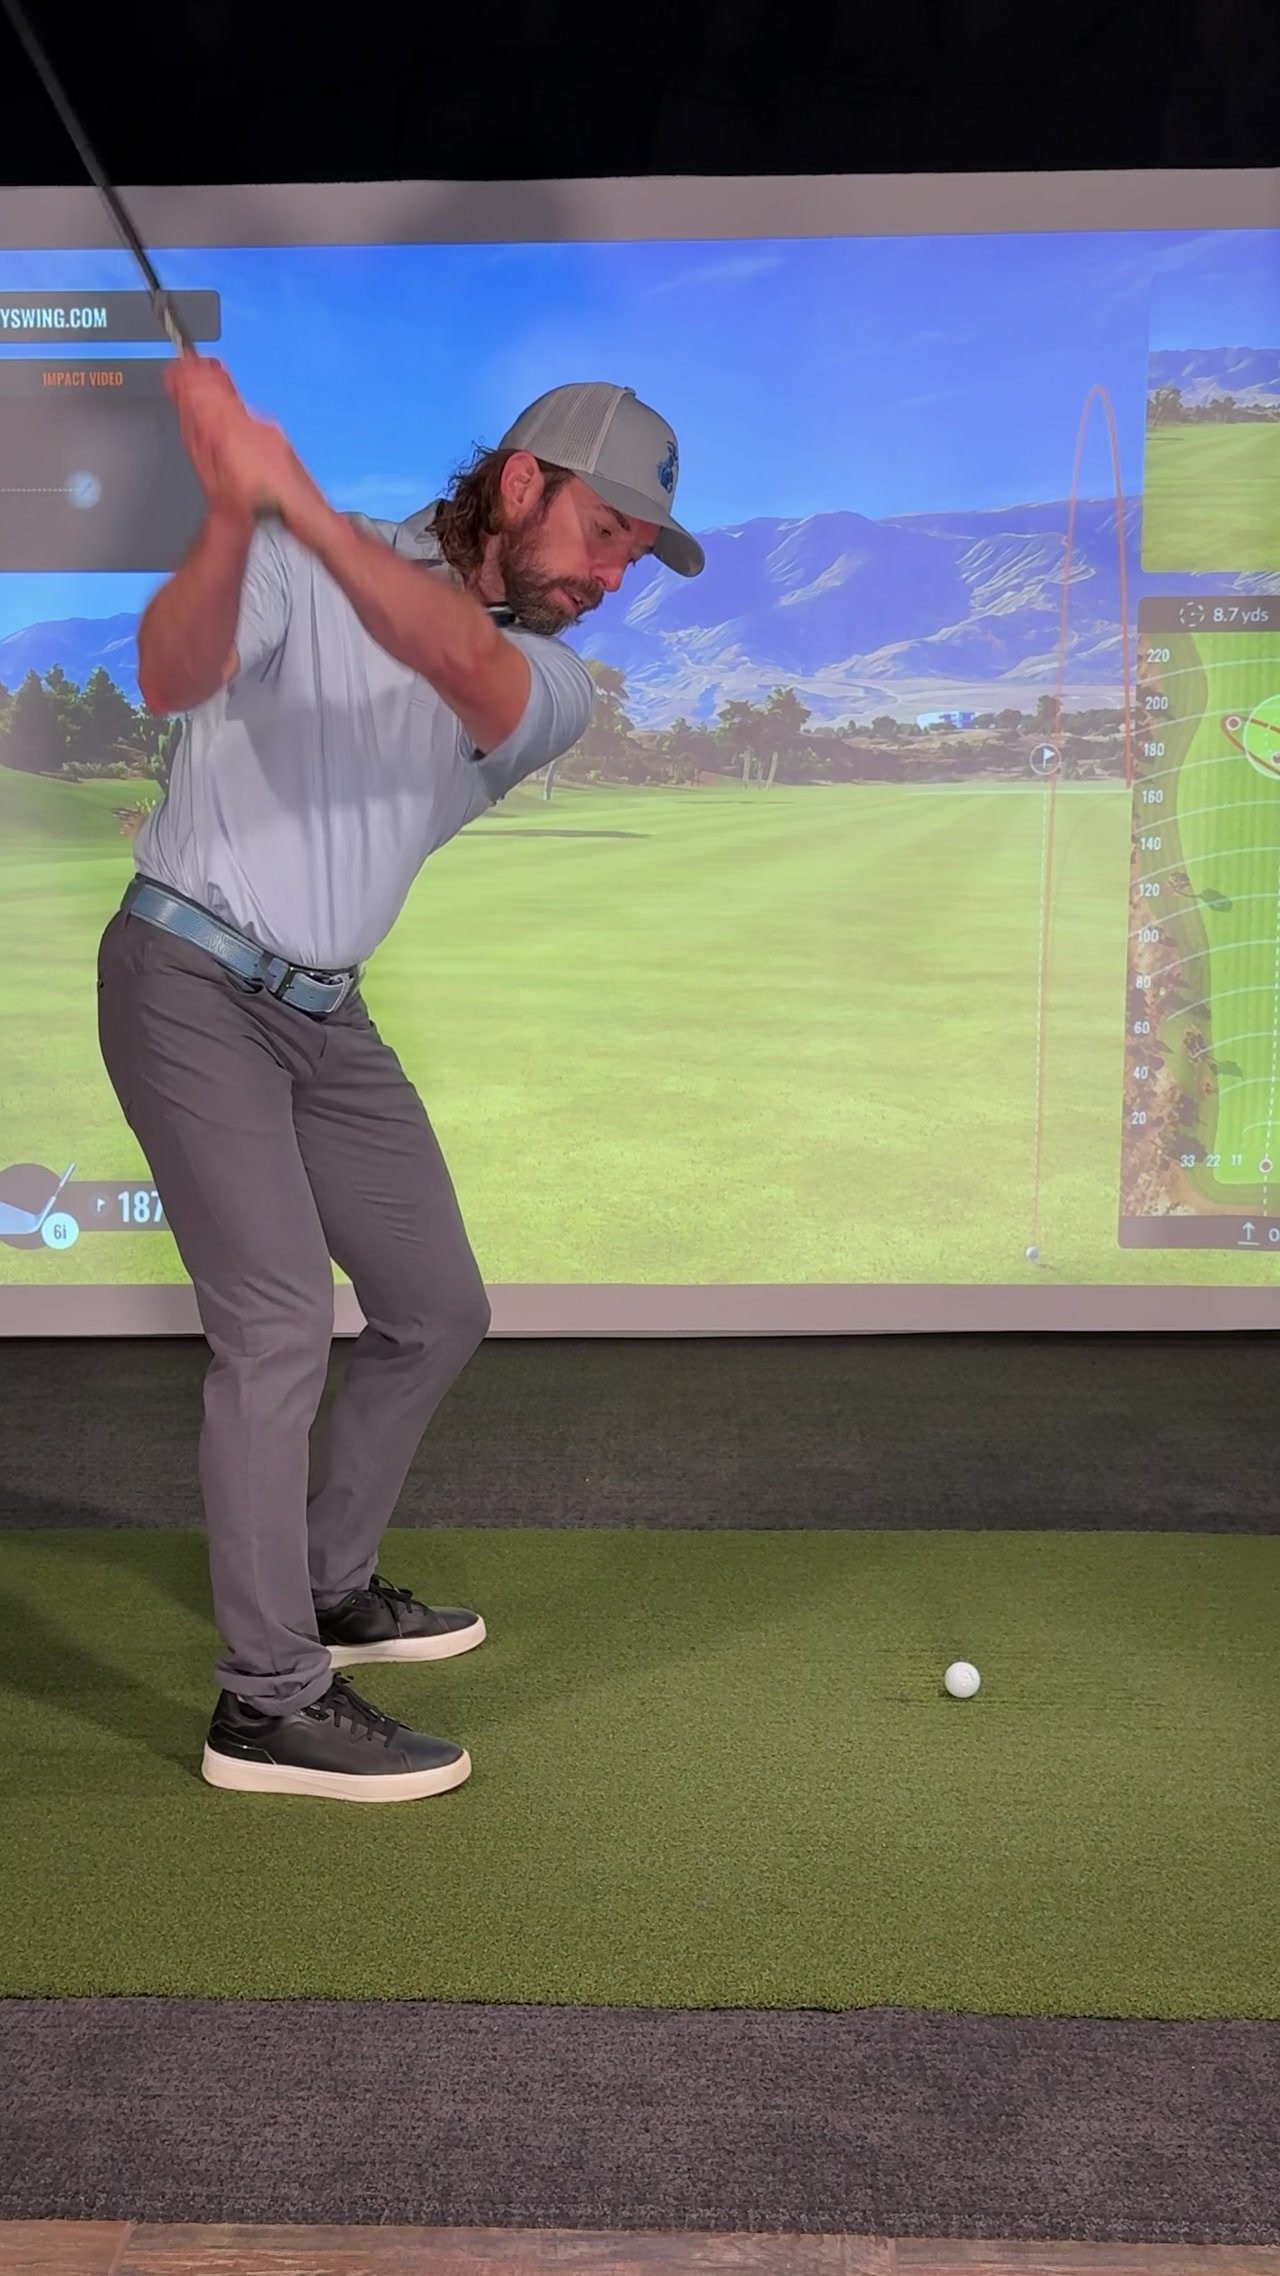
We're going to be trying to promote more secondary axis tilt by widening our base a little bit and then moving our ball position a little bit more forward.
Because when we start to shift our pelvis forward over to our lead side with a wider base, we keep our head quiet, you're going to notice that your spine wants to lean back a little bit more here.
Again, that's going to help create more of an ascending blow rather than a descending blow.
Now, with what we're going to do under a stock shot format is we're not going to go to a wider base here.
What we're going to do is we're going to just try to keep all of those things that we've worked through with RST as simple as possible here.
We're going to go to our normal stance width, we're going to have the ball position off of our left ear, and we're not going to try to promote any more secondary axis tilt.
We would just promote it just outside the lead knee here.
Now, with the low boat ball here, What we're going to be trying to do is we're going to try to keep our lead shoulder very low in transition.
We're almost going to be trying to take out some of that secondary axis tilt.
Now, so just as the opposite here, if I were to lean my spine away, if my spine were to feel like it was moving towards the target here, That would help get the golf club coming down a little bit steeper and make this shot a little bit easier for me to hit.
Because we're going to be trying to hit down on it quite a bit here.
So again, the tee at high, let it fly ball, we're going to widen our base up a little bit here.
We're going to promote a little bit more secondary axis tilt by keeping our head back.
Number two ball, the stock ball, we're just going to keep all of the RST fundamentals the same here.
Proper stance width, golf ball position off the left ear.
And we're going to just try to keep our spine just outside of our lead knee, down in the hitting area.
And then this low boat bullet ball, We're going to try to keep our left shoulder much lower down in the hitting area to keep our spine a little bit more vertical.
That way we can hit down on the golf ball and be able to flight it lower, be able to control that spin, and also be able to keep the ball down through the wind so it's boring through the wind.
And hopefully you guys can get some good usage out of this.
Okay, so let's go ahead and take a look at the high launch ball here.
You're going to notice that that ball is almost completely above the face.
I've gone ahead and widened my base here quite a bit.
Ball position is going to be quite a bit more forward with where we would normally play it.
Okay, what I'm going to try to do is make sure when I come down to the hitting area, I'm going to keep my head really quiet when I'm shifting my weight.
So I'm going to promote a little bit more secondary tilt.
We're going to try to really get that thing launching.
There we go, did pretty good there.
Okay, all we're going to do is try to promote just enough tilt just to have it outside the knee.
So all of our other RST fundamentals stay the same.
There you go.
And now the low bolt bullet ball.
This is the one where we're going to try to make sure our left shoulder is going to stay much lower in transition.
Take out some of that tilt so we can really flight that golf ball down.
Get it underneath the wind.
There you go.
Alright guys, so now that you've seen my different tee heights here, We've talked a little bit about how axis tilt is going to ultimately affect the way the golf club enters the hitting area.
It can help you start creating more of an ascending blow rather than a descending blow.
So if you've been struggling with either creating too much secondary axis tilt and haven't really had a solution on how to fix that, We've got an absolutely fantastic video that a lot of golfers get great success with, and that's called the level shoulders drill.
And that's in the downswing section.
Okay, so level shoulders video.
It's going to teach you what you want your shoulders to be able to look like down into the hitting area.
So that you don't start to get the club shallowing out too much and then you can start to compress the golf ball properly.
Also check out the video called the driver setup adjustments video.
That's another great video that talks to you about the sciences of why.
We make these little, minor setup adjustments to help get that golf ball launching in the air.
And then also the importance of launch.
The importance of launch is another video that's going to talk to you about the sciences and why.
We want to get that golf ball really launching in the air in certain circumstances on the golf course.
Now let's get out there guys, let's play some great golf.
Welcome back.
I'm your instructor, Chris Tyler, And today we're going to be talking about how.
Tee height and the position of your spine can help you optimize your distance and also get you more control in the golf course.
Okay, guys, So before we start getting into the mechanics and how, it's going to be important to control the position of your spine in the hitting area, I want to go ahead and discuss the three different tee heights that I like to use when on the golf course here.
And this first tee height, you're going to notice that the ball is pretty much completely above the face.
Now, this is the ball that I call tee it high and let it fly.
And these are going to be ones that we're really trying to get the ball to be in a very high launch condition, with very low spin.
I like to play this shot on days that there's not tons of wind, or if it's a hole that's playing dead downwind.
We want to really kind of tee it high, let it fly, take advantage of the wind.
Also, another good time to use it is if you have some crosswind on the golf course.
And you can use the wind to your advantage to help get the ball back into play and further down the fairway.
This is another one that you can use this particular tee height on.
This next ball position, this is what I call the stock shot position.
Okay, this is where I have about half the ball on the face and half the ball above the face.
Now, what does a stock shot mean?
Well, a stock shot is typically, if you were to hit a pitching wedge, a total of 130 yards.
That was your maximum value to it, where you didn't have to swing too hard and you didn't have to take anything off it.
It went 130 yards.
That would be what we consider a stock shot.
Well, the same thing with a driver.
We want to be able to have a go-to shot in your round.
I'm not going to be making any adjustments to my setup with this particular tee height.
All I'm really doing is trying to make a good golf swing, get the golf ball in play.
So, this is what I call my stock shot ball.
This low ball right here, this is what I call my low ball bullet ball.
Now, this is a ball that's great for really windy conditions.
If you're playing a hole that's dead back into the wind, this is going to help you flight your golf ball down quite a bit.
This is also good for those players that are starting to try to work the golf ball left to right off the tee.
If you have a hole that's set up to where you're going to need to start curving the ball or hitting a cut shot, this is a great way to start to do that.
So, you'll notice that this ball position on the club face is pretty low.
It's pretty much what I have just right in the center of the face is really where I tee it up.
So, again, we have the tee it high, let it fly, we've got the stock shot, and then we've got the low bolt bullet here.
Okay, so let's go ahead and talk about the position of the spine now, how it's going to affect each one of these shots, so you can start optimizing the distance and start optimizing that control.
Okay, so now that we've looked at the various tee heights here, Let's talk about the various spine positions that you're going to be working with with each one of these balls.
So that you have a good understanding of what you're going to be looking for.
To help get these things launched properly.
So, with the ball that we had first here, that one we were going to call tee it high and let it fly, we're going to be trying to promote a lot of secondary axis tilt.
Now, what is axis tilt?
A lot of you may be asking right now.
Well, axis tilt is just simply the position or the angle to my spine here from a face-on perspective.
Okay, so at a dress, we like to have our spine just inside of our lead knee, and for a stock shot, you'll notice that our spine just shifts just outside of our lead knee.
Now, what does axis tilt do to your golf swing?
Well, what it does is it helps shallow your golf swing out quite a bit.
So, what I mean there is if you turn down the line here, okay, and I were to lean my spine away from the target, you're going to notice that the shaft plane lays flat here.
Now, why is that important to your golf swing?
Well, it's going to help get your golf ball, especially with a tee it high, let it fly condition, it's going to help you get the golf club on more of an ascending blow rather than a descending blow.
And a lot of these drivers these days are set up for very high launch conditions with very little ball spin.
So, what we're going to be trying to do with the tee it high, Let it fly.
Ball is.
We're going to be trying to promote more secondary axis tilt by widening our base a little bit and then moving our ball position a little bit more forward.
Because when we start to shift our pelvis forward over to our lead side with a wider base, we keep our head quiet, you're going to notice that your spine wants to lean back a little bit more here.
Again, that's going to help create more of an ascending blow rather than a descending blow.
Now, with what we're going to do under a stock shot format is we're not going to go to a wider base here.
What we're going to do is we're going to just try to keep all of those things that we've worked through with RST as simple as possible here.
We're going to go to our normal stance width, we're going to have the ball position off of our left ear, and we're not going to try to promote any more secondary axis tilt.
We would just promote it just outside the lead knee here.
Now, with the low boat ball here, What we're going to be trying to do is we're going to try to keep our lead shoulder very low in transition.
We're almost going to be trying to take out some of that secondary axis tilt.
Now, so just as the opposite here, if I were to lean my spine away, if my spine were to feel like it was moving towards the target here, That would help get the golf club coming down a little bit steeper and make this shot a little bit easier for me to hit.
Because we're going to be trying to hit down on it quite a bit here.
So again, the tee at high, let it fly ball, we're going to widen our base up a little bit here.
We're going to promote a little bit more secondary axis tilt by keeping our head back.
Number two ball, the stock ball, we're just going to keep all of the RST fundamentals the same here.
Proper stance width, golf ball position off the left ear.
And we're going to just try to keep our spine just outside of our lead knee, down in the hitting area.
And then this low boat bullet ball, We're going to try to keep our left shoulder much lower down in the hitting area to keep our spine a little bit more vertical.
That way we can hit down on the golf ball and be able to flight it lower, be able to control that spin, and also be able to keep the ball down through the wind so it's boring through the wind.
And hopefully you guys can get some good usage out of this.
Okay, so let's go ahead and take a look at the high launch ball here.
You're going to notice that that ball is almost completely above the face.
I've gone ahead and widened my base here quite a bit.
Ball position is going to be quite a bit more forward with where we would normally play it.
Okay, what I'm going to try to do is make sure when I come down to the hitting area, I'm going to keep my head really quiet when I'm shifting my weight.
So I'm going to promote a little bit more secondary tilt.
We're going to try to really get that thing launching.
There we go, did pretty good there.
Okay, all we're going to do is try to promote just enough tilt just to have it outside the knee.
So all of our other RST fundamentals stay the same.
There you go.
And now the low bolt bullet ball.
This is the one where we're going to try to make sure our left shoulder is going to stay much lower in transition.
Take out some of that tilt so we can really flight that golf ball down.
Get it underneath the wind.
There you go.
Alright guys, so now that you've seen my different tee heights here, We've talked a little bit about how axis tilt is going to ultimately affect the way the golf club enters the hitting area.
It can help you start creating more of an ascending blow rather than a descending blow.
So if you've been struggling with either creating too much secondary axis tilt and haven't really had a solution on how to fix that, We've got an absolutely fantastic video that a lot of golfers get great success with, and that's called the level shoulders drill.
And that's in the downswing section.
Okay, so level shoulders video.
It's going to teach you what you want your shoulders to be able to look like down into the hitting area.
So that you don't start to get the club shallowing out too much and then you can start to compress the golf ball properly.
Also check out the video called the driver setup adjustments video.
That's another great video that talks to you about the sciences of why.
We make these little, minor setup adjustments to help get that golf ball launching in the air.
And then also the importance of launch.
The importance of launch is another video that's going to talk to you about the sciences and why.
We want to get that golf ball really launching in the air in certain circumstances on the golf course.
Now let's get out there guys, let's play some great golf.
Salut, golfeurs du Rotary Swing.
Content de te revoir.
Je suis votre instructeur, Chris Tyler, et aujourd'hui nous allons parler de comment.
La hauteur du tee et la position de votre colonne vertébrale peuvent vous aider à optimiser votre distance et également à vous donner plus de contrôle sur le parcours de golf.
Ok les gars, donc avant de commencer à entrer dans la mécanique et comment, il sera important de contrôler la position de votre colonne vertébrale dans la zone de frappe, je veux aller de l'avant et discuter des trois hauteurs de tee différentes que j'aime utiliser sur le parcours de golf ici.
Et à cette première hauteur de tee, vous remarquerez que la balle est presque complètement au-dessus de la face.
Maintenant, c'est la balle que j'appelle « tee it high » et « launch it fly ».
Et ce sont ceux pour lesquels nous allons vraiment essayer de mettre la balle dans une condition de lancement très élevée, avec un effet très faible.
J'aime jouer ce coup les jours où il n'y a pas beaucoup de vent, ou s'il s'agit d'un trou qui se joue sous le vent.
Nous voulons vraiment le lancer haut, le laisser voler, profiter du vent.
Un autre bon moment pour l’utiliser est s’il y a du vent de travers sur le parcours de golf.
Et vous pouvez utiliser le vent à votre avantage pour aider à remettre la balle en jeu et plus loin sur le fairway.
C'est un autre modèle sur lequel vous pouvez utiliser cette hauteur de tee particulière.
Cette position de balle suivante, c'est ce que j'appelle la position de tir standard.
Ok, c'est là que j'ai environ la moitié de la balle sur le visage et la moitié de la balle au-dessus du visage.
Maintenant, que signifie une photo d'archives ?
Eh bien, un tir standard correspond généralement, si vous frappez un pitching wedge, à un total de 130 yards.
C'était votre valeur maximale, où vous n'aviez pas à vous balancer trop fort et où vous n'aviez rien à lui enlever.
Il a parcouru 130 mètres.
Ce serait ce que nous considérons comme une photo d’archive.
Eh bien, la même chose avec un chauffeur.
Nous voulons pouvoir avoir un cliché de référence dans votre tour.
Je ne vais pas apporter de modifications à ma configuration avec cette hauteur de tee particulière.
Tout ce que je fais, c'est essayer de faire un bon swing de golf, de mettre la balle de golf en jeu.
Voilà donc ce que j'appelle ma balle de tir standard.
Cette balle basse ici, c'est ce que j'appelle ma balle basse.
Voilà une balle idéale pour les conditions très venteuses.
Si vous jouez un trou qui est face au vent, cela va vous aider à faire voler votre balle de golf vers le bas.
C'est également une bonne idée pour les joueurs qui commencent à essayer de faire travailler la balle de golf de gauche à droite depuis le tee.
Si vous avez un trou qui est configuré à l'endroit où vous allez devoir commencer à courber la balle ou à frapper un coup coupé, c'est une excellente façon de commencer à le faire.
Vous remarquerez donc que la position de la balle sur la face du club est assez basse.
C'est à peu près ce que j'ai juste au centre du visage, c'est vraiment là que je le mets en place.
Donc, encore une fois, nous avons le tee haut, nous le laissons voler, nous avons le tir de stock, puis nous avons la balle à boulon bas ici.
Ok, alors allons-y et parlons maintenant de la position de la colonne vertébrale, de la façon dont elle va affecter chacun de ces coups, afin que vous puissiez commencer à optimiser la distance et commencer à optimiser ce contrôle.
Ok, maintenant que nous avons examiné les différentes hauteurs de tee ici, parlons des différentes positions de colonne vertébrale avec lesquelles vous allez travailler avec chacune de ces balles.
Pour que vous ayez une bonne compréhension de ce que vous allez rechercher.
Pour aider à lancer ces choses correctement.
Donc, avec la balle que nous avions en premier ici, celle que nous allions appeler tee-it high et la laisser voler, nous allons essayer de favoriser beaucoup d'inclinaison de l'axe secondaire.
Maintenant, qu’est-ce que l’inclinaison de l’axe ?
Beaucoup d’entre vous se posent peut-être cette question en ce moment.
Eh bien, l'inclinaison de l'axe est simplement la position ou l'angle de ma colonne vertébrale ici d'un point de vue de face.
D'accord, donc pour une robe, nous aimons avoir notre colonne vertébrale juste à l'intérieur de notre genou avant, et pour une photo d'archive, vous remarquerez que notre colonne vertébrale se déplace juste à l'extérieur de notre genou avant.
Maintenant, quel effet l’inclinaison de l’axe fait-elle à votre swing de golf ?
Eh bien, cela permet d'atténuer considérablement votre swing de golf.
Donc, ce que je veux dire, c'est que si vous tournez la ligne ici, d'accord, et que je penche ma colonne vertébrale loin de la cible, vous remarquerez que le plan de l'arbre est plat ici.
Maintenant, pourquoi est-ce important pour votre swing de golf ?
Eh bien, cela va vous aider à placer votre balle de golf, en particulier avec un tee haut, laissez-la voler, cela va vous aider à placer le club de golf sur un coup plus ascendant plutôt que sur un coup descendant.
Et de nos jours, beaucoup de ces drivers sont conçus pour des conditions de lancement très élevées avec très peu d'effet de balle.
Alors, ce que nous allons essayer de faire avec le tee, c'est de le mettre haut, de le laisser voler.
La balle est.
Nous allons essayer de favoriser une plus grande inclinaison de l'axe secondaire en élargissant un peu notre base, puis en déplaçant un peu plus notre position de balle vers l'avant.
Parce que lorsque nous commençons à déplacer notre bassin vers l'avant, vers notre côté avant avec une base plus large, nous gardons la tête calme, vous allez remarquer que votre colonne vertébrale veut se pencher un peu plus en arrière ici.
Encore une fois, cela va contribuer à créer un coup plus ascendant plutôt qu’un coup descendant.
Maintenant, avec ce que nous allons faire sous un format de stock shot, nous n'allons pas aller vers une base plus large ici.
Ce que nous allons faire, c'est simplement essayer de garder toutes ces choses sur lesquelles nous avons travaillé avec RST aussi simples que possible ici.
Nous allons revenir à notre largeur de position normale, nous allons avoir la position de la balle hors de notre oreille gauche et nous n'allons pas essayer de favoriser davantage l'inclinaison de l'axe secondaire.
Nous le ferions simplement la promotion juste à l'extérieur du genou avant ici.
Maintenant, avec la balle basse du bateau ici, ce que nous allons essayer de faire, c'est de garder notre épaule avant très basse pendant la transition.
Nous allons presque essayer de supprimer une partie de cette inclinaison de l'axe secondaire.
Maintenant, tout comme le contraire ici, si je devais pencher ma colonne vertébrale vers l'extérieur, si ma colonne vertébrale avait l'impression qu'elle se dirigeait vers la cible ici, cela aiderait le club de golf à descendre un peu plus raide et rendrait ce coup un peu plus facile à frapper pour moi.
Parce que nous allons essayer d'en parler un peu ici.
Donc encore une fois, le tee est haut, laissez la balle voler, nous allons élargir un peu notre base ici.
Nous allons favoriser un peu plus l'inclinaison de l'axe secondaire en gardant la tête en arrière.
Numéro deux, la balle de stock, nous allons simplement garder tous les fondamentaux RST identiques ici.
Largeur de position appropriée, position de la balle de golf par rapport à l'oreille gauche.
Et nous allons simplement essayer de garder notre colonne vertébrale juste à l'extérieur de notre genou avant, dans la zone de frappe.
Et puis cette balle basse, nous allons essayer de garder notre épaule gauche beaucoup plus basse dans la zone de frappe pour garder notre colonne vertébrale un peu plus verticale.
De cette façon, nous pouvons frapper la balle de golf et pouvoir la faire voler plus bas, pouvoir contrôler cet effet et également pouvoir garder la balle au sol à travers le vent pour qu'elle soit ennuyeuse à travers le vent.
Et j’espère que vous pourrez en tirer un bon usage.
Ok, alors allons-y et jetons un œil à la balle de lancement haute ici.
Vous remarquerez que cette balle est presque complètement au-dessus du visage.
J'ai progressé et j'ai considérablement élargi ma base ici.
La position du ballon sera un peu plus avancée que celle dans laquelle nous le jouerions normalement.
Ok, ce que je vais essayer de faire, c'est de m'assurer que lorsque j'arrive dans la zone de frappe, je vais garder ma tête très calme lorsque je déplace mon poids.
Je vais donc promouvoir un peu plus d'inclinaison secondaire.
Nous allons vraiment essayer de lancer cette chose.
Et voilà, nous avons plutôt bien réussi.
D'accord, tout ce que nous allons faire est d'essayer de promouvoir juste assez d'inclinaison pour l'avoir à l'extérieur du genou.
Ainsi, tous nos autres fondamentaux RST restent les mêmes.
Voilà.
Et maintenant la balle à boulon bas.
C'est celui où nous allons essayer de nous assurer que notre épaule gauche restera beaucoup plus basse pendant la transition.
Supprimez une partie de cette inclinaison pour que nous puissions vraiment faire voler cette balle de golf vers le bas.
Mettez-le sous le vent.
Voilà.
Très bien les gars, maintenant que vous avez vu mes différentes hauteurs de tee ici, nous avons un peu parlé de la façon dont l'inclinaison de l'axe va finalement affecter la façon dont le club de golf entre dans la zone de frappe.
Cela peut vous aider à commencer à créer davantage un coup ascendant plutôt qu’un coup descendant.
Donc, si vous avez du mal à créer trop d'inclinaison de l'axe secondaire et que vous n'avez pas vraiment trouvé de solution pour résoudre ce problème, nous avons une vidéo absolument fantastique avec laquelle de nombreux golfeurs obtiennent un grand succès, et qui s'appelle l'exercice des épaules de niveau.
Et c'est dans la période de ralentissement.
Ok, donc vidéo sur les épaules à niveau.
Cela va vous apprendre à quoi vous voulez que vos épaules ressemblent dans la zone de frappe.
Pour éviter que le club ne commence à devenir trop plat et que vous puissiez alors commencer à comprimer correctement la balle de golf.
Consultez également la vidéo intitulée « Réglages de configuration du pilote ».
C'est une autre excellente vidéo qui vous parle des sciences du pourquoi.
Nous effectuons ces petits ajustements mineurs de configuration pour aider à lancer cette balle de golf dans les airs.
Et puis aussi l’importance du lancement.
L'importance du lancement est une autre vidéo qui va vous parler des sciences et pourquoi.
Nous voulons que la balle de golf soit vraiment lancée dans les airs dans certaines circonstances sur le parcours de golf.
Maintenant, sortons les gars, jouons au bon golf.
Content de te revoir.
Je suis votre instructeur, Chris Tyler, et aujourd'hui nous allons parler de comment.
La hauteur du tee et la position de votre colonne vertébrale peuvent vous aider à optimiser votre distance et également à vous donner plus de contrôle sur le parcours de golf.
Ok les gars, donc avant de commencer à entrer dans la mécanique et comment, il sera important de contrôler la position de votre colonne vertébrale dans la zone de frappe, je veux aller de l'avant et discuter des trois hauteurs de tee différentes que j'aime utiliser sur le parcours de golf ici.
Et à cette première hauteur de tee, vous remarquerez que la balle est presque complètement au-dessus de la face.
Maintenant, c'est la balle que j'appelle « tee it high » et « launch it fly ».
Et ce sont ceux pour lesquels nous allons vraiment essayer de mettre la balle dans une condition de lancement très élevée, avec un effet très faible.
J'aime jouer ce coup les jours où il n'y a pas beaucoup de vent, ou s'il s'agit d'un trou qui se joue sous le vent.
Nous voulons vraiment le lancer haut, le laisser voler, profiter du vent.
Un autre bon moment pour l’utiliser est s’il y a du vent de travers sur le parcours de golf.
Et vous pouvez utiliser le vent à votre avantage pour aider à remettre la balle en jeu et plus loin sur le fairway.
C'est un autre modèle sur lequel vous pouvez utiliser cette hauteur de tee particulière.
Cette position de balle suivante, c'est ce que j'appelle la position de tir standard.
Ok, c'est là que j'ai environ la moitié de la balle sur le visage et la moitié de la balle au-dessus du visage.
Maintenant, que signifie une photo d'archives ?
Eh bien, un tir standard correspond généralement, si vous frappez un pitching wedge, à un total de 130 yards.
C'était votre valeur maximale, où vous n'aviez pas à vous balancer trop fort et où vous n'aviez rien à lui enlever.
Il a parcouru 130 mètres.
Ce serait ce que nous considérons comme une photo d’archive.
Eh bien, la même chose avec un chauffeur.
Nous voulons pouvoir avoir un cliché de référence dans votre tour.
Je ne vais pas apporter de modifications à ma configuration avec cette hauteur de tee particulière.
Tout ce que je fais, c'est essayer de faire un bon swing de golf, de mettre la balle de golf en jeu.
Voilà donc ce que j'appelle ma balle de tir standard.
Cette balle basse ici, c'est ce que j'appelle ma balle basse.
Voilà une balle idéale pour les conditions très venteuses.
Si vous jouez un trou qui est face au vent, cela va vous aider à faire voler votre balle de golf vers le bas.
C'est également une bonne idée pour les joueurs qui commencent à essayer de faire travailler la balle de golf de gauche à droite depuis le tee.
Si vous avez un trou qui est configuré à l'endroit où vous allez devoir commencer à courber la balle ou à frapper un coup coupé, c'est une excellente façon de commencer à le faire.
Vous remarquerez donc que la position de la balle sur la face du club est assez basse.
C'est à peu près ce que j'ai juste au centre du visage, c'est vraiment là que je le mets en place.
Donc, encore une fois, nous avons le tee haut, nous le laissons voler, nous avons le tir de stock, puis nous avons la balle à boulon bas ici.
Ok, alors allons-y et parlons maintenant de la position de la colonne vertébrale, de la façon dont elle va affecter chacun de ces coups, afin que vous puissiez commencer à optimiser la distance et commencer à optimiser ce contrôle.
Ok, maintenant que nous avons examiné les différentes hauteurs de tee ici, parlons des différentes positions de colonne vertébrale avec lesquelles vous allez travailler avec chacune de ces balles.
Pour que vous ayez une bonne compréhension de ce que vous allez rechercher.
Pour aider à lancer ces choses correctement.
Donc, avec la balle que nous avions en premier ici, celle que nous allions appeler tee-it high et la laisser voler, nous allons essayer de favoriser beaucoup d'inclinaison de l'axe secondaire.
Maintenant, qu’est-ce que l’inclinaison de l’axe ?
Beaucoup d’entre vous se posent peut-être cette question en ce moment.
Eh bien, l'inclinaison de l'axe est simplement la position ou l'angle de ma colonne vertébrale ici d'un point de vue de face.
D'accord, donc pour une robe, nous aimons avoir notre colonne vertébrale juste à l'intérieur de notre genou avant, et pour une photo d'archive, vous remarquerez que notre colonne vertébrale se déplace juste à l'extérieur de notre genou avant.
Maintenant, quel effet l’inclinaison de l’axe fait-elle à votre swing de golf ?
Eh bien, cela permet d'atténuer considérablement votre swing de golf.
Donc, ce que je veux dire, c'est que si vous tournez la ligne ici, d'accord, et que je penche ma colonne vertébrale loin de la cible, vous remarquerez que le plan de l'arbre est plat ici.
Maintenant, pourquoi est-ce important pour votre swing de golf ?
Eh bien, cela va vous aider à placer votre balle de golf, en particulier avec un tee haut, laissez-la voler, cela va vous aider à placer le club de golf sur un coup plus ascendant plutôt que sur un coup descendant.
Et de nos jours, beaucoup de ces drivers sont conçus pour des conditions de lancement très élevées avec très peu d'effet de balle.
Alors, ce que nous allons essayer de faire avec le tee, c'est de le mettre haut, de le laisser voler.
La balle est.
Nous allons essayer de favoriser une plus grande inclinaison de l'axe secondaire en élargissant un peu notre base, puis en déplaçant un peu plus notre position de balle vers l'avant.
Parce que lorsque nous commençons à déplacer notre bassin vers l'avant, vers notre côté avant avec une base plus large, nous gardons la tête calme, vous allez remarquer que votre colonne vertébrale veut se pencher un peu plus en arrière ici.
Encore une fois, cela va contribuer à créer un coup plus ascendant plutôt qu’un coup descendant.
Maintenant, avec ce que nous allons faire sous un format de stock shot, nous n'allons pas aller vers une base plus large ici.
Ce que nous allons faire, c'est simplement essayer de garder toutes ces choses sur lesquelles nous avons travaillé avec RST aussi simples que possible ici.
Nous allons revenir à notre largeur de position normale, nous allons avoir la position de la balle hors de notre oreille gauche et nous n'allons pas essayer de favoriser davantage l'inclinaison de l'axe secondaire.
Nous le ferions simplement la promotion juste à l'extérieur du genou avant ici.
Maintenant, avec la balle basse du bateau ici, ce que nous allons essayer de faire, c'est de garder notre épaule avant très basse pendant la transition.
Nous allons presque essayer de supprimer une partie de cette inclinaison de l'axe secondaire.
Maintenant, tout comme le contraire ici, si je devais pencher ma colonne vertébrale vers l'extérieur, si ma colonne vertébrale avait l'impression qu'elle se dirigeait vers la cible ici, cela aiderait le club de golf à descendre un peu plus raide et rendrait ce coup un peu plus facile à frapper pour moi.
Parce que nous allons essayer d'en parler un peu ici.
Donc encore une fois, le tee est haut, laissez la balle voler, nous allons élargir un peu notre base ici.
Nous allons favoriser un peu plus l'inclinaison de l'axe secondaire en gardant la tête en arrière.
Numéro deux, la balle de stock, nous allons simplement garder tous les fondamentaux RST identiques ici.
Largeur de position appropriée, position de la balle de golf par rapport à l'oreille gauche.
Et nous allons simplement essayer de garder notre colonne vertébrale juste à l'extérieur de notre genou avant, dans la zone de frappe.
Et puis cette balle basse, nous allons essayer de garder notre épaule gauche beaucoup plus basse dans la zone de frappe pour garder notre colonne vertébrale un peu plus verticale.
De cette façon, nous pouvons frapper la balle de golf et pouvoir la faire voler plus bas, pouvoir contrôler cet effet et également pouvoir garder la balle au sol à travers le vent pour qu'elle soit ennuyeuse à travers le vent.
Et j’espère que vous pourrez en tirer un bon usage.
Ok, alors allons-y et jetons un œil à la balle de lancement haute ici.
Vous remarquerez que cette balle est presque complètement au-dessus du visage.
J'ai progressé et j'ai considérablement élargi ma base ici.
La position du ballon sera un peu plus avancée que celle dans laquelle nous le jouerions normalement.
Ok, ce que je vais essayer de faire, c'est de m'assurer que lorsque j'arrive dans la zone de frappe, je vais garder ma tête très calme lorsque je déplace mon poids.
Je vais donc promouvoir un peu plus d'inclinaison secondaire.
Nous allons vraiment essayer de lancer cette chose.
Et voilà, nous avons plutôt bien réussi.
D'accord, tout ce que nous allons faire est d'essayer de promouvoir juste assez d'inclinaison pour l'avoir à l'extérieur du genou.
Ainsi, tous nos autres fondamentaux RST restent les mêmes.
Voilà.
Et maintenant la balle à boulon bas.
C'est celui où nous allons essayer de nous assurer que notre épaule gauche restera beaucoup plus basse pendant la transition.
Supprimez une partie de cette inclinaison pour que nous puissions vraiment faire voler cette balle de golf vers le bas.
Mettez-le sous le vent.
Voilà.
Très bien les gars, maintenant que vous avez vu mes différentes hauteurs de tee ici, nous avons un peu parlé de la façon dont l'inclinaison de l'axe va finalement affecter la façon dont le club de golf entre dans la zone de frappe.
Cela peut vous aider à commencer à créer davantage un coup ascendant plutôt qu’un coup descendant.
Donc, si vous avez du mal à créer trop d'inclinaison de l'axe secondaire et que vous n'avez pas vraiment trouvé de solution pour résoudre ce problème, nous avons une vidéo absolument fantastique avec laquelle de nombreux golfeurs obtiennent un grand succès, et qui s'appelle l'exercice des épaules de niveau.
Et c'est dans la période de ralentissement.
Ok, donc vidéo sur les épaules à niveau.
Cela va vous apprendre à quoi vous voulez que vos épaules ressemblent dans la zone de frappe.
Pour éviter que le club ne commence à devenir trop plat et que vous puissiez alors commencer à comprimer correctement la balle de golf.
Consultez également la vidéo intitulée « Réglages de configuration du pilote ».
C'est une autre excellente vidéo qui vous parle des sciences du pourquoi.
Nous effectuons ces petits ajustements mineurs de configuration pour aider à lancer cette balle de golf dans les airs.
Et puis aussi l’importance du lancement.
L'importance du lancement est une autre vidéo qui va vous parler des sciences et pourquoi.
Nous voulons que la balle de golf soit vraiment lancée dans les airs dans certaines circonstances sur le parcours de golf.
Maintenant, sortons les gars, jouons au bon golf.
Hola, golfistas del Rotary Swing.
Bienvenido de nuevo.
Soy su instructor, Chris Tyler, y hoy vamos a hablar sobre cómo.
La altura del tee y la posición de tu columna pueden ayudarte a optimizar tu distancia y también a obtener más control en el campo de golf.
Bien, muchachos, antes de comenzar a analizar la mecánica y cómo será importante controlar la posición de la columna en el área de golpe, quiero seguir adelante y analizar las tres alturas de tee diferentes que me gusta usar en el campo de golf aquí.
Y en esta primera altura del tee, notarás que la pelota está prácticamente completamente por encima de la cara.
Ahora, esta es la pelota que yo llamo: "Lanzarla bien alta y dejarla volar".
Y estos son aquellos en los que realmente vamos a intentar conseguir que la pelota esté en una condición de lanzamiento muy alta, con un giro muy bajo.
Me gusta jugar este tiro en días en los que no hay mucho viento, o si se trata de un hoyo que está muy a favor del viento.
Realmente queremos lanzarlo alto, dejarlo volar y aprovechar el viento.
Además, otro buen momento para usarlo es si hay viento cruzado en el campo de golf.
Y puedes usar el viento a tu favor para ayudar a que la pelota vuelva a estar en juego y más abajo en el fairway.
Este es otro en el que puedes usar esta altura de tee particular.
La siguiente posición de la bola es lo que yo llamo la posición de tiro estándar.
Bien, aquí es donde tengo aproximadamente la mitad de la bola en la cara y la otra mitad por encima de la cara.
Ahora bien, ¿qué significa una fotografía de archivo?
Bueno, un tiro de serie es típicamente, si fueras a golpear un pitching wedge, un total de 130 yardas.
Ese era tu máximo valor, donde no tenías que golpear demasiado fuerte y no tenías que quitarle nada.
Recorrió 130 yardas.
Eso sería lo que consideraríamos una fotografía de archivo.
Bueno, lo mismo con un conductor.
Queremos poder tener un tiro ideal en tu ronda.
No voy a realizar ningún ajuste en mi configuración con esta altura de tee particular.
Lo único que realmente hago es intentar realizar un buen swing de golf y poner la pelota en juego.
Entonces, esto es lo que llamo mi bola de tiro de serie.
Esta bola baja que está aquí, es lo que yo llamo mi bola baja tipo bala.
Ahora bien, esta es una pelota ideal para condiciones de mucho viento.
Si estás jugando en un hoyo que está completamente a contracorriente del viento, esto te ayudará a hacer que tu pelota de golf vuelque bastante hacia abajo.
Esto también es bueno para aquellos jugadores que están empezando a intentar trabajar la pelota de golf de izquierda a derecha desde el tee.
Si tienes un hoyo preparado de manera que necesites comenzar a curvar la pelota o pegar un tiro de corte, esta es una excelente manera de comenzar a hacerlo.
Entonces, notarás que la posición de la bola en la cara del palo es bastante baja.
Es más o menos lo que tengo justo en el centro de la cara, es realmente donde lo coloco.
Entonces, nuevamente, tenemos el tee en alto, lo dejamos volar, tenemos el disparo de serie y luego tenemos la bala de perno bajo aquí.
Bien, ahora sigamos adelante y hablemos sobre la posición de la columna, cómo afectará cada uno de estos disparos, para que puedas comenzar a optimizar la distancia y ese control.
Bien, ahora que hemos visto las distintas alturas de tee aquí, hablemos de las distintas posiciones de la columna con las que trabajarás con cada una de estas pelotas.
Para que tengas una buena comprensión de lo que vas a buscar.
Para ayudar a que estas cosas se lancen correctamente.
Entonces, con la pelota que teníamos primero aquí, la que íbamos a llamar "tee-la alta y dejarla volar", íbamos a tratar de promover mucha inclinación del eje secundario.
Ahora bien, ¿qué es la inclinación del eje?
Muchos de vosotros os estaréis preguntando ahora mismo:
Bueno, la inclinación del eje es simplemente la posición o el ángulo de mi columna desde una perspectiva frontal.
Bien, entonces, en un vestido, nos gusta tener nuestra columna justo dentro de nuestra rodilla delantera, y para una toma de archivo, notarás que nuestra columna se desplaza justo afuera de nuestra rodilla delantera.
Ahora bien, ¿qué efectos produce la inclinación del eje en tu swing de golf?
Bueno, lo que hace es ayudar a suavizar bastante tu swing de golf.
Entonces, lo que quiero decir es que si giras la línea aquí, bien, y yo inclino mi columna lejos del objetivo, notarás que el plano del eje queda plano aquí.
Ahora bien, ¿por qué es esto importante para tu swing de golf?
Bueno, va a ayudar a que tu pelota de golf, especialmente con un tee alto, la dejes volar, te va a ayudar a que el palo de golf realice un golpe más ascendente en lugar de descendente.
Y muchos de estos drivers actuales están configurados para condiciones de lanzamiento muy altas con muy poco giro de bola.
Entonces, lo que vamos a intentar hacer con el tee es dejarlo volar alto.
La pelota es.
Intentaremos promover una mayor inclinación del eje secundario ampliando un poco nuestra base y luego moviendo la posición de la pelota un poco más hacia adelante.
Porque cuando empezamos a mover nuestra pelvis hacia adelante, hacia el lado principal, con una base más amplia, mantenemos nuestra cabeza quieta y notarás que tu columna quiere inclinarse un poco más hacia atrás aquí.
Nuevamente, eso ayudará a crear un golpe más ascendente que descendente.
Ahora, con lo que vamos a hacer bajo un formato de toma de archivo, no vamos a ir a una base más amplia aquí.
Lo que vamos a hacer es intentar mantener todo lo que hemos trabajado con RST lo más simple posible aquí.
Vamos a volver a nuestro ancho de postura normal, vamos a tener la posición de la pelota fuera de nuestra oreja izquierda y no vamos a intentar promover más inclinación del eje secundario.
Simplemente lo promocionaríamos justo afuera de la rodilla delantera aquí.
Ahora, con la pelota baja aquí, lo que vamos a intentar hacer es mantener nuestro hombro delantero muy bajo en la transición.
Casi vamos a intentar eliminar algo de esa inclinación del eje secundario.
Ahora bien, tal como ocurre aquí, si inclinara mi columna, si sintiera que mi columna se mueve hacia el objetivo aquí, eso ayudaría a que el palo de golf baje un poco más inclinado y haría que este tiro sea un poco más fácil de realizar.
Porque vamos a intentar abordarlo bastante aquí.
Entonces, nuevamente, el tee en alto, deja que la pelota vuele, vamos a ampliar nuestra base un poco aquí.
Vamos a promover un poco más de inclinación del eje secundario manteniendo la cabeza hacia atrás.
La bola número dos, la bola estándar, simplemente mantendremos todos los fundamentos de RST iguales aquí.
Ancho de postura adecuado, posición de la pelota de golf cerca de la oreja izquierda.
Y vamos a intentar mantener nuestra columna justo afuera de nuestra rodilla adelantada, abajo en el área de golpeo.
Y luego, con esta bola de bala baja, vamos a tratar de mantener nuestro hombro izquierdo mucho más abajo en el área de impacto para mantener nuestra columna un poco más vertical.
De esa manera podemos golpear la pelota de golf hacia abajo y hacerla volar más abajo, controlar el giro y también mantener la pelota abajo a través del viento para que siga avanzando a través del viento.
Y espero que ustedes puedan sacarle algún provecho a esto.
Bien, sigamos adelante y echemos un vistazo a la pelota de lanzamiento alto aquí.
Notarás que esa bola está casi completamente por encima de la cara.
He seguido adelante y he ampliado mi base aquí bastante.
La posición de la pelota será bastante más adelantada respecto a donde normalmente la jugaríamos.
Bien, lo que voy a intentar hacer es asegurarme de que cuando llegue al área de golpe, mantendré mi cabeza muy quieta mientras cambio mi peso.
Así que voy a promover un poco más la inclinación secundaria.
Vamos a intentar realmente poner en marcha esa cosa.
Allá vamos, lo hicimos bastante bien.
Bien, todo lo que vamos a hacer es intentar promover la inclinación suficiente para tenerla fuera de la rodilla.
Así que todos los demás fundamentos de RST siguen siendo los mismos.
Ahi tienes.
Y ahora la bala de perno bajo.
En este ejercicio vamos a intentar asegurarnos de que nuestro hombro izquierdo se mantenga mucho más bajo en la transición.
Elimina un poco de esa inclinación para que podamos hacer volar la pelota de golf hacia abajo.
Ponlo debajo del viento.
Ahi tienes.
Bien muchachos, ahora que han visto mis diferentes alturas de tee aquí, hemos hablado un poco sobre cómo la inclinación del eje afectará en última instancia la forma en que el palo de golf ingresa al área de golpe.
Puede ayudarte a empezar a crear un golpe más ascendente en lugar de descendente.
Entonces, si has tenido problemas con la creación de demasiada inclinación del eje secundario y realmente no has tenido una solución sobre cómo solucionarlo, tenemos un video absolutamente fantástico con el que muchos golfistas obtienen grandes resultados, y se llama el ejercicio de nivel de hombros.
Y eso es en la sección descendente.
Bien, entonces, el video de hombros nivelados.
Te enseñará cómo quieres que se vean tus hombros en el área de golpeo.
Para que no empieces a hacer que el palo se vaya haciendo demasiado plano y luego puedas empezar a comprimir la pelota de golf correctamente.
Consulte también el vídeo llamado vídeo de ajustes de configuración del controlador.
Este es otro gran video que te habla sobre las ciencias del por qué.
Hacemos estos pequeños ajustes de configuración para ayudar a que la pelota de golf se eleve por el aire.
Y luego también la importancia del lanzamiento.
La importancia del lanzamiento es otro video que te hablará sobre las ciencias y por qué.
Queremos conseguir que la pelota de golf realmente se eleve por el aire en determinadas circunstancias en el campo de golf.
Ahora salgamos muchachos y juguemos un buen golf.
Bienvenido de nuevo.
Soy su instructor, Chris Tyler, y hoy vamos a hablar sobre cómo.
La altura del tee y la posición de tu columna pueden ayudarte a optimizar tu distancia y también a obtener más control en el campo de golf.
Bien, muchachos, antes de comenzar a analizar la mecánica y cómo será importante controlar la posición de la columna en el área de golpe, quiero seguir adelante y analizar las tres alturas de tee diferentes que me gusta usar en el campo de golf aquí.
Y en esta primera altura del tee, notarás que la pelota está prácticamente completamente por encima de la cara.
Ahora, esta es la pelota que yo llamo: "Lanzarla bien alta y dejarla volar".
Y estos son aquellos en los que realmente vamos a intentar conseguir que la pelota esté en una condición de lanzamiento muy alta, con un giro muy bajo.
Me gusta jugar este tiro en días en los que no hay mucho viento, o si se trata de un hoyo que está muy a favor del viento.
Realmente queremos lanzarlo alto, dejarlo volar y aprovechar el viento.
Además, otro buen momento para usarlo es si hay viento cruzado en el campo de golf.
Y puedes usar el viento a tu favor para ayudar a que la pelota vuelva a estar en juego y más abajo en el fairway.
Este es otro en el que puedes usar esta altura de tee particular.
La siguiente posición de la bola es lo que yo llamo la posición de tiro estándar.
Bien, aquí es donde tengo aproximadamente la mitad de la bola en la cara y la otra mitad por encima de la cara.
Ahora bien, ¿qué significa una fotografía de archivo?
Bueno, un tiro de serie es típicamente, si fueras a golpear un pitching wedge, un total de 130 yardas.
Ese era tu máximo valor, donde no tenías que golpear demasiado fuerte y no tenías que quitarle nada.
Recorrió 130 yardas.
Eso sería lo que consideraríamos una fotografía de archivo.
Bueno, lo mismo con un conductor.
Queremos poder tener un tiro ideal en tu ronda.
No voy a realizar ningún ajuste en mi configuración con esta altura de tee particular.
Lo único que realmente hago es intentar realizar un buen swing de golf y poner la pelota en juego.
Entonces, esto es lo que llamo mi bola de tiro de serie.
Esta bola baja que está aquí, es lo que yo llamo mi bola baja tipo bala.
Ahora bien, esta es una pelota ideal para condiciones de mucho viento.
Si estás jugando en un hoyo que está completamente a contracorriente del viento, esto te ayudará a hacer que tu pelota de golf vuelque bastante hacia abajo.
Esto también es bueno para aquellos jugadores que están empezando a intentar trabajar la pelota de golf de izquierda a derecha desde el tee.
Si tienes un hoyo preparado de manera que necesites comenzar a curvar la pelota o pegar un tiro de corte, esta es una excelente manera de comenzar a hacerlo.
Entonces, notarás que la posición de la bola en la cara del palo es bastante baja.
Es más o menos lo que tengo justo en el centro de la cara, es realmente donde lo coloco.
Entonces, nuevamente, tenemos el tee en alto, lo dejamos volar, tenemos el disparo de serie y luego tenemos la bala de perno bajo aquí.
Bien, ahora sigamos adelante y hablemos sobre la posición de la columna, cómo afectará cada uno de estos disparos, para que puedas comenzar a optimizar la distancia y ese control.
Bien, ahora que hemos visto las distintas alturas de tee aquí, hablemos de las distintas posiciones de la columna con las que trabajarás con cada una de estas pelotas.
Para que tengas una buena comprensión de lo que vas a buscar.
Para ayudar a que estas cosas se lancen correctamente.
Entonces, con la pelota que teníamos primero aquí, la que íbamos a llamar "tee-la alta y dejarla volar", íbamos a tratar de promover mucha inclinación del eje secundario.
Ahora bien, ¿qué es la inclinación del eje?
Muchos de vosotros os estaréis preguntando ahora mismo:
Bueno, la inclinación del eje es simplemente la posición o el ángulo de mi columna desde una perspectiva frontal.
Bien, entonces, en un vestido, nos gusta tener nuestra columna justo dentro de nuestra rodilla delantera, y para una toma de archivo, notarás que nuestra columna se desplaza justo afuera de nuestra rodilla delantera.
Ahora bien, ¿qué efectos produce la inclinación del eje en tu swing de golf?
Bueno, lo que hace es ayudar a suavizar bastante tu swing de golf.
Entonces, lo que quiero decir es que si giras la línea aquí, bien, y yo inclino mi columna lejos del objetivo, notarás que el plano del eje queda plano aquí.
Ahora bien, ¿por qué es esto importante para tu swing de golf?
Bueno, va a ayudar a que tu pelota de golf, especialmente con un tee alto, la dejes volar, te va a ayudar a que el palo de golf realice un golpe más ascendente en lugar de descendente.
Y muchos de estos drivers actuales están configurados para condiciones de lanzamiento muy altas con muy poco giro de bola.
Entonces, lo que vamos a intentar hacer con el tee es dejarlo volar alto.
La pelota es.
Intentaremos promover una mayor inclinación del eje secundario ampliando un poco nuestra base y luego moviendo la posición de la pelota un poco más hacia adelante.
Porque cuando empezamos a mover nuestra pelvis hacia adelante, hacia el lado principal, con una base más amplia, mantenemos nuestra cabeza quieta y notarás que tu columna quiere inclinarse un poco más hacia atrás aquí.
Nuevamente, eso ayudará a crear un golpe más ascendente que descendente.
Ahora, con lo que vamos a hacer bajo un formato de toma de archivo, no vamos a ir a una base más amplia aquí.
Lo que vamos a hacer es intentar mantener todo lo que hemos trabajado con RST lo más simple posible aquí.
Vamos a volver a nuestro ancho de postura normal, vamos a tener la posición de la pelota fuera de nuestra oreja izquierda y no vamos a intentar promover más inclinación del eje secundario.
Simplemente lo promocionaríamos justo afuera de la rodilla delantera aquí.
Ahora, con la pelota baja aquí, lo que vamos a intentar hacer es mantener nuestro hombro delantero muy bajo en la transición.
Casi vamos a intentar eliminar algo de esa inclinación del eje secundario.
Ahora bien, tal como ocurre aquí, si inclinara mi columna, si sintiera que mi columna se mueve hacia el objetivo aquí, eso ayudaría a que el palo de golf baje un poco más inclinado y haría que este tiro sea un poco más fácil de realizar.
Porque vamos a intentar abordarlo bastante aquí.
Entonces, nuevamente, el tee en alto, deja que la pelota vuele, vamos a ampliar nuestra base un poco aquí.
Vamos a promover un poco más de inclinación del eje secundario manteniendo la cabeza hacia atrás.
La bola número dos, la bola estándar, simplemente mantendremos todos los fundamentos de RST iguales aquí.
Ancho de postura adecuado, posición de la pelota de golf cerca de la oreja izquierda.
Y vamos a intentar mantener nuestra columna justo afuera de nuestra rodilla adelantada, abajo en el área de golpeo.
Y luego, con esta bola de bala baja, vamos a tratar de mantener nuestro hombro izquierdo mucho más abajo en el área de impacto para mantener nuestra columna un poco más vertical.
De esa manera podemos golpear la pelota de golf hacia abajo y hacerla volar más abajo, controlar el giro y también mantener la pelota abajo a través del viento para que siga avanzando a través del viento.
Y espero que ustedes puedan sacarle algún provecho a esto.
Bien, sigamos adelante y echemos un vistazo a la pelota de lanzamiento alto aquí.
Notarás que esa bola está casi completamente por encima de la cara.
He seguido adelante y he ampliado mi base aquí bastante.
La posición de la pelota será bastante más adelantada respecto a donde normalmente la jugaríamos.
Bien, lo que voy a intentar hacer es asegurarme de que cuando llegue al área de golpe, mantendré mi cabeza muy quieta mientras cambio mi peso.
Así que voy a promover un poco más la inclinación secundaria.
Vamos a intentar realmente poner en marcha esa cosa.
Allá vamos, lo hicimos bastante bien.
Bien, todo lo que vamos a hacer es intentar promover la inclinación suficiente para tenerla fuera de la rodilla.
Así que todos los demás fundamentos de RST siguen siendo los mismos.
Ahi tienes.
Y ahora la bala de perno bajo.
En este ejercicio vamos a intentar asegurarnos de que nuestro hombro izquierdo se mantenga mucho más bajo en la transición.
Elimina un poco de esa inclinación para que podamos hacer volar la pelota de golf hacia abajo.
Ponlo debajo del viento.
Ahi tienes.
Bien muchachos, ahora que han visto mis diferentes alturas de tee aquí, hemos hablado un poco sobre cómo la inclinación del eje afectará en última instancia la forma en que el palo de golf ingresa al área de golpe.
Puede ayudarte a empezar a crear un golpe más ascendente en lugar de descendente.
Entonces, si has tenido problemas con la creación de demasiada inclinación del eje secundario y realmente no has tenido una solución sobre cómo solucionarlo, tenemos un video absolutamente fantástico con el que muchos golfistas obtienen grandes resultados, y se llama el ejercicio de nivel de hombros.
Y eso es en la sección descendente.
Bien, entonces, el video de hombros nivelados.
Te enseñará cómo quieres que se vean tus hombros en el área de golpeo.
Para que no empieces a hacer que el palo se vaya haciendo demasiado plano y luego puedas empezar a comprimir la pelota de golf correctamente.
Consulte también el vídeo llamado vídeo de ajustes de configuración del controlador.
Este es otro gran video que te habla sobre las ciencias del por qué.
Hacemos estos pequeños ajustes de configuración para ayudar a que la pelota de golf se eleve por el aire.
Y luego también la importancia del lanzamiento.
La importancia del lanzamiento es otro video que te hablará sobre las ciencias y por qué.
Queremos conseguir que la pelota de golf realmente se eleve por el aire en determinadas circunstancias en el campo de golf.
Ahora salgamos muchachos y juguemos un buen golf.
Hallo, Rotary Swing-Golfer.
Willkommen zurück.
Ich bin Ihr Lehrer, Chris Tyler, und heute werden wir darüber sprechen, wie das geht.
Die Abschlaghöhe und die Position Ihrer Wirbelsäule können Ihnen dabei helfen, Ihre Distanz zu optimieren und Ihnen mehr Kontrolle auf dem Golfplatz zu verschaffen.
Okay, Leute, bevor wir uns mit der Mechanik befassen und damit, wie wichtig es ist, die Position Ihrer Wirbelsäule im Schlagbereich zu kontrollieren, möchte ich zunächst die drei verschiedenen Abschlaghöhen besprechen, die ich hier auf dem Golfplatz gerne verwende.
Und bei dieser ersten Abschlaghöhe werden Sie feststellen, dass der Ball fast vollständig über der Schlagfläche liegt.
Das ist der Ball, den ich so nenne: „Hoch aufschlagen und losfliegen.“
Und bei diesen Schlägen versuchen wir wirklich, den Ball in einen sehr hohen Abschlagzustand mit sehr geringer Drehung zu bringen.
Ich spiele diesen Schlag gerne an Tagen, an denen nicht viel Wind weht, oder wenn es sich um ein Loch handelt, das völlig gegen den Wind spielt.
Wir wollen den Ball wirklich hoch aufschlagen, fliegen lassen und den Wind ausnutzen.
Ein weiterer guter Zeitpunkt für die Verwendung ist, wenn auf dem Golfplatz Seitenwind herrscht.
Und Sie können den Wind zu Ihrem Vorteil nutzen, um den Ball wieder ins Spiel und weiter nach unten auf das Fairway zu bringen.
Dies ist ein weiteres Beispiel, bei dem Sie diese spezielle Abschlaghöhe verwenden können.
Diese nächste Ballposition nenne ich die Standardschussposition.
Okay, hier habe ich ungefähr die Hälfte des Balls auf der Schlagfläche und die andere Hälfte darüber.
Was bedeutet nun ein Archivfoto?
Ein Standardschlag beträgt, wenn Sie mit einem Pitching Wedge schlagen, normalerweise insgesamt 130 Yards.
Das war Ihr Maximalwert, bei dem Sie nicht zu stark schwingen und nichts davon abnehmen mussten.
Es ging 130 Yards weit.
Das wäre das, was wir als Archivfoto betrachten.
Das Gleiche gilt für einen Fahrer.
Wir möchten Ihnen in Ihrer Runde einen Go-to-Schlag ermöglichen.
Ich werde bei dieser bestimmten Abschlaghöhe keine Anpassungen an meinem Setup vornehmen.
Ich versuche eigentlich nur, einen guten Golfschwung hinzulegen und den Golfball ins Spiel zu bringen.
Das ist also das, was ich meinen Standard-Schussball nenne.
Diesen niedrigen Ball hier nenne ich meinen niedrigen Bullet Ball.
Dieser Ball eignet sich hervorragend für sehr windige Bedingungen.
Wenn Sie ein Loch spielen, das direkt gegen den Wind liegt, können Sie Ihren Golfball dadurch deutlich nach unten fliegen lassen.
Dies ist auch für Spieler gut, die versuchen, den Golfball vom Abschlag nach links und rechts zu schlagen.
Wenn Sie ein Loch haben, bei dem Sie den Ball in eine Kurve schlagen oder einen Cut-Shot ausführen müssen, ist dies eine großartige Möglichkeit, damit zu beginnen.
Sie werden also feststellen, dass diese Ballposition auf der Schlagfläche ziemlich niedrig ist.
Es ist so ziemlich das, was ich genau in der Mitte der Schlagfläche habe, und zwar dort, wo ich es aufschlage.
Also, wir haben wieder das Abschlagsziel hoch, lassen es fliegen, wir haben den Standardschuss und dann haben wir hier das Geschoss mit dem niedrigen Bolzen.
Okay, sprechen wir jetzt über die Position der Wirbelsäule und wie sie sich auf jeden dieser Schläge auswirkt, damit Sie mit der Optimierung der Distanz und der Kontrolle beginnen können.
Okay, nachdem wir uns nun die verschiedenen Abschlaghöhen angesehen haben, sprechen wir über die verschiedenen Spine-Positionen, mit denen Sie bei jedem dieser Bälle arbeiten werden.
Damit Sie genau wissen, wonach Sie suchen.
Um dabei zu helfen, diese Dinge richtig auf den Weg zu bringen.
Mit dem Ball, den wir hier zuerst hatten, dem Ball, den wir „Hoch abschlagen und fliegen lassen“ nennen wollten, werden wir versuchen, eine starke Neigung der zweiten Achse zu fördern.
Was ist nun die Achsenneigung?
Viele von Ihnen fragen sich das jetzt vielleicht.
Nun, die Achsenneigung ist einfach die Position oder der Winkel meiner Wirbelsäule hier aus der Frontalperspektive.
Okay, bei einem Kleid möchten wir unsere Wirbelsäule direkt innerhalb unseres vorderen Knies haben, und bei einer Archivaufnahme werden Sie feststellen, dass sich unsere Wirbelsäule direkt außerhalb unseres vorderen Knies bewegt.
Welchen Einfluss hat die Achsenneigung auf Ihren Golfschwung?
Es trägt dazu bei, Ihren Golfschwung deutlich abzuflachen.
Was ich damit meine ist, dass wenn Sie hier die Linie entlang abbiegen, okay, und ich meine Wirbelsäule vom Ziel weg lehne, Sie feststellen werden, dass die Schaftebene hier flach liegt.
Warum ist das für Ihren Golfschwung wichtig?
Nun, es wird Ihnen dabei helfen, Ihren Golfball zu bekommen, insbesondere wenn Sie ihn hoch abschlagen und fliegen lassen möchten. Es wird Ihnen dabei helfen, mit dem Golfschläger eher einen aufsteigenden als einen absteigenden Schlag auszuführen.
Und viele dieser Driver sind heutzutage auf sehr hohe Abschlagbedingungen mit sehr geringem Ballspin ausgelegt.
Also, was wir versuchen werden, ist, den Abschlag hoch zu halten und ihn fliegen zu lassen.
Ball ist.
Wir werden versuchen, eine stärkere Neigung der sekundären Achse zu erreichen, indem wir unsere Basis ein wenig verbreitern und dann unsere Ballposition ein wenig weiter nach vorne verschieben.
Denn wenn wir beginnen, unser Becken mit einer breiteren Basis nach vorne auf unsere vordere Seite zu verlagern und dabei unseren Kopf ruhig halten, werden Sie feststellen, dass Ihre Wirbelsäule sich hier etwas mehr nach hinten lehnen möchte.
Auch hierdurch wird eher ein aufsteigender als ein absteigender Schlag erzeugt.
Was wir nun im Rahmen eines Archivbildformats tun werden, ist, dass wir hier keine breitere Basis verwenden werden.
Wir werden einfach versuchen, all die Dinge, die wir mit RST durchgearbeitet haben, hier so einfach wie möglich zu halten.
Wir nehmen unsere normale Standbreite ein, positionieren den Ball außerhalb unseres linken Ohrs und versuchen nicht, eine weitere Neigung der sekundären Achse zu fördern.
Wir würden es hier einfach knapp außerhalb des Führungsknies befördern.
Was wir jetzt mit dem niedrigen Bootsball versuchen werden, ist, dass wir versuchen werden, unsere vordere Schulter beim Übergang sehr niedrig zu halten.
Wir werden fast versuchen, einen Teil dieser Neigung der sekundären Achse zu beseitigen.
Genau wie hier, wenn ich meine Wirbelsäule nach außen lehnen würde, wenn es sich anfühlen würde, als würde sich meine Wirbelsäule hier in Richtung Ziel bewegen, würde das dazu beitragen, dass der Golfschläger etwas steiler herunterkommt und mir den Schlag etwas leichter machen würde.
Denn wir werden hier versuchen, es ziemlich genau zu treffen.
Also noch einmal, das Tee oben, lass den Ball fliegen, wir werden unsere Basis hier ein wenig verbreitern.
Wir fördern eine etwas stärkere Neigung der sekundären Achse, indem wir unseren Kopf nach hinten halten.
Ball Nummer zwei, der Standardball, wir werden hier einfach alle RST-Grundlagen beibehalten.
Richtige Standbreite, Golfballposition vom linken Ohr entfernt.
Und wir werden einfach versuchen, unsere Wirbelsäule direkt außerhalb unseres vorderen Knies zu halten, unten im Schlagbereich.
Und dann dieser Low Boat Bullet Ball. Wir werden versuchen, unsere linke Schulter viel tiefer im Schlagbereich zu halten, um unsere Wirbelsäule etwas aufrechter zu halten.
Auf diese Weise können wir den Golfball von unten treffen und ihn tiefer fliegen lassen, den Spin kontrollieren und den Ball auch trotz des Windes unten halten, sodass er durch den Wind fliegt.
Und hoffentlich können Sie das sinnvoll nutzen.
Okay, schauen wir uns also den Ball mit dem hohen Abschuss hier an.
Sie werden feststellen, dass sich der Ball fast vollständig über der Schlagfläche befindet.
Ich habe meine Basis hier schon um einiges erweitert.
Die Ballposition wird deutlich weiter vorne liegen, als wir es normalerweise tun würden.
Okay, ich werde versuchen, sicherzustellen, dass ich meinen Kopf beim Verlagern meines Gewichts ganz ruhig halte, wenn ich in die Schlagzone komme.
Ich werde also etwas mehr sekundäre Neigung fördern.
Wir werden versuchen, das Ding wirklich auf den Markt zu bringen.
So, das haben wir ziemlich gut gemacht.
Okay, wir werden lediglich versuchen, eine Neigung zu erreichen, die gerade so groß ist, dass sie sich außerhalb des Knies befindet.
Alle anderen RST-Grundlagen bleiben also gleich.
Da haben Sie es.
Und jetzt die Low-Bolt-Kugelkugel.
Hier versuchen wir sicherzustellen, dass unsere linke Schulter beim Übergang viel tiefer bleibt.
Nehmen Sie etwas von dieser Neigung heraus, damit wir den Golfball wirklich nach unten fliegen lassen können.
Holen Sie es unter den Wind.
Da haben Sie es.
Also, Leute, nachdem ihr nun meine verschiedenen Abschlaghöhen gesehen habt, haben wir ein wenig darüber gesprochen, wie sich die Achsenneigung letztendlich auf die Art und Weise auswirkt, wie der Golfschläger in den Schlagbereich eintritt.
Dies kann Ihnen dabei helfen, eher einen aufsteigenden als einen absteigenden Schlag zu erzeugen.
Wenn Sie also Probleme damit haben, eine zu starke Neigung der sekundären Achse zu erzeugen und keine wirkliche Lösung dafür haben, haben wir ein absolut fantastisches Video, mit dem viele Golfer große Erfolge erzielen. Es heißt „Übung für gerade Schultern“.
Und das ist im Abschwungabschnitt.
Okay, also das Video mit den geraden Schultern.
Dadurch lernen Sie, wie Ihre Schultern im Schlagbereich aussehen sollen.
Damit wird der Schläger nicht zu flach und Sie können den Golfball richtig komprimieren.
Sehen Sie sich auch das Video mit dem Titel „Video zu den Treiber-Setup-Anpassungen“ an.
Das ist ein weiteres großartiges Video, das Ihnen die Wissenschaft des Warum näherbringt.
Wir nehmen diese kleinen, geringfügigen Setup-Anpassungen vor, um den Golfball in die Luft zu bringen.
Und dann auch die Bedeutung des Starts.
„Die Bedeutung des Starts“ ist ein weiteres Video, in dem wir Ihnen etwas über die Wissenschaft und die Gründe dafür erzählen.
Wir möchten, dass der Golfball unter bestimmten Umständen auf dem Golfplatz wirklich in die Luft fliegt.
Und jetzt lasst uns rausgehen, Jungs, und tolles Golf spielen.
Willkommen zurück.
Ich bin Ihr Lehrer, Chris Tyler, und heute werden wir darüber sprechen, wie das geht.
Die Abschlaghöhe und die Position Ihrer Wirbelsäule können Ihnen dabei helfen, Ihre Distanz zu optimieren und Ihnen mehr Kontrolle auf dem Golfplatz zu verschaffen.
Okay, Leute, bevor wir uns mit der Mechanik befassen und damit, wie wichtig es ist, die Position Ihrer Wirbelsäule im Schlagbereich zu kontrollieren, möchte ich zunächst die drei verschiedenen Abschlaghöhen besprechen, die ich hier auf dem Golfplatz gerne verwende.
Und bei dieser ersten Abschlaghöhe werden Sie feststellen, dass der Ball fast vollständig über der Schlagfläche liegt.
Das ist der Ball, den ich so nenne: „Hoch aufschlagen und losfliegen.“
Und bei diesen Schlägen versuchen wir wirklich, den Ball in einen sehr hohen Abschlagzustand mit sehr geringer Drehung zu bringen.
Ich spiele diesen Schlag gerne an Tagen, an denen nicht viel Wind weht, oder wenn es sich um ein Loch handelt, das völlig gegen den Wind spielt.
Wir wollen den Ball wirklich hoch aufschlagen, fliegen lassen und den Wind ausnutzen.
Ein weiterer guter Zeitpunkt für die Verwendung ist, wenn auf dem Golfplatz Seitenwind herrscht.
Und Sie können den Wind zu Ihrem Vorteil nutzen, um den Ball wieder ins Spiel und weiter nach unten auf das Fairway zu bringen.
Dies ist ein weiteres Beispiel, bei dem Sie diese spezielle Abschlaghöhe verwenden können.
Diese nächste Ballposition nenne ich die Standardschussposition.
Okay, hier habe ich ungefähr die Hälfte des Balls auf der Schlagfläche und die andere Hälfte darüber.
Was bedeutet nun ein Archivfoto?
Ein Standardschlag beträgt, wenn Sie mit einem Pitching Wedge schlagen, normalerweise insgesamt 130 Yards.
Das war Ihr Maximalwert, bei dem Sie nicht zu stark schwingen und nichts davon abnehmen mussten.
Es ging 130 Yards weit.
Das wäre das, was wir als Archivfoto betrachten.
Das Gleiche gilt für einen Fahrer.
Wir möchten Ihnen in Ihrer Runde einen Go-to-Schlag ermöglichen.
Ich werde bei dieser bestimmten Abschlaghöhe keine Anpassungen an meinem Setup vornehmen.
Ich versuche eigentlich nur, einen guten Golfschwung hinzulegen und den Golfball ins Spiel zu bringen.
Das ist also das, was ich meinen Standard-Schussball nenne.
Diesen niedrigen Ball hier nenne ich meinen niedrigen Bullet Ball.
Dieser Ball eignet sich hervorragend für sehr windige Bedingungen.
Wenn Sie ein Loch spielen, das direkt gegen den Wind liegt, können Sie Ihren Golfball dadurch deutlich nach unten fliegen lassen.
Dies ist auch für Spieler gut, die versuchen, den Golfball vom Abschlag nach links und rechts zu schlagen.
Wenn Sie ein Loch haben, bei dem Sie den Ball in eine Kurve schlagen oder einen Cut-Shot ausführen müssen, ist dies eine großartige Möglichkeit, damit zu beginnen.
Sie werden also feststellen, dass diese Ballposition auf der Schlagfläche ziemlich niedrig ist.
Es ist so ziemlich das, was ich genau in der Mitte der Schlagfläche habe, und zwar dort, wo ich es aufschlage.
Also, wir haben wieder das Abschlagsziel hoch, lassen es fliegen, wir haben den Standardschuss und dann haben wir hier das Geschoss mit dem niedrigen Bolzen.
Okay, sprechen wir jetzt über die Position der Wirbelsäule und wie sie sich auf jeden dieser Schläge auswirkt, damit Sie mit der Optimierung der Distanz und der Kontrolle beginnen können.
Okay, nachdem wir uns nun die verschiedenen Abschlaghöhen angesehen haben, sprechen wir über die verschiedenen Spine-Positionen, mit denen Sie bei jedem dieser Bälle arbeiten werden.
Damit Sie genau wissen, wonach Sie suchen.
Um dabei zu helfen, diese Dinge richtig auf den Weg zu bringen.
Mit dem Ball, den wir hier zuerst hatten, dem Ball, den wir „Hoch abschlagen und fliegen lassen“ nennen wollten, werden wir versuchen, eine starke Neigung der zweiten Achse zu fördern.
Was ist nun die Achsenneigung?
Viele von Ihnen fragen sich das jetzt vielleicht.
Nun, die Achsenneigung ist einfach die Position oder der Winkel meiner Wirbelsäule hier aus der Frontalperspektive.
Okay, bei einem Kleid möchten wir unsere Wirbelsäule direkt innerhalb unseres vorderen Knies haben, und bei einer Archivaufnahme werden Sie feststellen, dass sich unsere Wirbelsäule direkt außerhalb unseres vorderen Knies bewegt.
Welchen Einfluss hat die Achsenneigung auf Ihren Golfschwung?
Es trägt dazu bei, Ihren Golfschwung deutlich abzuflachen.
Was ich damit meine ist, dass wenn Sie hier die Linie entlang abbiegen, okay, und ich meine Wirbelsäule vom Ziel weg lehne, Sie feststellen werden, dass die Schaftebene hier flach liegt.
Warum ist das für Ihren Golfschwung wichtig?
Nun, es wird Ihnen dabei helfen, Ihren Golfball zu bekommen, insbesondere wenn Sie ihn hoch abschlagen und fliegen lassen möchten. Es wird Ihnen dabei helfen, mit dem Golfschläger eher einen aufsteigenden als einen absteigenden Schlag auszuführen.
Und viele dieser Driver sind heutzutage auf sehr hohe Abschlagbedingungen mit sehr geringem Ballspin ausgelegt.
Also, was wir versuchen werden, ist, den Abschlag hoch zu halten und ihn fliegen zu lassen.
Ball ist.
Wir werden versuchen, eine stärkere Neigung der sekundären Achse zu erreichen, indem wir unsere Basis ein wenig verbreitern und dann unsere Ballposition ein wenig weiter nach vorne verschieben.
Denn wenn wir beginnen, unser Becken mit einer breiteren Basis nach vorne auf unsere vordere Seite zu verlagern und dabei unseren Kopf ruhig halten, werden Sie feststellen, dass Ihre Wirbelsäule sich hier etwas mehr nach hinten lehnen möchte.
Auch hierdurch wird eher ein aufsteigender als ein absteigender Schlag erzeugt.
Was wir nun im Rahmen eines Archivbildformats tun werden, ist, dass wir hier keine breitere Basis verwenden werden.
Wir werden einfach versuchen, all die Dinge, die wir mit RST durchgearbeitet haben, hier so einfach wie möglich zu halten.
Wir nehmen unsere normale Standbreite ein, positionieren den Ball außerhalb unseres linken Ohrs und versuchen nicht, eine weitere Neigung der sekundären Achse zu fördern.
Wir würden es hier einfach knapp außerhalb des Führungsknies befördern.
Was wir jetzt mit dem niedrigen Bootsball versuchen werden, ist, dass wir versuchen werden, unsere vordere Schulter beim Übergang sehr niedrig zu halten.
Wir werden fast versuchen, einen Teil dieser Neigung der sekundären Achse zu beseitigen.
Genau wie hier, wenn ich meine Wirbelsäule nach außen lehnen würde, wenn es sich anfühlen würde, als würde sich meine Wirbelsäule hier in Richtung Ziel bewegen, würde das dazu beitragen, dass der Golfschläger etwas steiler herunterkommt und mir den Schlag etwas leichter machen würde.
Denn wir werden hier versuchen, es ziemlich genau zu treffen.
Also noch einmal, das Tee oben, lass den Ball fliegen, wir werden unsere Basis hier ein wenig verbreitern.
Wir fördern eine etwas stärkere Neigung der sekundären Achse, indem wir unseren Kopf nach hinten halten.
Ball Nummer zwei, der Standardball, wir werden hier einfach alle RST-Grundlagen beibehalten.
Richtige Standbreite, Golfballposition vom linken Ohr entfernt.
Und wir werden einfach versuchen, unsere Wirbelsäule direkt außerhalb unseres vorderen Knies zu halten, unten im Schlagbereich.
Und dann dieser Low Boat Bullet Ball. Wir werden versuchen, unsere linke Schulter viel tiefer im Schlagbereich zu halten, um unsere Wirbelsäule etwas aufrechter zu halten.
Auf diese Weise können wir den Golfball von unten treffen und ihn tiefer fliegen lassen, den Spin kontrollieren und den Ball auch trotz des Windes unten halten, sodass er durch den Wind fliegt.
Und hoffentlich können Sie das sinnvoll nutzen.
Okay, schauen wir uns also den Ball mit dem hohen Abschuss hier an.
Sie werden feststellen, dass sich der Ball fast vollständig über der Schlagfläche befindet.
Ich habe meine Basis hier schon um einiges erweitert.
Die Ballposition wird deutlich weiter vorne liegen, als wir es normalerweise tun würden.
Okay, ich werde versuchen, sicherzustellen, dass ich meinen Kopf beim Verlagern meines Gewichts ganz ruhig halte, wenn ich in die Schlagzone komme.
Ich werde also etwas mehr sekundäre Neigung fördern.
Wir werden versuchen, das Ding wirklich auf den Markt zu bringen.
So, das haben wir ziemlich gut gemacht.
Okay, wir werden lediglich versuchen, eine Neigung zu erreichen, die gerade so groß ist, dass sie sich außerhalb des Knies befindet.
Alle anderen RST-Grundlagen bleiben also gleich.
Da haben Sie es.
Und jetzt die Low-Bolt-Kugelkugel.
Hier versuchen wir sicherzustellen, dass unsere linke Schulter beim Übergang viel tiefer bleibt.
Nehmen Sie etwas von dieser Neigung heraus, damit wir den Golfball wirklich nach unten fliegen lassen können.
Holen Sie es unter den Wind.
Da haben Sie es.
Also, Leute, nachdem ihr nun meine verschiedenen Abschlaghöhen gesehen habt, haben wir ein wenig darüber gesprochen, wie sich die Achsenneigung letztendlich auf die Art und Weise auswirkt, wie der Golfschläger in den Schlagbereich eintritt.
Dies kann Ihnen dabei helfen, eher einen aufsteigenden als einen absteigenden Schlag zu erzeugen.
Wenn Sie also Probleme damit haben, eine zu starke Neigung der sekundären Achse zu erzeugen und keine wirkliche Lösung dafür haben, haben wir ein absolut fantastisches Video, mit dem viele Golfer große Erfolge erzielen. Es heißt „Übung für gerade Schultern“.
Und das ist im Abschwungabschnitt.
Okay, also das Video mit den geraden Schultern.
Dadurch lernen Sie, wie Ihre Schultern im Schlagbereich aussehen sollen.
Damit wird der Schläger nicht zu flach und Sie können den Golfball richtig komprimieren.
Sehen Sie sich auch das Video mit dem Titel „Video zu den Treiber-Setup-Anpassungen“ an.
Das ist ein weiteres großartiges Video, das Ihnen die Wissenschaft des Warum näherbringt.
Wir nehmen diese kleinen, geringfügigen Setup-Anpassungen vor, um den Golfball in die Luft zu bringen.
Und dann auch die Bedeutung des Starts.
„Die Bedeutung des Starts“ ist ein weiteres Video, in dem wir Ihnen etwas über die Wissenschaft und die Gründe dafür erzählen.
Wir möchten, dass der Golfball unter bestimmten Umständen auf dem Golfplatz wirklich in die Luft fliegt.
Und jetzt lasst uns rausgehen, Jungs, und tolles Golf spielen.



Kyaw Thet
Michael (Certified RST Instructor)
Kyaw Thet
Michael (Certified RST Instructor)
Fred
Craig (Certified RST Instructor)
Fred
Craig (Certified RST Instructor)
gordon
Craig (Certified RST Instructor)
gordon
Craig (Certified RST Instructor)
gordon
Craig (Certified RST Instructor)
Dan
Craig (Certified RST Instructor)
Chris
Craig (Certified RST Instructor)
Steven J
Craig (Certified RST Instructor)
nicholas
Chris (Certified RST Instructor)
William (Jeff)
Micah (Certified RST Instructor)
Yuefeng
Craig (Certified RST Instructor)
Yuefeng
Craig (Certified RST Instructor)
Yuefeng
Craig (Certified RST Instructor)
Christian
Craig (Certified RST Instructor)
gordon
Craig (Certified RST Instructor)
Loran
Craig (Certified RST Instructor)
RODERICK
Mark
Chris (Certified RST Instructor)
Craig (Certified RST Instructor)
Chris (Certified RST Instructor)